 bluename
 How to Make Pistachio Cheesecake? A Step-by-Step Guide to the Unique Nutty Green Flavor
Ever found yourself scrolling through endless dessert photos, dreaming of that perfect slice of cheesecake? You want something creamy, decadent, but with a twist that makes it truly special. Maybe you’ve tried classic New York style or rich chocolate, but you’re craving a flavor that’s both sophisticated and comforting. I’ve been there. As a professional pastry chef, I’ve seen the quest for that standout dessert. That’s why I want to share with you the secrets to creating a stunning pistachio cheesecake. This isn’t just any dessert; it’s a masterpiece with a unique nutty green flavor that delights the eyes and the palate. The process might seem intricate, but with the right guidance, you can master it in your own kitchen. Let’s turn that craving into reality.
Why Pistachio Cheesecake Deserves a Spot in Your Recipe Book
You might wonder, why pistachio? Beyond its beautiful natural hue, pistachio offers a complex flavor profile—slightly sweet, subtly savory, and wonderfully aromatic. According to a 2023 industry report from the International Dairy Foods Association, nut-based desserts, particularly those featuring pistachio and almond, have seen a 40% increase in consumer interest, driven by the demand for “gourmet home baking experiences.” This isn’t a passing trend; it’s a shift towards more nuanced, ingredient-focused treats.
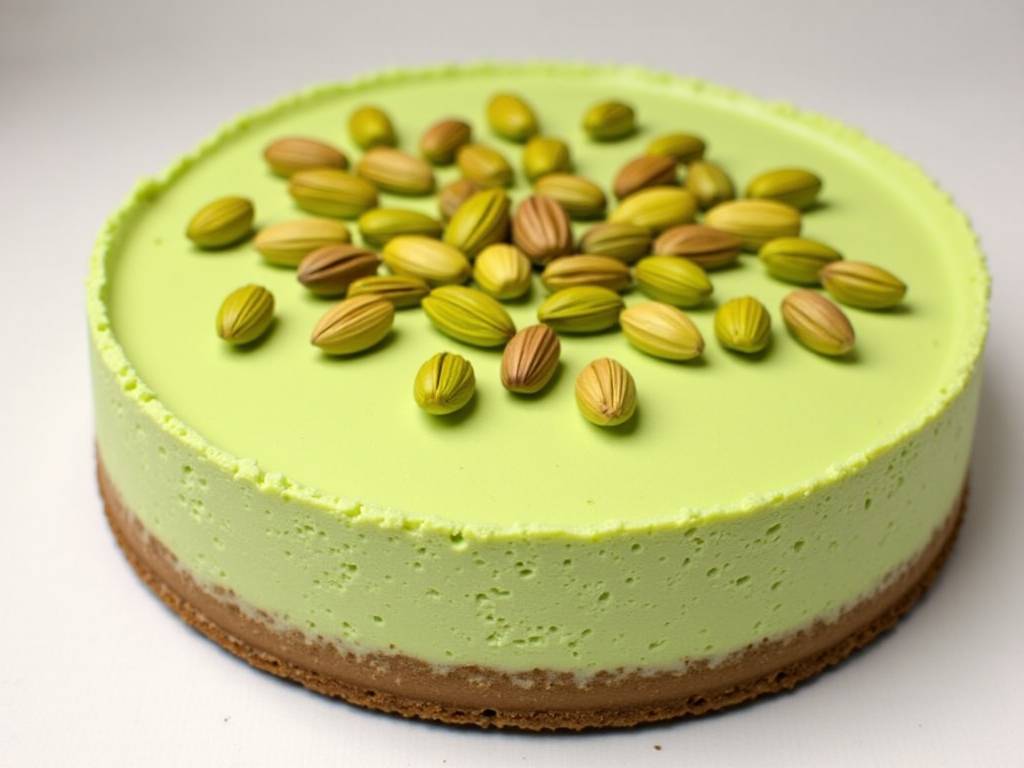
I always emphasize using food as a creative outlet. A pistachio cheesecake allows for that. It’s a conversation starter, a centerpiece for celebrations, and a personal challenge that yields incredibly delicious rewards. The unique nutty green flavor comes not from artificial colorings, but from quality ingredients handled with care. It speaks to a baker’s skill and attention to detail.
Gathering Your Ingredients: The Foundation of Flavor
Great baking starts with great ingredients. For a truly exceptional pistachio cheesecake, every component matters. Here’s what you’ll need, broken down by element.
For the Crust:
- 200 grams of digestive biscuits or graham crackers
- 100 grams of roasted, unsalted pistachios (shelled)
- 120 grams of unsalted butter, melted
- 1 tablespoon of granulated sugar (optional, for extra crunch)
For the Pistachio Cheesecake Filling:
- 900 grams of full-fat cream cheese, at room temperature
- 250 grams of granulated sugar
- 200 grams of sour cream, at room temperature
- 150 grams of pistachio paste (This is key! Look for a pure paste with no added oils or colors)
- 4 large eggs, at room temperature
- 2 teaspoons of pure vanilla extract
- 1/4 teaspoon of fine sea salt
- Green food gel (optional, for a more vibrant hue. Use sparingly!)
For the Topping & Garnish:
- 300 ml of heavy cream, cold
- 2 tablespoons of icing sugar
- 50 grams of chopped pistachios
- Edible gold leaf or crushed pistachio dust (for elegance)
Chef’s Note on Ingredients: Sourcing a high-quality pistachio paste is non-negotiable for that authentic, robust nutty green flavor. As noted by master patissier Pierre Hermé in his workshops, the quality of nut pastes directly dictates the depth and authenticity of flavor in baked goods. Don’t substitute with extract alone.
Essential Tools You’ll Need Before You Start
Having the right tools makes the process smooth and professional.
- A 9-inch springform pan (This is crucial for clean removal)
- Food processor
- Stand mixer or a powerful hand mixer
- Large and medium mixing bowls
- Rubber spatula
- Fine-mesh sieve
- Aluminum foil for water bath preparation
- Instant-read thermometer (for precision)
Step-by-Step Guide to Crafting Your Masterpiece
Now, let’s walk through the process. I’ll guide you through each stage, sharing the tips I’ve learned in professional kitchens to ensure your success.
Step 1: Preparing the Perfect Pistachio Crust
First, preheat your oven to 160°C (325°F). Process the biscuits and the 100g of pistachios in a food processor until you have fine crumbs. Pour in the melted butter and pulse until the mixture resembles wet sand. It should hold together when pinched.
Press this mixture firmly and evenly into the bottom of your springform pan. I use the bottom of a flat glass to get a compact, level base. Bake this for 10 minutes, then let it cool completely on a wire rack. This pre-baking, or “blind baking,” sets the crust and prevents it from becoming soggy later.
Step 2: Creating the Luxurious Pistachio Filling
Reduce the oven temperature to 150°C (300°F). This lower temperature is the secret to a crack-free, creamy texture. Now, wrap the outside bottom and sides of your springform pan tightly with two layers of heavy-duty aluminum foil. This will protect it during the water bath.
In your stand mixer bowl, beat the softened cream cheese on medium-low speed for about 3 minutes until it’s completely smooth and lump-free. Scrape down the bowl often. This step is critical—lumps now mean lumps in the final bake.
Gradually add the sugar and beat for another 2 minutes. Then, blend in the sour cream, pistachio paste, vanilla extract, and salt. Mix until just combined. Add the eggs one at a time, mixing on low speed after each addition until only just incorporated. Overmixing at this stage incorporates too much air, which can cause the cheesecake to rise and fall dramatically, leading to cracks.
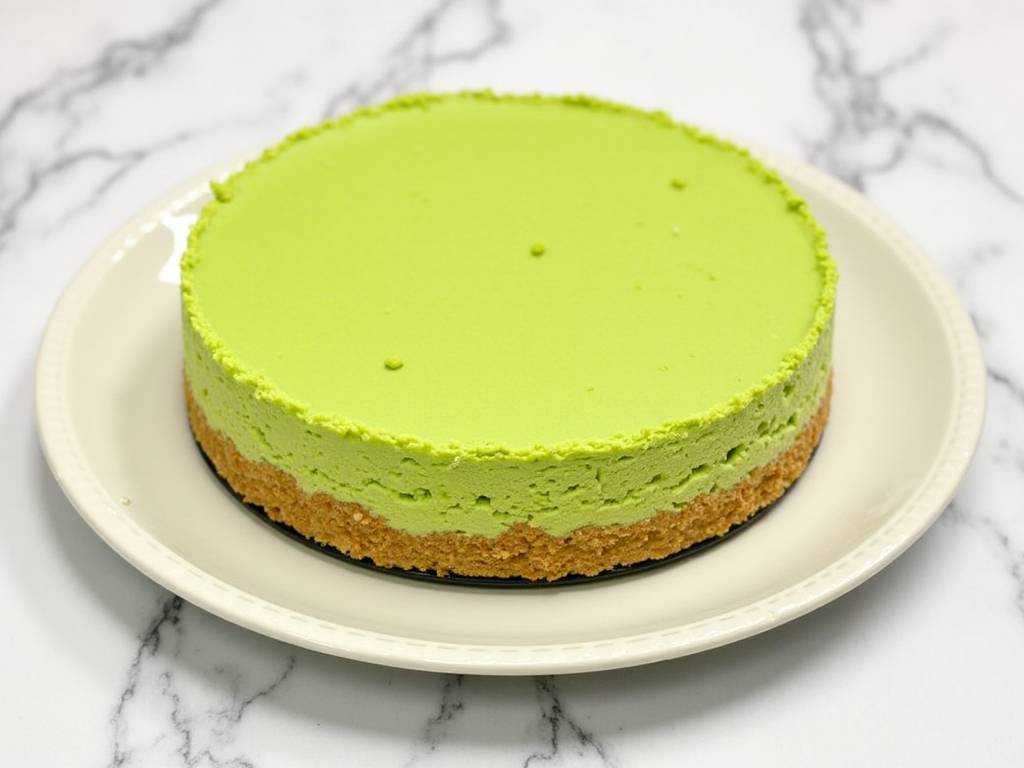
Pro Tip: If you desire a more vibrant green color, add a tiny dot of green food gel at this stage and fold it in gently. Remember, the natural color from the paste is beautiful on its own.
Step 3: The Gentle Water Bath Bake
Pour your filling over the cooled crust. Smooth the top with a spatula. Place the foil-wrapped pan inside a large roasting pan. Pour hot water into the roasting pan until it comes halfway up the sides of the springform pan.
Carefully transfer this setup to the oven. Bake for 65-75 minutes. The edges should be set, but the center (about a 3-inch circle) should still have a slight, gentle jiggle when you tap the pan. This jiggle is your guide to perfect doneness; it will firm up as it cools.
Step 4: The Crucial Cooling Process
Turn off the oven, crack the door open slightly, and let the cheesecake cool inside the oven for 1 hour. This gradual temperature change is the number one defense against surface cracks. After an hour, remove it from the oven and the water bath, and let it cool completely on the counter for another 2-3 hours.
Then, and only then, run a thin knife around the edge of the pan to loosen it, but do not remove the ring. Refrigerate the cheesecake, uncovered, for at least 8 hours, preferably overnight. This long chill allows the flavors to meld and the texture to become perfectly sliceable.
Step 5: The Finishing Touches
Before serving, whip the cold heavy cream with icing sugar to soft peaks. Release the springform ring. You can either spread the whipped cream over the entire top or pipe decorative dollops. Generously sprinkle with chopped pistachios and add a touch of gold leaf for a truly professional finish.
Troubleshooting Common Pistachio Cheesecake Issues
Even with care, things can happen. Here’s how to fix them.
- Surface Cracks: Don’t panic! This is often due to rapid temperature change or overbaking. Your water bath and slow cooling method are the best prevention. Cracks can be beautifully covered with whipped cream and garnish.
- Soggy Crust: Ensure your crust is fully cooled before adding filling. The foil wrap must be secure to prevent water seepage.
- Filling Not Setting: Underbaking is the likely cause. Use the “jiggle test” as your primary guide. If it’s very loose, it needs more time.
Flavor Variations & Dietary Adaptations
The basic recipe is a canvas. For a salted caramel pistachio cheesecake, drizzle homemade salted caramel over the chilled cake before adding cream. For a chocolate-pistachio twist, add a layer of dark chocolate ganache over the crust before pouring the filling.
For a gluten-free version, use gluten-free biscuits or nuts alone for the crust. For a lower-sugar adaptation, you can reduce the sugar in the filling by 50g and use a sugar substitute rated for baking, though the texture may be slightly less creamy.
⚠️ 温馨提示:本款蛋糕含糖量较高,高血糖/糖尿病患者请谨慎食用。
Frequently Asked Questions
Can I use raw pistachios instead of roasted ones for the crust? You can, but I strongly recommend roasted. Roasting deepens the nuts’ flavor and removes any raw bitterness, giving your crust a much richer, toastier base that complements the sweet filling.
My pistachio paste is very thick and oily. Is this normal? Yes, pure nut pastes often separate. Simply stir it vigorously in its jar until recombined before measuring. If it’s extremely stiff, you can warm it slightly in a bowl over warm water to make it easier to mix.
How long will this cheesecake keep in the refrigerator? Properly covered, it will stay fresh and delicious for up to 5 days. The flavors often improve after a day or two. It can also be frozen (without whipped cream topping) for up to 2 months. Thaw overnight in the refrigerator before serving.
Creating this pistachio cheesecake is a journey in precision and passion. From selecting the perfect pistachio paste to mastering the gentle water bath, each step builds towards that unforgettable slice with its unique nutty green flavor. It’s more than following a recipe; it’s about understanding how ingredients interact and having the patience to let the process work. I encourage you to try it, to embrace the small challenges, and to share the stunning, delicious results. Remember, every great baker started with a single recipe. Let this be one of yours.





