 bluename
 How to Support Tall Multi-Layer Cakes Prevent Sideways Sliding Under Frosting
I still remember the first time I tried to stack a four-tier wedding cake in a warm kitchen. Everything looked fine during assembly. Then I stepped away for ten minutes, came back, and watched the top two layers tilt like they were trying to escape. That was the day I learned the hard way how to support tall multi-layer cakes prevent sideways sliding under frosting. It is not just about stacking skill. It is about structure, timing, and a few simple tricks most tutorials skip. I have baked and built tiered cakes for over a decade now, and I have coached dozens of home bakers through this exact problem. So let me share what actually works.
Why tall cakes slide sideways under frosting
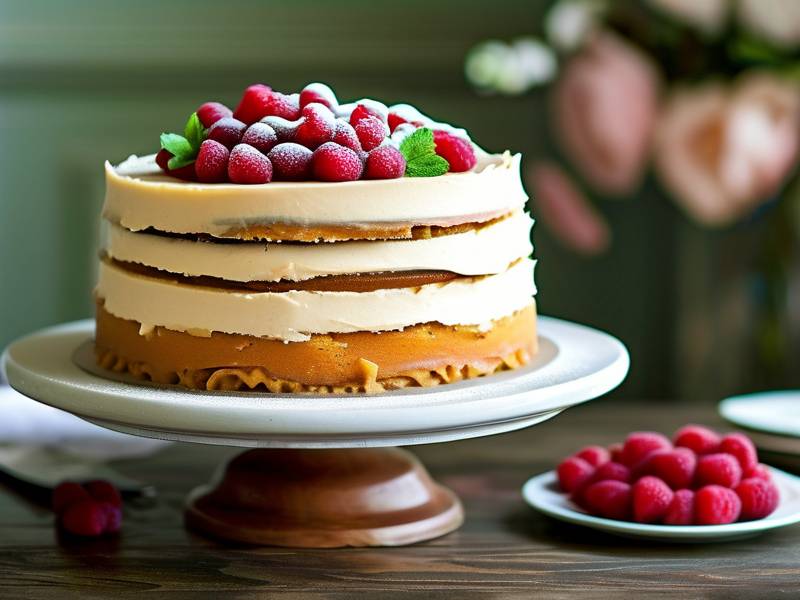
Before I get into solutions, let me explain why this happens. Frosting is slippery. Buttercream, cream cheese, and even ganache create a thin layer of fat between cake tiers. When you stack a heavy tier on top, gravity pulls it down. If there is any wobble, the frosting acts like a lubricant. The cake starts to slide sideways. The taller the cake, the more leverage the top tiers have. A small tilt at the bottom becomes a big lean at the top. Warm rooms make it worse. I once watched a three-tier cake lean a full inch in a 78°F room. The frosting had softened just enough to let the tiers shift.
The frosting itself matters too. American buttercream is stiffer, so it slides less. Swiss meringue buttercream is silkier, which is lovely for taste but risky for tall stacks. Cream cheese frosting is the worst offender because it stays soft even when chilled. So if you are using a soft frosting, you need extra support. Simple as that.
Core support tools you actually need
You do not need a professional bakery setup. I have built stable five-tier cakes on a home kitchen counter. But you do need the right tools. Here is what I keep on hand.
First, bubble tea straws or thick plastic dowels. Wooden dowels work, but they can splinter and they absorb moisture. I switched to food-grade plastic dowels years ago. They are cheap, reusable, and easy to cut. Boba straws are a great backup for smaller tiers.
Second, a cake board for every tier. Thin 1/8-inch foam core boards are my favorite. They are lightweight but rigid. Corrugated cardboard works in a pinch, but it bends under heavy loads. I learned that lesson after a two-tier cake sagged in the middle.
Third, a sharp serrated knife or cake saw. You need clean cuts for dowels. A dull knife crushes the straws and creates uneven support.
Fourth, a small spirit level. Yes, a tiny level from the hardware store. I use it to check each tier before adding the next one. It takes ten seconds and saves hours of repair.
Fifth, non-slip shelf liner. This is a game changer. A small square of rubbery shelf liner between the cake board and the frosting layer below adds friction. It stops sliding before it starts. I get mine from the dollar store.
How to properly dowel each tier to prevent sideways sliding
This is the heart of the whole process. Doweling is not complicated, but most people do it wrong. They put one dowel in the center. That does nothing for sideways sliding. You need multiple dowels placed in a circle near the edge of the tier below.
Here is my method. After stacking a tier and chilling it firm, I place the next cake board on top. I trace a circle about half an inch inside the edge. Then I mark four to six spots evenly around that circle. For a six-inch tier, four dowels. For an eight-inch tier, five or six. For a ten-inch tier, six to eight. I push a dowel into the frosting and cake until it hits the board below. Then I mark the height with a food-safe pen. I pull it out and cut it. I repeat for every mark. The dowels should be flush with the top of the frosting. Not sticking up, not sunken in.
Then I add a thin layer of frosting on top of the dowels. This creates a sticky bond. I place the next tier on its own board. I press gently but firmly. Then I check with my spirit level. If it is off, I lift and adjust. I never force it. Forcing creates cracks.
One more thing. I always chill each tier for at least two hours before stacking. Cold cake is firm cake. Cold frosting is less slippery. I cannot stress this enough. Warm cake plus warm frosting equals disaster. I have seen it too many times.
The secret trick: using a center dowel for tall cakes
For cakes over three tiers, I add a center dowel. This is a long, sharpened wooden or plastic dowel that goes through every tier down to the base board. It stops the whole stack from shifting sideways as one unit. I sharpen one end with a pencil sharpener or sandpaper. Then I drive it through the top tier after the cake is fully assembled and chilled. I use a mallet and a clean towel to protect the top. I stop when it hits the base board.
Some bakers skip this step. I used to skip it too. Then I delivered a four-tier cake on a 20-minute drive. The center dowel would have saved me. The top tier slid two inches to the left. The bride was not happy. Now I never skip it for tall cakes.
You can also use a cake separator plate system. These are plastic plates with a central rod. Each tier sits on its own plate. The rod goes through all of them. They are very stable. But they are also expensive. For home bakers, the center dowel method works just as well.
How to choose the right frosting for tall stacked cakes
Not all frostings are created equal for tall cakes. I love the taste of Swiss meringue buttercream. But for a five-tier cake in summer, I use a stiff American buttercream or a ganache-based frosting. Ganache sets firm and grips the cake board. It is my top choice for stability.
If you must use a soft frosting, here is what I do. I add a thin layer of stiff royal icing or melted chocolate between tiers. This creates a hard, non-slip barrier. It is like a cement layer. I also chill the frosted tier until it is very firm. Then I stack quickly and return the whole cake to the fridge.
Another trick: use a frosting dam. Pipe a thick ring of stiff frosting around the edge of the tier below. Then fill the center with softer frosting. The dam stops the upper tier from sliding outward. I learned this from a pastry chef in Chicago. It works like a charm.
What about buttercream that contains a lot of butter? It softens fast. I add a tablespoon of meringue powder or a quarter cup of powdered sugar to stiffen it. Just be careful not to make it grainy. Sift your sugar first.
Transporting tall cakes without sideways sliding
Transport is where most sliding happens. You have built a perfect cake. Then you put it in the car and hit a speed bump. The tiers shift. I have cried over this. Now I follow a strict routine.
First, chill the assembled cake for at least four hours. Overnight is better. Cold cake does not slide.
Second, place the cake on a non-slip mat in the car. I use a rubberized shelf liner. Then I wedge soft towels or foam blocks around the base. Not tight, just snug. The goal is to stop any movement.
Third, drive slowly. No sudden turns. No hard braking. I take side streets instead of highways. It adds ten minutes but saves the cake.
Fourth, if possible, deliver the cake in a box that is one inch taller than the cake. The box walls stop sideways movement. I buy tall cake boxes online. They are cheap and worth every penny.
For very tall cakes, I sometimes disassemble for transport. I stack on site. This is the safest method. I bring chilled tiers in coolers. I bring my dowels, boards, and a small level. I assemble in five minutes. It is less stressful than praying the whole drive.
Common mistakes I see home bakers make
I have taught many classes. I see the same mistakes over and over.
Mistake one: not chilling the tiers. Warm cake is the number one cause of sliding. Chill, chill, chill.
Mistake two: using one central dowel only. That does nothing for sideways sliding. You need a ring of dowels.
Mistake three: cutting dowels too short or too long. Too short means no support. Too long means the upper tier tilts. Measure twice, cut once.
Mistake four: skipping the cake board between tiers. Without a board, the upper cake sinks into the lower frosting. It also makes sliding worse.
Mistake five: stacking in a warm room. I once tried to stack in a 80°F kitchen. The frosting melted under my hands. I ended up refrigerating the whole thing and starting over. Now I stack in the coolest room in the house. If it is summer, I turn the AC down to 68°F.
Mistake six: not using a non-slip layer. A small square of shelf liner costs pennies. It prevents heartbreak.
Frequently asked questions
Can I use wooden dowels instead of plastic for tall cakes?
Yes, you can. But wooden dowels absorb moisture from the cake. They can swell and crack. They also splinter when you cut them. I prefer food-grade plastic dowels or thick bubble tea straws. They are stronger, cleaner, and reusable. If you only have wood, make sure they are smooth and sealed. Replace them if they get soft.
How do I stop a two-tier cake from sliding without dowels?
For a two-tier cake, you still need support. The top tier is heavy. Without dowels, it will sink and slide. Use at least three dowels in the bottom tier. Also use a cake board under the top tier. And chill everything well. If you absolutely cannot use dowels, use a stiff frosting dam and a non-slip mat. But I strongly recommend dowels. It is not worth the risk.
What is the best way to prevent sideways sliding under frosting in a warm climate?
In a warm climate, you need to fight heat. Chill your cake thoroughly before stacking. Use a firm frosting like ganache or stiff American buttercream. Add a thin layer of melted chocolate between tiers. Use a center dowel for extra stability. Transport in an air-conditioned car. And keep the cake in the fridge until 30 minutes before serving. I have built cakes in 90°F weather using these tricks. They held up fine.
Final thoughts on building stable tall cakes
So there you have it. How to support tall multi-layer cakes prevent sideways sliding under frosting comes down to a few key habits. Chill your tiers. Use a ring of dowels. Add a cake board between each tier. Use a non-slip layer. And for tall cakes, add a center dowel. I know it sounds like a lot. But once you do it a few times, it becomes second nature. I can now dowel and stack a four-tier cake in under twenty minutes. You will get there too.
My biggest advice? Do not rush. I have rushed and paid the price. Take the extra ten minutes to chill. Take the extra five minutes to level. Your cake will thank you. And your guests will never know the panic you avoided. Start with a two-tier cake. Practice the dowel ring. Then move up to three tiers. You will build confidence fast. And you will never serve a leaning cake again.
⚠️ Warning: This cake is high in sugar. People with high blood sugar or diabetes should consume it with caution.





