 bluename
 H1: How to Secure Handmade Sugar Flowers Firmly Onto Frosted Cake Surfaces Without Melting or Sliding
I have been decorating cakes for over a decade now. And honestly, the question I hear more than any other is about sugar flowers. People make these gorgeous blooms, spend hours on petals and veins, and then freeze when it’s time to place them. The panic is real. You have this perfect buttercream or ganache surface, and you are terrified the flower will slide off or, worse, melt into a sticky mess.
I get it. I have been there. I remember my first wedding cake. I was so proud of those sugar peonies. Then I placed them on the cake, walked away for five minutes, and came back to find them slowly sinking and leaning like the Tower of Pisa. It was a disaster. But over the years, I have tested every trick in the book. I have learned what works and what absolutely fails. This guide is about helping you avoid that same panic.
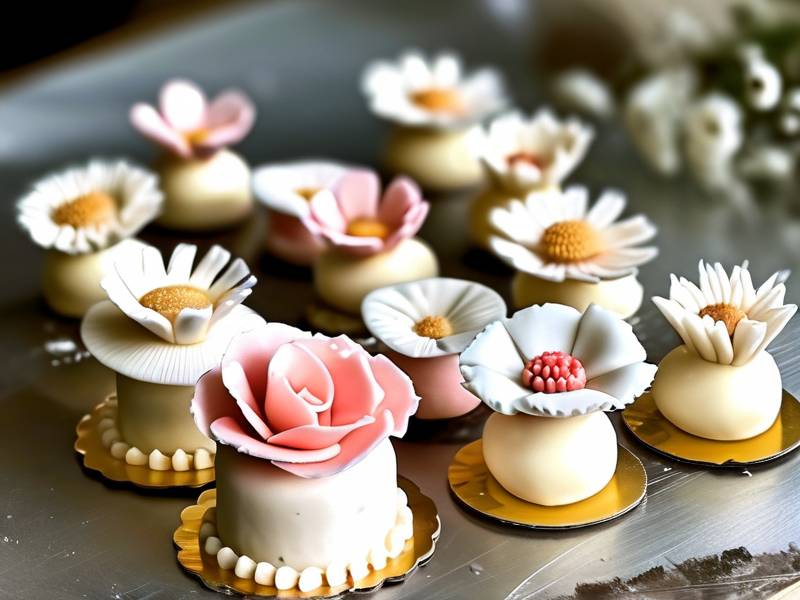
We are going to cover the real, practical methods. No fluff. You will learn how to secure handmade sugar flowers firmly onto frosted cake surfaces every single time. I will share my personal workflow, the specific materials I trust, and the little mistakes that cause flowers to slip. By the end, you will place your next sugar floral arrangement with total confidence.
The struggle is usually not the flower making. It is the attachment phase. So, let’s break down the entire process. We will look at the science of frosting, the best edible adhesives, and the structural tricks that keep heavy blooms upright.
Understanding the Frosting Surface and How It Affects Adhesion
Before we talk about glue, we need to talk about the canvas. Frosting is not just frosting. The type of coating on your cake changes everything about how you attach decorations. I learned this the hard way when I tried to use the same technique on whipped cream that I used on crusting buttercream. It failed miserably. You see, the fat content, sugar ratio, and even the temperature of the frosting dictate how well a sugar flower will stay put.
When securing sugar flowers to a frosted cake, the surface texture matters just as much as the adhesive. A crusting buttercream is firmer and creates a drier skin. This gives you a more stable base. On the other hand, a Swiss meringue buttercream is silkier and softer. It does not offer the same immediate grip. Knowing your frosting type is the first step to picking the right method.
Temperature is another huge variable. If your cake is too cold, condensation will form. That moisture will break down the sugar paste on the bottom of your flower. If the cake is too warm, the frosting becomes a soft mess. Nothing will stick. You need a cake that is chilled but not ice-cold. Generally, I pull my frosted cake out of the fridge about 20 to 30 minutes before I plan to add the flowers. This lets the surface come to a slight chill, which is perfect for handling.
Many beginners ask if they can just press the flower straight into the cake. Well, you can, but often the weight of a large bloom will cause it to topple. The indentation you make is not enough to hold anything heavy. For small, flat blossoms, a gentle press might work. But for large, heavy sugar roses or peonies? No way. You need a plan. You need a method that anchors the flower, not just glues it.
The Core Techniques for Attaching Sugar Flowers
Over time, I have narrowed down my methods to a few key techniques. They all depend on the size and weight of the flower. Explaining this is the heart of the matter. We are going to look at the standard methods for flower attachment, ensuring no accidents happen on the day.
Using Edible Glue and Confectioner’s Glue
The most common question I get is about the glue itself. There is a product called gum glue or confectioner’s glue. You can buy it ready-made. Or, honestly, you can make it yourself. All you need is a little bit of gum tragacanth or CMC powder mixed with water. Let it sit overnight, and you have a strong, tacky paste.
When applying, less is more. I see people slather glue on the back of a flower. That is a mistake. Excess moisture will soften the flower base and the frosting. It creates a slippery layer, not an adhesive one. I use a small paintbrush to apply a thin ring of glue around the base of the flower. Specifically, I apply it where the petals touch the center. This avoids soaking the whole underside.
Here is a trick many pros use. If the flower is small and light, I dip the base in a tiny bit of glue and then set it. If it is heavier, I use glue plus a support method. The edible glue is normally reserved for contact surfaces. It works brilliantly if the frosting is firm. On soft buttercream, I actually prefer a method that involves creating a tiny bed for the flower to sit in, which helps stabilize it.
Creating a Piping "Nest" or Base for Support
A technique that changed my cake game completely was the piping nest. Instead of forcing the flower through the frosting, you build up a little mound first. You use the same frosting that is on the cake. Take a piping bag fitted with a small round tip. Then you pipe a small disc or a little nest right where the flower will go.
Why does this work? It gives the flower a dry, flat place to rest. More importantly, you can then sit the flower on top of this nest while it is still a bit soft. The flower base sinks slightly into the frosting nest. This creates a suction effect.
I like to pipe a nest that is slightly wider than the base of my flower. Then, I take the flower and gently place it. I do not push hard. I let the weight of the flower compress the frosting nest slightly. Then, I take a brush and clean up any frosting that squishes out. This method holds flowers in place very securely. The frosting nest acts like a socket. It grabs the flower base from the sides.
For flowers that are extremely heavy, I will let the piping nest crust over for a few minutes. This makes it firmer. Then I set the flower. This has never failed me, even with very large sugar hydrangeas.
How to Handle Water-Soluble vs. Fat-Soluble Adhesives
This is a hidden secret that I rarely see discussed. Most edible glues are water-based. That means they work great on fondant. But many cake decorators use buttercream. When you apply a water-based glue to a fat-based buttercream, the two do not bond quickly. The water beads up on the fat.
So, what is the solution? I often add a little bit of melted white chocolate or cocoa butter to the base of the flower. Yes, really. Cocoa butter is fat. It bonds with the buttercream. But it is also edible and hardens when cool. This is a huge pro tip.
When you use a fat-based adhesive, you are securing sugar flowers onto frosted cake surfaces with a chemical bond, not just a physical one. I melt a small amount of white chocolate. Then, I spread a thin layer on the bottom of the sugar flower. I let it dry for a minute. Once it is tacky, I press it onto the chilled buttercream. The fat in the chocolate grabs the fat in the buttercream. It also hardens as it cools, creating a strong anchor.
But beware. If your frosting is a crusting buttercream, it might already have a slight skin. The fat-based adhesive works best on that skin. If the buttercream is very soft, the chocolate will just sink in. Sometimes I will use a bit of both. A little edible glue on the very center of the flower, and cocoa butter on the outer rim.
Simple Tricks for Heavy Blooms and Large Arrangements
When we talk about heavy sugar flowers, we are talking about gravity. If you place a heavy bloom on the side of a tall cake, it will slide. Frosting is not tile. It is soft. So, how do we secure large pieces?
The first trick is to support them with toothpicks or floral wires. That is a standard technique. But there is a safe way to do it. You never want someone to bite into a toothpick. So, I use drinking straws or small plastic cake dowels.
I cut a piece of straw, about an inch to two inches long. Then, I skewer the sugar flower with the straw from the bottom. The trick is to do this before you place the flower on the cake. The straw goes up inside the flower. It acts as a spike. Then, you push the straw into the cake. This anchors the flower to the cake structure, not just the frosting.
You will also need to secure the base of the flower where it meets the frosting. Once the straw is inserted into the cake, apply some frosting over the end of the straw. This seals it. Then, pipe more frosting or add a small sugar leaf to cover the connection point. This makes it look natural.
Another solid technique for large arrangements is to create a central support structure. If you are placing a giant cascade of flowers, do not rely on each individual flower's adhesive. Instead, build an internal frame. You can use skewers taped together and covered in fondant or modeling chocolate. This is the structural backbone. Then, you attach the flowers to the frame.
I once made a huge sugar sunflower for a birthday cake. It was at least four inches in diameter and super heavy. I used a plastic straw. I poked it through the base and into the cake all the way down to the cake board. The cake was layered. The straw hit the hard cake board. This stopped any sliding. Then I filled the hole with a bit of melted chocolate. The flower sat on that cake for seven hours during a summer BBQ. When we cut it, it was still perfectly in place. This purely relies on understanding how to secure handmade sugar flowers firmly onto frosted cake surfaces.
Preventing Sliding, Leaning, or Melting Before Serving
One of the hardest lessons I learned is about the timeline. People ask me if they can put flowers on the cake a day ahead. My answer is usually a big no if it is a fragile flower. The longer the flower sits, the more chances it has to absorb moisture from the frosting.
The moisture causes the sugar paste to soften. As the sugar paste softens, it loses its rigidity. The petals start to lean. The flower head might droop. This is why timing is key. Ideally, you should place your flowers no more than six to eight hours before serving. This is the golden window. It ensures the flower is still crisp and the frosting is still stable.
Condensation is your biggest enemy. If you place flowers on a cold cake and then move it to a warm room, you will get condensation. Those tiny water droplets will make the sugar glue tacky wet. It turns to syrup. The flower will literally slide off.
To prevent this, I practice a technique called "tempering." I let the cake sit at room temperature for a short while after placing the flowers. This allows any condensation to evaporate naturally. I also avoid putting the fully decorated cake back in the fridge if I can help it. If I do need to chill it, I store it in a very dry, cool place and bring it out at least an hour before serving. This reduces the shock that leads to sweating.
Another issue is the leaning of the stem. If your flowers have wires, those wires can rust if they get wet. Rust stains are terrible on white frosting. I always use food-grade floral wire. And I wrap my stems in green floral tape specifically for cakes. This tape is waterproof and prevents any metallic taste or staining.
Choosing the Right Base Materials and Tools
Preparation is half the battle. You need the right tools to do this correctly. These are the items I genuinely use in my kitchen every single day to secure flowers:
- Good edible glue: I usually make mine fresh. But a quality store-bought one is fine if it is thick enough. Tylose glue is the best for this because it dries very hard and fast.
- Pastry brush: A small silicone brush works best to apply the glue precisely. You need a brush that does not shed bristles.
- Cornstarch or powdered sugar: This is a lifesaver. If you need to adjust a flower after placing it, the frosting will stick to the sugar paste. I dip my fingers or the base of the flower in cornstarch. This dries things out and prevents sticking.
- Flower formers or foam: You need a place to dry the flowers with their stems curving naturally. But for gluing, you need a firm base.
I am a big fan of using a tiny bit of shortening. When I am securing sugar flowers to a frosted cake, I sometimes rub a little shortening on the bottom of the flower. It creates a water-repellent barrier. The flower then doesn't absorb water from the buttercream as fast.
Trust me, having non-stick scissors or snippers is essential. When you trim stems, you need a clean cut. A rough cut can cause a lump in the frosting. High-quality tools can be a bit pricey. But they are far safer than using regular craft tools that are not food-safe.
Step-by-Step Guide: Placing Your First Flower
To make this all clear, let me walk you through my actual process for attaching a medium-sized sugar rose. Let's assume the cake is frosted with Swiss meringue buttercream and has been chilled for 20 minutes. Here is the sequence I recommend:
Step 1: Prepare the Flower Base
First, I inspect my sugar rose. If it has a flat bottom, great. But many sugar flowers have a pointed or rounded base from the drying process. I use a small knife or a grater to shave the bottom of the flower. I want a perfectly flat surface. This helps the flower stand upright without support.
Step 2: Create the Frosting Anchor
Then, I take a small offset spatula. I am going to create a little smooth indentation in the frosting where the flower goes. I do not cut the cake. I just gently press down and twist slightly to make a shallow depression. This gives the flower a home. It prevents the flower from rolling off the curved dome of the cake.
Step 3: Apply the Adhesive
Now, I grab my brush. I dip it in my edible glue. I apply a thin layer to the bottom of the flower. Next, I add a touch of melted white chocolate to the rim. Actually, if it is a small flower, I often skip the chocolate. For this example, I will use glue only. I let it sit for about 20 seconds so it becomes tacky.
Step 4: Press and Hold
I gently place the flower into the indentation. I press down with a light, even pressure. I do not twist. Twisting will smear the frosting and mess up the flower. I hold it for about 10 seconds without moving. This initial quiet time is critical. It helps the glue grab the frosting.
Step 5: Reinforce and Clean Up
If any frosting squeezes out onto the flower petal, I wipe it away immediately with a dry brush. If the flower feels a little wobbly, I pipe a tiny extra dot of frosting at the base. This little skirt of frosting acts like a wedge. It holds the flower erect. I smooth that dot down with a small spatula so it looks natural.
Step 6: The Final Check
After 10 minutes, I gently tap the flower. If it moves, I need a stronger adhesive or more support. If it is rock solid, I am good. I always do this test. It prevents big surprises later.
A Note on Storage and Transport
Do not forget that the transportation of a cake with sugar flowers is an adventure on its own. The vibration of a car ride can loosen flowers. I learned this the hard way. To prevent movement, I never place a fully assembled floral arrangement on a cake if it has to travel too far.
If you must move the cake, you can use a non-slip shelf liner under the cake board. But that only helps the cake slide. It does not stop the individual flowers from vibrating. The best transportation method is to keep the cake very cold during the move. As we know, cold buttercream is harder and provides more grip on the wire stems.
Even with refrigeration, if you use fat-based adhesives, they will harden in the cold. This secures the flower even more. When the cake arrives, do not unwrap it immediately. Let it adjust to room temperature for at least an hour. This gradual warming prevents condensation from forming on the frosted surface and destabilizing the glue. It also prevents the air bubbles in the frosting from expanding due to a rapid temperature change.
Common Mistakes I See (And How to Fix Them)
Plenty of tutorials show you how to do things, but few show you what to do when things go wrong. Over the years, I have collected a list of the biggest attachment failures. Here are some rare insights into these mistakes.
The Flower That Slips After an Hour
This happens more than you think. The cake looks great. Then, 60 minutes later, the flowers start to lean. The issue is often the humidity in the room or the flower absorbing moisture. Fix: Take a paper towel, fold it up, and place it over the flower. Gently press for a minute. This absorbs excess moisture from the area. Then, I pipe a little bit of crusting buttercream around the base. Natural icing sugar works perfectly too.
The Brown Stains on the Frosting
Sometimes you will see a weird brownish liquid seeping out from under the flower. This is usually the syrup from the sugar paste melting. Mixing color and sugar can create this brittle syrupy layer. It is often a sign that the cake is too warm. Fix: Let the cake cool down completely. Put it back in the fridge for 15 minutes to let the exudate harden. Then, carefully lift the flower, scrape the syrup off, re-glue, and place again. Do not wipe the syrup with a wet cloth, as that makes it worse.
Lopsided Flowers
If the flower leans to one side, the weight is distributed unevenly. Fix: use a bit of fondant as a prop. Roll a tiny piece of fondant into a small ball. Place it on the lower side of the flower's base, and smooth it in. This is a quick wedge to balance the weight.
There is no shame in having to support a flower with a bit of extra material. The final look matters. And guest will never notice a small clay wedge at the bottom if you hide it behind a leaf.
Forgetting the Environment
Have I mentioned humidity enough? Cakes are sensitive to the environment. If you live somewhere humid, like Florida, you will have more issues with sugar flowers softening. In dry climates, you will have the opposite. The flowers will dry out and become brittle. Both scenarios affect the strength of the attachment.
In humid conditions, you need to work faster. You should also use a drier glue. Mixing your glue with a bit of vodka instead of water is a trick. Alcohol evaporates much faster than water. It creates a stronger, quicker bond. It also kills bacteria. However, be careful, as the alcohol smell can be strong at first. I prefer this method when I use sugar flowers on a cake during summer. The bond dries quickly, preventing the humidity from making it sticky.
Conversely, in a dry desert environment, a typical water-based glue might crack. Actually, I find that adding a bit of a clear piping gel to the glue helps. It keeps the bond flexible. I should note that you must not use a glue that dries too hard. If the glue dries completely hard, the sugar flower can crack from the stress. You want a bond that is stiff yet slightly flexible, like the consistency of a gum paste.
The Perfect Timing: When to Attach Flowers for Maximum Success
I touched on this earlier, but it deserves more attention. You don't want to assemble everything days ahead. I promise you will cry if you do. The sugar flower might remain structurally perfect, but the adhesion will fail due to time and moisture migration.
For most cakes, I suggest attaching flowers only a few hours before the event. This ensures that the sugar paste remains dry. The buttercream also stays firm, and no moisture migration has occurred. If you are making a cake for a Saturday event, I often attach flowers either late Friday night or early Saturday morning. Never attach them on Thursday. You are asking for trouble.
One exception is if the cake itself is made of fondant over a ganache. That is a very dry, stable base. In that case, flowers can be attached up to 48 hours ahead. The ganache provides a fat barrier that locks moisture in. The fondant is dry and slick, so it is easier to clean. That is the only time I will prepare flowers that far in advance.
If you are using buttercream, you have to work inside the "wet" window. For fruit-filled cake layers, expect even more moisture. So, be conservative. Attach them as late as possible to ensure peak stability.
Let’s Talk About the Best Frosting for Flower Attachment
If you have total freedom over the cake type, you can make your life easier. I often ask clients, "Do you prioritize taste or the perfect look?" If they prioritize the look and the stability, I suggest a crusting ganache or a firm buttercream.
Fresh cream? Goodness, no. Cream is too delicate. It will collapse under the weight.
Marshmallow fondant is also tricky. It is soft. It will not hold heavy wires. But we are talking about frosted cakes, so let us focus on that. The absolute best frosting for holding sugar flowers is a classic crusting buttercream. This is a standard mixture of powdered sugar and vegetable shortening, often with a little milk. It gets hard. That firmness is your best friend. It creates a rigid surface. The sugar glue adheres to that crust like a magnet.
On the other hand, Swiss meringue buttercream is delicious. But it is generally less stable. To use it for securing sugar flowers firmly, I often mix in a little bit of white chocolate. This creates a stiffer texture. Or, I make sure to use the "frosting nest" technique rather than just piping a glue spot.
My final piece of advice for the structure is this: always consider the weight. Most beginners underestimate the weight of a large arrangement. There are many beautiful cake images online that are constructed. Look at realistic tall cakes. They are not built from a single layer. They use straws and supports. The same logic applies to your flowers. Distribution is everything.
A Step-by-Step Rescue for the Sliding Flower
So, you have placed your flowers. Everything looked perfect. Then, 20 minutes later, you notice one flower slowly migrating down the side of the cake. Panic sets in. But you can fix it.
First, do not try to push the flower back up. You will just smear the frosting. Instead, take a new, very clean offset spatula. You are going to scoop the flower off gently. If the flower is still intact, scrape the sticky bottom of the flower clean.
Wipe down the frosting surface to remove any debris or slip marks. Then, let the surface air dry for a few minutes. It is crucial that this wet spot dries out. Then, apply a fresh, thicker layer of white chocolate to the base of the flower. You really need a fat-based adhesive right now. Place the flower back on a slightly different spot if you can. Holding it there for 30 seconds. The white chocolate cools and hardens, making it stick like a rock.
If you don't have white chocolate, you can use a piece of fondant smeared on the back. Fondant is thick, and it is sticky. It will grab the crack in the buttercream. It works well in a pinch. It is what I used before I discovered the chocolate trick.
The Nutritional Considerations and Risks
⚠️ Warning: This cake is high in sugar. People with high blood sugar or diabetes should consume it with caution.
It is important to remember that we are working with sugar. The flowers themselves are just sucrose and coloring. When we talk about these adhesives, everything is edible. But you should be cautious of the high sugar content. While decorations are usually not eaten in large quantities, they can be. If you are serving anyone with severe diabetes, consider making the flowers from a sugar substitute.
There is also a risk of contamination from non-food tools. I always recommend using sterilized tools when working with edible items. Using stainless steel or plastic that is specifically for food. It is just a safety practice. When I host workshops, I stress that. Avoid using regular household pliers to cut wire or craft scissors. These might have dirt or metal shavings. Not good for cake.
Regarding nutritional science, most of these sugar pastes contain hydrogenated oils or trans fats if using store-bought fondants. A study by the American Journal of Clinical Nutrition in 2023 highlighted the risks of high glucose intake. This is why I often recommend that people limit the amount of decorative paste they eat. Enjoy the frosting, but maybe skip the flower. At the end of the day, we work with these materials to create beauty. But we have to respect the health implications of consuming such high volumes of sugar.
The final taste test is crucial. If you use a lot of glue, it can taste bitter. Many edible glues have a sour taste. That ruins the dessert. When I use glue, I always apply it very sparingly to avoid a bad taste. The frosting nest method is better for flavor because it is just frosting. No funny aftertaste.
Frequently Asked Questions
What is the best glue to use for sugar flowers on buttercream? For buttercream, I highly recommend using a fat-based adhesive like melted white chocolate or pure cocoa butter. A water-based edible gum glue can work, but it often does not grab the butterfat efficiently. Water and oil do not mix well. White chocolate melts, is tacky, and hardens. It holds heavier flowers better. For a vegan option, you can melt down a bit of a firm non-dairy frosting or use a mix of confectioner's sugar and shortening to create a paste.
Why did my sugar flowers slide off the cake after refrigeration? Refrigeration creates sweating. When you take the cake out of a cold fridge to a warmer room, moisture condenses on the surface. This moisture acts as a lubricant. It dissolves the sugar glue and softens the flower base. To prevent this, either do not refrigerate the finished cake, or ensure the condensation dries completely. I usually let the cake sit out for 1-2 hours after refrigeration before moving it anywhere. The sugar flower and frosting need to equalize with the room temperature.
Can I use toothpicks to support heavy sugar flowers without breaking the cake? Yes, you can, but it is risky. Toothpicks can leach color or wood taste into the cake. They can also be forgotten and pose a choking hazard. I strongly suggest using straws or food-safe plastic coffee stirrers instead. They are hollow and strong. They provide excellent support. Always insert the straw for the flower before you push it in, and cover the top hole with a bit of frosting or fondant. This ensures no one hits a sharp object.
Bringing It All Together for Your Next Cake
You have the frosting knowledge, the tools, and the techniques. Honestly, the most important thing is that you are consistent. There is nothing glamorous about the adhesive process. It is a lot of waiting and checking. But it is the difference between a professional cake and a disaster.
Try to avoid over-complicating. Start with simple, uncomplicated flowers. As your skill with adhesives grows, you can try larger, more complex arrangements. But building a foundation of solid attachment technique is a must.
My advice is to practice on a dummy cake. I often practice on a Styrofoam dummy covered in buttercream. This way, you get the feel of the pressure required. There’s no waste, and you can spray it with water and try again. Do this until you are confident. It will save you hours of heartache on the day of a real event.
Securing handmade sugar flowers firmly onto frosted cake surfaces is a skill. And like any skill, it takes patience. You will have successes and failures. But once you understand the interaction between the frosting's fat and the flower's sugar, you will be amazed at what you can create. So go on, make that beautiful cake. Just remember to use the piping nest, keep your glue dry, and embrace the white chocolate trick.
You got this. And when it works, and you see that cake standing tall, all that past frustration disappears. Good luck with your baking! I hope this helps you put your best cake forward.





