 bluename
 How to Tint White Buttercream Soft Pastel Hues with Gel Food Coloring Drops
I have lost count of how many times I have stared at a batch of stark white buttercream and felt completely uninspired. White is beautiful for a wedding cake, sure. But for baby showers, Easter brunches, or spring birthday parties, you need something softer.
You need those dreamy, muted tones that look like they came straight out of a high-end bakery magazine.
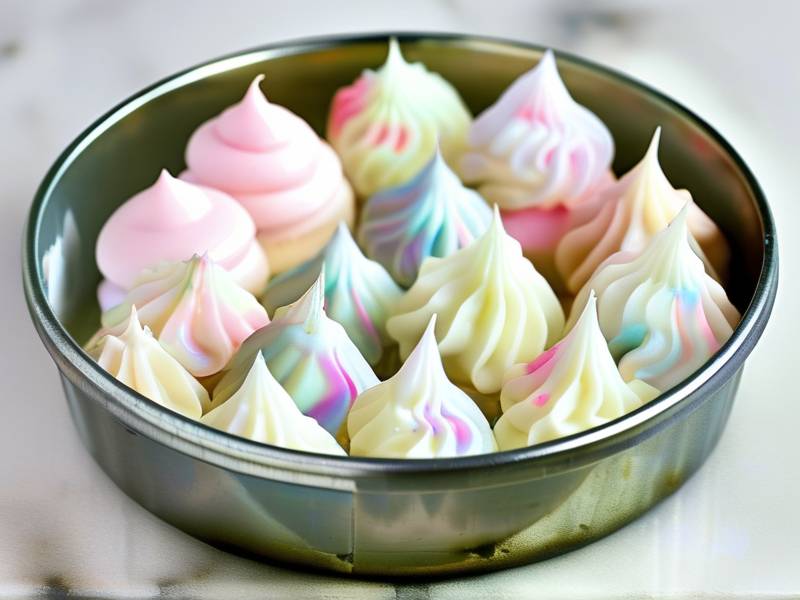
The good news? Achieving those gorgeous pastel shades is surprisingly simple. It all comes down to understanding how to tint white buttercream soft pastel hues using gel food coloring drops. It is less about the brand of coloring you buy and more about the technique you use.
I have been decorating cakes professionally from my home kitchen for over six years. I have ruined plenty of batches with gloppy, over-saturated colors that looked nothing like the soft clouds I envisioned. I have learned the hard way what works and what absolutely does not work.
Let me walk you through my exact process. We will cover everything from ingredient selection to fixing a batch that went too dark. Honestly, once you get the hang of this, you will never fear pastel colors again.
Understanding Why Gel Food Coloring Drops Are Non-Negotiable For Buttercream
The first big mistake I see beginners make? Grabbing that little box of liquid food colors from the grocery store. You know the one. It is usually sitting next to the vanilla extract and has four basic colors in tiny squeeze bottles.
Please, trust me on this. Do not use those for tinting buttercream.
Liquid colors are mostly water. When you add enough liquid to get a true pastel shade, you alter the consistency of your frosting. Your stiff, pipeable buttercream suddenly becomes loose and runny. I remember one specific batch where I added too much liquid red to achieve pink. The frosting collapsed right on the counter.
Gel food coloring drops are different.
These are highly concentrated. They are viscous but not watery. You only need a tiny amount to get excellent color payoff. That means your buttercream stays nice and stiff. The structure remains intact for piping beautiful rosettes or creating smooth sides on a layered cake.
The consistency empowers you. When you use drops instead of bottles, you have way more control over the final color. It is precise work.
Another technical advantage with gel colors is that they mix into fat-based frostings easily. Traditional American buttercream is loaded with butter and powdered sugar. Gel colors blend in effortlessly without leaving behind that weird, watery separation you get with liquid alternatives.
Your Shopping List: Getting The Right Supplies Before You Start Tinting
Before we dive deep into the actual technique, let me give you a quick rundown of my favorite supplies. Having the right tools on hand saves you so much frustration.
You do not need fifty different shades in your pantry. You can mix most pastels from primary colors. But a few quality basics help.
I personally recommend the Americolor Soft Gel Paste set if you are starting fresh. I have used this brand for years. The pigmentation is consistent.
For pure white buttercream, you need a high-quality vanilla buttercream base. Whipped egg whites or meringue powder make a huge difference if you want a bright white base color. If your buttercream has a yellow tint from the butter or vanilla extract, your pastels will look muddy. Use clear vanilla if you can get it.
Also, grab some toothpicks. You will use these instead of pouring directly from the bottle. This is a key habit to develop.
Many people ask me about using Wilton Color Right food coloring drops vs another brand. Honestly, both work well. I just prefer brands that offer dropper tops. These allow you to count how many drops you are adding. I use clear gel food coloring in the primary colors for my buttercream coloring guide.
One more tip. Keep a white plate nearby. A white surface helps you see the true color of your frosting without the surrounding countertop skewing your perception.
Preparation: Starting With The Right Buttercream Base For Pastel Perfection
Let me walk you through this. You cannot just grab any buttercream recipe and expect perfect pastel results.
The starting point matters. A lot.
Your buttercream needs to be smooth, creamy, and completely lump-free. Tiny lumps of unmixed powdered sugar will show up as streaks in your final pastel color. They interrupt the smooth appearance you are going for.
I prefer a crusting buttercream for most of my projects. It pipes beautifully. The crusting property helps when you are smoothing the outside of a cake with a bench scraper.
But here is the secret. Let your buttercream sit at room temperature for about 15 minutes before you start coloring.
Cold buttercream is stiff. It resists the gel color. You will end up overmixing it to incorporate the drops, which introduces air bubbles into your frosting.
Warm buttercream, on the other hand, blends colors quickly. It only needs gentle stirring.
Take a deep breath. You are almost there.
Aim for that peanut butter consistency. If you spread a small amount on your finger, it should feel slick and soft without melting. This texture allows the gel food coloring drops to disperse evenly throughout the entire batch.
Now, one thing many bakers forget. Pastel hues look brighter on a truly white base. If using regular butter that yellows your frosting, consider a small drop of white gel color. This neutralizes the yellow tone. Try using violet or purple to cancel out yellow.
You want to work with about two cups of buttercream per color batch. This quantity is manageable. It is enough to frost a small cake tier or pipe a border.
Step-By-Step Guide To Getting Soft Pastel Hues Every Single Time
Now we get down to the technical execution. How to tint white buttercream soft pastel hues with gel food coloring drops really does come down to patience and disciplined measuring.
Let me break my process down into very specific steps.
First, portion your buttercream into separate bowls. Use a kitchen scale to keep portions even. This matters more than you might think.
If you are making a three-color cake, for instance, you need equal amounts of frosting for each color. That ensures consistent piping coverage.
Second, always mix your colors in natural daylight. Artificial kitchen lights, particularly those yellow incandescent bulbs, will completely distort your perception. I learned this when I piped a "peach" cake that looked brownish in my dining room. Once I moved it near the window, I saw the error immediately.
Natural light is your best friend for color-blending.
Third, start with a small amount. Place a toothpick into the gel bottle, then swipe that tiny dab into your white buttercream. Stir it in thoroughly.
And here is the part people struggle with: mix completely before you evaluate the color. Gel colors take a few seconds to fully disperse.
You cannot see the true color if the gel is still streaked through the frosting.
Use a sturdy spatula and fold that buttercream over itself multiple times. Scrape the bottom and sides of the bowl well. That tint often hides in those forgotten corners.
Fourth, be patient when judging the color. Here is a critical fact that many frosting guides skip.
Fresh buttercream that is still being mixed appears lighter than the final product. During mixing, you are incorporating tiny air bubbles. These bubbles scatter light and make the color look pale.
Once your buttercream sits for a few minutes, those bubbles rise to the surface and pop. The color will deepen slightly.
That one-minute pause can make the difference between a color that looks perfect when you are mixing it and one that ends up too dark later.
Why Less Is More: The Strategy Behind Subtle Pigments
I need to emphasize the principle of starting small. To achieve soft pastel hues, you are actually adding very little pigment.
Pastels are essentially just full-strength colors with a high percentage of white added. Since your buttercream is already white, the goal is to tint it just a tiny bit.
The professional bakers I know do not mix colors by dumping in drops. They use the dip-and-swirl method. This is old-school cake decorating.
Dip a clean toothpick into the gel color. Remove it. The toothpick has a tiny coating of color on the tip. Swirl that into one spot on your buttercream and mix completely.
This is similar to how much pigment you need for some shades. You want that amount but maybe double it if you are looking for a stronger tint.
It sounds almost impossible. But gel colors are that concentrated.
Remember, you can always add more. You cannot take color out once it is mixed.
If you dump too much color in, you instantly wind up with a medium or dark shade. Fixing that means adding more white buttercream to dilute the color. If you do not have extra frosting made, you are in trouble.
A conservative approach will serve you well.
Trust me on this. I have so many memories of me shaking my head at disastrous batches of frosting that looked more like pepto-bismol than blush pink. That is not the dreamy shade you want.
Mixing Specific Pastel Shades With Gel Drops: My Personal Go-To Formulas
I use very specific gel food coloring drops for soft pastels to get consistent results. Let me share my common color formulas for buttercream.
Creating a Soft Blush Pink
This is the shade everyone always asks me about. Blush pink is timeless, romantic, and perfect for so many occasions. The secret is to use only a tiny amount of red or rose.
Take your toothpick and dip it into a deep pink or red gel. Swipe a tiny speck into your bowl. Mix that thoroughly.
Most of the time, this alone gives you a lovely pale pink. If you want it ever so slightly warmer, add the tiniest dab of lemon yellow. This warms the pink and keeps it from turning blue-toned.
Making a Baby Blue
For a true powder blue, avoid simply dumping blue into buttercream. A straight blue can result in a shade that looks synthetic.
Instead, dip your toothpick into the blue gel. Swipe it into a bowl of white buttercream. Blend well. Then add a tiny speck of violet to knock out any green-tone. This produces a more sophisticated, muted baby blue.
Getting a Soft Lavender or Lilac
Lavender is one of those colors that can turn gray quickly if you are not careful. Pure purple is a combination of red and blue. If your purple has too much blue, it can look dull.
I use a violet or purple gel directly. But I always add just a touch of pink or rose alongside it.
This keeps the color bright and fresh. The result is a soft lilac rather than a muddy grayish purple.
Developing a Gentle Peach or Apricot
Peach is trickier than people think. It is tempting to simply mix orange into white. However, your orange might be very yellow-leaning, resulting in a color that resembles banana cream rather than peach.
I mix two parts coral or deep pink gel with one part yellow. This combination yields a soft, peachy tone that looks natural and warm.
For a slightly brighter peach, add a touch more yellow. For a dusty rose, add more pink.
Achieving Mint Green
Do not try to make mint green by mixing lemon yellow and sky blue. That creates a loud, apple-green shade.
A proper soft mint green starts with a touch of teal or leaf green. Add just a speck of that to your white buttercream.
Mix thoroughly, then add a tiny drop of lemon yellow to warm it up slightly. This creates that muted, gentle mint tone we all associate with spring treats.
Considerations for Buttercream Temperature and Texture
Your buttercream temperature and mixing technique will affect the gel color payoff. Here are a few things I have learned through trial and error.
Many people ask me about using paste food coloring vs gel food coloring for frosting. Both work fine. Gel is just easier to measure with the dropper bottles.
However, the temperature of the buttercream is critical regardless of the color type you use.
If your kitchen is hot and your buttercream is melting, the color will not incorporate smoothly. The butterfat separates. This creates a broken appearance in the frosting.
I usually work in a cooler room during summer projects. If the frosting starts slumping, I pop the bowl into the refrigerator for ten minutes and then stir it again.
Conversely, if your buttercream is too cold, the gel will clump. You will get little flecks or dots of concentrated color in your frosting. Nobody wants that in a finished cake.
If you notice flecks after mixing, you can try warming the outside of the bowl slightly. I do this by resting the bowl in warm water for about thirty seconds. Then I aggressively beat the mixture on low speed to break up those clumps until the color looks homogenous.
Fix Common Coloring Problems That Happen With Gel Drops
Even with the best intentions, things can go sideways. Let me share some quick fixes for when the color dips sideways.
The Buttercream Looks Too Dark
This happens to everyone.
Do not panic. Start mixing in portions of plain white buttercream to dilute the color. Add about one-quarter cup at a time.
As you fold this in, the color lightens significantly. However, you will have more buttercream than you originally wanted. If you only need a specific amount for piping, you now have extra ingredients to use.
The photo shows exactly what happens when you skip this step and believe you can spot-fix a dark patch.
The Color Faded After Sitting Overnight
Some gel colors can change over time. Red shades are often the worst culprit for fading in buttercream.
This is especially true if you use natural or organic food colorings without stable synthetic pigments.
If you need a color to stay vibrant for 24 hours, make the buttercream a touch darker than you want the final result. It will mellow overnight.
I usually recommend that you store the decorated treats somewhere cool but not chilled. Too much condensation will also affect the color.
The Buttercream Turned Grainy
If your gel color does not incorporate fully, you might see a grainy texture. This happens when you add color to warm, softened buttercream and then chill it too fast.
The water in the gel creates small sugar crystals. Beat the buttercream at a higher speed for a minute to smooth it out. Make sure you use gel products that specify they are oil-based or water-based for baking.
Conversely, you might find that the paste is not the right type. Always check the label. Make sure you have the formula meant for buttercream.
How Long Does Colored Buttercream Stay Good?
I get this question every time I teach a class or share a tutorial. Properly stored, tinted buttercream lasts just as long as plain buttercream.
The coloring process does not dramatically impact shelf life.
At room temperature, an American buttercream can sit out for up to two days. This is safe as long as your kitchen is not hot. The high volume of sugar acts as a preservative.
In the refrigerator, your leftover pastel buttercream will keep happily for up to two weeks. Store it in an airtight container.
When you are ready to use it again, let it come to room temperature completely. Then give it a good, vigorous stir with a spatula.
Do not use an electric mixer if you can avoid it. This incorporates too much air and changes the texture. Manual stirring is safer.
You can also freeze tinted buttercream. I freeze portions in zip-top bags for up to three months. Just push out the excess air before sealing.
Choosing The Right Gel Food Coloring Drops For Baking
I have used countless brands over the years. Some have blown me away; others have been total disappointments.
Let us talk about what sets a high-grade gel apart from the cheaper options.
The viscosity should be thick. When you tilt the bottle, it should barely move. A watery gel is a warning sign.
The color payoff is another core factor. One drop from a concentrated formula really outperforms two drops from a watery brand.
Chefmaster and Americolor are industry standards. Both have droppers that make it easy to manage how many drops you use. That is essential for those tiny, precise amounts you need for soft pastels.
Natural colors, like those made by Watkins, are great if you prefer plant-based options. But be aware they carry a flavor profile.
For instance, natural red from beets can add an earthy taste. Natural yellow from turmeric will taste slightly bitter. I do not recommend those for clean-tasting buttercream.
The synthetic gels, such as Red 40 or Blue 1, have no taste at all. They are perfect for frosting that is meant to be eaten.
Piping Techniques For Swirled Pastel Buttercream
Once you have your beautiful pastel shades, the real fun starts.
Tinting multiple shades for a swirled effect is simpler than you might think. You just need disposable piping bags, gel colors, and a squeeze of patience.
Prepare each buttercream color and place it in separate bowls. Take a couple of piping bags.
You can make one bag filled with different pastel stripes of color to create a watercolor look. Use a long spatula to smear a vertical stripe of pink up the side of the bag. Repeat with mint and lavender stripes.
Then fill the bag with a large scoop of white buttercream.
When you pipe, the colors will come out in different patterns. This is a style I use a lot for cupcakes.
It looks intimidating but is very forgiving. Nobody has to know that you only had three tiny scrapes of color on the bag wall.
If you are piping roses or ruffles, you will want a dedicated bag for each color. It just keeps everything clean and precise.
Adding Beautiful Depth to Pastel Buttercream Cakes
Once you have perfected your tints, it is time to put them on a cake. I love a classic semi-naked cake with pastel layers showing through. This works especially well with soft buttercream stripes.
Another technique is the ombre effect. This is where you blend one shade from light to darker across the sides of the cake.
To do this, set up a turntable. Divide your buttercream into five or six bowls, each slightly darker than the last.
Pipe stripes of each shade around the bottom half of the cake. Then use a bench scraper to smooth the transitions. You will get a beautiful gradient that rises from dark at the bottom to pale at the top.
This is definitely an intermediate skill. Try it the first time on a tall cake without any fragile decorations.
The Storage Mistake That Ruins Pastel Buttercream Colors
Do not store un-decorated buttercream in a metal bowl. Some colors react with metals. This can change the tint or leave an off-flavor.
I have seen a beautiful pink turn a strange gray color because it sat overnight in an aluminum bowl. The acids in certain colors caused a chemical reaction. It was a mess.
Always choose glass or plastic containers for your colored frosting.
Also, use plastic wrap pressed directly onto the surface of the buttercream. This prevents a crust from forming. The crust can be very annoying when you are trying to pipe a smooth design the next day.
A Quick Guide On How Many Drops For Different Pastel Recipes
For people just getting started with how to tint white buttercream soft pastel hues, having a basic drop count helps.
Keep in mind that these numbers vary by gel brand. I use gel food coloring brands that are very concentrated. This means fewer drops overall.
If you are mixing 1 cup of white buttercream, start with these amounts:
For blush pink, use one small dab on a toothpick. That is roughly one-eighth of a drop.
For sage green, use one tiny swipe of leaf green mixed with a fleck of yellow.
For butter yellow, you might use two drops of lemon yellow. Yellow is a weaker color and needs slightly more.
For lilac, one swipe of violet plus one tiny dab of rose.
These are all starting points. Always mix and check your color under natural sunlight before you commit.
Should You Use Butter Extract Or Vanilla For White Base?
The flavor of the buttercream is part of the experience. But it also affects tinting.
Vanilla extract will tint your buttercream with a tan or beige hue. Over several days, this amber color deepens slightly.
If you want a crystal-clear white base for your pastels, use clear vanilla extract.
If you do not have that on hand, increase the white gel amount to double what you normally use. That compensates for the yellow tint from traditional vanilla.
Many bakers also add a pinch of salt to round out their buttercream. Salt will not affect your color. Use it freely.
Frequently Asked Questions
Can I use regular liquid food coloring instead of gel drops? I do not recommend it at all. Liquid coloring is water-based. Liquid colors can make your buttercream runny. You would have to add a lot to achieve soft pastel shades. This throws off the texture and makes it hard to pipe with structure. Plus, the colors always look less vibrant and more washed out.
Why is my pastel buttercream so pale that I cannot see the color? That generally means you simply did not add enough. Start by doubling the amount of gel you used. Make sure you are mixing it really well and checking it in natural light. Remember that your buttercream will look lighter when fresh. But it should still be clearly visible on a spoon.
How do I prevent buttercream from turning gray when I mix blue and purple? Add a little bit of pink or rose to blue and purple mixtures. That pink color cancels out the gray. Gray in purple often comes from too much blue pigment. Pink adjusts the balance nicely.
Should I use oil-based food coloring for buttercream? For standard buttercream, always look for water-based gel. Oil-based colors are better for chocolate or candy melts. In buttercream, oil-based colors can struggle to mix smoothly. Just stick with water-based gel and you will have the best luck.
Summary Of Key Success Points
Decorating a cake with gorgeous pastel shades is not complicated.
Starting with a clean, white, well-textured buttercream guarantees predictable results. Equally important is using a concentrated gel food coloring, which gives you excellent control.
Always try a small ratio first. Add more only after you have mixed thoroughly. Evaluate the hue under natural light to get a realistic understanding of the color.
Once you see a shade you like, stick to it. It is okay if you have extra frosting. You can always use it on a practice cake or pipe extra borders.
The true pro tip is working carefully and faithfully. There is no substitute for patience.
Color is not simply paint. It is an emotion.
A soft mint buttercream on an almond cake feels fresh and cool. A buttery, pale yellow filling evokes the comfort of a lemon meringue pie. These colors bring joy, and they make people smile on their special day.
I still get butterflies when I pipe that first row of pastel rosettes onto a freshly baked cake. There is something magical about seeing your creative vision come to life in those muted hues.
Each batch might teach you something a little different. Maybe you notice how much brand names vary in intensity. Perhaps you find your own personal recipe for a perfect peach color.
This is what cake decorating is about. Experimentation blended with craft.
Do not worry about perfection. Just get involved.
Your next batch of pastel buttercream is waiting. And now you can color it with total confidence.
⚠️ Warning: This cake is high in sugar. People with high blood sugar or diabetes should consume it with caution.





