 bluename
 How to Line Baking Sheets to Prevent Cookie Dough Sticking During Baking
I cannot tell you how many batches of cookies I ruined before I figured this out. You spend twenty minutes mixing the dough, another ten scooping perfect little rounds, and then boom—half of them peel apart when you try to lift them off the sheet. The bottoms are browned too fast, the edges are crisped beyond repair, and you're left scraping burnt bits off metal with a spatula while muttering things your grandmother would blush at.
The fix is simple. But it's not just about slapping down some parchment and calling it a day. There's a real method to lining baking sheets properly, and the difference between a good cookie and a great one often comes down to that tiny decision you make before the oven even preheats.
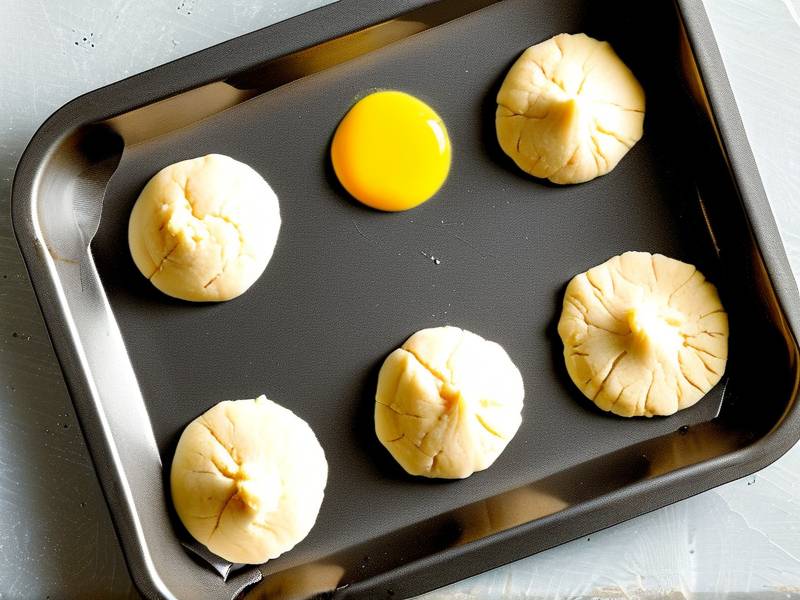
In this guide, I'm walking you through everything I've learned about lining baking sheets to keep cookie dough from sticking—the materials that actually work, the ones that don't, and the little tricks that make cleanup effortless.
Why Cookie Dough Sticks in the First Place
Let's break down what's actually happening on that bare metal surface. Cookie dough contains sugar, fat, and moisture. When the dough hits a hot sheet, the sugar melts and caramelizes. That's the good stuff—it gives you those golden brown edges. But caramelization is also nature's glue. The melted sugar fuses with the metal surface, and once it cools, you've got a bond that's stronger than your patience.
The proteins in the flour also play a role. As the dough bakes, the proteins coagulate and form structure. On a bare sheet, that structure can literally anchor itself into microscopic scratches and imperfections in the metal. I've seen people blame their recipes, blame their ovens, blame everything under the sun—and honestly, it's usually not the recipe's fault.
Another factor is the fat content of your dough. Lower-fat doughs, like shortbread or biscotti-style cookies, tend to stick more because there isn't enough butter or oil to create a barrier between the dough and the pan. High-fat doughs, like classic chocolate chip, are more forgiving—but they're not immune.
The point is, sticking is a physical and chemical reaction. It's not about your skill. It's about whether you've created a proper barrier. And that's where lining the sheet comes in.
The Best Materials for Lining Baking Sheets
Parchment Paper Is Your Everyday Best Friend
If there's one material I recommend above all others, it's parchment paper. Not wax paper—never wax paper. I'll get to that in a minute. Parchment is coated with silicone, which makes it non-stick and heat-resistant up to about 425°F or so, depending on the brand.
I use parchment for roughly ninety percent of my baking. It's affordable, it's disposable, and it works. You don't need to grease it, you don't need to flour it, and the cookies slide off like they're on ice skates. The only mistake I see people making is reusing sheets of parchment multiple times. Do that, and the paper gets brittle and can tear when you're sliding cookies off. Fresh sheet for every batch—it's not that expensive, and it saves you from heartbreak.
Another thing: some people cut parchment to fit, but I prefer to let it overhang the edges slightly. That gives me little handles to lift the entire batch of cookies off the sheet at once. I'll fold a batch of cookies onto a cooling rack in less than ten seconds flat with this trick.
Silicone Baking Mats Are Worth the Investment
Silicone mats—like the popular French-made ones that start with a brand name I probably shouldn't say—are reusable liners that sit snugly on your baking sheet. They provide a non-stick surface that's genuinely impressive. I've used the same set of mats for over three years now, and they still look almost new.
The main advantage here is reusability. You pay more upfront, but you never buy parchment again. Silicone also provides a slightly cushioned surface, which can help cookies spread a touch less and bake more evenly on the bottom. Some people swear that cookies brown less on silicone than on parchment because silicone insulates the bottom slightly. I've found that to be mostly true. If you like pale-bottomed, chewy cookies, silicone mats are a solid pick.
The downside is storage and cleaning. They're flexible and roll up somewhat, but they're not small. And while they claim to be dishwasher safe, I hand wash mine. It takes thirty seconds. Keep them flat when storing, avoid folding them, and they'll last you years.
Aluminum Foil—Use It, But With a Caveat
Foil is something I use when I'm out of parchment and too lazy to go to the store. It works, but there's a catch. Bare foil will still stick. You need to grease it lightly with butter or cooking spray, and even then, thin cookies can be stubborn. The non-stick variety of foil exists—it's got a textured coating—but I find it's only marginally better than plain foil.
Here's the real problem with foil: it doesn't absorb heat the same way parchment does. Foil is highly conductive, which means cookies bake faster and brown more intensely on the bottom. Sometimes that's fine. Sometimes it's exactly what you don't want.
Also, wrapping foil tightly around the sheet creates wrinkles and creases. Those lines will transfer onto your cookies. If you care about aesthetics, skip the foil unless it's truly your only option.
A Note on Wax Paper That Could Save You a Kitchen Disaster
I need to be clear about this because it's a mistake I almost made when I started baking. Wax paper is not parchment paper. They look similar, but they are not the same. Wax paper has a thin coating of wax on both sides. It's moisture-resistant, not heat-resistant. If you put wax paper in an oven set to 350°F, that wax will melt and, in some cases, smoke. I've seen photos online of kitchens fully smoked out because someone grabbed the wrong roll.
Wax paper has its place—wrapping food for storage, rolling out dough, etc. But it has no place in a hot oven. If you're baking cookies, reach for parchment or silicone. Do not substitute wax paper. I honestly cannot emphasize this enough.
How to Line Sheets the Right Way
Lining a sheet isn't just about tossing down a piece of paper and hoping for the best. How you position that liner matters more than most people realize. I've developed a system that works every single time.
For parchment paper, I start by tearing off a piece that's slightly larger than my sheet. I set the sheet on top, then use my hands to crease the paper along the edges. After that, I fold the corners—just like wrapping a present—so the paper sits snugly inside the pan instead of curling up at the edges. This corner-folding bit is the step most people skip, and it's the step that makes the paper stay put while you scoop dough onto it.
If I'm working with dough that's very sticky or soft, I'll occasionally dab a tiny smear of butter in the center of the pan before laying the parchment down. That holds the paper in place while I scoop. It's not strictly necessary, but it's one of those small details that makes the process smoother.
For silicone mats, you don't need to worry about corners or sliding. The mat naturally grips the sheet. Just make sure the mat is completely dry and clean before you put dough on it. Any residual moisture or grease can cause hot spots and uneven browning.
Here's a pro move: never line a cold pan and preheat it with the liner inside. Parchment can withstand high heat, but certain brands struggle when heated empty for too long. Silicone mats can release odors or discolor if heated empty. I always place my lined sheet into the oven after the oven has reached the target temperature. This avoids exposing the liner to more heat than necessary.
Why Greasing the Pan Isn't Enough
You might think that buttering or oiling the sheet solves the entire problem, and I'm here to tell you—it doesn't. At least not consistently. Butter contains milk solids and water. Those solids can burn at high temperatures, leading to dark spots and a slightly bitter taste. Oil, on the other hand, doesn't burn as quickly, but it doesn't provide that clean release that parchment or silicone does. The dough will still grip onto whatever microscopic texture is on the metal.
Greasing is fine as a supplement. If you're using foil, it's basically mandatory. But as a primary method, it's unreliable. I grease and flour my sheet when I'm making certain traditional European butter cookies that don't spread much. For most standard American-style cookies, I skip the greasing entirely and rely solely on a properly lined sheet.
I caught the difference once when I baked two identical batches of sugar cookies side by side. One pan was greased directly on metal and dusted with flour. The other was lined with parchment. The parchment batch came off clean. The greased pan needed aggressive coaxing, and I lost the bottoms of at least a third of the cookies that day. From then on, I stopped trying to save a few cents on liner material.
Other Factors That Affect Sticking
Your liner choice is huge, but it's not the only variable. The temperature of your dough and the temperature of your sheet matter, too.
If your dough is warm and slack from sitting at room temperature, it spreads thin. Thin cookies bake faster and have more surface area in contact with the liner. That increases the chance of sticking, even on parchment. Chilling the dough for thirty to sixty minutes before baking firms up the fat, which slows spreading and leaches less sugar. Cold dough sticks far less than warm dough.
Also, never place cookie dough onto a hot sheet. If you reuse the same sheet for back-to-back batches, give it time to cool completely between uses. Warm metal can melt the dough's fat immediately upon contact, causing the cookies to spread unpredictably and stick to any exposed imperfections.
Directly placing room-temperature dough onto a sheet that's still hot is, in my experience, one of the most common reasons cookies stick despite proper lining. The liner works, but the dough becomes overly soft and flows into the tiny crevices of the paper or mat.
I keep two baking sheets in rotation. While one batch bakes, the other sits on the counter cooling overnight or for at least twenty minutes. I rotate between them, so each sheet is completely room temperature before I scoop out the next batch.
Temperature Guide for Different Liner Types
Everyone's oven runs differently, so these numbers will vary slightly. But I've found a general pattern over years of testing:
Parchment handles temperatures up to 425°F without browning or flaking. If you're baking cookies at 350°F or 375°F, which is where most cookie recipes fall, parchment is perfect.
Silicone mats can handle slightly higher temperatures, up to 480°F or above. But here's the thing. Because silicone is more insulating, your cookies' bottoms won't brown quite as much at any given temperature. If you bake a batch at 350°F on parchment and the same batch at 350°F on silicone, the parchment version will show slightly darker bottoms. If you're chasing crispy edges, you may need to add 10–15°F when using silicone mats. This is a subtle difference, but worth knowing.
Aluminum foil conducts heat aggressively. If you use it, you might need to lower your oven temperature by 25°F, and you'll need to check your cookies a couple minutes earlier than the recipe suggests.
Common Lining Mistakes That Lead to Sticking
Let me walk you through the classic errors that I see all the time and that I've personally made.
First, using a liner that's too small for the pan. That's more of a mess than a sticking issue. Dough will spread onto the exposed metal and fuse there, leavingscorched bits that provoke excessive cursing. Your liner should cover the entire baking surface, including corners, with a slight overhang if possible.
Second, reusing a liner that already has grease spots or baked-on residue. That residue creates rough points where newly baked cookies can cling. Once parchment gets saturated with grease from chocolate or butter, its non-stick quality diminishes. When it loses that slickness, switch it out.
Third, using scrunched-up paper that has deep folds. Even a minor crease in parchment can create a ridge. Cookie dough spreads into that ridge, bakes around it, and then when you attempt to lift, the cookie snaps along that line. I smooth my parchment out as much as possible, often rubbing my hands across the surface to flatten imperfections.
Fourth, failing to use enough pressure when pressing silicone mats into the pan corners. If your mat doesn't sit flush in the edges of the pan, fluid dough can seep underneath the mat and onto the metal. That creates smoke, sticking, and a mess that takes forever to clean.
Realistic Expectation Setting
Now, a moment of truth. Even with perfect lining, some cookies will stick. There are recipes with extremely high sugar content, like Florentines or certain lace cookies, that can adhere to nearly anything if baked too long. For those delicate types, I take extra precautions. I use parchment that's been lightly coated with a thin film of butter. And I pull them from the oven slightly earlier—leaving them to finish setting on the hot sheet for two minutes before attempting to remove.
Also, amaretti, macarons, and some meringue-based cookies benefit from being left undisturbed for a full five minutes on the sheet after baking. This lets steam escape and allows them to firm up. Give these cookies the time they need. Don't yank them off immediately and expect perfection.
My Go-To Cleanup Routine
Here's an underestimated benefit of properly lining your baking sheets—your cleanup time collapses. With parchment or silicone, forget soaking, scraping, or scrubbing. Cool the sheet completely. If I've used parchment, I lift the paper by the overhanging sides and direct the cookies into a container. Then, if the sheet looks clean, I wipe it with a cloth and return it to the rack.
Silicone mats are slightly involved. I hand wash them with warm, soapy water, then dry them completely before stacking. I avoid rolling them tightly or bending them while wet. This keeps them flat for years.
Once a year, I occasionally rub a silicone mat with a paste of baking soda and water to remove stubborn film. That's rare, only if it looks cloudy. It brings back the original slickness.
Is There Really a "Best" Method? Or Is It All Subjective?
After all this detail, you might wonder if there's a single best way. I'll tell you what I think. Parchment is the most practical, budget-friendly, all-around material for standard cookie baking. It's disposable, widely available, and reliable. Silicone mats are a better long-term investment if you bake regularly and if you have storage space. Both outperform foil and greased pans significantly.
Choosing between them often comes down to your usual oven setup and baking style. If you move constantly or live in a small dorm, parchment is ideal because you don't need to keep track of a mat. If you have a designated baking drawer and bake weekly, silicone will serve you well.
I personally use both. Parchment for sticky, wet, spread-heavy batches. Silicone for firm doughs and anything involving chocolate, because it naturally releases them with zero fuss.
Why This All Matters More Than Your Recipe
Here's the thing I've realized after years of trial and error. People search for the perfect cookie recipe, invest in premium chocolate, fuss over exact measuring. They forget that how you get that cookie off the pan is just as important as how the dough tastes. A beautifully flavored cookie with a ruined bottom is a minor tragedy. And honestly, every one of those ruined cookies I've seen stemmed from poor sheet lining.
The humble sheet liner deserves more respect than it gets. It is the barrier between your effort and the dreaded scraping sound of a ruined batch. Once you treat lining as a deliberate part of the baking process—not an afterthought—your results transform.
Frequently Asked Questions
Q: Does lining baking sheets with parchment paper change baking time?
A: In my experience, parchment can slightly reduce browning on the bottom of cookies compared to bare metal. The paper creates a thin barrier that slows direct heat transfer. So you might need an extra minute or two in the oven to achieve the same level of color you'd get on a bare pan. Silicone mats delay browning even more noticeably. If your cookies look pale at the recipe's suggested time, don't panic. Just leave them in for another couple of minutes and watch them closely for the last 60 seconds.
Q: Can you use cooking spray on parchment paper, or does that cause sticking?
A: You can spray parchment, but you honestly don't need to. Parchment is already non-stick. Adding spray or melted butter might sound helpful, but it can actually make the paper greasy, which doesn't improve release. For very sticky doughs like soft gingerbread or high-sugar cookies, a light spray is fine. But for regular dough, skip it. Using extra grease just creates residue that impacts the liner's performance and makes it less reusable. I only add spray if the recipe explicitly asks for a greased liner.
Q: My cookies still stick to parchment paper. What could be wrong?
A: This usually happens for one of two reasons. Either the dough is too warm, which causes excessive spreading, or the cookies are underbaked and have not fully set. I also check my parchment quality. Some cheaper brands are thinner and have a weaker silicone coating. They can absorb grease and become less slick during baking. Try chilling your dough for 30 to 60 minutes, and ensure your sheet is fully cooled before each batch. If that fails, switch to a thicker parchment brand or silicone mat. In rare cases, the culprit is overmixing your dough and developing excess gluten, which can make cookies unusually adhesive.
My Final Thoughts on Lining Baking Sheets
I wish someone had walked me through this when I first started baking seriously. I would have saved myself dozens of ugly batches, tons of wasted butter, and quite a few burnt fingers trying to pry stuck discs off hot pans. The instructions seem trivial—line the pan, right? But the details, the differences between materials, the temperature nuances, all of them matter.
My strongest advice for anyone reading this is to be intentional. Decide what kind of cookie you want to make, choose your liner based on that goal, and don't let a poorly chosen liner sabotage your efforts. The lining is not where you cut corners. It's where a good baker separates themselves from the rest.
I hope you walk away from this feeling equipped. Take your dough, put good parchment on that sheet, maybe give it an extra corner fold, and bake without fear. That clean release isn't just possible—it's completely within your reach.
⚠️ Warning: Homemade cookies are high in sugar. People with high blood sugar or diabetes should consume them with caution.





