 bluename
 How to Touch Up Fine Cracks on Baked Cheesecake Thin Layer Smooth Frosting
There's nothing quite like pulling a perfectly baked cheesecake out of the oven, only to watch those tiny surface cracks appear as it cools. I've been there more times than I can count. Honestly, it used to drive me crazy. You spend all that time on the water bath, the slow cooling, the gentle handling—and then bam, a few fine lines show up right on top.
The good news? You absolutely can fix them. Learning how to touch up fine cracks on baked cheesecake thin layer smooth frosting is actually simpler than most people think. I've refined my technique over years of trial and error, and I'm going to walk you through exactly what works.
Let me be clear about one thing right from the start: a cracked cheesecake isn't a failed cheesecake. It's just a cheesecake that needs a little cosmetic attention. And honestly, some of the best-looking desserts I've ever made started with cracks that I repaired using the methods I'm about to share with you.
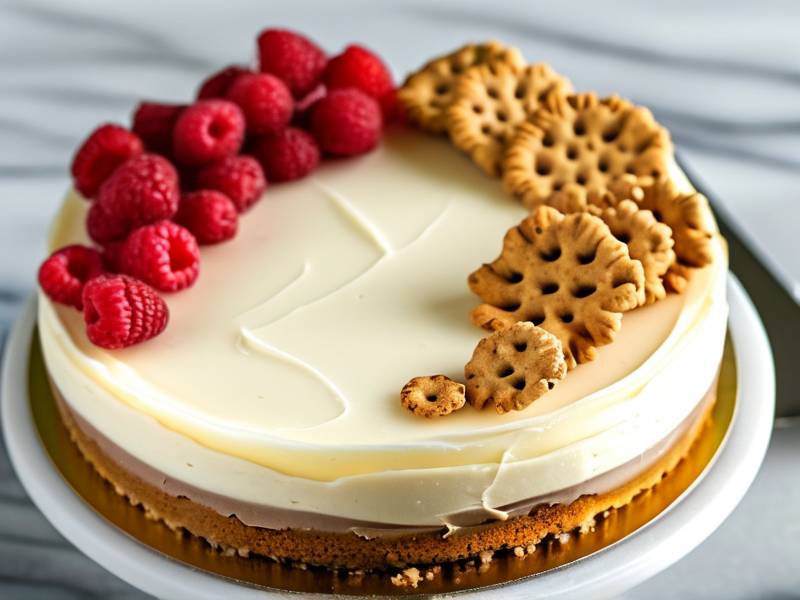
Why Fine Cracks Appear on Baked Cheesecake and How to Assess the Damage
Before you can fix a problem, you need to understand why it's happening. Fine cracks on baked cheesecake usually come down to a few main culprits. Over-baking is probably the biggest one. When the custard sets too firmly, the proteins contract and pull away from each other as the cake cools. Rapid temperature changes are another big factor. If you pull a hot cheesecake straight from the oven into a cold kitchen, that sudden shift makes the surface contract quickly.
I've also noticed that skipping the water bath makes cracking way more likely. The steam keeps the oven environment moist and gentle. Without it, the top dries out faster than the center cooks through. And here's one people don't talk about enough: over-mixing. When you beat too much air into the batter, those air bubbles expand in the heat and then collapse, leaving small fissures behind.
How to Recognize Different Types of Cracks on Cheesecake Surfaces
Not all cracks are created equal. You've got your fine hairline cracks, which are shallow and mostly surface-level. Then there are deeper cracks that go further into the cake. And sometimes you'll see one big split down the middle, which usually means the cheesecake was seriously over-baked or cooled too fast. For this article, we're focusing on those fine, thin cracks. These are the ones that a thin layer of smooth frosting can easily cover.
I always tell my readers that if you can run a damp spatula over the top and the crack basically disappears with a little pressure, you're dealing with a minor issue. That's the perfect scenario for a thin layer smooth frosting touch-up. Deeper cracks might need a bit more filling work first, which I'll cover in the steps below.
When a Thin Layer Smooth Frosting Fix Is the Right Choice
Here's what I've learned through experience: if the cracks are shallow and the cheesecake structure is still solid, a thin layer smooth frosting is your best friend. It's not about masking a problem—it's about giving the surface a polished finish. The key word here is thin. You're not piling on inches of frosting. You're applying a refined layer that smooths everything out while keeping the cheesecake as the star.
I personally prefer this method over fruit glazes or heavy ganache when I want to keep the original flavor profile intact. A thin layer of sour cream frosting, for example, does double duty. It covers those fine cracks on baked cheesecake and adds a subtle tang that complements the richness beautifully.
Essential Tools and Ingredients for Cheesecake Crack Repair
Let me walk you through my prep list. Having everything ready before you start saves so much hassle. Trust me, the last thing you want is to have frosting half-applied and realize you've misplaced your offset spatula. That's a lesson I learned the hard way.
First, you absolutely need an offset spatula. The angled handle gives you better control when you're spreading that thin layer smooth frosting. A bench scraper is also handy for getting perfectly straight edges. You'll want a small bowl of warm water nearby—this is my secret weapon. Dipping your spatula in warm water between passes keeps the frosting workable and prevents it from dragging or pulling.
For ingredients, you've got options. My go-to is a simple mixture of softened cream cheese, a little heavy cream, and confectioners' sugar. It whips up smooth and sets beautifully. Some people prefer a straight whipped cream frosting, but I find it's a bit too fragile for touching up fine cracks on baked cheesecake. It doesn't have enough structure to hold that thin layer smooth frosting look without sliding.
The Best Frosting Consistency for Concealing Fine Surface Lines
Getting the consistency right is everything. You want your frosting to be spreadable but not runny. Think about the texture of softened butter—that's your target. If your frosting is too thick, it'll pull at the cheesecake surface and make things worse. If it's too thin, it'll pool in the cracks and leave visible lines.
I like my frosting to hold a soft peak but still have that silky, spreadable quality. That way, when I apply that thin layer smooth frosting, it fills the fine cracks without leaving any noticeable marks. Adding cream a tablespoon at a time helps you dial in exactly the right texture.
Preparing Your Work Area for Stress-Free Frosting Application
Set yourself up for success. Make sure your cheesecake is completely chilled before you even think about applying frosting. I'm talking at least four hours in the fridge, ideally overnight. A cold cheesecake holds its shape better and gives you a stable surface to work with. I learned this the hard way when I tried to rush the process once and ended up with frosting smearing into the cake itself.
Clear your counter, make sure you have good lighting so you can actually see what you're doing, and have a damp cloth nearby for wiping your spatula. When you're fixing fine cracks on baked cheesecake, cleanliness and visibility are everything. You need to see those tiny lines to make sure they're properly covered.
Step-by-Step Process for Applying a Thin Layer Smooth Frosting Over Fine Cracks
Alright, let's get into the actual process. This is the part people ask me about most. I'm going to break this down into really manageable steps because, honestly, the technique matters more than the ingredients. Anyone can mix up frosting, but applying it properly is a skill.
Start with your fully chilled cheesecake still in the springform pan, but loosen the sides. Run a thin knife around the edge and remove the ring. This gives you unhindered access to the entire surface. Now, look closely at your fine cracks on baked cheesecake. Get a mental picture of where they are. This helps you guide your frosting application.
How to Gently Smooth the Surface Before Applying Frosting
Here's a tip I don't see many people mention: take a dry, clean paper towel and gently blot the surface of your cheesecake. This removes any condensation that might have formed in the fridge. Moisture is the enemy here. It'll make your frosting slide around and create uneven spots.
If you have stubborn raised edges around the cracks, you can very gently press them down with your fingertips. Be careful. You're not trying to press the whole cake flat—just nudge those slightly raised edges so they're level with the rest of the surface. I've found this little prep step makes the thin layer smooth frosting look so much more professional.
Applying the Frosting in Thin, Even Passes for a Flawless Finish
Now for the main event. Load your offset spatula with a small amount of frosting. We're talking about a dollop about the size of a walnut for an entire 9-inch cheesecake. That might not sound like enough, but remember, we're going for a thin layer smooth frosting look. You can always add more, but you can't take it away.
Start at the center and work outward in long, sweeping strokes. I find that committing to each stroke is important. Don't stop halfway through and reposition—that creates drag marks. One smooth motion from the center to the edge. Then come back in from another angle, overlapping slightly. Overlap light, thin passes rather than trying to spread it all at once. This is how you achieve that uniform, thin layer smooth frosting effect without leaving texture behind.
Here's a practical detail: dip your spatula in warm water, shake off the excess, and dry it with a cloth. A warm spatula glides through the frosting like magic. It melts the frosting just enough to create that glassy-smooth finish. I do this between every two or three passes. It makes a world of difference.
Filling Deeper Fine Cracks on Baked Cheesecake Before the Final Frost
Sometimes those fine cracks on baked cheesecake are a little more noticeable than you'd like. If you can feel the crack with your fingertip, you might need to spot-treat it first. Take a tiny amount of frosting and push it into the crack using your finger or a small spatula. Then scrape off the excess flush with the surface.
This is my favorite trick. It creates a base layer inside the crack so that when you do your final thin layer smooth frosting pass, the deep lines don't show through. I know it sounds obvious, but so many people skip this step and then wonder why their cracks are still visible. You have to fill them, not just cover them.
Once the cracks are filled, give that spot a little time to set in the fridge. Fifteen minutes should do it. Then proceed with your overall thin layer smooth frosting application. The result is a surface that looks completely flawless, with no trace of the original cracks.
Chilling and Setting Methods for Maintaining That Smooth Frosted Look
After you've finished applying your thin layer smooth frosting, the rest matters just as much as the application. Don't rush this part. Place your cheesecake back in the fridge, uncovered, for at least an hour. This lets the frosting set up properly. If you cover it too soon, condensation can form on the surface and ruin that smooth finish.
Some people ask me if they can use the freezer to speed things up. You can, but be careful. Too much time in the freezer can make the frosting crack again if you let it get too cold. I limit freezer time to 20 minutes maximum. Honestly, the fridge is safer, and the wait is worth it for a perfect thin layer smooth frosting.
One more thing: when you're ready to serve, let the cheesecake sit at room temperature for about 15 to 20 minutes. This softens the frosting slightly, which improves the mouthfeel and makes every bite feel luxurious. Those beautiful, crack-free surfaces stay intact, so your presentation is just as good as the taste.
Professional Tips for Preventing Cracks So You Don't Have to Touch Them Up
Here's the thing about learning how to touch up fine cracks on baked cheesecake thin layer smooth frosting—it's a great skill. But wouldn't you rather not have to deal with cracks in the first place? Over my years of baking, I've picked up some prevention strategies that help me bake beautiful cheesecakes from the start.
The water bath is non-negotiable for me now. I know it's a hassle with all that foil wrapping, but the even, moist heat it provides makes such a difference. My cheesecakes develop that gorgeous golden top without the stress of cracking. Along with that, I never skip the slow cooling phase. After the oven's off, I leave the cheesecake inside with the door propped open for an hour. Then it moves to the counter for another hour. Only then does it hit the fridge.
Cooling and Temperature Management Techniques
Temperature shock is probably the number one cause of fine cracks on baked cheesecakes. Let me explain what happens. When your cheesecake comes out of the oven, it's still cooking inside. The center is jiggly but set. If you expose it to cool air too quickly, the exterior contracts while the interior is still warm and expanded. Something has to give—and that's when those fine lines appear.
Gradual cooling lets everything settle at the same rate. I've started using a slightly different technique recently. Once the cheesecake is out of the oven and the water bath is removed, I run a knife around the edge immediately. This helps the top separate from the pan edges, giving it room to contract without pulling. It's a small step that pays off in fewer cracks.
Ingredient Temperature and Mixing Techniques That Reduce Cracking Risk
Room temperature ingredients matter more than you might think. When cream cheese, eggs, and sour cream are all at the same temperature, they blend together smoothly without overworking the batter. Cold cream cheese creates lumps, which means you have to beat longer to get a smooth texture. Extra beating means extra air, and extra air means a greater chance of cracking.
I also want to talk about eggs. Add them one at a time and mix on low speed just until incorporated. Stop mixing as soon as you don't see any more yolk streaks. Every second of over-mixing after that point is adding unnecessary risk. These small adjustments in technique do more to prevent fine cracks on baked cheesecake than any repair method ever could.
FAQ: Common Questions About Fixing Cracks and Applying Smooth Frosting on Cheesecake
Can I fix cracks on warm cheesecake or should I wait for it to cool completely?
You've got to wait for it to cool completely. I know the anticipation is real, but working with a warm cheesecake creates a mess you won't want to deal with. The frosting will melt and slide right off. Plus, the cheesecake is still setting internally. It won't hold its shape for proper frosting application. Chilled to at least 4 hours is the standard, and overnight is even better for achieving that smooth frosting finish.
What's the best frosting for covering cracked cheesecake tops?
A cream cheese-based frosting is my top pick because it mirrors the flavor of the cheesecake itself. A simple blend of cream cheese, butter, powdered sugar, and a splash of vanilla works wonderfully. The tanginess complements the sweet cheesecake without overwhelming it. You want something that sets up firm enough to hold its shape but still spreads thinly. Whipped cream frosting can work, but it's more delicate and doesn't provide the same level of coverage for fine cracks on baked cheesecake surfaces.
How long will the thin layer smooth frosting repair last?
If you've applied a thin layer smooth frosting and kept your cheesecake refrigerated, the repair will last as long as the cheesecake itself. That's typically 5 to 7 days for a properly stored cheesecake. The frosting sets and stays stable at refrigerator temperatures. Just make sure your container has a little airflow—you don't want condensation dripping onto your beautiful, crack-free surface. When you're ready to eat, let it sit at room temperature briefly for the best texture.
Final Thoughts on Touching Up Fine Cracks on Baked Cheesecake with Thin Layer Smooth Frosting
Let me leave you with this. Fixing fine cracks on baked cheesecake with a thin layer smooth frosting is one of those skills that separates casual bakers from confident ones. It's not about being perfect—it's about knowing how to handle the imperfect moments. I still get cracks sometimes, and honestly, it doesn't bother me anymore. I know I have the tools and technique to make it look beautiful.
Start with a well-chilled cheesecake. Use a simple, spreadable cream cheese-based frosting. Work in thin, even passes with an offset spatula dipped in warm water. Fill deeper cracks first, then finish with that silky top layer. And remember, a little patience during the chilling process goes a long way toward a professional-looking result.
I've made all the mistakes so you don't have to. I've applied frosting too early, used frosting that was too thick, and skipped the crack-filling step entirely. Now I know better. And now you do too. So next time your cheesecake shows a few fine surface lines, take a breath. Warm up that spatula, mix up your frosting, and get ready to create something beautiful. You've absolutely got this.
⚠️ Warning: This cake is high in sugar. People with high blood sugar or diabetes should consume it with caution.





