 bluename
 How to Thin Thick Fruit Jam Soft Suitable as Internal Cake Layer Filling
I’ve lost count of how many cakes I’ve nearly ruined because the jam layer just wouldn’t behave. You spread it, and it tears the sponge. You chill it, and it turns into a rubbery slab. Honestly, for a while I thought thick fruit jam was just a lost cause for internal fillings. Then I started experimenting, and I found that the solution is way simpler than most baking guides suggest.
If you’ve been wrestling with a jar of overly dense strawberry or raspberry preserve, this one’s for you. I’ll walk you through exactly how I thin thick fruit jam to make it soft and suitable as an internal cake layer filling, using methods that keep the flavor intact and the texture silky.
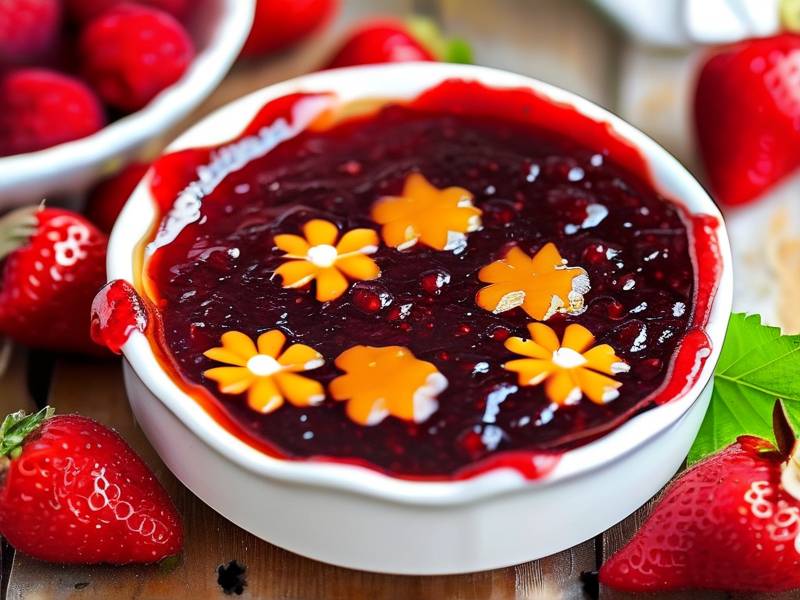
The core issue is pectin. It’s what gives jam its body, but it’s also what makes it stubborn. Heat, liquid, and a little patience can break that down without turning your filling into soup. My favorite approach doesn’t even require a thermometer, but I’ll give you options depending on how much time you have.
Let me start with the first thing I learned the hard way. Never microwave the jar straight from the fridge. That creates hot spots, and the jam seizes up again once it cools. Always work with jam at room temperature. If you forgot to pull it out early, place the sealed jar in a bowl of warm water for ten minutes. That alone softens the structure slightly.
Now, here’s the actual thinning process. For every cup of thick jam, add one to two tablespoons of warm water. Not hot, just warm. Stir it slowly. You’ll notice it loosens almost immediately. If it still feels stiff after two minutes, add another half tablespoon. But stop there. Too much water and you’ll have a runny mess that soaks into your cake layers.
Let’s talk about the heat method, because that’s what I use most often for a stable internal cake layer filling. Put the jam in a small saucepan with the same ratio of water. Warm it over low heat, stirring constantly. What you’re looking for is a consistency that coats the back of a spoon but still drips slowly. That’s the perfect point. It should take about three to four minutes. Take it off the heat and let it cool to room temperature. As it cools, it will thicken a little, so aim slightly thinner than your final target.
One trick that changed everything for me was adding a squeeze of lemon juice. The acid helps break down the pectin chains. Honestly, a teaspoon of fresh lemon juice per cup of jam makes a noticeable difference. It also brightens the fruit flavor, which is a bonus. I use this with blueberry and blackberry jams all the time.
But what if you don’t want to heat the jam at all? I get it, sometimes you’re in a hurry. In that case, try the whisking method. Room temperature jam in a bowl, add a teaspoon of warm water, and whisk aggressively for thirty seconds. The mechanical action breaks the gel structure. Repeat with another teaspoon if needed. It won’t get as soft as the heat method, but it’s enough for a delicate internal filling.
For those who prefer a completely smooth texture, push the thinned jam through a fine mesh sieve. This removes any chunkiness that could poke through your cake layers. I do this when I’m filling a chiffon cake, because the crumb is so tender. A coarse strainer just won’t cut it. Take your time, use the back of a spoon, and scrape every bit of pulp through.
Now, let me address a question I see all the time. Can I use alcohol to thin the jam? Yes, and honestly, it’s my secret weapon for adult cakes. A tablespoon of Grand Marnier or rum does wonders. The alcohol evaporates slightly during heating, leaving a subtle depth. Just be careful, alcohol changes the setting time. If you add it, keep the mixture looser than usual, because it will firm up more as it rests.
What about cream or milk? I’ve seen recipes that suggest adding heavy cream. That works, but it also dulls the bright fruit taste. I only use cream if I’m making a quick mousse-like layer. For a standard internal filling, stick with water, juice, or alcohol.
Here’s something I wish someone had told me years ago. The type of jam matters. High-pectin fruits like apples, blackberries, and citrus need more liquid. Low-pectin fruits like strawberries and peaches need less. So adjust your ratios based on what’s in the jar. A strawberry jam might only need one tablespoon of water per cup, while a blackberry jam might need two and a half.
Let me share a specific example from last week. I had a jar of fig jam that was basically a solid brick. I couldn’t even get a knife into it. I warmed it with two tablespoons of water and a teaspoon of lemon juice over low heat. After five minutes, it still wasn’t smooth. So I added another half tablespoon of water and kept stirring. Then, I let it sit for ten minutes. When I came back, it had loosened beautifully. That little rest period is crucial. Sometimes the jam just needs time to absorb the liquid.
Another thing to watch is over-thinning. I’ve made this mistake more times than I want to admit. You add a bit too much water, you panic, and then you try to fix it by adding more jam. That just makes a lumpy mess. The better move is to simmer it uncovered for a few extra minutes. The excess moisture steams off, and the jam rethickens. Just keep stirring so it doesn’t scorch on the bottom.
For a layered cake, I usually apply the filling while it’s still slightly warm but not hot. Hot jam will melt your buttercream. Warm jam, around body temperature, spreads evenly and doesn’t tear the sponge. I test it by touching the back of my hand, the way you’d test baby formula. If it feels neutral, you’re good to go.
Now, let’s talk about what makes a jam filling actually soft after assembly. A lot of bakers chill the whole cake overnight, and the jam firms up again. To prevent that, I add a small amount of cornstarch slurry before cooling. Mix one teaspoon of cornstarch with two teaspoons of cold water. Stir that into the warm jam, and simmer for one minute. The cornstarch stabilizes the structure, so the filling stays soft even after refrigeration. It’s a game changer for anything you're serving the next day.
But here’s the catch. The cornstarch needs to fully cook or it leaves a chalky aftertaste. So don’t skip the simmering. I learned that the hard way with a lemon curd incident, not jam, but the principle is the same.
Another approach is using pectin-degrading enzymes, but honestly, that’s overkill for home bakers. You can buy liquid pectinase at some specialty stores, but the heat and water method achieves the same result with less fuss. Unless you’re running a commercial bakery, skip the science experiment.
I also want to mention storage. Thinned jam does not keep as long as the original jam. The extra water introduces more moisture, which can lead to mold. If you have leftovers, store them in the fridge for no more than three days. Or better yet, only thin as much as you need for the cake. For a two-layer cake, that’s usually half a cup. For a three-layer, three-quarters of a cup.
Let me give you my go-to baseline recipe, the one I use for almost every internal cake layer filling.
Start with one cup of jam at room temperature. Add one tablespoon of warm water and one teaspoon of lemon juice. If the jam is very thick, add another half tablespoon of water. Heat gently for three minutes, stirring constantly. If you want a stable softer set, whisk in a cornstarch slurry of one teaspoon cornstarch and two teaspoons cold water. Simmer until glossy and slightly translucent, about one minute. Cool to room temperature. Spread on your cake layer with an offset spatula.
That’s it. Simple, repeatable, and it solves the tearing problem instantly.
I want to share a little tale about a wedding cake I made last summer. The couple wanted raspberry filling, but the jam I bought was incredibly stiff. I almost panicked because the cake delivery was the next morning. I used the heat method with the lemon juice, and then, because I was nervous, I added the cornstarch slurry. The filling turned out perfect. It held its shape, it didn’t seep into the buttercream, and the bride texted me later saying it was the best raspberry cake she’d ever had. That’s when I knew the process was reliable.
Now, let me address the question of whether you can thin jam in the microwave. Yes, you can, but you have to be careful. Microwave in short bursts of fifteen seconds, stirring in between. The issue with microwaves is that they superheat the edges while the center stays cold. That uneven heating can make the jam cloudy or even cause it to separate. If you’re in a rush, the microwave works, but the stovetop gives a more consistent result. I’ll always recommend the stovetop.
Something else that surprised me is that the whisk choice matters. A flat whisk works better than a balloon whisk here. It reaches the bottom of the pot and prevents sticking. You don’t need a fancy tool, but a flat whisk saves a lot of frustration. If you don’t have one, a wooden spoon does the job, just stir more frequently.
Let me transition to a slightly different topic. What if your jam is chunky and you want a smooth internal layer? Sieving is the answer, but do it after heating. The heat softens the fruit pieces, so they pass through the strainer more easily. If you sieve cold jam, you’ll fight with every piece. Heat first, then strain. That’s the order that works.
For those of you using jam under fondant, you’ll want it slightly thicker. Under fondant, a runny filling can cause the icing to slide. So reduce the water to one teaspoon per cup of jam. Under buttercream, you can afford a looser consistency. Keep that distinction in mind.
I also get asked whether honey or agave can help thin jam. They don’t. They add sweetness but don’t break down the pectin. In fact, they can make it stickier. Stick with water, lemon juice, or alcohol. That’s the honest truth.
Alright, let’s talk about the flavor side. When you thin jam, you dilute the sweetness a bit. That’s usually a good thing because most commercial jams are overly sweet. The lemon juice adds a nice tart counterbalance. If you want to keep the sweetness level, add a pinch of salt instead of extra sugar. Salt enhances fruit flavor without making things salty. A tiny pinch, that’s all.
Now, I’m going to give you some guidance on how to apply the thinned jam without making a mess. After you cool the jam, use a piping bag to pipe a spiral onto the cake layer. This keeps the jam contained and prevents it from oozing out the sides. I started doing this after too many incidents of jam dripping down the cake base. A piping bag also gives you more control over the thickness. If you don’t have a piping bag, just use a spoon and spread gently outward.
Another pro tip is to pipe a rim of buttercream around the edge of your layer first. This creates a dam that keeps the jam filling inside. Then you can spoon the jam into the middle and spread it as thick as you like. This is especially helpful for soft fillings like thinned jam. The buttercream dam doesn’t need to be tall, just a quarter-inch is enough.
Let me also note the timing. If you’re assembling a cake, the jam layer should be the last thing you add before stacking the next cake layer. Because if the jam sits exposed for too long, it absorbs moisture from the air and can get tacky on top. So have everything else ready, then add the jam, then immediately stack the next layer.
I’ve been doing this for years, and I genuinely believe that the most common cake filling failure is just a texture issue. People don’t need a new recipe. They just need to thin the jam correctly. That’s it. Once you understand the pectin behavior, you can apply this to apricot jam, cherry jam, even quince paste.
Before I wrap up, let me answer a few frequent questions that might be on your mind.
FAQ
Can I thin jam with orange juice instead of water?
Yes, you can, and it works well, especially for citrusy or tropical fruit jams. Orange juice adds a nice layer of flavor, but it also adds extra sugar. The acidity in the orange juice helps break down the pectin, similar to lemon juice. Just use the same ratio, one tablespoon per cup of jam, then adjust if needed.
Why does my thinned jam become thick again after sitting in the fridge?
This happens because the pectin re-forms its gel structure at cold temperatures. To prevent this, use the cornstarch slurry method I described earlier. The cooked starch prevents the pectin molecules from reconnecting tightly. If you didn’t use cornstarch, you can reheat the jam gently with a teaspoon of water and it will loosen up again.
Is it better to thin jam for a cake filling with water or with the fruit’s natural juice?
Natural juice, like the liquid from macerated strawberries, is better because it doesn’t dilute the flavor. But in practice, water is fine if you add a bit of lemon juice to compensate for the lost tartness. I use water 90% of the time simply because it’s always available. The result is still excellent.
One last thing about safety. This cake filling, like any jam-based layer, is high in sugar.
⚠️ Warning: This cake is high in sugar. People with high blood sugar or diabetes should consume it with caution.
I genuinely hope this helps you get that perfect jam layer. I remember my own early disasters, and I know how frustrating it is. But once you master this simple thinning technique, you’ll never shy away from using jam in your cakes again. It’s such an easy fix, and the payoff is huge. Just take it slow, use the right ratios, and always let the mixture cool before assembly. Your cake layers will thank you.





