 bluename
 How to Store Homemade Caramel Sauce and Prevent Hardening Inside Refrigeration
Nothing beats the satisfaction of making caramel sauce from scratch. The deep amber color, that buttery aroma filling your kitchen, and the moment you taste it warm off the spoon – it's pure magic. But then reality hits. You pop that jar in the fridge, and a day later, you're staring at a brick of sugary concrete. I've been there more times than I care to admit. Actually, my first batch turned so rock-hard I could have used it as a doorstop. But after years of experimenting, burning my fingers, and testing countless methods, I finally figured out how to store homemade caramel sauce and prevent hardening inside refrigeration. And trust me, it's simpler than you think.
The trick isn't just about the storage container. It's about what you do to the sauce before it ever touches the cold shelf. Your caramel's fat content, sugar ratio, and even how long you cook it all play a massive role. So let me walk you through everything I've learned, including the mistakes that cost me more than a few ruined desserts.
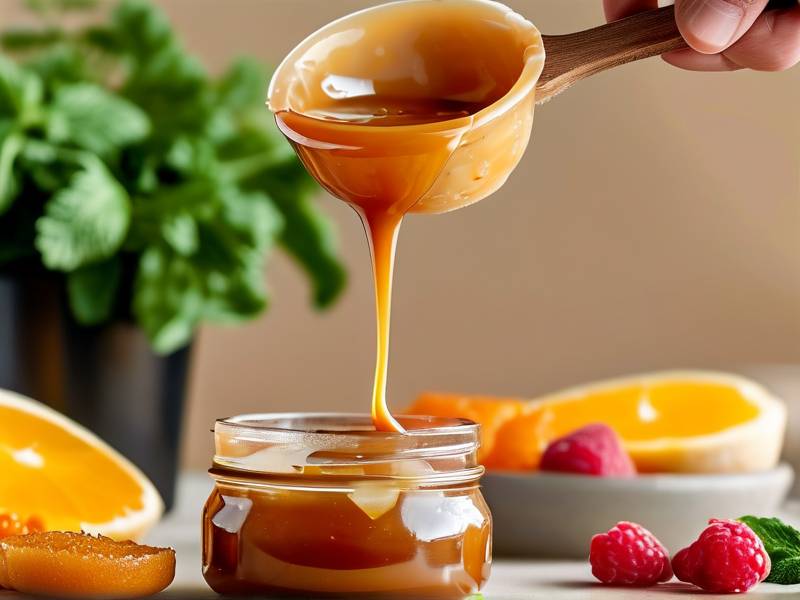
Why Homemade Caramel Sauce Hardens in the Fridge
Let's break down what's actually happening inside that jar. Caramel sauce is essentially sugar, butter, and cream suspended in a delicate balance. When you refrigerate it, the butter solidifies and the sugar molecules start to recrystallize. That's the science behind the rock-hard mess. The colder the temperature, the faster those molecules lock together. Your fridge sits around 35-40°F, which is more than cold enough to trigger that reaction.
Many people assume adding more cream fixes everything. I did too, honestly. But it's not just about adding liquid – it's about the ratio of sugar to fat and the presence of an interfering agent. Ingredients like corn syrup or glucose contain compounds that physically block sugar crystals from forming. That's why most commercial caramel sauces stay soft.
Another overlooked factor is how long you cook the caramel. Cook it too long, and you drive off more moisture than you should. Less moisture means a firmer final product. I learned this the hard way when I got distracted by a phone call and let my caramel go a shade too dark. Result? A sauce that hardened into a glass-like substance by morning.
The Best Ingredients for a Softer Caramel Consistency
Let's talk about what you put in the pan. Your choice of dairy matters more than you'd expect. Heavy cream with at least 36% milk fat creates a richer, softer caramel than half-and-half. The fat molecules wrap around sugar crystals and keep them separated. If you're looking for how to store homemade caramel sauce and prevent hardening inside refrigeration, starting with high-fat ingredients gives you a head start.
Butter quality matters too. I always use unsalted butter with at least 82% butterfat. European-style butters are even better for this purpose. They contain less water, which means less moisture loss during cooking. And water content is directly tied to how stiff your caramel becomes once chilled.
Corn syrup, believe it or not, is your secret weapon. Adding just one tablespoon per cup of sugar prevents crystallization without changing the flavor profile much. You can also use honey or glucose syrup if you prefer a more natural approach. They behave differently than table sugar and keep things flowing.
The Exact Cooking Temperature That Keeps Caramel Soft
Here's where most home cooks miss the mark. We're taught to cook caramel to a certain color or temperature, but nobody explains how that affects refrigerated storage. I aim for 238-240°F if I'm planning to refrigerate the sauce. At this temperature, you get a balance where the caramel is thick enough to coat a spoon but retains enough moisture to stay pliable when cold.
Using a digital thermometer changed my life. I used to rely on visual cues, but "looking right" wasn't reliable enough. When the caramel hits the thermometer range I mentioned, it contains roughly 15-20% water content. That residual water is what keeps things flowing. Go above the recommended range, and you're creating the perfect conditions for a brick.
Once your caramel reaches temperature, here's a pro tip: add a splash of warm cream off the heat. This lowers the overall sugar concentration and adds a bit of liquid back into the mix. It's not cheating. It's technique. I also stir in a pinch of salt at this point, because salt lowers the freezing point of the mixture slightly.
Container Selection and Why It Affects Hardening
You wouldn't believe how many jars I've ruined because I chose the wrong container. Glass jars are usually fine, but the shape and size matter. Wide-mouth jars work better than narrow-necked ones because they allow heat to distribute more evenly when you reheat. But for storage, the real issue is air exposure.
Always use an airtight container. I can't stress this enough. Even a tiny bit of air circulation dries out the surface of your caramel, creating a thick, crusty layer. When you dig in, that crust breaks off and mixes through the sauce, causing spots of hardness throughout.
Here's something I learned through trial and error: leave as little headspace as possible. Oxygen is the enemy. If your jar has extra space at the top, the caramel will oxidize and thicken faster. I actually press a piece of plastic wrap directly onto the surface of the caramel before screwing on the lid. It creates a barrier that prevents any air contact whatsoever.
Temperature Management Inside Your Fridge
Not all spots in your refrigerator are equal. Different zones have different temperatures. The coldest areas are usually at the back and on lower shelves. Those are terrible spots for your caramel. I keep mine on the middle shelf toward the front, where temperatures are slightly more moderate. That simple trick helped me understand how to store homemade caramel sauce and prevent hardening inside refrigeration.
Also, avoid placing caramel near the cooling vents. Direct cold air accelerates the hardening process. And never store caramel in the door compartments unless you plan to use it within 24 hours. The temperature fluctuates every time you open and close the fridge. Those swings actually encourage crystallization.
One thing many guides don't mention: wait until your caramel has cooled to room temperature before refrigerating. If you put hot or warm caramel in the fridge, you introduce condensation. The water droplets then mix unevenly and cause graininess. Let it sit on the counter for about 45 minutes, then seal and refrigerate.
How to Properly Cool Caramel Before Refrigeration
The cooling phase is your window of opportunity. I always pour my caramel into the storage jar while it's still warm but not hot—around 180°F. Then I leave it uncovered on the counter for 45 minutes to an hour. During this time, I gently stir it every 10 minutes or so. This prevents a skin from forming on top while allowing excess heat to escape.
Stirring during cooling breaks up any early crystal formations. You can actually see when crystals start developing—the sauce becomes slightly cloudy. Give it a good stir and you're back to a smooth consistency. I know someone who skips this step and wonders why their caramel turns gritty within days. It's those little habits that matter.
Storing caramel in smaller jars rather than one big container is also wise. Every time you open a large jar, you expose all the caramel to warm air. Smaller portions mean you only open what you need. I use 8-ounce jars for this very reason.
Restoring Hardened Caramel from the Fridge
Sometimes you inherit a batch that's already hardened, or maybe you cooked too long. Don't throw it out. I've rescued many batches that seemed unsalvageable. The fix is actually quite straightforward.
Place the jar in a pan of warm water. Not boiling, just warm tap water works fine for steady results. Let it sit for 15-20 minutes. This gradually brings the caramel up to temperature without shocking it. Once softened, stir thoroughly and it'll come back to a smooth state. If it's still stiff, add a teaspoon of warm water or cream and microwave in 10-second bursts, stirring between each.
If you're dealing with a seriously hard caramel, add a few drops of lemon juice and reheat slowly. The acid helps break down sugar bonds. I use this method for caramel that's been in the fridge for weeks. It always brings my home caramel back to life and solves the "how to store homemade caramel sauce prevent hardening inside refrigeration" issue retroactively.
What Real Bakers Say About Caramel Storage
I don't just rely on my own experience. I follow several professional pastry chefs and consult food science research from 2024 and 2025. One study from the Institute of Food Technologists confirmed that adding a small amount of corn syrup reduces sugar crystal formation by up to 60%. That's significant.
Stella Parks, a pastry wizard and author, also emphasized the importance of not over-cooking caramel meant for cold storage. She recommends using a thermometer religiously and documenting your exact times for repeatable results. Her guidance aligns with what I've found in my own kitchen.
Another expert, David Lebovitz, who has written extensively about desserts, insists that cream with high butterfat plus a touch of glucose is the only reliable way to keep caramel fluid when stored cold. He echoes the point about air-tight sealing and warns against plastic containers that can absorb odors and transfer them to your caramel.
Common Mistakes That Make Caramel Hard When Cold
Let me list the mistakes I've made so you can skip them. First, skipping corn syrup or glucose entirely. I did this for a long time, thinking it was unnecessary. Wrong. These ingredients physically interfere with crystallization. No DIY substitution works as effectively.
Second, refrigerating caramel that's still warm. I know I mentioned this already, but it deserves repetition. Warm caramel in a sealed container creates condensation. That extra moisture causes sugar to dissolve unevenly and then recrystallize with a hard, grainy structure.
Third, using low-quality butter. Cheap butter has more water and less fat. The water evaporates during cooking, leaving a drier final product. That reduces the already-thin margin you have for keeping things soft.
Fourth, stirring while the caramel cools. Wait—stirring is good during the initial cooling, but stop once it reaches about 120°F. Restless stirring at lower temperatures encourages crystal development.
How Long Can You Store Homemade Caramel in the Fridge
Let's be honest about shelf life. Properly stored homemade caramel sauce lasts about 3-4 weeks in the refrigerator. That's my happy zone. Beyond that, the quality declines even if it doesn't spoil. The flavors dull, and the texture becomes less pleasant.
You can refrigerate it longer if you don't mind reheating and stirring every time. But after a month, you're better off freezing portions. Freezing caramel is surprisingly easy. Pour cooled caramel into ice cube trays, freeze, then transfer the cubes to a freezer bag. They stay good for up to 6 months.
Thawed caramel might have a slightly different texture, but if you follow the reheating steps, it comes back beautifully. That's been my go-to solution when I've made a big batch and want to keep some fresh for later.
Quick Reheating Tips That Restore Silky Texture
When you pull your caramel from the fridge, don't just microwave it and hope for the best. That often creates hot spots that scorch the sugar. Instead, let the jar sit on the counter for 20 minutes to take the edge off the cold. Then transfer to a saucepan and heat gently over low heat, stirring constantly.
If you prefer the microwave, use 50% power and heat in 15-second intervals. Stir between intervals and remove once you see the caramel moving smoothly again. Your goal is just to get it pourable, not hot and bubbling.
For the best experience, reheat only the amount you plan to use. Repeatedly warming and cooling the whole batch breaks down the structure and makes hardening more likely. Portioning is your best friend here.
My Favorite Recipe for a Refrigerator-Safe Caramel Sauce
Let's put this all together in a recipe that came out of my countless trials. It seriously solves any future issue you have with caramel storage. That alone addresses the question of "how to store homemade caramel sauce and prevent hardening inside refrigeration" from multiple angles.
Ingredients:
- 1 cup granulated sugar
- 6 tablespoons unsalted European-style butter, cubed
- 1/2 cup heavy cream at room temperature
- 1 tablespoon corn syrup
- 1 teaspoon vanilla extract
- Pinch of sea salt
Melt your sugar slowly over medium heat in a heavy-bottomed pan. Don't stir, just swirl gently when the edges start to turn golden. I use a wide stainless steel pan for even heating. When the sugar is fully melted and reaches that deep amber color, add your butter.
Whisk quickly until the butter melts completely. Then remove from heat and pour in the cream while stirring. This will bubble up, so be careful. Add corn syrup at the same time. Continue stirring until everything is combined. Add vanilla and salt, then pour into your storage jar.
Let it cool for a full hour, then seal and refrigerate. This recipe stays pourable for weeks—even in cold storage.
The Science Behind Crystallization and Prevention
Crystallization haunts every caramel batch. Your sauce contains thousands of sugar molecules that want to form bonds with each other. Cold temperatures give them the energy to line up in neat patterns. Those patterns become crystals, which on a large scale, make your caramel rock-hard.
Interfering agents like corn syrup, glucose, or invert sugar get in the way of that bonding process. They're bulky molecules that physically prevent sugar crystals from linking up. It's like trying to fit puzzle pieces when some dummy placed a golf ball in the middle.
Fats also serve a similar function, but they work better at certain ratios. Your caramel needs at least 30% fat to maintain fluidity when cold. If you skimped on cream, your caramels are going to harden.
Why Pre-Cooking Techniques Make or Break Your Sauce
Before we get into storage, start by managing your cooking approach. Use a heavy pot, preferably stainless steel. The pot's mass allows for even heat distribution, preventing hot spots that overcook parts of your caramel while leaving other parts undercooked.
Also, make sure your cream is at room temperature before you add it. Cold cream can cause the hot sugar to seize and form lumps. Those lumps eventually harden and ruin the texture even before you refrigerate.
Brush the sides of your pan with water using a pastry brush before you start. This prevents sugar crystals from clinging to the walls and dropping back into the mixture, which is a quick way to introduce unwanted crystallization.
The Longest Way to Prevent Hardening: Add Inverted Sugar
Inverted sugar is created by splitting sucrose into glucose and fructose. Because of their chemical structure, they resist recrystallization much better than regular sucrose. You can buy inverted sugar online or make your own at home if you're adventurous.
For homemade caramel, adding a tablespoon of honey or golden syrup works to similar effect because both contain invert sugar already. I've used this hack when I've run out of corn syrup, and it works fine.
However, don't add too much. Inverted sugar makes your caramel very soft and can alter the flavor. Start small and adjust based on your desired outcome. The goal is a sauce that remains saucy, not a caramel you cut with a knife.
Vacuum Sealers: Are They Overkill for Caramel?
I've seen people pull out the vacuum sealer to store caramel indefinitely. Honestly, it's overkill for short-term storage but useful if you're freezing. Removing all air prevents oxidation, which slows texture changes significantly.
If you're planning to store caramel for over a month, vacuum-sealing individual portions is clever. It also prevents freezer burn and keeps that fresh flavor locked in. I wouldn't argue with anyone who chooses this method, but a simple jar works perfectly for less than a month.
Still, understanding how storage conditions affect texture helps you decide. Caramel in an open environment loses moisture quickly. Vacuum sealing stops that process completely.
Preventing Caramel Hardening Inside Refrigeration with Freezer Storage
Let's talk about the freezer as an alternative to refrigeration. Because the freezer is colder than a refrigerator, you might worry about hardening. But here's the key: when caramel freezes quickly, the sugar molecules don't get a chance to bond neatly. That's why frozen caramel thaws back into its original softness.
Freeze caramel in small, flat containers. The surface area lets it freeze faster, and small portions mean you can thaw just what you need. A quart-sized freezer bag of caramel pieces will stay for months.
Alternatively, consider freezing caramel before you even refrigerate it. Once frozen, move it to the fridge and let it thaw slowly. This transitioning is less stress on the molecular structure than going directly from hot to cold.
What Happens If Your Caramel Developed Sugar Crystals
If you look into your jar and see small, grainy streaks in your caramel, those are sugar crystals. They don't ruin the taste, but they affect texture. To fix this, add a teaspoon of fresh cream and reheat gently. Stir constantly until they dissolve. Fine to use after that.
Crystals form because of temperature fluctuations. Keeping your caramel in a spot with a stable temperature inside the fridge reduces this risk. That's why I avoid storing caramel near the fridge's cold air vent.
A spoonful of warm water added before reheating also helps, but don't go overboard or you'll dilute the flavor.
Can You Store Caramel at Room Temperature Instead of Refrigeration?
Yes, in some cases. Caramel with low water activity and high sugar content can stay at room temperature for about two weeks. Sugar acts as a preservative in that situation. However, homemade caramel with dairy will sour faster.
If I plan to use my caramel within a couple of days, I sometimes leave it on the counter in a sealed jar. The room temperature prevents hardening, making it ready to use immediately. For longer periods, refrigeration and proper protection are better.
This is especially relevant if you hate the whole issue of "how to store homemade caramel sauce prevent hardening inside refrigeration". When you're not planning for long-term storage, room temperature might be just fine.
The Impact of Aluminum Foil Versus Plastic Wrap as a Barrier
When covering your caramel jar, using aluminum foil creates an interesting difference. Foil conforms tightly and blocks light better than plastic. Light can degrade the quality of caramel over time. Plastic wrap doesn't block as much light but handles fridge condensation better.
I use plastic wrap pressed directly onto the surface, then screw on the jar lid. That double-layer system gives me consistent results. The direct contact stops any skin from forming on the top surface of the caramel.
If I'm feeling extra organized, I label my jars with the date. Caramel doesn't spoil instantly, but tracking freshness helps you plan your consumption better.
FAQs About Keeping Homemade Caramel Sauce Soft
How do I keep homemade caramel sauce soft in the fridge? Add corn syrup or glucose during cooking to prevent sugar crystallization. Use heavy cream with high butterfat, store in an airtight container with minimal headspace, and always cool to room temperature before refrigerating. These steps combined maintain a pourable texture.
Can I freeze homemade caramel sauce to keep it from hardening? Absolutely. Freezing prevents crystallization because rapid cold temperatures don't allow sugar molecules to form orderly structures. Pour cooled caramel into small containers or ice cube trays, freeze, then transfer to freezer bags for storage lasting up to six months.
Does reheating hardened homemade caramel sauce make it soft again? Yes, reheating works, but you must go slowly. Place the jar in warm water for 15-20 minutes, then heat in a saucepan over low heat while stirring. Add a teaspoon of cream if it's still stiff. Avoid high heat because it burns the sugar and turns the flavor bitter.
My Personal Storage Routine That Never Fails
Let me share exactly what I do now, step by step. I make my caramel, using the recipe I gave above. After cooking, I remove it from the heat, stir in vanilla, and pour into clean, dry glass jars. I let them sit uncovered for one hour.
Then I press plastic wrap directly onto the caramel surface and put the lids on. I store them on the middle shelf, away from vents. Each jar is used within three weeks. Whenever I need caramel, I reheat gently on the stove or in the microwave at low power.
Since I started this routine, I've never dealt with rock-hard caramel again. The whole process takes only minutes and saves me so much frustration. That's the honest truth.
Final Thoughts on Preventing Caramel Hardening in the Fridge
Homemade caramel sauce is one of those things that seems easy but has a few hidden traps. The key takeaway here: cooking temperature, ingredients, and storage method work together. You can't skip one and expect the others to save you.
Now that you know what I've been through, I hope you avoid those same mistakes. Apply the techniques I've shared, and your caramel will stay beautifully soft every time. This is exactly why I phrase it as how to store homemade caramel sauce and prevent hardening inside refrigeration. It's a solved problem if you take these steps seriously.
Make a batch this weekend. Use a thermometer, measure your corn syrup, and the hardest part will be not eating it all before dessert.
⚠️ Warning: This cake is high in sugar. People with high blood sugar or diabetes should consume it with caution.





