 bluename
 I’ve lost count of how many birthday cakes I’ve assembled over the years. But the one question people always ask me isn’t about the sponge. It’s about the filling. Specifically, how to make mocha cream filling assemble layered birthday sponge cakes without everything sliding into a mess.
Let me share what I’ve learned from countless trials, a few happy accidents, and definitely some late-night kitchen failures. By the time you finish reading, you’ll have a rock-solid method. And honestly, once this clicks, you’ll wonder why you ever bought pre-made frosting.
Understanding the Core Components: Sponge, Mocha, and Layering Order
Before you even pull out a mixing bowl, let’s talk about the game plan. A layered birthday cake is basically a construction project. You’ve got the sponge acting as your foundation, the mocha cream as your mortar, and the assembly order as your blueprint.
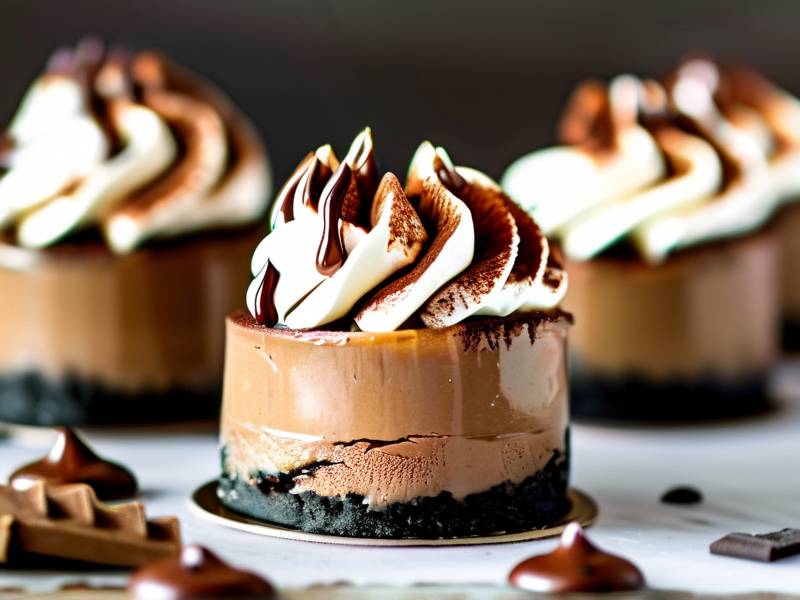
Why Mocha Cream Filling Works Best for Layered Cakes
I’ve tested buttercream, whipped ganache, and even plain pastry cream. Mocha cream sits in a sweet spot. The coffee cuts through the sugar, and the chocolate adds structure. This means your layers won’t squish out the sides when you stack them.
Plus, the flavor profile is forgiving. It pairs well with vanilla sponge, chocolate sponge, or even a simple yellow cake. That’s why I keep coming back to it. It’s a crowd-pleaser that doesn’t demand perfection.
Selecting the Right Sponge Texture for Stacking
Here’s something nobody tells beginners: your sponge’s moisture level dictates everything. If it’s too dry, it crumbles and sucks moisture from your filling. If it’s too wet, it turns into a pudding mess inside the cake.
I prefer a genoise or a slightly dense chiffon. These hold their shape under weight. If you’re using box mix, let the cakes cool completely, then wrap them in plastic wrap and chill for at least two hours. A cold sponge is a sturdy sponge. It cuts cleaner, and it won’t tear when you move it.
Common Layering Mistakes That Ruin the Final Look
I see the same mistakes every time someone shares a cake photo online. The filling oozes out because there’s too much of it. The top layer slides because there’s no “crumb coat” to grip onto. And sometimes, the cake just sinks because the filling was too warm when assembled.
The fix is simple: temperature control. Keep your mocha cream chilled. Keep your sponge cold. And when you spread, aim for an even layer—about half an inch thick. No more.
Preparing the Mocha Cream Filling: Step-by-Step
Let’s get into the actual method. This is the part where I walk you through how to make mocha cream filling assemble layered birthday sponge cakes with confidence.
Gather Your Ingredients and Tools First
This might sound boring, but mise en place saves you. I can’t tell you how many times I’ve scrambled mid-recipe because I forgot the instant espresso. Here’s what you’ll need:
- 2 cups heavy cream (cold)
- 8 oz cream cheese (softened)
- 1 cup powdered sugar (sifted)
- 2 tablespoons cocoa powder
- 1 tablespoon instant espresso powder (dissolved in 1 tablespoon hot water)
- 1 teaspoon vanilla extract
- Pinch of salt
Tools: a stand mixer or hand mixer, a rubber spatula, and a piping bag (optional but helpful).
Step-by-Step Mocha Cream Mixing Process
First, dissolve the espresso powder in hot water. Let it cool completely. I’ve made the mistake of adding hot liquid to cream before; you’ll end up with soup, not frosting.
Next, beat your cream cheese until it’s silky smooth. No lumps allowed. Then, add the powdered sugar in batches. Keep the mixer on low speed so you don’t create a sugar cloud.
Once that’s combined, pour in the heavy cream. Here’s where I switch to medium-high speed. Watch it carefully. You’re looking for stiff peaks. If you overbeat, you’ll get butter. And that’s not what we want.
Finally, add the cooled espresso, cocoa powder, vanilla, and salt. Fold gently with a spatula. Stop as soon as it’s uniform.
Chilling and Consistency Adjustments for Perfect Spreading
Here’s a trick I picked up from a pastry chef friend: chill the cream for 30–60 minutes before using it. This firms it up, making it easier to spread evenly. If it’s too stiff, let it sit at room temp for 10 minutes. If it’s too runny, whip it again briefly.
One thing I always check: the texture. It should hold a shape when you spoon it out. Not runny, not rock hard. That sweet spot is what makes the assembly part so much easier.
Assembling Layered Birthday Sponge Cakes Like a Pro
Alright, you’ve got your sponge and your mocha cream. Now comes the part where most people stress. But trust me, it’s simple once you break it down.
Leveling and Slicing the Sponge Layers Evenly
This is non-negotiable. If your layers are uneven, your cake will lean. I use a serrated knife and a turntable. Mark the sides with toothpicks at the same height, then cut slowly.
If you don’t have a turntable, place the cake on a cutting board and spin it manually. Take your time. A level cake is the foundation of a professional-looking result.
Creating a Crumb Coat: The Secret to a Clean Finish
I always do a thin layer of mocha cream all over the cake before adding the final frosting. This is called a crumb coat. It traps loose crumbs so your outer layer stays clean.
Spread a thin layer, refrigerate for 20 minutes, then apply the final coat. This step alone will elevate your cake from “homemade” to “almost pro.”
Stacking Technique to Prevent Slipping and Sinking
Once your crumb coat is set, stack your layers. Place the bottom layer on your cake board. Add a generous dollop of mocha cream. Spread it evenly, slightly over the edges.
The secret? Pipe a border of cream around the edge of each layer first. This creates a dam that keeps the filling inside. Then, fill the center. This prevents the classic “filling oozing out” disaster.
How to Make Mocha Cream Filling Assemble Layered Birthday Sponge Cakes Perfectly
Let’s be real. Everything I said above only matters if the final cake looks and tastes good. Here’s how to ensure that.
Expert Tips for a Professional-Looking Cake Finish
The final finish is about technique, not fancy tools. Use a bench scraper for smooth sides. Dip it in warm water and wipe it dry before each pass. Heat helps glide the cream.
For a rustic look, you can leave swirls on top. For a clean look, keep scraping until the sides are even. I prefer adding chocolate shavings around the base for a touch of drama.
Flavor Enhancements: Adding Coffee Liqueur or Vanilla Variations
If you want to level up, add a splash of coffee liqueur to your mocha cream. Just reduce the instant espresso to avoid overpowering. Or, swap vanilla for almond extract for a completely different vibe.
I’ve also tried adding a pinch of cinnamon. It gives a warm, cozy undertone that’s perfect for fall birthdays.
Storage and Make-Ahead Options for Busy Bakers
You can make the mocha cream a day ahead. Store it in an airtight container in the fridge. Whip it briefly before use to restore its fluffiness. The assembled cake keeps in the fridge for up to three days. Just let it sit out for 20–30 minutes before serving for the best flavor.
FAQ: Quick Answers on Mocha Cream Filling and Cake Assembly
I get asked the same questions over and over. Here are the ones that pop up most often.
Can I use mocha cream filling for cupcakes?
Absolutely. This mocha cream pipe beautifully on cupcakes. Just keep it chilled and use a star tip. It holds its shape well, and the coffee flavor pairs perfectly with chocolate or vanilla cupcakes.
My mocha cream is too runny. How do I fix it?
This usually happens when the cream wasn’t cold enough. Pop the bowl in the fridge for 15 minutes, then whip again. If it’s still runny, add a tablespoon of powdered sugar and beat briefly. That should help stabilize it.
How far in advance can I assemble a layered birthday cake?
I recommend assembling the cake a day before you serve it. This gives the flavors time to meld. The mocha cream will firm up, making slicing easier. Just wrap it well and keep it refrigerated.
Wrapping Up with Actionable Steps
By this point, you know exactly how to make mocha cream filling assemble layered birthday sponge cakes. You’ve learned the importance of cold sponges, even layers, and a solid crumb coat. You’ve got the mocha cream recipe dialed in.
Now, I encourage you to try this for your next special occasion. Start small. Make a two-layer cake first. Get comfortable before attempting a three or four-layer celebration cake.
I’d love to hear how it goes. Drop me a comment below or tag me in your cake photos. Happy baking, and may your layers stay perfectly stacked.
⚠️ Warning: This cake is high in sugar. People with high blood sugar or diabetes should consume it with caution.





