 bluename
 How to Make Coconut Vegan Whipped Cream Stable for Piping Cake Decorations
I have spent countless hours in my kitchen testing vegan whipped cream recipes. The struggle is real when you want that perfect pipeable consistency. Coconut cream is my go-to base, but getting it to hold its shape for cake decorating takes some serious technique. I have ruined my fair share of frosting batches trying to figure this out. Let me save you the trouble with everything I have learned about making stable coconut vegan whipped cream that actually pipes beautifully.
The core problem with coconut whipped cream is that it collapses quickly. It turns into a soupy mess right when you are in the middle of piping delicate rosettes.
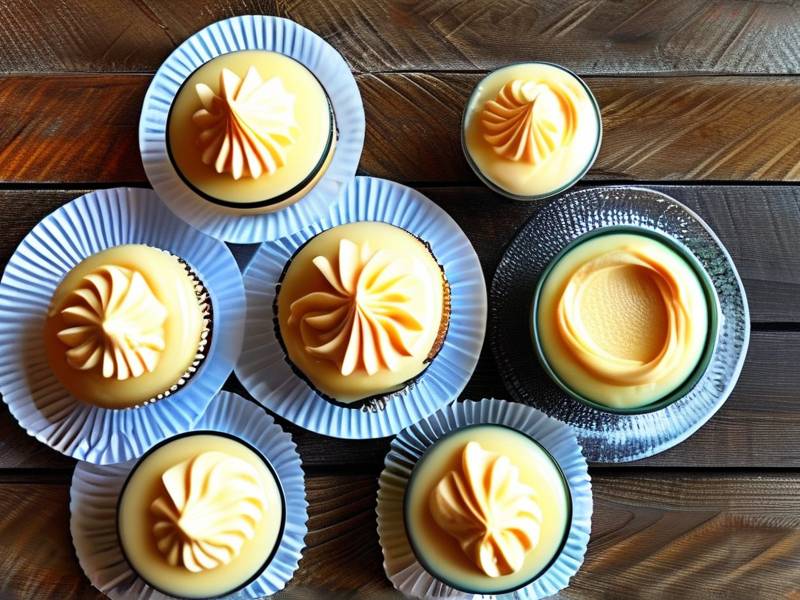
I remember my first attempt at piping coconut cream onto a chocolate cake. The cream looked gorgeous in the bowl. Then I scooped it into my piping bag and started pressing. It came out looking like melted ice cream. Such a disaster.
But after months of testing, I have found several reliable methods that create a stable, pipeable vegan whipped cream. These techniques work for everything from simple swirls to intricate border designs.
The key is understanding the science behind coconut cream stabilization. Once you get that, you can adapt these methods to your specific needs and environment.
Why Regular Coconut Whipped Cream Fails
Coconut cream contains about 20-25 percent fat content. Heavy dairy cream contains around 36-40 percent fat. That fat difference is exactly why coconut whipped cream struggles to hold its shape.
The water content in coconut cream is also higher than dairy cream. Water creates ice crystals when chilled. Those crystals melt at room temperature. This causes your beautiful piped peaks to droop and collapse.
Another factor is the natural emulsifiers present in dairy cream. They help stabilize the air bubbles you whip into the cream. Coconut cream lacks these natural stabilizers. So the air bubbles pop easily, and your cream deflates quickly.
Temperature is your biggest enemy when working with coconut cream. Everything needs to stay cold. Your bowl, your whisk, your piping bag, even the cake you are piping onto. Warmth makes the coconut fat soften and lose structure.
I learned this the hard way during a summer wedding cake order. The kitchen was warm, and my coconut cream just would not cooperate. I had to keep popping the piping bag into the freezer every few minutes.
The truth is, coconut whipped cream will never behave exactly like dairy whipped cream. But with the right techniques, you can get very close.
Choosing the Right Coconut Cream
Not all coconut cream is created equal. This is one of the most important factors for stability.
Look for full-fat coconut cream with no additives or stabilizers. The ingredient list should say "coconut extract" or "coconut cream" only.
I prefer canned coconut cream over coconut milk. The cream-to-water ratio in coconut cream is much higher. If you use coconut milk, you need to refrigerate it overnight and scoop only the solid part from the top.
Here is what I look for when choosing coconut cream for stabilizing:
Thick, firm consistency at room temperature. Any liquid or watery appearance means it will produce weak whipped cream.
High fat content, around 20 percent or more. Check the nutrition label on the back of the can.
No guar gum or other thickeners. While these can help stabilize, they also alter the flavor and texture in unpleasant ways.
Organic brands tend to have more consistent quality. I have found that cheaper brands sometimes have more water and less cream.
One tip I swear by: buy your coconut cream in advance and store it at room temperature. Then refrigerate it for 48 hours before use. Two days in the fridge allows the cream to fully separate and firm up.
The chilled can should feel solid when you shake it. If you hear liquid sloshing, it needs more time to chill.
Chilling Everything Before You Start
I cannot stress this enough. Cold temperatures are the foundation of stable coconut whipped cream.
Everything that touches the cream should be cold. This includes:
The mixing bowl. I use a metal bowl that I freeze for 30 minutes before whipping.
The whisk attachment or beaters.
The piping bag. I keep it in the fridge while I whip the cream.
The piping tips. These go in the fridge as well.
The cake or cupcakes you are decorating. A warm cake will melt your cream instantly.
I have a dedicated zone in my freezer for cake decorating supplies. It has made a huge difference in the quality of my frosting.
If you do not have space in your freezer, ice water baths work too. You can place your mixing bowl in a larger bowl filled with ice water while you whip.
Some people even chill the kitchen itself. I have used my air conditioner to keep the room cool during summer decorating sessions.
The Simple Stabilization Method
Let us start with the basic method that works for most situations. This requires cream of tartar.
Start with a chilled can of full-fat coconut cream. Do not shake the can before opening it. Carefully open the can and scoop out the solid cream at the top.
Discard the liquid at the bottom or save it for smoothies and soups. You want only the thick, solidified cream.
Place the cream in your chilled mixing bowl. Add a pinch of salt to enhance the natural coconut flavor.
Whip on medium speed for one minute. The cream will start to smooth out and loosen.
Scrape down the sides of the bowl with a spatula. This ensures all the cream is evenly whipped.
Continue whipping on medium-high speed. Add one half teaspoon of cream of tartar per cup of coconut cream. The cream of tartar acts as a stabilizer by helping the cream hold air bubbles.
Whip for an additional three to five minutes. You are looking for stiff peaks. The cream should hold its shape when you lift the whisk.
At this point, slowly add powdered sugar. Whip just until incorporated.
Test the stability by piping a small swirl onto a plate. Place it in the refrigerator for 10 minutes. If it holds its shape without drooping, you are good to go.
The cream of tartar method works well for cakes that will be eaten within a day. It holds up at room temperature for about two hours before showing signs of softening.
Using Gelatin Alternatives for Stronger Hold
If you need a firmer, longer-lasting whipped cream, this method is for you. I use this for wedding cakes and other formal events.
Agar agar is my preferred gelling agent. It is a seaweed-based product that works wonderfully for vegan recipes.
Let me explain how to use it properly.
You will need one quarter teaspoon of agar agar powder for every cup of coconut cream. This is a powerful gelling agent, so a little goes a long way.
Dissolve the agar agar powder in two tablespoons of cold water. Let it sit for five minutes to bloom.
Heat the mixture gently in a small saucepan. Stir constantly until the agar agar completely dissolves. The mixture should become slightly syrupy.
Remove from heat and let it cool for about five minutes. It should still be liquid but not hot. Hot agar will melt your coconut cream and ruin the texture.
Whip your coconut cream until you see soft peaks. Then slowly pour the agar agar mixture into the cream while the mixer is running.
Continue whipping until stiff peaks form. The cream will thicken dramatically as the agar sets.
Chill the whipped cream in the refrigerator for 15 minutes before piping. This gives the agar time to fully set and create that gel structure.
The agar method produces whipped cream that holds its shape for hours at room temperature. I have tested it on cakes that sat out for six hours and still had their shape.
One caveat: agar agar can make the cream slightly jelly-like in texture if you use too much. Stick to the quarter teaspoon ratio and you will avoid this problem.
Cornstarch as a Simple Stabilizer
Cornstarch is a pantry staple that works surprisingly well for stabilizing coconut whipped cream.
This method is simpler than the agar method but still effective for most decorating needs.
Mix one tablespoon of cornstarch with two tablespoons of cold water to form a slurry. Make sure there are no lumps.
Whip your coconut cream with the sugar until soft peaks form. Then slowly add the cornstarch slurry while the mixer runs on low speed.
Increase the speed to high and whip until stiff peaks form. The cornstarch helps absorb excess moisture and prevents the cream from weeping.
The cornstarch method creates a slightly denser whipped cream. This is perfect for piping borders and detailed designs that need precision.
I find that this whipped cream works wonderfully for cupcakes. The density helps the swirls stay crisp and defined.
One thing to note: cornstarch can leave a slightly chalky aftertaste if you use too much. Start with a small amount and add more only if needed.
The cream will continue to thicken as it chills. So do not over-whip or you may end up with a texture similar to butter.
Adding Vegan Butter for Stability
This method creates a hybrid whipped cream that pipes like buttercream but tastes lighter and more coconutty.
Add two tablespoons of room-temperature vegan butter per cup of coconut cream. The butter should be softened but not melted.
Whip the coconut cream until soft peaks form. Then add the softened butter one tablespoon at a time.
Whip on medium speed until the butter is fully incorporated and the cream reaches stiff peaks.
The butter adds additional fat that helps stabilize the air bubbles. It also gives the whipped cream a smoother, silkier texture.
This hybrid cream holds up wonderfully for intricate piping work. It keeps its shape even in slightly warm environments.
The flavor is richer than plain coconut whipped cream. You might need to adjust your sugar levels accordingly.
I use this method when I want a more substantial topping that can hold heavier decorations like fondant pieces or chocolate shards.
The key is making sure the butter is fully softened before adding it. Cold butter will seize the cream and create lumps.
I take the butter out of the fridge about 20 minutes before I start whipping. It should be soft enough to easily press your finger into.
If you accidentally add cold butter and get lumps, briefly place the bowl in a warm water bath for a few seconds. Then whip vigorously to smooth it out.
The Buttercream Hybrid Method
While this is no longer pure whipped cream, the combination creates an exceptionally stable frosting for cake decoration.
This is actually my secret weapon for piping complex designs in warm conditions.
Start by making coconut whipped cream using your preferred base method. Whip until stiff peaks form.
In a separate bowl, beat vegan butter until fluffy, about three minutes. Use a good quality vegan butter that has a high fat content.
Gradually add the coconut whipped cream to the butter, one third at a time. Beat well after each addition.
Continue beating for several minutes until the mixture becomes light and airy. It should look like traditional buttercream frosting.
This hybrid frosting pipes like a dream. It holds sharp edges and precise details beautifully.
You can color this frosting easily without it breaking or separating. Gel food colors work best. They do not add excess liquid to the mixture.
The frosting stays stable at room temperature for up to eight hours. It actually gets firmer as it sits, which is fantastic for cake decorating.
One thing I love about this method is that you can make it ahead of time. It keeps well in the refrigerator for up to five days.
Simply bring it to room temperature before piping. Give it a quick whip to restore its fluffiness.
The texture is slightly different from traditional dairy buttercream. It has a hint of coconut flavor and a slightly lighter mouthfeel.
But honestly, most people cannot tell the difference. I have served this at parties and nobody realized it was vegan.
Sweetener Adjustments for Stability
The type of sweetener you use affects the stability of your whipped cream. Liquid sweeteners are the enemy of stable frosting.
Powdered sugar is my top choice. It contains cornstarch, which actually helps absorb moisture and stabilize the cream.
If you want a less sweet cream, use less powdered sugar and add a stabilizer like agar or cornstarch instead.
Maple syrup and agave nectar add moisture and will make your cream soften faster. If you must use liquid sweeteners, use them sparingly and add extra stabilizer.
Powdered erythritol or other sugar-free sweeteners work well for low-sugar versions. Just make sure they are in powdered form for proper dissolution.
I always sift my powdered sugar before adding it to the cream. This prevents lumps and ensures even distribution.
Gradually add the sugar in small batches. This allows it to dissolve evenly and prevents the cream from deflating.
Whip just until the sugar is incorporated. Over-whipping after adding sugar can cause the cream to become grainy and lose stability.
For a less sweet but stable option, use a combination of powdered sugar and a small amount of cornstarch. The cornstarch will help both stabilization and add a subtle sweetness.
Temperature Management During Piping
Your environment and tools must remain cold throughout the piping process. This seems obvious but its the most common mistake.
I keep my piping bag in the freezer for at least 15 minutes before I fill it. This sets the groundwork for proper stabilization.
Fill your piping bag with the whipped cream and return it to the refrigerator for five minutes. This allows the cream to firm up slightly after handling.
Work in small batches. Keep the main bowl of whipped cream refrigerated while you are working with the piping bag.
When your piping bag starts to feel warm from your hand heat, switch to a chilled bag. This is why I prepare multiple piping bags in advance.
If you are decorating a cake over an extended period, use a cooling pad or a tray of ice under the turntable. This keeps the cream cool while you work.
In hot weather, I set my air conditioner to its lowest setting about an hour before I start decorating. I also close all the windows to minimize heat entering the space.
A kitchen temperature below 68 degrees Fahrenheit is ideal for stable coconut whipped cream.
If you are decorating outside in warm weather, forget it. Move inside or choose a different frosting method that can withstand heat.
The cream will start to break down at around 75 degrees Fahrenheit. It will turn into liquid and your decorations will slide right off the cake.
I have also found that the humidity level in the room affects stability. High humidity draws moisture into your cream. This causes it to become sticky and lose structure.
If you live in a humid climate, consider running a dehumidifier in your kitchen during the decorating process.
Fixing Broken or Runny Coconut Whipped Cream
We have all been there. Your cream looks perfect one second and turns into soup the next. Do not panic, there are ways to fix this.
If your cream has become runny but is not completely split, you can chill it in the refrigerator for 30 minutes. Then rewhip on high speed for two to three minutes.
Sometimes the cream just needs more time to firm up. Cold fixes many problems.
If your cream has split and looks curdled, you have a few options.
Option one: chill the entire mixture in the refrigerator until it becomes solid. Then melt it down, allow it to reset, and start over. The texture will be slightly different but it will still work.
Option two: add one tablespoon of melted coconut oil to the runny cream. Whip on high speed. The coconut oil will help create a more stable emulsion.
Option three: fold in some softened vegan butter. This changes the texture from whipped cream to more of a mousse-like consistency, but it will stabilize the mixture.
When piping fails during the decorating process, its usually because the cream got too warm. Your hands are heat sources, as is the friction of piping.
Take a break, re-chill everything, and start again with fresh cream. You can also try warming the piping bag by gently rolling it between your palms before testing pressure.
If none of your fixes work, simply admit defeat and repurpose the cream. Use it as a filling for trifles or blend it into a milkshake. No point wasting good ingredients.
For future batches, try one of the stabilization methods mentioned earlier. They significantly reduce the likelihood of breaking.
The Role of Aging and Brand Variations
Different coconut cream brands produce different results. This is because the quality and processing methods vary widely.
I tested five major brands side by side last year. The differences were striking.
The highest-quality brands produced whipped cream that was firm and held peaks beautifully. The lower-quality brands barely whipped up and collapsed within minutes.
Read ingredient labels carefully. Some brands add water, thickeners, and preservatives that weaken the cream structure.
Pure coconut cream with no additives consistently produces the best results. The fat content is higher and more stable.
Aging the coconut cream in the refrigerator for 48 hours before whipping helps with stabilization. This allows the cream to fully separate and become firmer.
Some brands benefit from freezing the cream for two hours before whipping. This creates a firmer, more stable whip.
I typically buy a few cans of different brands to test before committing to one for a large project. This way, I know exactly what to expect.
Keep a notebook with your results. I have documented which brands work best in hot weather, which are most stable for piping, and which have the best flavor.
This information is invaluable when preparing for catering events or special occasion cakes.
Using Cold Equipment for Optimal Stability
Beyond chilling the ingredients, equipment choice and temperature play a critical role.
The type of bowl you use matters. Metal bowls hold cold temperatures better than glass or plastic. I freeze mine for 30 minutes before whipping.
Your hand mixer or stand mixer should have cold beaters as well. I keep my beaters in the refrigerator and swap them out when the cream is too close to being fully whipped.
This little trick prevents the cream from destabilizing on a warm whisk.
When using a stand mixer, refrigerate the entire bowl and whisk attachment for at least 20 minutes before use.
Consider investing in a pastry cooling rack that can be placed in your freezer. Its wonderful for keeping piping bags and tips cold.
When working with piping tips, I store them in a small container in the freezer. They stay cold and ready to use.
Tongs for handing cold items are also useful. Warm hands transfer heat from the environment to the cold cream.
Even the spoon you use for scooping the cream should be cold. I keep a bowl of ice water on my counter specifically for chilling utensils.
These small steps add up. The cumulative effect is a more stable whip that pipes cleanly.
I know it seems like a lot of work, but the difference in the final result is well worth the extra effort.
Decorating Techniques That Preserve Stability
How you pipe affects how long your coconut whipped cream stays stable.
Piping in a cool environment is essential to keeping your cream at its best. Keep the rest of the cake cool and away from direct sunlight.
Use smaller piping tips for more precise work. Smaller tips create less friction and heat than larger tips.
Do not overhandle the piping bag. Every time you squeeze, you generate heat. Work quickly and efficiently.
When you need to pause during piping, set the piping bag down on a cold surface. This is where a chilled marble slab comes in handy. I keep one in my fridge for this purpose.
If you are piping tall structures like a layer cake, pipe one layer at a time, then return the cake to the refrigerator for 10 minutes. This allows the cream to firm up before adding the next layer.
This layering technique is especially important for tall cakes. Gravity puts extra stress on the cream, so allowing it to set between layers prevents sliding.
Use a cake turntable that keeps the cake off the warm counter. The heat from the counter can melt the cream from below.
If you are concerned about the cream softening after decorating, you can lightly dust the piped cream with powdered sugar. This helps absorb moisture and extends stability.
I also like to "prep" my piping bags by cutting them open properly. A well-cut piping bag provides better control and reduces the need for repeated squeezing.
The right consistency of your coconut whipped cream matters just as much as how you pipe it. Its better to have the cream slightly too thick than too thin when starting.
Making ahead versus just before piping another consideration. I find that coconut whipped cream is best when used within 30 minutes of whipping. The longer it sits, the more it relaxes and loses structure.
If you need to prepare in advance, use the buttercream hybrid method or the agar stabilization method. These hold up much better over time.
Flavor Variations That Maintain Stability
You can flavor your coconut whipped cream without compromising stability. The key is choosing flavorings that do not add excess liquid.
Vanilla extract works fine. The amount is small enough that it does not affect stability.
Almond extract, peppermint extract, and other concentrated flavorings are good options. Use them sparingly, a few drops at a time.
Zest from lemons, limes, or oranges also works well. The natural oils in the zest reinforce the cream structure rather than weakening it.
Cocoa powder will add stability because it absorbs moisture. Sift the cocoa first and add it with the powdered sugar.
For chocolate coconut whipped cream, replace two tablespoons of powdered sugar with cocoa powder for every cup of cream.
Fruit purees are tricky. They add moisture and can thin the cream. If you want a fruit-flavored cream, use freeze-dried fruit that has been ground into a powder. This adds flavor without extra liquid.
Matcha powder, turmeric for color, and other fine powders are excellent choices too. They disperse easily and do not upset the balance of the cream.
Spices like cinnamon, nutmeg, and cardamom add warmth without affecting stability.
Liquid sweeteners like maple syrup or agave are best avoided if you need maximum stability. Stick with powdered sugar or use a combination of powdered sugar and a bit of maple extract.
When experimenting with new flavors, always do a test batch before piping onto your final cake. You need to know how the flavoring affects the cream texture.
Storage and Shelf Life of Piped Coconut Whipped Cream
Coconut whipped cream cakes have a shorter shelf life than those with dairy buttercream.
Piped cakes should be refrigerated. They will maintain their shape for up to two days in the refrigerator, although the texture may change slightly.
I usually advise people to eat their cake within 24 hours for the best taste and texture.
When you remove the cake from the refrigerator, allow it to sit at room temperature for 10 to 15 minutes before serving. This lets the cream soften slightly for a better mouthfeel, but it will hold its shape if the cake was fully chilled.
Coconut whipped cream does not freeze well. The texture becomes spongy and grainy upon thawing. If you need to freeze a cake, use the buttercream hybrid method or skip the whipped cream entirely.
For leftover piped cream, store it in an airtight container in the refrigerator. Use it within three days. Rewhip briefly before reusing to restore some fluffiness.
I also recommend avoiding the use of real dairy in your vegan coconut whipped cream if you are preparing it for vegan guests. Stick to plant-based stabilizers like agar and cornstarch.
Frequently Asked Questions About Coconut Whipped Cream Stability for Piping
Why does my coconut whipped cream become runny after I pipe it? The cream becomes runny because it is either too warm or it lacks sufficient stabilizers. Make sure your cream is thoroughly chilled and your environment is cool. Consider using agar agar or cornstarch as stabilizers. Your piping bag and tips should be cold as well. Work quickly and put the piped cake into the refrigerator immediately.
Can I substitute coconut milk for coconut cream? I would strongly advise against it for piping. Regular coconut milk has too much water content to form stable peaks. If you only have coconut milk, refrigerate it unshaken for 48 hours. Then scoop only the thick solid cream from the top. Avoid the watery part at the bottom.
What is the best way to sweeten coconut whipped cream for piping? Powdered sugar is the best option for piping. It dissolves quickly, sweetens evenly, and the cornstarch in it helps stabilize the cream. Liquid sweeteners like maple syrup or agave will make the cream softer and less stable. If you want a sugar-free option, use powdered erythritol or monk fruit sweetener.
How long can I keep a coconut whipped cream cake outside the refrigerator? A coconut whipped cream cake can stay at room temperature for about 2 hours during normal indoor conditions. If your room is warm or humid, that time is shorter. If the cream has been stabilized with agar or cornstarch, it might last 4 to 6 hours, but I would not push it further. Any longer and the cream will soften and slide.
What should I do if my coconut cream will not whip? If your coconut cream will not whip, it is likely too watery. When you open the can, it should be almost solid and creamy. If it is watery, the brand is not suitable for whipping. Try chilling the cream in the refrigerator for another 24 hours, or freeze it for 1 hour before whipping. Also, ensure your mixing bowl and beaters are spotless and free of grease. Any grease will prevent proper whipping.
Wrap up
Getting coconut vegan whipped cream stable for piping cake decorations takes some trial and error. I have gone through many cans of coconut cream to find what works best. Honestly, the most important thing is temperature control and using the right stabilizer.
Before you start, chill everything for at least 30 minutes. Pick a good brand of coconut cream that has no additives. Decide whether you want to use cream of tartar, agar, cornstarch, or vegan butter. Each one makes a difference in how your cream performs.
Start with a simple design when you are new to this. Practice piping basic swirls on a plate before you attempt decorating a full cake. Simple designs with coconut whipped cream can look fresh and elegant. You do not need complex piping patterns to make a cake beautiful.
A naked cake with rustically piped cream swirls is basically foolproof. You can add fresh berries and mint leaves with ease. These elements do not require precise piping skills.
For vegan cakes, I also like to use a vegan biscuit base instead of baking a traditional cake. It is faster and does not require an oven. Coconut whipped cream with a biscuit base is actually a classic French dessert called charlotte.
I hope these tips help you get the stable, pipeable coconut vegan whipped cream you have been dreaming of. It takes practice, but once you master the technique, it is such a joy to work with.
Keep a list of what works for you. Test your cream before the big day. Your first attempt may not be perfect, and that is totally fine. The second attempt will be better, and the third will be even better. Pretty soon, you will have your own reliable method for coconut whipped cream that always pipes beautifully.
Let me know in the comments how your coconut vegan whipped cream turned out. I would love to hear about your successes and frustrations. We can all learn from each other and create better plant-based desserts together.
Happy decorating, everyone.
⚠️ Warning: This cake is high in sugar. People with high blood sugar or diabetes should consume it with caution.





