 bluename
 Applying edible gold leaf to frosted cake surfaces is a real game-changer for custom bakers. I have been decorating cakes for over eight years, and honestly, gold leaf still feels like the ultimate secret weapon. It turns a simple buttercream finish into something that looks like it belongs in a high-end boutique bakery.
But I will be the first to admit that I messed up my first few attempts. The gold tore, stuck to my fingers, and even ended up on my apron instead of the cake. The difference between a cheap-looking smudge and a luxurious accent is all about technique and placement. In this guide, I am going to walk you through exactly how to apply edible gold leaf to decorate key focal areas on frosted cake surfaces.
We are not just talking about slapping a sheet on the side. We are talking about precise, controlled application that makes your design pop. I will cover the tools that actually work, the preparation steps you should not skip, and the specific focal points that benefit most from a little shimmer. Plus, I will share the mistakes I made so you can avoid them.
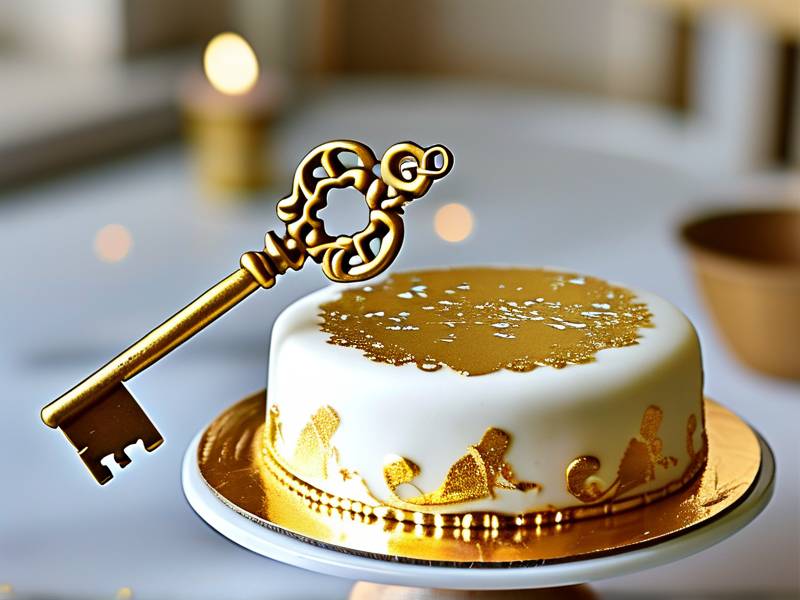
Let me share what I have learned from countless practice cakes, a few industry trade secrets, and the science behind why this delicate material behaves the way it does. By the time you finish this article, you will feel confident enough to take a gilded cake to your next client meeting.
Gathering the Right Tools for Flawless Gold Leaf Application
Before you even open that little book of gold sheets, let’s talk about tools. Honestly, I used to think I could just use my fingers. That was a huge mistake. The oils on your skin will make the gold crinkle and stick to you permanently, ruining the sheet instantly.
You will need a clean, dry, and soft brush. I use a professional grade squirrel hair brush specifically for gilding. It is soft enough to not tear the leaf but firm enough to press it down. You also need a pair of fine-tipped tweezers. These are non-negotiable for lifting the delicate sheets without ripping them.
You will also need a ceramic or glass dish to work over. This catches the fragments and lets you pick up small pieces for detailed work. And you absolutely need a steady surface. I always set up my gilding station away from fans and air vents. Even a tiny breeze will send that gold flying across the room. It is incredibly light.
Another thing that helps is a microfiber cloth to wipe your tweezers clean. Static is your enemy here. If the gold sticks to your tools, it is usually because of static electricity. I keep a small anti-static wrist strap nearby, but honestly, wiping the tweezers on a damp cloth works fine too.
The quality of the gold leaf matters too. I only use 24-karat edible gold leaf. You can find cheaper imitation gold, but it is not truly edible and often contains copper. If you are charging premium prices for your cakes, using real edible gold is part of the professional standard. Plus, it applies more smoothly, and the color is richer.
Make sure your hands are completely dry and you have a clean workspace. I cannot stress this enough. A cluttered table with crumbs or sugar dust will ruin the adhesive layer. Take a second to wipe down your area with a dry cloth before you start.
Preparing the Frosted Surface to Ensure the Gold Leaf Adheres Properly
This is the step that most beginners skip, and it makes a world of difference. You cannot just press gold leaf onto a dry, crusted buttercream and expect it to stick. The surface needs a little prep work. First, make sure your frosted cake is thoroughly chilled. I usually keep my cake in the fridge for about 20 minutes before I start gilding. A cold cake is firmer, and it gives you a forgiving surface to work on.
Now, about your frosting. If your buttercream has formed a crust, you need to handle it carefully. Pressing gold leaf onto a crusted surface will leave air pockets. The gold will sit on top of the crust and flake off easily. I prefer to work with a slightly softer frosting for focal areas. You want the gold to sink into the surface just a little bit.
For certain focal points, like the top edge or a specific flower, you need an adhesive. There are commercial edible glues, but I have found that a light application of corn syrup mixed with a drop of water works perfectly. This is great for vertical surfaces where gravity is fighting you. You can apply this adhesive with a fine brush to the exact spot where you want the gold.
For a smooth, seamless look, let the adhesive sit for about 30 seconds. It should become tacky but not wet. If it is too wet, the gold will slide around. If it is too dry, the gold will not stick at all. Look for that sticky window. It is similar to working with transfer foil, except the gold is more delicate.
Do not apply the gold leaf too early in the decorating process. I always finish all my piping and frosting details first. If you try to frost over gold leaf, you will scratch it and create a messy look. The leaf is a finishing touch, the final layer of detail. So plan your design and make sure the gold is the last thing that touches the cake.
Another vital tip is to keep the surface moisture-free. Condensation is a killer for gold leaf. If the cake is too cold and you bring it into a warm room, condensation forms, and the gold will lose its shine and look blotchy. I take the cake out of the fridge and let it sit for about 5 minutes to take the chill off the surface before I start applying the leaf.
Mastering the Transfer Technique for Large Gold Leaf Sheets
Let us talk about the actual transfer process. This is where I see people struggle the most. When you buy a book of edible gold leaf, the sheets are usually resting on a piece of tissue paper. There are two way to handle this. You can lift the entire sheet with tweezers, but full disclosure, I rarely do that for large areas because it increases the chance of tearing.
My favorite technique is to cut the gold leaf into smaller pieces while it is still in the book. This gives me more control. I use a pair of sharp scissors to cut the sheet into strips or squares, depending on the size of the focal area I want to cover. This way, I am not struggling with a large, flimsy sheet that wants to fold over itself.
When you are ready to apply the gold, hold a piece over the target area. Gently lay it down, starting from one edge, and let it fall into place. Use your dry brush to press it down softly. I use a patting motion rather than a sweeping motion. Sweeping will drag the gold and tear it. Patting helps it conform to the contours of the frosting.
If you are covering a large area like the top of a cake, you will have overlapping seams. Do not worry about making them invisible. The overlap creates a beautiful, textured look that catches light in unique ways. That is actually a common design aesthetic. You can be strategic about it and create a patchwork effect that looks intentional.
For detailed focal points, like a small flower or a monogram, I use the "flourish" method. I pick up small pieces with the tip of my tweezers and press them into the adhesive spots using a fine silicone brush. It is tedious but worth it. The precision you get is what separates a professional finish from a DIY attempt.
The brush you use is crucial for smoothing out wrinkles. If a piece of gold wrinkles, do not panic. Just gently lift the edge with the brush and lay it down again. The gold has a little bit of give. With a soft touch, you can stretch it back flat. The key is to always handle it with a feather-light touch. The pressure you think you need is always too much.
Identifying Key Focal Areas That Benefit the Most from Gold Accents
Alright, so you have your tools ready and your surface prepped. Now, where do you put the gold? This is the artistic part that takes your cake from looking simple to looking expensive. In my experience, the best focal areas are the ones that naturally draw the eye. You want to guide the viewer’s attention to your best work.
One of my favorite focal points is the base of the cake. It sounds counterintuitive, but adding a band of gold leaf around the bottom edge creates a sense of grounding and luxury. It frames the entire cake. I usually apply a thin strip of adhesive along the base and press delicate gold pieces there. It looks like a shimmering skirt.
Another prime focal point is the top rim of the cake. This is where the cake catches overhead light, so the gold will really sparkle there. I create a gilded edge that is about half an inch thick. This frames the top of the dessert and contrasts beautifully with any piped details. It is simple, clean, and modern.
If you have a piped floral arrangement on top of the cake, use gold to highlight the petals. You do not have to gild the entire flower. Just highlight the tips of the petals or the center of the bloom. This makes the flower look dimensional and expensive without looking gaudy. It is all about moderation.
You can also use gold leaf to highlight drip details. If you have a caramel or white chocolate drip, you can apply small gold flakes along the edges of the drips. This intensifies the sense of movement. It looks like the golden liquid is dripping down the cake, which is a really striking effect. It is one of my signature details actually.
For a modern, geometric cake, gold leaf is perfect for accentuating angles. If you have sharp corners or a textured pattern, apply gold to the edges. This creates a high-contrast design that feels very contemporary. The metallic finish paired with matte frosting is that luxury look everyone asks for.
Troubleshooting Common Issues Like Tearing and Static
Honestly, no matter how much experience you have, you will encounter issues with gold leaf. I still do sometimes. The trick is knowing how to fix them. The most common issue is tearing. This usually happens because the sheet is too dry or you are pulling on it too harshly. The solution is to use a lighter touch and make sure your hands are not sticky.
Another issue is static cling. The gold will fly up and wrap around your tweezers. This is super frustrating. You can solve this by wiping your tweezers with a dryer sheet before you start. This neutralizes the static. I thought this was a myth until I tried it myself. It is night and day.
If the gold is not sticking to the cake, it usually means your adhesive is too dry. You need to reapply a thin, fresh layer. Or, if you are working without an adhesive on a frosted surface, the frosting might have crusted too much. You can lightly brush the surface with a damp (not wet) brush to reactivate the tackiness before applying the gold.
One more common problem is the gold flaking off after you have finished the cake. This is a nightmare if you are delivering it. This usually happens if the cake is moved around too much or if the surface got cold and then warm, creating condensation. Always store a gilded cake in a cool, dry place and transport it on a flat, stable surface.
I also want to warn you about using too much gold at once. When you open a book of gold leaf, you get about 25 sheets. Use them sparingly. A little goes a long way. You can always add more gold, but you cannot take it off once it is on there. So, apply small pieces first, step back, and assess the look before adding more.
Expert Tips for Sealing and Storing Your Gilded Cake
Once you have applied the gold leaf, you might think you are done. But there are a few more considerations to ensure your masterpiece makes it to the event intact. First and foremost, do not cover a gilded cake with a tight plastic wrap. The plastic will stick to the gold and pull it off. I always store gilded cakes in a large, open cardboard box.
This cardboard box method is gold. It keeps dust off the cake but allows air to flow. It also prevents condensation buildup. If you need to put the cake in the refrigerator, this is the way to do it. Just place the cake on a board, set it in the box, and put the whole thing in the fridge. It stays safe and shiny.
When you are serving the cake, make sure the person cutting it understands the gold is edible. I have had clients hesitate before eating it. Reassure them that it is 24-karat edible gold and is safe to consume. It will also crumble and get mixed into the frosting as you cut, which means every slice will have a lovely glimmer.
If you are using a cake stand, be careful with the platter. If you place the cake on a porous ceramic surface, the gold might catch on it as you slide the cake. I prefer to place the cake on a fresh, clean cake board first, then transfer it to the stand. This gives you a smooth surface between the cake and the stand.
For a smooth finish, you can use a clean, dry brush to gently whisk away any loose flakes. Do not rub, just lightly whisk. This removes the excess gold that did not adhere. This creates a cleaner look. It also prevents those little specks from ending up on your counter or cake box.
FAQ
How do I keep the edible gold leaf from tearing when applying it to a frosted cake? Keep the gold leaf away from moisture and use a soft, dry brush to pat it down. Do not sweep the brush. Cut the sheets into smaller pieces before applying. Also, make sure your tweezers are clean and dry. If the sheet is too large, it will tear under its own weight. Smaller pieces are much more forgiving and easier to control on the frosted surface.
Can I apply edible gold leaf directly onto buttercream without any adhesive? Yes, you can, as long as the buttercream is still tacky and has not formed a crust. The moisture in the fresh buttercream is enough to hold the gold in place. If you are working on a vertical surface or the buttercream has crusted, use a thin layer of edible glue or corn syrup to create a sticky surface for the gold to adhere to.
Is edible gold leaf safe for people with dietary restrictions or allergies? Real edible gold leaf is biologically inert, which means it does not react with food, and it passes through the body without being digested. It does not contain gluten or dairy and is safe for most people. However, it is crucial to buy from a reputable source to ensure it is 24-karat and truly edible. Other metal leaf varieties are not safe to eat.
What are the best focal areas on a cake for a modern minimalist gold leaf design? For a minimalist design, I recommend focusing on just one or two areas. The top rim of the cake is a great choice. Also, consider a single drip detail. The key is to leave most of the cake bare. You want to create a stark contrast between the white or soft-toned frosting and the bright gold. Less is definitely more for this aesthetic.
How far in advance can I apply gold leaf to a cake before it needs to be served? You can apply the gold leaf a day in advance without issue. The main risk factor is exposure to humidity or condensation. If the cake is stored in a dry, cool environment, the gold will remain bright. Some bakers even prefer to apply it 24 hours ahead. It is quite stable. Just do not apply it if the cake is cold and damp.
⚠️ Warning: This cake is high in sugar. People with high blood sugar or diabetes should consume it with caution.





