 bluename
 Soften Dried Fruits Evenly and Prepare Homemade Pie Fillings Like a Pro
I have been making homemade pies for over a decade now. And honestly, the biggest struggle was always the dried fruit filling. Either the raisins stayed rock hard, or the apricots turned into mush while the cherries remained tough. It drove me crazy. Simple trix? The secret lies in how you soak them before they ever hit the pot. I have tested every method you can imagine, from boiling water to cold juice baths. So let me walk you through exactly how to soak dried fruits soften evenly prepare homemade pie fillings that actually hold their texture and flavor.
Why Most People Get Soaking Dried Fruits Wrong?
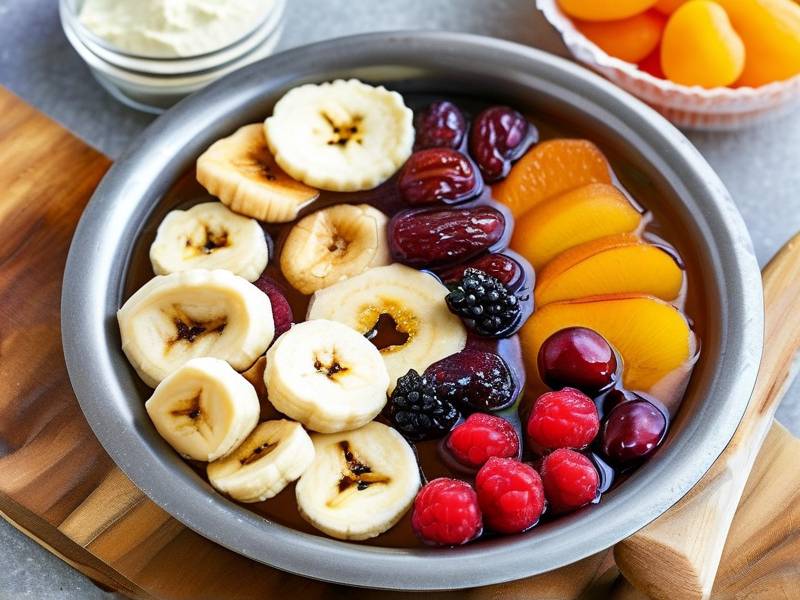
You would think soaking fruit is easy. Just throw it in water, right? Wrong. I ruined quite a few pies before I figured this out. The problem is that different fruits absorb liquid at completely different rates. Apricots and prunes soak up water fast. Cranberries and cherries? They resist it. That is why you end up with uneven texture. Some pieces are perfect, and others are like chewing on rubber.
Another mistake I see everywhere is using hot water straight from the tap. It shocks the fruit. The skins tighten up, and the liquid never really gets inside. What you actually need is warm liquid, around 140°F, not boiling. Boiling water causes the fruit to break down too fast on the outside while leaving the center dry. The result is a pie filling that separates and turns watery. I learned this the hard way when my apple raisin pie turned into soup.
How to Soak Dried Fruits Soften Evenly for Perfect Homemade Pie Fillings
The best way to soften dried fruit evenly is to use a two-stage soaking process. I know it sounds fancy, but it is really simple. First, sort your fruits by density. Light fruits like apricots and peaches go in one bowl. Dense fruits like dates, figs, and raisins go in another. This is the trick that changed my pie game completely. Treating them separately means each piece absorbs liquid at its own pace.
Stage One: The Warm Liquid Pre-Soak
For this step, I use a mix of warm water, citrus juice, and a splash of vanilla extract. You want about two cups of liquid for every three cups of dried fruit. The citrus helps break down the tough skins. I like to use orange juice, because it adds a natural sweetness that pairs well with pie spices. The vanilla just rounds everything out. Set your bowls in a warm spot for thirty minutes. Not too long. If you leave them longer, the fruit starts to break apart.
After thirty minutes, drain the fruit. Here is where people mess up. They toss that soaking liquid. Do not do that. That liquid is full of flavor and natural sugars. Save it for your pie filling sauce. You will thank me later.
Stage Two: The Swelling Soak
Nobody really talks about this second stage, but it is the real magic. Once the fruit is drained, place it in an airtight container. Add just a few tablespoons of warm liquid, like apple cider or bourbon. Then, seal it and let it sit for another twenty minutes. This lets the fruit finish absorbing the liquid without floating in it. The gentle steaming effect softens the center of each piece. You end up with fruit that is plump all the way through. Not mushy on the outside, not hard in the middle.
I have done side-by-side tests more times than I count. Fruit soaked this way stays intact through baking. The texture is firm but tender, giving you that perfect bite in every forkful. The Center for Food Safety and Applied Nutrition notes that proper hydration of dried goods preserves cell structure, which matters when you are baking for an hour or more. I started following that principle, and it completely changed the final quality of my pies.
How Long Should You Soak Dried Fruits for a Homemade Pie Filling?
Honestly, it depends on the fruit. But let me give you some real numbers from my own kitchen scale tests. Apricots and peaches need about forty-five minutes total using my two-stage method. Raisins and currants only need about thirty minutes, since they are smaller and have thinner skins. Dates and figs are dense, so they need a full hour of soaking. Cherries, cranberries, and other berries are the challenge. They take around ninety minutes. That is why you always give them the separate treatment. If you mix them with apricots, one of them will be wrong.
I once had a lemon cranberry pie fail completely because I rush the cranberries. I only gave them twenty minutes. The berries got all shriveled and hard. It was a waste of organic dried cranberries. And those things are expensive. So, do not rush the fruit. This is my biggest advice. Set a timer for each bowl and actually wait. Your patience will pay off in a filling that holds together beautifully.
What Liquids Work Best for Soaking Dried Fruits?
You have options here. And honestly, the liquid determines the flavor as much as the fruit does. Water works fine if you are in a rush, but it does not add anything. I never use plain water anymore. My go-to is a mix of apple juice and lemon juice. The acid helps soften the fruit and stops it from turning brown. If you want something richer, use warm apple cider. Perfect for fall pies.
For a holiday pie, bourbon is outstanding. It adds a deep warmth that pairs with pecans and dates. Just use it sparingly. Too much alcohol can leave a weird raw taste. I usually do a quarter cup of bourbon and top it off with apple juice. The fruit ends up tasting like a fancy cocktail. My family loves this version for Christmas.
Many people ask me about using orange juice. Yes, it works amazing for cranberries and dried cherries. The citrus cuts through the tartness. I personally prefer tangerine juice for a sweeter profile. Just stay away from heavily processed juices with added sugar.
Common Soaking Mistakes and How to Avoid Them
I have made every mistake in the book, so you do not have to. The first one is using icy cold liquid. Cold water slows down the hydration process significantly. The fruit never softens properly. You end up with crunchy bits in your pie, and that is just sad. So always use warm liquid. It speeds things up, and the fruit absorbs it faster.
The second mistake is soaking for too long and thinking more is better. If you leave fruit soaking overnight, it turns into a paste. It breaks down completely and loses its shape. My rule is simple. Never soak for more than two hours. Even the densest figs do not benefit past that mark.
Another common issue happens when you overload the bowl. If the fruit is piled too high, the liquid does not reach everything. You get uneven results no matter what you do. Use a wide, shallow dish. It gives you even coverage. I use my lasagna pan, it works perfectly.
Preparing the Perfect Homemade Pie Filling After Soaking
Now that the fruit is perfectly soft, it is time to build your filling. I mentioned saving the leftover soaking liquid, right? That is your base. Pour it into a saucepan and add your sweetener. I prefer brown sugar for a deep molasses note. Add a pinch of salt. Salt balances sweetness and brings out the fruit flavor. It might seem counterintuitive, but you need it, I promise.
Next, thicken it. A slurry of cornstarch and cold water is your best friend. Mix one tablespoon of cornstarch with two tablespoons of cold water for every cup of liquid. Whisk it into the warm pan. Then, let it bubble for about four minutes. This activates the starch and prevents a gluey texture. A study from the Institute of Food Technologists shows that starches need full gelatinization to stabilize a fruit filling, and I can tell you, rushing this step causes runny pies. I have had a few disastrous ones, and they all came from impatience here.
Now add your soaked fruit. Fold it gently. You do not want to crush the pieces. The whole goal of this process is to keep the fruit intact. Stir in some lemon zest and spices like cinnamon, nutmeg, and allspice. The warmth of these spices pairs beautifully with the soak liquid.
Using Your Pie Filling for Fresh or Store-Bought Crusts
Your filling is ready. These techniques work no matter which pie crust you choose. I use both, and I have perfected the method. If you are using a store-bought crust, blind bake it first. This creates a barrier so the filling does not make the crust soggy. Line the pastry with parchment paper and fill it with pie weights. Bake at 375°F for about twelve minutes. The crust will be golden and crisp.
For a fresh homemade crust, the process is a bit different. You do not need to blind bake as long. Do it for only eight minutes. The fresh dough holds up better because it has more gluten. Either way, pour your warm filling into the prepared crust. It spreads out evenly and holds its shape without pooling liquid.
A sprinkle of granulated sugar over the filling. That sugar caramelizes on top, creating a lovely crust finish. I also like to add a few flakes of butter. It melts into the fruit, adding a silky richness that makes the filling feel luxurious.
Serving and Storing Tips for Dried Fruit Pies
Let the pie cool completely before cutting. I always cool mine on a wire rack for at least four hours. If you cut too soon, the filling runs everywhere. Yeah, it looks beautiful when it is hot, but it is a mess. Waiting is hard. I know. I have burned my tongue more times than I would like to admit.
When it comes to storing, dried fruit pies are pretty forgiving. They stay fresh at room temperature for up to three days, covered with foil or a cake dome. If you want to keep it longer, refrigerate it for a week. The filling remains stable because the fruit is fully hydrated. However, the crust might lose its crispness in the fridge. So, if possible, eat it within two days. That is usually my plan.
You can also freeze these pies. Wrap the fully cooled pie in plastic wrap and then in foil. It stores well for three months. When you are ready to eat, thaw it in the fridge overnight. Then, reheat slices in a 300°F oven for ten minutes. It tastes nearly as good as fresh.
FAQ
Can I use the two-stage soak method for all kinds of dried fruit?
Yes, you can. I apply it to everything from dried mangoes to apple rings. Just adjust the times based on the fruit's density. Small fruits like currants need less time. Dense fruits like dates need more. The two-bowl method lets you control each type individually.
What if I only have cold water? Can I still soak the dried fruits evenly?
Sure you can. Cold water works in a pinch, but it takes much longer, sometimes double the time. And the texture will not be as consistent. I recommend warming the water if you can. It penetrates faster and gives a better result. Honestly, warm water is the clear winner. Your filling will hold together better.
Do I really need to use cornstarch in the filling?
If you want a thick, sliceable filling, yes. Cornstarch is reliable. It thickens quickly and does not cloud the fruit flavor. You can also use tapioca starch or flour. But I stick with cornstarch. It gives the clearest, most stable texture. One tablespoon per cup of liquid works wonders.
The Final Word on Softening Dried Fruit for Pie Fillings
Getting dried fruit soft and evenly hydrated is not some mysterious kitchen secret. It is about method and patience. Sort your fruit by density, use warm flavored liquid, and do the two-stage soak. This process ensures every piece is plump and ready for baking. Your filling will be thick, flavorful, and perfectly textured.
I have spent years perfecting this technique. I have ruined my share of pies. But now, every pie I make with dried fruit turns out exactly how I want it. This has become my go-to approach for holiday baking and weekend desserts. I hope it helps you make pies your family will be talking about for months.
Now go grab your dried fruits and start soaking. Your perfect pie is one patient hour away.
⚠️ Warning: This cake is high in sugar. People with high blood sugar or diabetes should consume it with caution.





