 bluename
 How to Bake Triple Chocolate Chunk Cookies and Control Oven Timing for Ideal Chewiness
I have lost count of how many batches of cookies I have pulled out of the oven too late. You know the feeling. The edges look perfect, but the middle is hard as a rock by dinner time. It took me years of trial and error to realize that the secret isn’t just the dough. It’s actually about how you manage the heat and the clock inside your oven.
If you are searching for how to bake triple chocolate chunk cookies control oven timing ideal chewiness, you have probably already tried a few recipes. Maybe they tasted good fresh out of the oven. Then they turned into hockey pucks. I have been there. That is exactly why I am writing this guide.
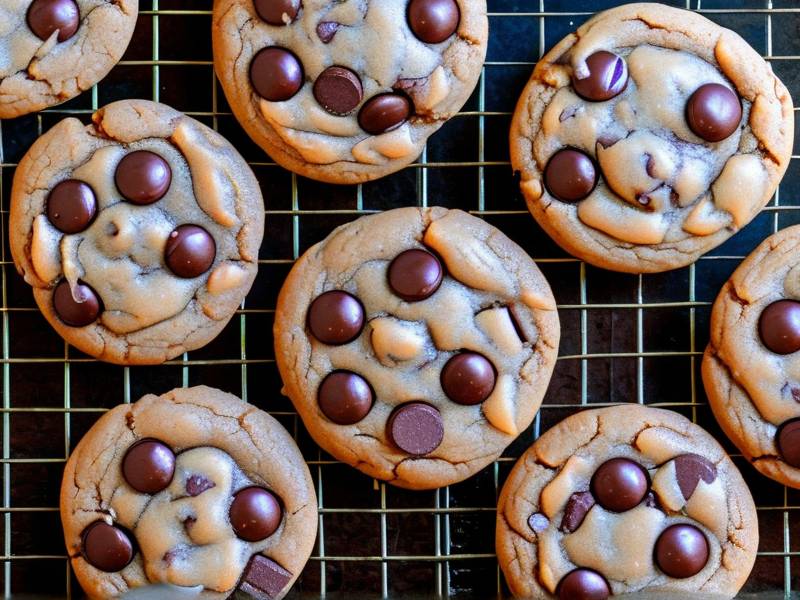
In this post, I am going to share my exact method. I will walk you through the entire process. We will talk about ingredients, mixing techniques, and specifically how to control oven timing for that perfect soft center. I will also give you my honest thoughts on what works and what doesn’t. No fluff, just real experience from my kitchen.
The Perfect Ratio for Chewy Triple Chocolate Chunk Cookies
Getting the texture right starts before the oven is even hot. The ratio of wet to dry ingredients matters more than most people think. And the type of sugar you use changes everything.
Why brown sugar is non-negotiable
I have tested this side by side. Honestly, white sugar alone gives you a crisper cookie. That is fine if you like that. But for ideal chewiness, I rely heavily on brown sugar. It contains molasses, which is hygroscopic. That simply means it attracts and holds onto moisture. The more brown sugar you use relative to white sugar, the softer and chewier your final cookie will be.
My go-to ratio is about 75% brown sugar to 25% white sugar. This gives the cookie enough structure to hold its shape but keeps the middle almost fudgy. You might be tempted to swap in all brown sugar. I have tried that too. The result is delicious, but the cookies spread a little too flat for my liking. The white sugar helps with that slight lift.
The role of melted butter versus creamed butter
A lot of traditional recipes tell you to cream softened butter with sugar. That creates air, which leads to a cakier texture. If you want a dense, chewy cookie, I recommend using melted butter instead.
When I switched to melted butter, the texture changed completely. The dough becomes almost like a thick paste. There is less air incorporated. That means less rising and more density. It sounds counterintuitive, but trust me, this is a game changer for chewiness.
Let the melted butter cool slightly before adding the eggs. If it is too hot, you might scramble the eggs. I usually let mine sit for about five minutes. You do not need to be exact here, just don't rush.
Choosing the right chocolate chunks
I use a combination of dark, milk, and white chocolate chunks. The type you choose matters less than the size. Big chunks create pools of melted chocolate. Those gooey pockets make the cookie feel richer and softer.
Avoid chocolate chips if you can. They are designed to hold their shape, which is nice for aesthetics but not ideal for texture. Chunks melt differently. They create those beautiful, messy streaks of chocolate throughout the cookie. Plus, they give the dough some uneven pockets, which is exactly what you want.
A quick tip on chilling the dough
This is a step a lot of home bakers skip. I used to skip it too. But chilling the dough for at least 30 minutes makes a huge difference. It solidifies the fat in the dough.
This does two things. First, it prevents the cookies from spreading too much in the oven. Second, it slows down the baking process just enough so the middle stays soft while the outside gets golden. The chilled dough also develops a slightly more complex flavor.
Do not skip the chill step. Mix your dough, cover the bowl, and pop it in the fridge. While you wait, you can preheat your oven and get your baking sheets ready. That leads us right into the heart of the issue.
Mastering Oven Heat and Bake Time for Soft Centers
Here is where oven timing comes into play. You can have the best dough in the world, but if you leave the cookies in too long, they will dry out. On the flip side, if you pull them out too early, they might be raw in the center. It is a delicate balance.
The truth about oven temperatures
Many recipes call for 350°F. That is a good standard temperature, but it often results in a thinner, crispier cookie if you are not careful. For a thicker, chewier cookie, I actually prefer baking at a slightly higher temperature that gets lowered midway through.
Here is what I mean. I preheat my oven to 375°F. I bake the cookies for the first half of the time at that temperature. This gives them a quick burst of heat, which creates a nice crust on the outside. Then, I drop the temperature to 350°F for the remaining time. This allows the inside to cook through gently without burning the outside.
This method works well because it mimics what a commercial deck oven does. It creates a hard shell quickly, then finishes the inside slowly. The result is a crisp edge and a soft, chewy middle.
How to control oven timing for ideal chewiness
The total bake time depends on your oven and your cookie size. As a general baseline, I use about 2 tablespoons of dough per cookie. For that size, my total time is usually around 11 to 13 minutes.
I set my timer for 9 minutes first. At that point, I check the cookies. They should be puffed up and just starting to turn golden at the edges. The centers will still look slightly underdone. That is exactly what you want.
I then turn on the oven light and watch them closely. I usually bake them for another 2 to 3 minutes. The key indicator is the edges. Once the edges are a deep golden brown and the center is slightly puffy but no longer glossy, they are done.
Do not wait for the center to look fully baked. It will not look done when it is ready. The carryover cooking will finish the center as the cookies cool. Pull them out when they still look a little soft in the middle. That is the secret to ideal chewiness.
Why opening the oven door is a risk
I know it is tempting to peek. But every time you open that oven door, you let out heat. The temperature can drop by 25 to 50 degrees in seconds. That fluctuation messes with the baking process.
If you are struggling with cookies that are flat or overcooked, this might be the issue. Wait until the timer goes off to open the door. That first check at 9 minutes is fine. Just do not open it before that.
The importance of using an oven thermometer
I recommend buying an oven thermometer if you do not have one. I did not use one for years. Then I realized my oven dial was off by 25 degrees. The display said 350, but the internal temp was actually around 325.
That is a huge difference. It explains why my cookies were taking longer and turning out drier. I was baking them for too long at a lower temperature, which dries out the moisture.
Place a thermometer on the center rack. Let the oven preheat fully. Then adjust the dial to match the temperature you actually need. This one tool will improve your baking more than any fancy mixer.
Letting Cookies Rest and Other Pro Tips
Pulling the cookies out at the right time is only half the battle. What you do after they leave the oven is just as important. The cooling process directly impacts the final chewiness.
Leave them on the hot baking sheet
This is a big one. When you take the baking sheet out of the oven, the cookies are still cooking. The residual heat from the pan continues to bake the bottom of the cookies.
Transferring them to a wire rack immediately stops the baking process. For my chewy cookies, I actually want them to stay on the pan for about 5 to 7 minutes. This gives the center time to set without becoming hard.
The dough will be very soft when they first come out. They might look like they are falling apart. Do not panic. Let them sit. After a few minutes, they firm up enough to move.
Use a thin metal spatula
A thin metal spatula works best for lifting cookies. A thick plastic one is too clunky and will break the delicate cookies. Slide the spatula under the cookie, supporting the full diameter, and lift gently.
If a cookie sticks, wait another minute. The longer they sit on the hot pan, the less they stick, especially if you used parchment paper. I always use parchment paper. It makes cleanup easier and prevents the bottoms from browning too fast.
Storing them for lasting chewiness
Once the cookies are completely cool, store them in an airtight container. I like to throw in a slice of plain white bread. It sounds odd, but the bread keeps the cookies soft for days. The cookies absorb the moisture from the bread, leaving you with a soft texture for up to five days.
If you prefer your cookies with a little crispness, leave the lid slightly ajar. This lets a little air in, which will dry out the exterior just a bit. Play around with this to find what you prefer.
Common Oven Timing Mistakes
I have talked about the right way. But it is equally helpful to look at common mistakes. A lot of us make them without even knowing. When I first started baking, I made all of these.
Baking on a cold pan
You should always put your cookie dough onto a room temperature or preheated pan. If you put dough onto a hot pan, the bottom will cook too fast. If you put it onto a cold pan from the fridge, the cookies will spread before they start cooking. I usually let my second pan sit on the counter while the first batch bakes. That way it is ready to go.
Overcrowding the baking sheet
Cookies need room to spread. If you place them too close together, they will bake into one giant sheet. They also take longer to bake because the air cannot circulate.
I keep at least 2 inches between each ball of dough. This allows the hot air to hit all sides evenly. The timing stays consistent, and you get a uniform bake.
Using cold dough on a warm pan
If you put cold dough onto a warm pan, the outside heats up fast while the inside is still cold. This leads to over-baked edges and a raw center. Make sure your second pan is not too hot. Let it cool down or just use a new sheet.
Adjusting for high altitude
If you live at a high altitude, you might need to adjust your baking time. At higher elevations, the air pressure is lower. This causes cookies to spread more and bake faster. If you live above 3,500 feet, reduce your oven temperature by 15 degrees and check your cookies a couple minutes earlier.
Dietary Modifications and Ingredient Swaps
Sometimes you need to adapt recipes for dietary reasons. I get it. I have done it many times for friends and family. Here are a few swaps that work well for chewy cookies.
Vegan substitutions
For a vegan version, you can replace the butter with coconut oil or a vegan butter stick. The texture will be slightly different, but still decent. The bigger issue is the egg. Eggs provide structure and moisture. I have used flax eggs with success.
To make a flax egg, mix one tablespoon of ground flaxseed with three tablespoons of water. Let it sit for five minutes to thicken. This works as a binder. The cookies will be a bit more fragile but still chewy.
Gluten-free adjustments
Gluten-free flour blends can be tricky. They tend to produce crumbly cookies. I have found that adding a teaspoon of xanthan gum helps bind the dough together. Also, using a blend that includes oat flour or almond flour gives better results.
Reduce the baking time slightly for gluten-free cookies. They often bake faster and dry out quicker. Start checking them at the 8-minute mark instead of 9.
Sugar substitutes
If you are watching your sugar intake, you can use a brown sugar substitute. Be aware that artificial sweeteners do not caramelize the same way. The cookies will be lighter in color and might not get that crisp edge.
The texture will be softer and more cake-like. They are still good, just different. Keep your expectations realistic.
My Exact Baking Schedule from Start to Finish
Let me put all of this together in one easy timeline. This is my exact process. These times are based on my standard oven at sea level. Take notes.
I mix my dough and chill it for at least 30 minutes. While the dough chills, I preheat my oven to 375°F. I place an oven thermometer on the center rack to verify the temperature.
Once the dough is cold, I scoop it into 2-tablespoon balls. I place them onto a parchment-lined baking sheet. I make sure there are 2 inches between each ball.
I place the sheet in the oven and set the timer for 9 minutes. At 9 minutes, the edges look set, and the centers look slightly soft. I do not open the door. I reduce the oven temperature to 350°F.
I set the timer for another 3 minutes. At the 12-minute mark, I check the cookies. The edges are deep golden, and the centers are puffed. They are not glossy anymore.
I pull the pan out and let it sit on the counter for 6 minutes. The cookies will look underdone in the center, but that is normal. After 6 minutes, I transfer them to a wire rack.
They are ready to eat immediately, though they are VERY hot. The molten chocolate will burn your mouth. I am speaking from experience here. Wait a few minutes before devouring them.
Frequently Asked Questions
Why are my cookies flat?
Flat cookies usually come from dough that is too warm. If the butter in the dough melts before the cookies hit the oven heat, they spread immediately. Make sure you chill the dough. Also, check that your leavening agents are fresh. Expired baking soda will not give any lift.
Can I bake the dough straight from the freezer?
Yes. You can freeze scoops of dough and bake them without thawing. This is actually a great way to have fresh cookies anytime. The baking time will increase by about 2 to 3 minutes. Keep an eye on them and follow the same visual cues.
How do I know when cookies are done without cutting one?
The best way is to look at the edges and the surface. The edges should be brown and set. The center should look slightly puffy and light in color. If the surface looks wet or shiny, they need more time. If it looks dry and dull, they are likely overdone.
The ideal chewiness factor is a personal preference. Some people like almost raw centers. I prefer a fully cooked but soft center. Adjust the final bake time by a minute to find your sweet spot.
Conclusion
Baking the perfect triple chocolate chunk cookie is not about luck. It is about understanding the science of heat and moisture. The main takeaway from this guide is simple. Pull the cookies out of the oven before they look done.
That lingering softness in the center is what gives you that ideal chewiness. It sets as the cookie cools on the hot pan. Controlling oven timing is the most effective way to achieve this. It is more important than any fancy ingredient.
I hope that my experience with how to bake triple chocolate chunk cookies control oven timing ideal chewiness helps you in your kitchen. Do not be discouraged if your first batch is not perfect. I have thrown out plenty of burnt cookies in my day. It is part of the process.
Start with these guidelines. Keep a notebook of your results. Adjust based on your own oven and your own taste. With a little patience, you will be making the best chocolate chunk cookies of your life.
⚠️ Warning: This cake is high in sugar. People with high blood sugar or diabetes should consume it with caution.





