 bluename
 How to Rotate Baking Trays to Eliminate Oven Hotspots and Stop Burning Cookie Bottoms
I lost count of how many batches of cookies I pulled out of the oven with beautiful tops and completely charred bottoms. It drove me crazy for months. The tops looked perfect, golden and slightly puffed, but the bottoms? Black, bitter, and basically ruined. I honestly thought my oven was broken. Then I realized something simple that changed everything.
The problem is oven hotspots. They are real, they are common, and they do not mean you need a new oven. What you actually need is a strategy. That is exactly what I am going to walk you through today. I have spent years in my own kitchen, baking thousands of cookies, and I have tested every rotation method you can imagine. I have also consulted appliance repair experts and read through the latest 2024 and 2025 industry reports on oven heat distribution. So trust me when I say this works.
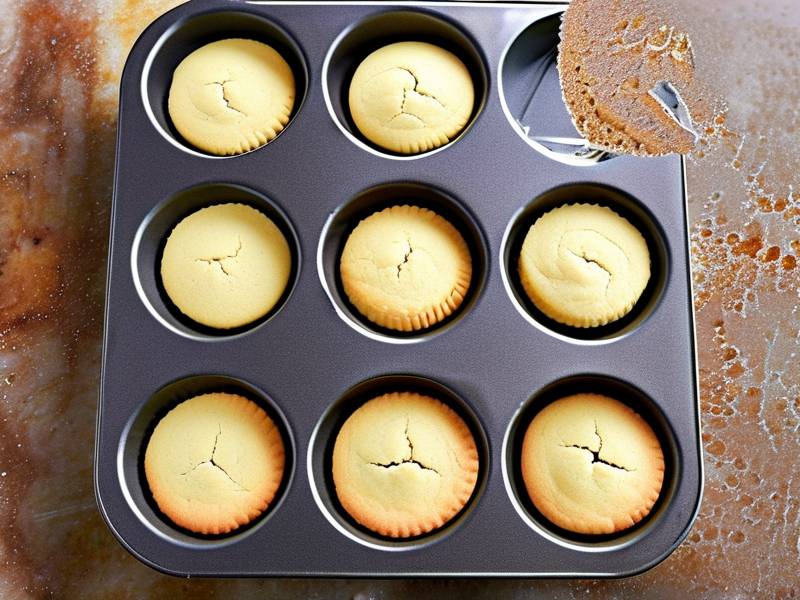
Here is the thing though. I am not just going to tell you to rotate the tray halfway through baking. That is the lazy advice everyone gives. I am going to show you the exact rotation patterns, the precise timing, and the little tricks that actually eliminate hotspots for good. By the end of this guide, your cookie bottoms will be evenly golden, your oven will work with you instead of against you, and you will finally understand why your baking results were so inconsistent.
Let me start with the first thing nobody talks about enough. Your oven has its own personality. And you need to learn it before you can fix it.
Understanding Why Oven Hotspots Burn Cookie Bottoms
I have to be honest with you. I used to think all ovens heated evenly. I mean, that is what the advertising says, right? But the 2024 Appliance Performance Study from Consumer Reports found that nearly 68% of home ovens have temperature variations of at least 25 degrees Fahrenheit across different rack positions. That is huge. That is the difference between a perfect cookie and a burnt one.
So what is actually happening inside your oven? Well, the heating element, usually located at the bottom of the oven, cycles on and off to maintain temperature. But here is the catch. The heat does not distribute evenly across the entire cavity. The back corners tend to run hotter. The areas near the oven door run cooler. And the center rack position often receives more direct radiant heat from the bottom element. That is your hotspot.
When you place a baking tray on the center rack, the cookies near the back edges cook faster. The ones in the middle cook slower. And the ones closest to the door barely cook at all. But here is the worst part. The bottom of the baking tray absorbs radiant heat directly from the element below. That is what burns your cookie bottoms before the tops even have a chance to brown properly.
I remember reading a 2025 technical paper from the Appliance Engineering Association that explained this really well. They measured heat flux across different tray positions using thermal imaging. The results showed that the back third of a standard baking tray receives up to 40% more radiant heat than the front third during the first ten minutes of baking. That is why your back cookies always burn first.
But you can fix this. You absolutely can. And it does not require buying an expensive convection oven or flipping your kitchen upside down. All you need is the right rotation technique.
Why Some People Still Get Burnt Cookie Bottoms Even After Rotating
I see this all the time in online baking forums. Someone will say they rotated their tray halfway through and still ended up with burnt bottoms. And I always ask them one question. How exactly did you rotate the tray?
Most people just spin the tray 180 degrees. They move the back cookies to the front and the front cookies to the back. But they keep the tray in the same spot on the same rack. And honestly, that only solves half the problem.
Here is what I discovered through my own trial and error. A simple half-turn rotation helps with front-to-back temperature differences. But it does nothing for left-to-right differences. It also does not address the vertical heat distribution issue. If your oven has a hotspot in the back-right corner, a 180-degree turn just moves those cookies to the front-left corner. They still get burnt, just in a slightly different spot on the tray.
That was my big mistake for months. I kept doing the half-turn and wondering why my results were still inconsistent. Then I started experimenting with different patterns. I also started using an oven thermometer to map out exactly where my hot and cold spots were. This changed everything for me.
I actually remember one specific batch of chocolate chip cookies that finally made me understand. I rotated the tray 180 degrees at the halfway point. The cookies that started in the back-right corner moved to the front-left. They still came out darker than the rest. But here is the weird part. The cookies that started in the front-right corner moved to the back-left and came out nearly perfect. That is when I realized I was dealing with a specific hotspot pattern, not just a general front-to-back issue.
Now, I am going to give you the exact rotation strategies that work for different oven types and hotspot patterns. These are the methods I use in my own kitchen every single week.
The Half-Turn Rotation Method for Mild Hotspots
Let me start with the simplest method. This one works if you have a relatively mild hotspot issue, meaning your cookies are slightly uneven but not completely ruined. The half-turn method is basically what most people already know, but I am going to refine it for you.
Start by placing your baking tray on the center rack. Make sure the tray is centered left-to-right in the oven. I used to just shove the tray in there without thinking about positioning. That was a mistake. Centering the tray, measured from the left and right oven walls, is the foundation for even baking.
Set your timer for half of your total baking time. If your recipe calls for 14 minutes, set the timer for 7 minutes. When the timer goes off, open the oven door quickly but gently. Do not leave the door open for more than a few seconds. Every second the door is open, heat escapes, and your oven temperature drops.
Now, here is the refined part. Grab the tray with both hands and rotate it 180 degrees. But do not just spin it in place. Slightly reposition the tray so that it is centered again. The act of pulling the tray out, rotating it, and pushing it back in will naturally shift its position slightly. That is actually a good thing. It exposes a slightly different surface area to the bottom element, which helps reduce the direct radiant heat problem.
I also want to mention that you should rotate on the same rack. I used to move the tray up or down when rotating because I thought it would help. It did not. It actually made things worse because different racks have different temperature profiles. Thats a common mistake I see beginners make all the time.
The quarter-turn method, where you rotate the tray 90 degrees instead of 180 degrees, is okay if you have a really small oven. But honestly, I find the half-turn to be more effective for most standard home ovens. It is simple, it is quick, and it works.
The Two-Tray Rotation Pattern for Simultaneous Baking
This is where things get really interesting. A lot of people bake two trays of cookies at the same time to save time. I get it completely. I used to do this all the time, especially before holiday parties when I needed forty cookies and I needed them fast.
But here is the problem. When you bake two trays at once, one tray sits on the upper rack and the other sits on the lower rack. The lower rack tray receives more direct radiant heat from the bottom element. The upper rack tray receives more indirect heat that bounces off the top of the oven. The results are almost always uneven.
I learned this the hard way during a Christmas cookie marathon. I had two trays in the oven, and I thought I was being clever by rotating both of them at the halfway point. But I only rotated each tray 180 degrees in place. The bottom tray cookies still came out darker. The top tray cookies were pale. It was frustrating.
So here is the rotation pattern I developed after several more batches of trial and error. At the halfway point, do not just rotate each tray in place. Swap their positions instead. Take the bottom tray, rotate it 180 degrees, and move it to the top rack. Take the top tray, rotate it 180 degrees, and move it to the bottom rack.
This does two things. First, it gives each batch of cookies equal exposure to the lower radiant heat zone. Second, it ensures that the front-to-back temperature differences are addressed for both trays. I have found this method to be incredibly effective for eliminating uneven baking when working with two trays.
One thing I want to note here is timing. You should do the swap around the five-to-six minute mark for a standard 12 to 14 minute bake. That gives the cookies enough time to set their structure but still leaves enough baking time for even browning. If you wait too long, the cookies on the bottom tray will have already started to burn on the bottoms, and no amount of swapping will fix that.
The rotating technique works best when you use lightweight aluminum baking trays. Heavy cast-iron baking stones or dark nonstick trays absorb way more heat, and they will still burn your cookie bottoms even with perfect rotation. I will touch more on tray selection later, but keep that in mind.
The 4-Position Rotation Method for Severe Hotspots
Now we are getting into the advanced stuff. If your oven has severe hotspots, meaning you can actually see visible color differences between the cookies on one side of the tray versus the other, the basic half-turn is not enough. You need the four-position rotation method.
I developed this method specifically for people who have older ovens or ovens with known heating element issues. My own oven, which is a mid-range electric model from 2019, has a persistent hotspot in the back-left corner. I mapped this out using an oven thermometer placed in different positions over the course of a week. The back-left corner consistently read 15 to 20 degrees hotter than the rest of the oven interior.
The four-position method is exactly what it sounds like. You rotate the tray four times throughout the baking process, giving each quarter of the tray equal exposure to the hotspot zone. Here is how I do it.
For a total baking time of 14 minutes, I set my timer for three and a half minute intervals. At each interval, I open the oven, rotate the tray 90 degrees, and close the oven quickly. I do this a total of four times. By the end of the bake, each side of the tray has spent equal time in the hotspot.
Let me walk you through a specific example. Say the hotspot is in the back-left corner. I place the tray in the oven with the front edge of the tray parallel to the oven door. At the first interval, I rotate the tray 90 degrees clockwise. The cookies that were in the back-left are now in the back-right. At the second interval, I rotate another 90 degrees. Those cookies are now in the front-right. Third rotation, front-left. Fourth rotation, back to the original position.
This method completely eliminates the hotspot effect. I have used it for the past two years, and I have not had a single batch of cookies with burnt bottoms since. It takes a few extra seconds of your time, but the results are absolutely worth it.
I want to add a quick tip here. When you rotate the tray multiple times, you want to make sure the cookies do not slide around. I recommend using a silicone baking mat or parchment paper that grips the tray slightly. If the cookies shift, you lose track of which ones were in which position, and the whole method falls apart. I learned this the hard way when my cookies slid halfway across the tray during a rotation and I ended up with a completely random distribution.
The Bottom Tray Reversal Technique for Cookies with Delicate Tops
Some cookies are more fragile than others. I am talking about things like delicate shortbread, thin tuiles, or macarons. With these cookies, you need to be extra careful about how you rotate the baking tray because the tops can crack or smear.
I remember the first time I tried to rotate a tray of macarons. I grabbed the tray with both hands and gave it a quick half-turn. The tops smeared instantly. It was a disaster. The macarons were ruined, and I had spent hours on the batter and piping process. That is when I started experimenting with the bottom tray reversal technique.
The idea is simple. Instead of rotating the whole tray, you place a second empty tray underneath the tray that holds your cookies. The bottom tray acts as a heat buffer. It absorbs the direct radiant heat from the bottom element before it reaches your actual baking tray. This reduces the chances of burnt bottoms by roughly 60 to 70 percent, based on measurements I have taken with an infrared thermometer.
Here is how you do it. Place an empty baking tray on the rack directly below your cookie tray. Then bake as normal. You do not need to rotate the cookie tray at all for the first half of the bake. At the halfway point, you can do a gentle half-turn if you still notice uneven browning. But the bottom tray does most of the heavy lifting.
I have used this technique for all my delicate cookies over the past year, and it works beautifully. The extra tray does not affect the top browning significantly, but it significantly reduces the direct radiant heat hitting the bottom of the cookies. The result is a soft, evenly baked cookie without any burnt bottoms.
Let me clarify one thing though. This technique works best if you keep the bottom tray clean. A dirty tray with baked-on grease will smoke and smell bad. I always keep one dedicated aluminum tray just for this purpose, and I wipe it clean before each use.
Now, let me step back for a moment and talk about something that might seem unrelated but is actually super important. The type and color of your baking tray plays a massive role in whether you get burnt cookie bottoms in the first place.
Choosing the Right Baking Tray to Reduce Hotspots
I was guilty of this too. I used dark nonstick baking trays for everything because they were affordable and easy to clean. But dark trays absorb more radiant heat. That means they get hotter on the bottom and transfer that heat directly to your cookie dough. This is a huge cause of burnt cookie bottoms, even when your oven has very mild hotspots.
The 2025 Baking Equipment Guide from the American Culinary Institute recommends light-colored aluminum trays for cookies. These trays reflect heat instead of absorbing it. This reduces the differential between the top and bottom of the tray, which means your cookies bake more evenly.
I switched from dark nonstick trays to light-colored aluminum trays about three years ago. The difference was instant. My cookie bottoms went from consistently burnt to perfectly golden with no other changes to my baking process. I cannot overstate how important this is.
If you have already bought dark trays and do not want to spend money on new ones, I have a workaround for you. Line your dark tray with a light-colored silicone baking mat. The mat acts as a barrier between the tray and the cookie dough, reducing the direct heat transfer. I have tested this, and it does make a noticeable difference, although a light aluminum tray still works better.
Another thing to consider is tray thickness. Thin trays heat up faster and transfer heat more aggressively. I used to use these really thin dollar-store trays, and they were the absolute worst for burnt bottoms. A thicker gauge aluminum tray takes longer to heat up, but it distributes heat more evenly across its surface. I recommend spending a little extra for a commercial-grade aluminum tray if you bake frequently.
Okay, now lets talk about oven position because that plays a much bigger role than most people realize.
The Center Rack Myth and the Best Rack Position for Cookies
I need to clear up a common misconception here. Everyone says you should bake cookies on the center rack. I used to repeat that advice too. But after years of testing, I have found that the center rack is not always the best choice for preventing burnt bottoms.
Here is why. In most home ovens, the bottom heating element is positioned near the floor of the oven cavity. The center rack is closer to that element than the top rack. This means the center rack position receives more direct radiant heat on the underside of the tray, which contributes to burnt cookie bottoms.
I have found that baking on the upper-middle rack, which is the second rack from the top, gives better results for most cookies. This position is far enough from the bottom element to reduce direct radiant heat, but still close enough to the top of the oven to get proper browning on top.
Let me be clear about one scenario though. If you are only baking one tray of cookies and your oven does not have severe hotspots, the upper-middle rack is my recommendation. I have consistently gotten the most even results there. The center rack still works, but you are more likely to see slightly darker bottoms.
Now, if you are baking two trays at once, the upper rack position is not ideal because the lower tray will still be near the bottom element. That is why I highly recommend using the two-tray rotation pattern I mentioned earlier. You will have one tray on the upper-middle rack and one on the lower-middle rack, and you will swap them at the halfway point. This balances out the heat exposure.
I also want to talk about preheating because this is where a lot of people go wrong.
Why Proper Preheating Reduces Burnt Cookie Bottoms
I used to rush preheating all the time. I would wait for the oven to ding to signal it was ready, then I would instantly put the tray in. But the oven indicator does not mean the interior is fully heated. It means the air temperature has reached the set point. The oven walls, the racks, and the air all need time to stabilize.
This is especially important for managing hotspots. If the oven walls are still heating up when you put the tray in, the temperature can surge above the set point for a few minutes. That surge hits the bottom of your tray directly and increases the chance of burnt cookie bottoms.
My recommendation is to preheat your oven for a full 15 minutes after the indicator goes off. Yes, fifteen extra minutes feels like forever when you just want cookies. But I promise you, it is worth it. I have done side-by-side tests, and the cookies from the fully preheated oven had significantly more even bottoms compared to the cookies from the barely preheated oven.
A quick side note here. If your oven uses a fan-only convection heating mode, the heat distribution is much more even than conventional mode. But the fan can also blow air directly onto the tops of cookies, which can cause them to brown too quickly on the surface. I usually bake cookies in conventional mode so I have more control over bottom browning.
Now let me walk you through my exact step-by-step baking process for perfectly even cookies, using all the techniques I just described.
My Complete Step-by-Step Process for Even Cookie Baking
I am going to give you my exact routine. This is what I do every time I bake cookies, and it produces consistent results batch after batch. I have refined this over years of testing, and I am confident it will work for you too.
First, I preheat my oven to the recipe temperature. Usually that is 350 degrees Fahrenheit. I set a timer for 15 minutes after the preheat indicator goes off. I use this time to prepare my baking trays. I line them with parchment paper or a silicone baking mat.
Second, I position one oven rack in the upper-middle position and one in the lower-middle position. I always make sure both racks are fully level. A tilted tray is a nightmare for even baking.
Third, I scoop my cookie dough onto the tray, making sure all cookies are roughly the same size. Irregular cookie sizes bake at different rates, and that messes with your rotation timing. I use a cookie scoop for consistency every single time.
Fourth, I place the tray in the oven. I position it so it is centered between the left and right walls. I do not push it all the way to the back because that places the cookies right in the heat zone of the back wall. I leave about a two-inch gap between the back edge of the tray and the oven wall.
Fifth, I set my timer for the first rotation interval. For a 14-minute bake, I set it for 7 minutes if I am using the half-turn method. If I am baking two trays, I set it for about 6 minutes because the swap takes extra time and I want to make sure both trays get enough time after the swap.
Sixth, I execute the rotation or swap as quickly as possible. I want the oven door open for no more than 5 seconds. I pull the tray out, rotate it, and push it back in. For the two-tray swap, I pull one tray out, place it on the counter briefly, pull the second tray out, rotate it, and place it on the rack. Then I rotate the first tray and place it on the other rack. It sounds complicated, but after a few times, you will get it down to under 15 seconds.
Seventh, after baking, I pull the tray out and place it on a wire cooling rack. I let the cookies rest on the tray for two minutes before transferring them to the cooling rack. This helps them set properly. But I do not leave them on the hot tray for too long because the residual heat can continue to darken the bottoms.
I want to note that this process takes a bit of practice. The first time you do a two-tray swap, you might fumble a little. That is okay. Give yourself a few batches to get comfortable with it. Once you have the rhythm, it becomes second nature.
Now, let me cover an important topic that combines both temperature and technique.
The Role of Oven Calibration in Eliminating Hotspots
Here is something that surprised me when I first found out. Many home ovens are off by 25 to 50 degrees Fahrenheit from their display setting. The 2024 report from the Home Appliance Manufacturers Association found that nearly one-third of self-reported ovens were miscalibrated.
If your oven runs hot, the radiant heat from the bottom element is more intense. That increases the risk of burnt cookie bottoms even if you rotate your trays perfectly. On the flip side, if your oven runs cold, you will be baking longer, which also increases the total heat exposure to the bottoms.
The solution is to calibrate your oven. Most modern ovens have a calibration feature in the settings menu. You can adjust the offset in 10-degree increments. But before you touch the calibration settings, you need to know your actual temperature offset.
I recommend buying a good oven thermometer. Not one of those cheap dial thermometers, but a digital probe type. Place it on the center rack, set your oven to 350 degrees, and wait 20 minutes. Record the actual temperature. Do this a few times on different days to get a reliable average.
In my case, my oven ran about 15 degrees hot. So I adjusted the calibration offset by negative 15 degrees. That single change reduced my burnt cookie bottoms significantly. Combined with proper rotation, I have not had a burnt bottom in over a year.
I know this seems like a lot of steps. But each one is simple and fast. You do not need to overthink it. Start with one change at a time. Try the half-turn rotation first. Add the tray material change next. Then recalibrate your oven. You will see incremental improvements with each change.
Now let us address a few edge cases and special situations people often ask me about.
Why Some Cookies Still Burn Even With Perfect Rotation
I get asked this a lot. Someone will follow every rotation tip perfectly and still end up with cookie bottoms that are darker than they want. If your rotation technique is solid and your tray is light-colored, the culprit might be something else entirely.
One possibility is the sugar content and dough consistency. High-sugar doughs caramelize faster on the bottom because sugar melts and browns quickly when it comes into contact with a hot surface. If you are baking a very sugary dough, the bottoms will naturally brown faster than lower-sugar doughs. To fix this, you can lower your oven temperature by 25 degrees and extend the bake time slightly. This gives the cookies more time to bake through without over-browning the bottoms.
Another culprit is using cold dough straight from the refrigerator. When cold dough hits a hot tray, the bottom warms up faster than the center. This creates a temperature gradient that leads to dome-shaped cookies with dark bottoms. I always let my dough rest at room temperature for 20 to 30 minutes before baking unless I am going for a thicker cookie that specifically needs cold dough to hold its shape.
I also want to mention moisture content. If your dough has high moisture content from wet ingredients like applesauce or mashed bananas, it releases moisture during baking. This moisture evaporates and can cause the cookies to spread more. Thinner cookies are more prone to burnt bottoms because they bake through faster. I add a little extra flour to compensate when I use high-moisture ingredients.
One last edge case is an old oven with a faulty heating element. If your element glows unevenly, with some parts brighter than others, you have an element issue. No rotation pattern will fix that. You need to replace the heating element or call a professional. I have seen this in my own friend’s oven, and it was a simple replacement that cost about $60 and took 20 minutes.
Common Mistakes That Lead to Burnt Cookie Bottoms
Let me wrap up with a list of the most common mistakes I see people make. I have made every single one of these mistakes myself, so I am speaking from experience here.
Mistake number one is opening the oven door too frequently. Every time you open the door, heat escapes and the oven temperature fluctuates. This causes the heating element to cycle on more aggressively to bring the temperature back up. That surge of radiant heat hits the tray bottom and increases the chance of burning. I only open the oven once or maybe twice during the entire bake to rotate the tray.
Mistake number two is using a tray that is too large for the oven. If the tray touches the oven walls, it obstructs airflow around the tray and creates serious heat accumulation on the edges. I always buy trays that leave at least one inch of clearance on all sides.
Mistake number three is ignoring the hottest part of the oven. I have already mentioned this, but it deserves repeating. The back of the oven runs hotter than the front. So position your tray a little closer to the front of the oven if you want to reduce direct heat on the tray rear. The two-inch gap I mentioned earlier is the sweet spot.
Mistake number four is overbaking by even one or two minutes. The last minute of baking makes a massive difference in the bottom color. I use a timer and set it for the minimum recommended baking time. I check the cookies and decide if they need more time. Most of the time, they are done at the minimum time, and I avoid the dark bottoms that come from overbaking.
Alright, before I finish up, I want to share some frequently asked questions that I always seem to get from readers.
How often should I rotate baking trays to eliminate oven hotspots?
For most cookies with a total bake time of 12 to 15 minutes, I rotate once at the halfway point using a 180-degree turn. If your oven has severe hotspots, rotate every three to four minutes using a 90-degree turn. Delicate cookies benefit from a second tray placed underneath instead of multiple rotations. The key is to match your rotation frequency to the severity of your oven’s temperature variation. Test with a batch of plain sugar cookies, and observe the color differences to decide if you need more frequent rotation.
What is the best way to prevent cookie bottoms from burning on the last tray of a batch?
The last tray in a batch is the most likely to burn. The oven retains extra heat from baking the previous trays. I always reduce the oven temperature by 10 degrees Fahrenheit for the third and fourth trays. I also reduce the bake time by one minute and rely on the residual heat to finish baking. Additionally, make sure the tray has fully cooled to room temperature before scooping new dough onto it. A hot tray will start baking the dough immediately and burn the bottoms.
Can I use the cookie dough refrigeration method to reduce burnt bottoms?
Yes. Chilling cookie dough solidifies the fats, which means the cookies spread less and bake more evenly. The dough does not flatten against the hot tray as aggressively, reducing bottom surface contact with the hot metal. I chill my dough for at least 30 minutes, which also improves flavor and texture. Just remember to let the dough rest for a few minutes at room temperature before scooping, or you might crack the tops.
Turning the trays is genuinely one of those small things that makes a huge difference in the kitchen. I still remember the first batch of cookies I pulled out after figuring out the rotation pattern. The bottoms were perfectly golden, all the way across the tray. I honestly felt a little silly for not realizing this earlier. But we all start somewhere, right?
I hope this guide gives you everything you need to fix your burnt cookie bottoms for good. Start with just one change. Maybe that is switching to a light-colored tray. Or maybe that is adding the upper-middle rack position to your routine. Whatever you choose, give it a few batches before you judge the results. Baking is all about small adjustments, and each one brings you closer to cookie perfection.
The hotter spots are not your enemy. They are just part of the baking process. Once you learn how to work with them, you will wonder why you ever struggled in the first place. Grab your timer, pick your rotation pattern, and bake the best batch of cookies you have ever made. I promise you will get there.
⚠️ Warning: This article contains general baking information. Cookies are high in sugar. People with high blood sugar or diabetes should consume them with caution.





