 bluename
 I’ve frosted more cakes than I can count, and honestly, the final surface is what separates a homemade treat from a professional showpiece. Many people ask me about that elusive mirror-smooth finish. It’s not about magic, and it’s definitely not about expensive tools. The real secret is mastering the slow, gentle motion that lets the buttercream settle naturally.
I remember my first attempt at a flawless cake. I used a metal scraper, pressed way too hard, and ended up with crumb-filled streaks that made me want to cry. It took me years of trial and error to realize that pressure is the enemy. You don’t force the buttercream into place. You coax it.
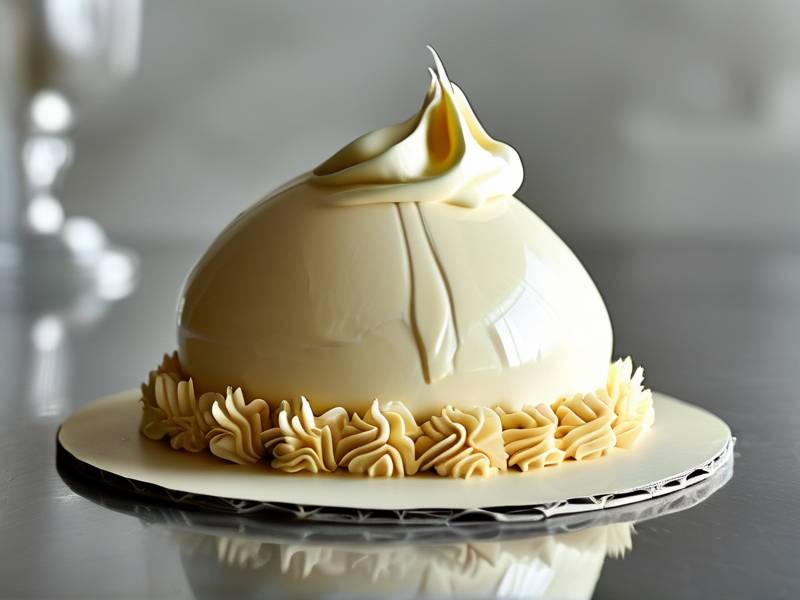
So, how to smooth buttercream surface slow gentle motion mirror smooth finish? It’s a technique built on patience, the right consistency, and a steady hand. In this guide, I’ll walk you through my exact process, including the common pitfalls I’ve learned to avoid.
Let’s get into it.
Understanding the right buttercream consistency for a flawless surface
Before you even pick up a spatula, you need to check your buttercream texture. This is where most people go wrong. If your frosting is too stiff, you’ll tug at the cake crumbs. If it’s too loose, you’ll see air bubbles and sagging.
For a mirror-smooth result, I aim for a consistency that’s soft but not runny. Think of room-temperature butter that yields slightly when pressed. Your spatula should glide through the frosting without resistance, but the frosting shouldn’t melt or lose its shape.
The importance of temperature in achieving a smooth buttercream finish
Temperature is everything. I’ve learned this the hard way. When the kitchen is too warm, the buttercream becomes slick and greasy. When it’s too cold, it becomes lumpy and hard to spread.
I usually check the ambient temperature first. If it’s above 75°F (24°C), I’ll work in short bursts and frequently chill my cake. Below 68°F (20°C), I might need to warm my spatula slightly to help the frosting glide.
A quick trick I use is the "finger test." Touch the surface of your frosted cake lightly. If your finger leaves a slight indentation but doesn’t stick, you’re in the perfect zone. If it sticks, it’s too warm. If it leaves no mark, it’s too cold.
Why stiff or lumpy frosting ruins your smooth buttercream surface finish
Stiff frosting is a nightmare. It creates drag, which leads to tears and crumb contamination. Lumpy frosting, on the other hand, creates ridges that you’ll chase around the cake forever.
I always pass my buttercream through a sieve after making it. That removes any unincorporated sugar or butter lumps. It takes an extra five minutes, but the result is worth it. A smooth base is non-negotiable if you want that mirror effect.
The core technique for a smooth buttercream surface
Now, let’s talk about the actual motion. The phrase "how to smooth buttercream surface slow gentle motion mirror smooth finish" sounds like a mouthful, but the principle is simple.
You’re not scraping the frosting. You’re barely touching it, letting the weight of the tool do the work. The speed matters as much as the pressure. Fast movements create friction, which melts the buttercream. Slow movements give the frosting time to settle into an even layer.
Perfecting the slow and gentle motion for a mirror-like buttercream finish
I start with the sides of the cake. I hold my bench scraper vertically, with the edge pressed lightly against the frosting. I then rotate the turntable slowly, maybe one full rotation every five to seven seconds.
Here’s the key detail: I hold the scraper steady. I don’t move it around the cake. The cake moves, and the scraper stays put. This feels counterintuitive at first, but it’s how you get a perfectly uniform surface without any wobble lines.
I apply so little pressure that I’m almost just hovering the scraper against the frosting. If I see a thin film of buttercream building up on the edge, I know I’m doing it right. That film is the excess being skimmed off.
Using a bench scraper for consistent pressure and smooth sides
A good bench scraper makes a world of difference. I prefer one with a straight, sharp edge and a comfortable handle. You want a tool that’s taller than your cake, so you can cover the entire side in one pass.
When you’re working, keep your shoulder relaxed. Tension in your arm translates to jerky movements. I take a breath, plant my feet, and slowly rotate the turntable with my other hand. Your eyes should focus on the top edge of the scraper to ensure it’s perfectly vertical.
One mistake I see often: people tilt the scraper slightly. That creates a beveled edge at the top of the cake. You won’t notice it until you add the final top coat, and then it’s a pain to fix.
How to fix small air pockets while smoothing buttercream frosting
Air bubbles are a fact of life. No matter how careful you are, a few will appear. Resisting the urge to pop them with your finger is hard, but you must.
When I see a bubble, I stop my rotation. I use a chilled, dry finger to gently press down on the bubble, moving it toward the edge of the cake. The pressure forces the air out, and the frosting fills the gap.
Then, I continue with my slow rotation. If I’ve done it right, the spot disappears completely. If it leaves a tiny indent, I let it be. Chase it too much, and you’ll carve a bigger hole.
The final pass for a mirror smooth buttercream surface
The final pass is about refinement. Once your cake is mostly smooth, you switch to a different approach. This is where the mirror finish comes to life.
Heating your tools for the last buttercream smoothing stage
I heat my spatula and scraper. Not hot, just warm. I run them under warm tap water, dry them thoroughly, and then give them a gentle tap on the counter. The residual heat melts the very top layer of the buttercream, which then re-hardens into a glass-like surface.
You have to dry the tool completely. Any water droplets will ruin the frosting instantly. I keep a clean, lint-free towel nearby and wipe the tool every time before I touch the cake.
The long steady stroke for a flawless buttercream cake finish
For the top, I use a different technique. I start from the edge and pull the warm spatula toward the center in one long, unbroken stroke. I don’t stop halfway. I don’t lift the spatula until I reach the middle.
This takes practice. The first time, I lifted too early and left a strange swirl mark. But once you get the hang of it, it’s a gorgeous way to finish the top. It leaves a barely-there texture that catches the light beautifully.
For the sides, I do one final rotation with the warm scraper, using even less pressure than before. The frosting should look wet and shiny as the scraper passes. That’s the "mirror" moment.
Essential tools and materials for a flawless buttercream finish
You don’t need a hundred gadgets, but the right tools matter. Here’s what I actually use in my kitchen.
- A rotating turntable (invest in a heavy one, it’s worth it)
- A stainless steel bench scraper (the straight edge is crucial)
- An offset spatula for the top surface
- A large piping bag for the initial crumb coat
- A clean, dry kitchen towel
- A bowl of warm water for tool heating
My favorite tools for a mirror smooth buttercream finish
I’ve tried everything from plastic scrapers to acrylic discs. Honestly, the cheap metal ones work the best. They heat up quickly and hold that warmth just enough to get the effect.
For the turntable, I use a heavy metal one. The lightweight plastic ones wobble, and that wobble shows up on the cake. It’s impossible to get a smooth surface on a wobbly turntable.
Using a cake turntable to keep your motion smooth and steady
The turntable is the unsung hero. A good one spins freely with zero resistance. That lets you maintain a constant speed without jerking.
I recommend doing a few practice spins before you even touch your cake. Get a feel for the speed. You want it to be slow, almost meditative. If you find yourself rushing, take a breath and slow down.
Common mistakes that ruin your smooth buttercream finish
We all make mistakes. I still do, occasionally. But knowing what to look for saves you time and frustration.
Overworking the buttercream when trying to get a smooth surface
This is my biggest sin. I get impatient, and I keep scraping long after I should stop. That creates a dry, matte texture that’s the opposite of mirror-smooth.
Know when to walk away. If the surface looks good at arm’s length, you’re done. Any further touching will just degrade the result.
Pressing too hard and other common buttercream smoothing errors
Hard pressing creates drag. Drag creates crumbs. Crumbs are the enemy of a smooth finish. If you’re pressing hard enough to flatten the frosting, you’re ruining the entire concept.
Another issue: skipping the crumb coat. That’s the thin layer of frosting you apply first to trap crumbs. Without it, your final layer will be speckled with brown bits. It’s tedious, but it’s mandatory.
Frequently Asked Questions about achieving a smooth buttercream surface
Why does my buttercream have a grainy texture?
Graininess comes from sugar that hasn’t dissolved. Your butter was too cold, or you didn’t beat it long enough. To fix it, warm a small portion of your buttercream in the microwave for five seconds, then whip it back in.
Can I use a wet paper towel to smooth buttercream?
I wouldn’t recommend it. Water creates steam and melts the frosting unevenly. If you use a paper towel, make sure it’s just warm and completely dry. A damp towel will leave streaks.
How long should I chill the cake before the final smooth pass?
I chill the cake for at least 20 minutes after the crumb coat. For the final pass, I actually prefer a slightly cool cake, not a frozen one. Too cold, and the warm scraper will instantly harden the frosting, creating a dull finish.
My final thoughts on getting that mirror smooth buttercream surface
If you take one thing from this, let it be this: slow is smooth, and smooth is fast. We all want to rush to the finish line, but that’s the exact opposite of what this technique requires. The mirror finish comes from patience, a light touch, and a willingness to let the buttercream shine.
I’ve spent years working on how to smooth buttercream surface slow gentle motion mirror smooth finish. It’s a skill you build, not a trick you learn overnight. My best advice is to practice on a styrofoam dummy cake first. It costs almost nothing and saves you the guilt of ruining a real bake.
Start with a well-crumb-coated cake. Keep your scraper steady and warm. Move the cake, not the scraper. And when you feel the urge to press harder, don’t. Just breathe and keep rotating.
You’ll get there. I promise.
⚠️ Warning: This cake is high in sugar. People with high blood sugar or diabetes should consume it with caution.





