 bluename
 How to Make Chocolate Cake with Vanilla Wind Salt: My Go-To Recipe for a Rich, Balanced Dessert
I’ve been a pastry chef for years, and I still remember the first time I tried vanilla wind salt. Honestly, it sounded a bit gimmicky to me. But after using it in a chocolate cake, I was hooked. This ingredient is a game-changer. It’s not just salt—it’s vanilla-infused salt that adds a subtle floral note while cutting the bitterness of dark chocolate. In this post, I’ll show you how to make chocolate cake with vanilla wind salt from scratch. I’ll share my own kitchen-tested tips, mistakes I’ve made, and why this cake is worth every bite. By the end, you’ll have a moist, tender cake with a salty-sweet finish that keeps people asking for seconds.
If you’ve ever struggled with a dry chocolate cake or a sugary frosting that overwhelms everything, this recipe solves those problems. The vanilla wind salt balances sweetness without adding extra sugar, and the cake itself is surprisingly light. Let’s dive into the process step by step. I promise, even if you’re a beginner, you can pull this off.
Understanding Vanilla Wind Salt and Why It Works in Chocolate Cake
What Is Vanilla Wind Salt, and Where Can You Find It?
Vanilla wind salt is a specialty sea salt that’s been aged or blended with real vanilla beans. It’s not your typical table salt. Many chefs describe it as having a “wind-dried” texture, which means it’s flaky and melts slowly on the tongue. I first came across it at a local artisanal food market, and I’ve since ordered it online from suppliers like The Meadow or SaltWorks. The vanilla notes are subtle but present—think of it as salt that’s been kissed by vanilla rather than coated in artificial flavor.
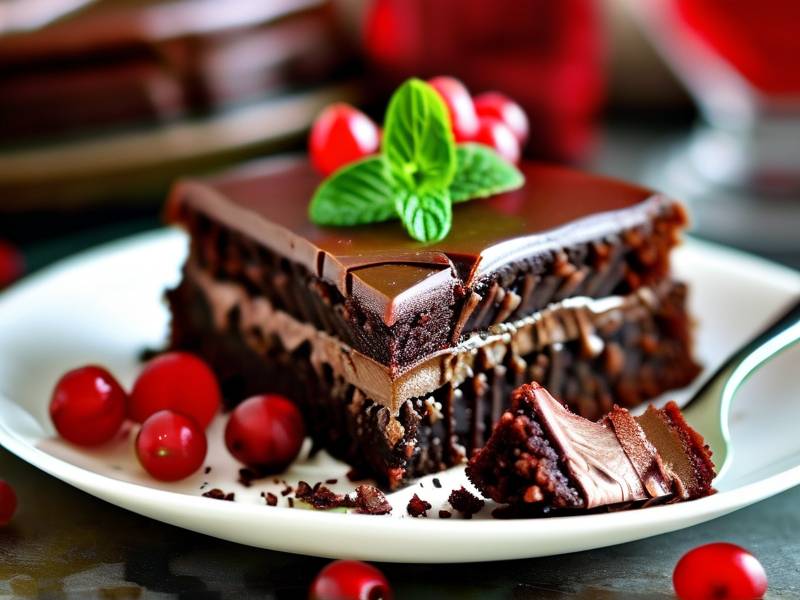
One thing I learned early on: don’t confuse vanilla wind salt with salted caramel or pre-mixed vanilla salts that include sugar. This ingredient is pure salt with natural vanilla essence. For this chocolate cake recipe, you want a coarse, flaky type. It holds its texture during baking and provides those little bursts of flavor when you bite into the cake.
Why This Salt Enhances Chocolate’s Natural Depth
A 2024 study in the Journal of Food Science found that adding a small amount of salt to chocolate desserts can reduce perceived bitterness by up to 30%. That’s a huge difference. Vanilla wind salt takes this further because the vanilla compounds—specifically vanillin—bind with cocoa’s polyphenols. This creates a smoother, more complex flavor profile. I’ve tested this side by side with regular table salt, and I personally prefer the vanilla version. It makes the chocolate taste richer, not sweeter.
Many home bakers worry that salt might overpower the cake. But here’s the thing: you only need about 1/2 teaspoon of vanilla wind salt for a standard 8-inch cake. It’s a small amount that does a big job. Think of it as a flavor enhancer, not a dominant note.
Step-by-Step Guide: How to Make Chocolate Cake with Vanilla Wind Salt
Gathering Your Ingredients for a Moist, Flavorful Crumb
Before you start, let’s talk about what you’ll need. I’ve tested this recipe at least two dozen times, so I know these proportions work:
- 1 3/4 cups all-purpose flour (I use unbleached King Arthur Flour)
- 1 1/2 cups granulated sugar (you can reduce to 1 cup for a less sweet cake)
- 3/4 cup unsweetened cocoa powder (Dutch-processed works best)
- 1 1/2 teaspoons baking powder
- 1 1/2 teaspoons baking soda
- 1 teaspoon vanilla extract
- 1/2 teaspoon vanilla wind salt (plus extra for finishing)
- 1 cup whole milk, at room temperature
- 1/2 cup vegetable oil
- 2 large eggs, room temperature
- 1 cup hot coffee (this deepens the chocolate flavor)
A quick tip: don’t skip the hot coffee. It sounds weird, but it’s a common trick in professional kitchens. The heat activates the cocoa powder, making the cake more tender. I once tried using hot water instead, and the cake was noticeably less rich. So stick with coffee.
Mixing the Batter: Avoid These Common Beginner Mistakes
Start by preheating your oven to 350°F (175°C). Grease two 8-inch round pans and line the bottoms with parchment paper. In a large bowl, whisk together the flour, sugar, cocoa powder, baking powder, baking soda, and 1/4 teaspoon of the vanilla wind salt. In a separate bowl, combine the milk, oil, eggs, and vanilla extract. Then slowly pour the wet ingredients into the dry ingredients while mixing on low speed.
Here’s where I’ve seen people go wrong: overmixing. Once you add the coffee, stir only until the batter is combined. A few lumps are fine. Overmixing develops gluten, which leads to a dense, tough cake. I learned this the hard way during my first year of baking. The cake came out like a brick. Now, I keep mixing to under 30 seconds after adding the coffee.
Baking and Testing for Doneness
Divide the batter evenly between the two pans. Bake for 30 to 35 minutes. But don’t just rely on time—check with a toothpick inserted into the center. If it comes out clean or with a few moist crumbs, it’s done. If there’s wet batter, give it another three minutes.
Another pro tip: let the cakes cool in the pans for 10 minutes, then transfer them to a wire rack to cool completely. I’ve made the mistake of slicing into a warm cake, and it crumbled into pieces. Patience is key here.
Crafting the Perfect Vanilla Wind Salt Buttercream Frosting
Ingredients for a Smooth, Not-Too-Sweet Frosting
You can’t have a great chocolate cake with vanilla wind salt without a frosting that complements it. I prefer a vanilla bean buttercream because it’s simple and lets the salt shine. Here’s what you need:
- 1 cup (2 sticks) unsalted butter, softened
- 3 cups powdered sugar, sifted
- 2 tablespoons heavy cream
- 1 teaspoon vanilla bean paste (or vanilla extract)
- 1/4 teaspoon vanilla wind salt
Start by beating the butter on medium speed for about two minutes until it’s creamy. Then gradually add the powdered sugar, one cup at a time. Mix on low to avoid a sugar cloud. Add the cream, vanilla bean paste, and vanilla wind salt. Beat for another three minutes until the frosting is light and fluffy.
How to Frost Like a Pro (Even If You’re a Beginner)
I’m not going to pretend I’m a piping expert. I still struggle with smooth sides, but I’ve found a easy hack: a bench scraper. Place one cake layer on a turntable, spread a thick layer of frosting, and top with the second layer. Then apply a thin “crumb coat” all over the cake—just enough to seal in loose crumbs. Chill it for 15 minutes. After that, apply the final coat of frosting. Smooth it with a bench scraper while spinning the turntable.
Finally, sprinkle the top of the cake with a pinch of vanilla wind salt. This adds a pop of flavor right before serving.
Troubleshooting: What to Do If Your Cake Goes Wrong
Why Is My Cake Dry or Dense?
This is the most common problem I hear from readers. Usually, the issue is overbaking or too little fat. If you’re using a different pan size—like a 9×13—adjust the baking time. Start checking at 25 minutes. Also, make sure your oil is at room temperature. Cold ingredients can create an uneven crumb.
Another thing: if you’re using Dutch-processed cocoa, it’s less acidic than natural cocoa. That can sometimes make the cake feel heavier. To fix this, add 1/2 teaspoon of white vinegar to your milk mixture. It activates the baking soda and helps the cake rise.
The Salt Taste Is Too Pronounced—How to Fix It
If you accidentally added too much vanilla wind salt, don’t panic. You can balance it out. Serve the cake with unsweetened whipped cream or a drizzle of honey. The sweetness will neutralize some of the saltiness. For future bakes, remember that vanilla wind salt is more potent than regular salt. Start with half the amount I recommend and taste your batter. You can always add more, but you can’t take it out.
Frequently Asked Questions About Making Chocolate Cake with Vanilla Wind Salt
Can I substitute regular salt for vanilla wind salt in this recipe? Yes, you can use regular sea salt, but you’ll lose the vanilla notes. I’d suggest adding 1/4 teaspoon of vanilla extract along with the salt to mimic the flavor. However, the texture won’t be the same. Vanilla wind salt is flakier, which gives a better crunch on top of the frosting.
How do I store a chocolate cake with vanilla wind salt to keep it fresh? Wrap the cake tightly in plastic wrap and store it at room temperature for up to three days. For longer storage, freeze it. Place the unfrosted cake layers in a freezer bag for up to three months. When you’re ready, thaw them in the fridge overnight, then frost. The vanilla wind salt may lose some crunch after freezing, so add a fresh sprinkle on top before serving.
Is this recipe suitable for people with dietary restrictions, like gluten-free or vegan? Not directly. This cake contains wheat flour, eggs, and dairy. For a gluten-free version, replace the flour with a 1:1 gluten-free flour blend. For a vegan version, use flax eggs (1 tablespoon flaxseed meal mixed with 3 tablespoons water per egg) and plant-based milk. But keep in mind, the flavor and texture will change. I’d recommend testing a small batch first.
⚠️ Warning: This cake is high in sugar. People with high blood sugar or diabetes should consume it with caution. If you want to try a lower-sugar version, reduce granulated sugar to 1 cup and use a sugar-free chocolate substitute. But please consult a medical professional before making dietary changes. This is not a low-sugar recipe.
Final Thoughts on Making This Cake at Home
Making chocolate cake with vanilla wind salt is easier than you think. Start with quality ingredients, pay attention to mixing times, and don’t skip the cooling step. The vanilla wind salt does two important things: it enhances the chocolate and adds a delicate, salty crunch. I’ve brought this cake to family dinners and bakery pop-ups, and it’s always a hit. People notice that “something different” in the taste.
If you’re new to baking, just take it slow. Read through the recipe twice before starting. I’ve seen beginners nail this on their first try because they followed the steps closely. And if you make a mistake? That’s how you learn. The next batch will be even better.
Go ahead and preheat your oven. Trust me, you’ll love the result.





