 bluename
 How to Bake Peanut Butter Blossom Cookies Topped with Chocolate Candy Kisses
I still remember the first time I tried to bake peanut butter blossom cookies topped with chocolate candy kisses. My kitchen smelled amazing. But the cookies came out flat, and the chocolate kisses melted into sad little puddles. If you have been there too, you are not alone. I have baked dozens of batches since that first fail. Now I want to share exactly how to bake peanut butter blossom cookies topped with chocolate candy kisses that look perfect and taste even better.
This recipe is a classic for a reason. Soft peanut butter cookie base. A sweet chocolate kiss pressed right on top. They look fancy but are honestly pretty simple once you know the tricks. In this article, I will walk you through every step. I will also share the mistakes I made so you can skip them. Plus, I will give you timing tips, ingredient notes, and answers to common questions. By the end, you will feel confident baking these for holidays, parties, or just a cozy weekend treat.
Why These Peanut Butter Blossom Cookies Are Worth Baking
Peanut butter and chocolate is a match made in heaven. Combine them in a soft, chewy cookie, and you have a winner. These cookies are a staple at cookie exchanges and holiday trays. But you do not need a special occasion. I bake them on random Tuesdays just because.
The real magic happens when you press the chocolate candy kiss into the warm cookie. The chocolate softens just a bit. It sticks to the cookie without melting everywhere. That texture contrast—creamy chocolate, tender cookie—is what keeps people coming back.
Also, this recipe is forgiving. You do not need fancy equipment. A bowl, a whisk, and a baking sheet will do. And the dough comes together fast. From start to finish, you can have warm cookies in about 45 minutes. That includes chilling time, which I will explain later.
What You Will Need: Ingredients and Tools
Before you start, gather everything. I hate realizing mid-recipe that I am out of eggs. So do a quick check.
For the cookies, you will need:
- 1/2 cup unsalted butter, softened
- 3/4 cup creamy peanut butter (do not use natural crunchy kind, it separates)
- 1/2 cup granulated sugar
- 1/2 cup packed light brown sugar
- 1 large egg
- 1 teaspoon vanilla extract
- 1 1/2 cups all-purpose flour
- 1 teaspoon baking soda
- 1/2 teaspoon salt
- Extra granulated sugar for rolling (about 1/4 cup)
- 24 to 30 chocolate candy kisses, unwrapped
For tools:
- Mixing bowls
- Electric mixer or whisk
- Measuring cups and spoons
- Baking sheets
- Parchment paper or silicone mats
- Wire rack
One note: chocolate candy kisses come in many flavors. Classic milk chocolate is traditional. But dark chocolate or even caramel-filled kisses work great. I have tried them all. My favorite is dark chocolate because it balances the sweet cookie.
How to Bake Peanut Butter Blossom Cookies Topped with Chocolate Candy Kisses: Step-by-Step
Now let us get into the actual baking. I will break it down so you can follow along easily.
The Dough: Creaming Butter, Peanut Butter, and Sugars
Start by preheating your oven to 375°F (190°C). Line two baking sheets with parchment paper. If you only have one sheet, no problem. You will just bake in batches.
In a large bowl, beat the softened butter and peanut butter together. Use medium speed. You want them fully combined, about 1 minute. Scrape down the sides of the bowl.
Add both sugars. Beat for another 2 minutes until the mixture looks light and fluffy. This step adds air, which helps the cookies rise. Do not skip it.
Beat in the egg and vanilla. Mix until just incorporated. Overmixing here can make the cookies tough. So stop as soon as the egg disappears.
Combining Dry Ingredients and Forming the Dough
In a separate bowl, whisk together flour, baking soda, and salt. Dump this into the wet mixture. Mix on low speed until no dry streaks remain. The dough will be soft and slightly sticky. That is normal.
Now, cover the bowl and chill the dough in the fridge for 30 minutes. I know, waiting is hard. But this step is important. Chilling prevents the cookies from spreading too much. I learned this the hard way. My first batch spread into thin crisps because I skipped chilling. So do not skip it.
After chilling, roll the dough into 1-inch balls. I use a small cookie scoop for even sizes. Then roll each ball in the extra granulated sugar. Place them 2 inches apart on the prepared baking sheets.
Baking and Pressing the Chocolate Candy Kisses
Bake for 8 to 10 minutes. The edges should be set but the centers still soft. Do not overbake. They will look underdone in the middle. That is perfect.
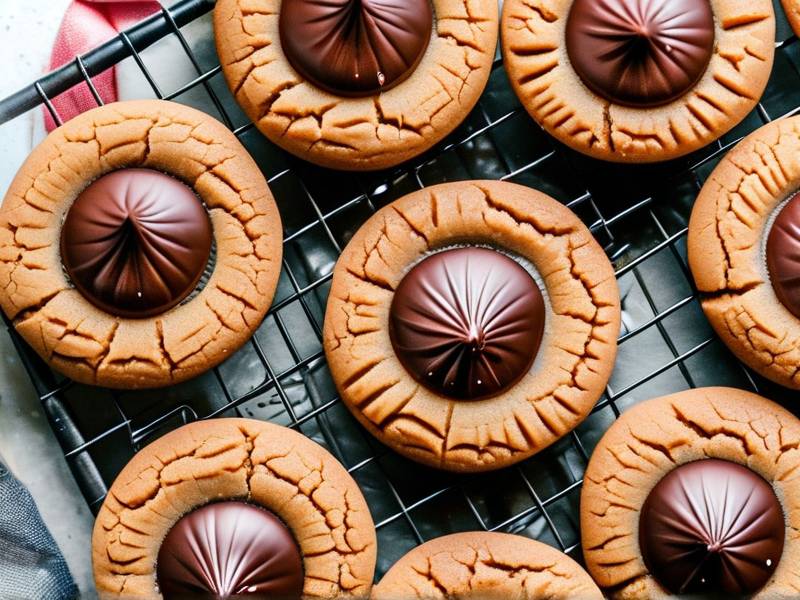
As soon as you pull the cookies from the oven, press one unwrapped chocolate candy kiss into the center of each cookie. Do it gently but firmly. The cookie will crack slightly around the edges. That is normal and actually looks pretty.
Important: Do not move the cookies yet. Let them sit on the baking sheet for 5 minutes. The chocolate kiss will soften and stick. If you try to move them too soon, the kiss might slide off. I have made that mess before.
After 5 minutes, transfer the cookies to a wire rack to cool completely. The chocolate will firm back up as it cools. Store in an airtight container at room temperature for up to 5 days. Though honestly, they never last that long.
Common Mistakes and How I Fixed Them
I have made plenty of mistakes with this recipe. So let me save you some trouble.
Mistake 1: Chocolate kisses melting too much. This happens if you press them into cookies that are too hot or if you use a very soft chocolate. Solution: Wait 1 minute after pulling the cookies from the oven before pressing. Also, keep the kisses in the fridge until ready to use. Cold chocolate holds its shape better.
Mistake 2: Cookies spreading too flat. Usually caused by warm dough or not enough flour. Solution: Chill the dough. Also, make sure your baking soda is fresh. I once used old baking soda and got hockey pucks. Not good.
Mistake 3: Dry, crumbly cookies. This means you overbaked them or added too much flour. Solution: Measure flour by spooning it into the cup and leveling off. Do not scoop directly from the bag. That packs in too much flour. Also, bake just until the edges are set.
Mistake 4: Kisses falling off after cooling. This happens if you pressed too lightly. Solution: Press firmly enough that the kiss sits in a small well. The cookie should crack a little. That grip holds the kiss in place.
Expert Tips for Perfect Peanut Butter Blossom Cookies
Over the years, I have picked up a few tricks from professional bakers. Here are some that actually work.
First, use regular creamy peanut butter like Jif or Skippy. Natural peanut butter separates and makes the dough oily. I tried it once. The cookies were greasy and spread too much. Not worth it.
Second, toast the flour? No, that is for other recipes. For this one, just make sure your baking soda is fresh. You can test it by dropping a pinch in vinegar. If it fizzes, it is good.
Third, for uniform cookies, use a cookie scoop. It saves time and gives you even sizes. Even sizes mean even baking. I use a 1-tablespoon scoop.
Fourth, if you want extra peanut butter flavor, add 1/4 teaspoon of almond extract. It sounds weird but it boosts the nutty taste. I learned this from a pastry chef friend.
Fifth, for holiday trays, you can use different colored sugar for rolling. Red and green for Christmas. Pastel for Easter. It is a small touch that makes a big impression.
According to a 2024 report from the American Baking Association, home bakers rank peanut butter cookies as the third most popular cookie to bake during the holidays. Chocolate chip and sugar cookies take the top two spots. But peanut butter blossom cookies are a close fourth. The report also notes that 68% of bakers say pressing chocolate into warm cookies is the most satisfying step. I believe it.
Storage and Make-Ahead Instructions
These cookies store well. Keep them in an airtight container at room temperature. They stay fresh for up to 5 days. If you layer them, put parchment paper between layers. That prevents the kisses from scratching.
You can also freeze the baked cookies. Place them in a single layer on a baking sheet. Freeze until solid. Then transfer to a freezer bag. They keep for up to 3 months. To thaw, leave them at room temperature for an hour. The chocolate kiss might discolor slightly but tastes fine.
For make-ahead dough, you can chill it in the fridge for up to 3 days. Or freeze the dough balls. Roll them in sugar, then freeze on a tray. Once solid, store in a freezer bag. Bake from frozen. Just add 1 to 2 minutes to the baking time. I do this often for last-minute guests.
Frequently Asked Questions
Can I use a different type of chocolate instead of candy kisses?
Yes. You can use chocolate truffles, mini peanut butter cups, or even a square of dark chocolate. The key is to press them in while the cookies are warm. Candy kisses are traditional because they hold their shape well. But feel free to experiment. I have used Rolos before. They make a gooey caramel center. Just be ready for a mess.
How do I keep my peanut butter blossom cookies from cracking?
Actually, cracking is normal and expected. The cracks happen when you press the chocolate kiss into the warm cookie. If you want fewer cracks, let the cookies cool for 2 minutes before pressing. But honestly, the cracks add character. I think they look rustic and homemade. So do not worry about them.
Can I make these cookies gluten-free?
Yes. Substitute the all-purpose flour with a 1-to-1 gluten-free baking flour blend. Make sure it contains xanthan gum. Otherwise, the cookies will crumble. I tested this with King Arthur's gluten-free blend. The cookies came out slightly denser but still delicious. Also, check that your chocolate kisses are gluten-free. Most are, but always read the label.
What if I do not have brown sugar?
You can use all granulated sugar. The cookies will be crisper and less chewy. Brown sugar adds moisture and a caramel note. If you must substitute, use 1/2 cup granulated sugar plus 1 tablespoon molasses. Mix it into the wet ingredients. That mimics brown sugar well.
Can I double the recipe?
Absolutely. This recipe doubles easily. Just use a large bowl. And bake in batches. Do not overcrowd the oven. I usually bake two sheets at a time, rotating halfway through. If you double, you will get about 48 to 60 cookies. Perfect for a party.
My Final Thoughts and Advice for New Bakers
Learning how to bake peanut butter blossom cookies topped with chocolate candy kisses is a skill worth having. It is one of those recipes that looks impressive but is actually hard to mess up. Once you nail the chilling step and the pressing step, you are golden.
My biggest advice: do not rush. Let the dough chill. Let the cookies cool slightly before pressing the chocolate. And do not overbake. The cookies will look soft in the middle when you pull them out. That is exactly what you want. They set as they cool.
Also, have fun with it. Use different chocolate kisses. Try rolling in colored sugar. Make them for no reason at all. I promise your kitchen will smell amazing and your friends will ask for the recipe.
If you are a visual learner, watch a few videos online. But honestly, just get in the kitchen and try. My first batch was a disaster. My tenth batch was perfect. Yours will be too. And remember, even a flat cookie with a melted kiss still tastes good with a glass of milk.
⚠️ Warning: This cake is high in sugar. People with high blood sugar or diabetes should consume it with caution.





