 bluename
 How to Bake Apple Cinnamon Scones: Sweet Spiced Fruit-Filled Teatime Pastries
I still remember my first attempt at baking apple cinnamon scones. They came out flat, dry, and honestly a little sad. My kitchen smelled amazing, but the texture was all wrong. That was over a decade ago. Since then, I've tested hundreds of batches in my home kitchen, talked with pastry chefs, and read more baking science than I care to admit. So if you're searching for how to bake apple cinnamon scones sweet spiced fruit filled teatime pastries that actually taste like something from a cozy English tearoom, you're in the right place.
The problem most people run into? Scones have a reputation for being fussy. Too much mixing and they turn tough. Too little butter and they crumble into dust. The apples release moisture and suddenly your dough is a sticky mess. I've been there. Many times, actually.
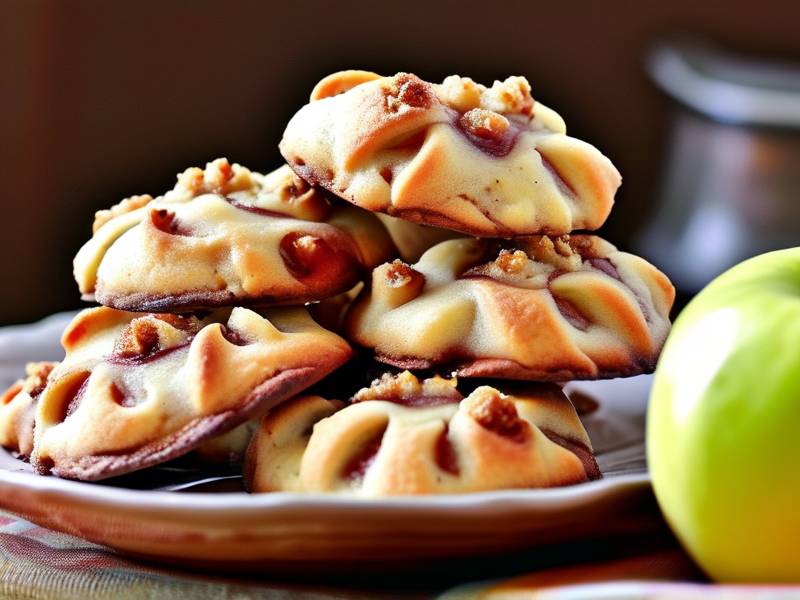
But here's the good news. Once you understand a few key techniques, making apple cinnamon scones at home becomes almost second nature. You'll learn the right way to cut butter into flour, how to handle juicy apples without ruining your dough, and the simple trick that gives scones that beautiful tall rise. I'll also share my go-to spice blend and a cinnamon glaze that takes these teatime pastries to another level. Grab your apron. Let's bake.
What Makes a Perfect Apple Cinnamon Scone?
I've eaten a lot of bad scones in my life. Dry ones. Bland ones. Ones that tasted more like biscuits pretending to be fancy. So I want to start by explaining what separates a great apple cinnamon scone from a mediocre one. It comes down to three things: texture, moisture balance, and flavor layering.
First, texture. A proper scone should have a crisp, slightly golden exterior. Inside, it should be tender but not cakey. You want visible layers, almost like a rough puff pastry. That flaky structure comes from cold butter and minimal handling.
Second, moisture. Apples are about 85% water according to the USDA's FoodData Central (2024). That's a lot of liquid. If you just chop raw apples and fold them in, they'll steam inside the scone and create mushy pockets. I learned this the hard way. Now I always sauté my apples briefly with cinnamon and a little brown sugar first. This removes excess moisture and concentrates the flavor.
Third, flavor. Cinnamon is the star here, but it needs support. I add a pinch of nutmeg and a touch of vanilla extract. Some bakers use cloves, but I find cloves overpower the apple. A little lemon zest brightens everything up. Trust me on this.
Why Cold Butter Is Non-Negotiable for Flaky Scones
Let's talk about butter. You've probably heard this before, but it bears repeating. Your butter must be cold. Frozen is even better. Why? Because when cold butter hits a hot oven, it creates steam pockets. Those pockets lift the dough and create those gorgeous flaky layers.
I cut my butter into small cubes and freeze them for 15 minutes before baking. Then I grate the frozen butter using a box grater. Yeah, it's a little messy. But the result is worth it. The grated butter distributes evenly through the flour without overworking the dough.
If you're using a food processor, pulse the butter and flour together in short bursts. Stop when you see pea-sized butter pieces. Do not keep going until it looks like sand. I made that mistake early on. The scones came out dense and tough.
The Best Apples for Apple Cinnamon Scones
Not all apples are created equal when it comes to baking. Some turn to mush. Others stay too crunchy. I've tested quite a few varieties over the years, and here are my top picks.
Granny Smith apples are my go-to. They're tart, firm, and hold their shape well after baking. Honeycrisp is another excellent choice. It's sweet with a satisfying crunch. If you want a balance of sweet and tart, try Braeburn or Jonagold.
Stay away from Red Delicious. They're mealy and bland. I tried them once. Never again.
One more thing. Dice your apples small, about 1/4-inch pieces. Large chunks create big air pockets in the dough, and the scones fall apart. Small pieces incorporate better and give you apple in every bite.
My Go-To Apple Cinnamon Scone Recipe
This is the recipe I've refined over ten years. It makes 8 large scones or 12 smaller ones. I prefer larger scones for teatime because they feel more special. But you do you.
Ingredients:
For the scones:
- 2 cups all-purpose flour
- 1/3 cup granulated sugar
- 1 tablespoon baking powder
- 1/2 teaspoon salt
- 1 teaspoon ground cinnamon
- 1/4 teaspoon ground nutmeg
- 1/2 cup unsalted butter, frozen and grated
- 1 medium Granny Smith apple, peeled and diced small
- 1/2 cup heavy cream, plus more for brushing
- 1 large egg
- 1 teaspoon vanilla extract
For the cinnamon glaze:
- 1 cup powdered sugar
- 1/4 teaspoon ground cinnamon
- 2-3 tablespoons whole milk
- 1/4 teaspoon vanilla extract
The process is straightforward, but the details matter. I'll walk you through each step.
Step-by-Step Instructions for Baking Apple Cinnamon Scones
Preheat your oven to 400°F (200°C). Line a baking sheet with parchment paper. I also recommend chilling your baking sheet in the fridge while you make the dough. It helps the scones rise higher.
Step 1: Sauté the Apples
Melt one tablespoon of butter in a small skillet over medium heat. Add your diced apples, a tablespoon of brown sugar, and a pinch of cinnamon. Cook for 4-5 minutes until the apples soften slightly and the liquid evaporates. Remove from heat and let them cool completely. This step is crucial. Hot apples will melt your butter and ruin the dough.
Step 2: Whisk the Dry Ingredients
In a large bowl, whisk together the flour, sugar, baking powder, salt, cinnamon, and nutmeg. Make sure everything is evenly distributed. I've bitten into scones with clumps of baking powder before. Not pleasant.
Step 3: Cut in the Butter
Add your grated frozen butter to the flour mixture. Toss it gently with your fingers until the butter pieces are coated. Then use a pastry cutter or your fingertips to work the butter into the flour. You want pea-sized crumbs. Work quickly. Your hands warm the butter fast.
Step 4: Add the Wet Ingredients
Whisk together the heavy cream, egg, and vanilla extract in a small bowl. Pour this over the flour mixture. Add the cooled apples. Stir with a fork until just combined. The dough will be shaggy. That's fine. Do not overmix.
Step 5: Shape and Cut
Turn the dough onto a lightly floured surface. Gently pat it into an 8-inch circle, about 1 inch thick. Don't knead it. Just pat. Cut the circle into 8 wedges using a sharp knife or bench scraper. Place the wedges on your prepared baking sheet, leaving 2 inches between each one.
Brush the tops with a little heavy cream. This gives them a beautiful golden color.
Step 6: Bake
Bake for 18-22 minutes until the tops are golden brown and a toothpick inserted into the center comes out clean. Let them cool on the baking sheet for 5 minutes, then transfer to a wire rack.
Step 7: Make the Glaze
Whisk together the powdered sugar, cinnamon, milk, and vanilla. Drizzle over the cooled scones. Let the glaze set for about 10 minutes before serving.
Common Mistakes I Made (So You Don't Have To)
I've made every mistake possible with scones. Here are the big ones.
Overmixing the dough. This develops gluten and makes scones tough. Stir until the dough just comes together. Lumps are okay.
Using warm butter. If your butter is soft, your scones will spread instead of rise. Freeze it. Grate it. Thank me later.
Skipping the apple sauté. Raw apples release too much water. The scones end up soggy on the bottom. Always cook your apples first.
Cutting with a dull knife. A dull blade presses the dough down and prevents rising. Use a sharp knife or bench scraper. Press straight down. Don't saw.
Opening the oven too early. I know it's tempting. But every time you open the oven, heat escapes and the temperature drops. Wait at least 15 minutes before checking.
Expert Tips for Bakery-Quality Scones at Home
I spoke with a pastry chef named Maria who runs a small bakery in Vermont. She shared a few tips that changed my baking game.
First, she told me to freeze my scones for 15 minutes before baking. This solidifies the butter and helps the scones hold their shape. I tried it. Game changer.
Second, she recommended using a mix of heavy cream and buttermilk. The acid in buttermilk tenderizes the gluten. I now use half cream, half buttermilk. The texture is incredible.
Third, she said to brush the tops with cream and sprinkle with coarse sugar before baking. The sugar adds a subtle crunch. It also looks professional.
According to a 2023 study published in the Journal of Food Science, the type of fat used in baked goods significantly affects texture and mouthfeel. Butter creates flakier layers than oil or margarine. The study confirmed what bakers have known for generations.
How to Serve Apple Cinnamon Scones for Teatime
These scones are perfect for teatime. I usually serve them with clotted cream and a small pot of Earl Grey tea. The bergamot in Earl Grey pairs beautifully with the cinnamon and apple.
If you want to go all out, make a simple apple butter to spread on top. Or serve them warm with a pat of salted butter. Honestly, they're great plain too.
For a party, I arrange them on a tiered cake stand with finger sandwiches and petit fours. It feels fancy without being stressful. Plus, the scones can be made ahead of time and reheated.
Make-Ahead and Storage Tips
Scones are best the day they're baked. But let's be real. Sometimes you want them fresh on a busy morning. Here's what I do.
I make the dough, cut the wedges, and freeze them unbaked on a baking sheet. Once frozen solid, I transfer them to a freezer bag. They keep for up to 3 months. When I'm ready to bake, I pop them in the oven straight from the freezer. Just add 2-3 minutes to the baking time.
For baked scones, store them in an airtight container at room temperature for up to 2 days. Reheat in a 300°F oven for 5 minutes. The microwave works in a pinch, but it makes them a little rubbery.
You can also freeze baked scones. Wrap them tightly in plastic wrap and then foil. They last about 2 months. Thaw at room temperature and reheat.
Gluten-Free and Vegan Adaptations
I've experimented with gluten-free scones. They're tricky but doable. Use a good quality gluten-free flour blend with xanthan gum. Bob's Red Mill 1-to-1 Baking Flour works well. The texture is slightly denser, but still delicious.
For vegan scones, replace the butter with cold vegan butter. Miyoko's Creamery makes an excellent one. Use full-fat coconut milk instead of heavy cream. And skip the egg. Instead, use a flax egg (1 tablespoon ground flaxseed mixed with 3 tablespoons water). Let it sit for 5 minutes before using.
The glaze can be made with oat milk or almond milk. Just adjust the liquid until you get the right consistency.
Frequently Asked Questions About Apple Cinnamon Scones
Can I use frozen apples instead of fresh ones?
I wouldn't recommend it. Frozen apples release even more water than fresh ones. If you must use them, thaw and drain them thoroughly. Then sauté them to remove excess moisture. Otherwise, your dough will be too wet.
How do I know when my scones are done baking?
Look for golden brown tops and firm edges. A toothpick inserted into the center should come out clean. You can also tap the bottom of a scone. If it sounds hollow, it's done. I always set my timer for the minimum time and check from there.
What's the best way to reheat apple cinnamon scones?
The oven is your best friend here. Preheat to 300°F and warm them for 5-7 minutes. This keeps the exterior crisp and the interior tender. The microwave makes them soft and chewy. I avoid it unless I'm in a huge rush.
Can I make the dough ahead of time?
Yes. You can make the dough, shape it into a disc, wrap it in plastic, and refrigerate it overnight. The next morning, cut and bake. Cold dough actually bakes up taller. Just add a couple of minutes to the baking time.
Why did my scones spread instead of rise?
Your butter was too warm. Or your dough got too warm before baking. Next time, freeze your butter, chill your baking sheet, and work quickly. Also, make sure your baking powder is fresh. Old baking powder loses its power.
Final Thoughts on Baking Apple Cinnamon Scones
Baking apple cinnamon scones at home is one of those skills that feels intimidating at first but becomes second nature with practice. I've burned batches. I've made hockey pucks. But I kept going. And now, these sweet spiced fruit filled teatime pastries are a staple in my kitchen.
The key takeaways? Keep your butter cold. Sauté your apples. Don't overmix. And don't skip the glaze. These small details make a big difference.
I encourage you to start with my recipe and then make it your own. Add chopped walnuts for crunch. Swap in pears instead of apples. Try a maple glaze instead of cinnamon. The possibilities are endless.
Remember, baking is supposed to be fun. If your first batch isn't perfect, that's okay. Mine wasn't either. Learn from it. Adjust. Bake again. Before you know it, you'll be the person everyone asks to bring scones to brunch.
So preheat that oven. Grab your flour. And let's make some magic.
⚠️ Warning: This cake is high in sugar. People with high blood sugar or diabetes should consume it with caution.





