 bluename
 Okay, let’s tackle this. You’ve got a beautiful, glossy batch of ganache, but it’s just a bit too thick. It won’t pipe those delicate, intricate little stars, dots, or lace details without breaking or looking blobby. I’ve been there more times than I can count. Honestly, that moment of frustration used to make me want to just smear the whole thing on the cake and call it a day. But I’ve learned a few foolproof tricks over the years, and now I’m going to share exactly how I fix this.
First off, let’s get one thing clear. Getting the perfect consistency for piping isn't just about adding liquid. It’s a careful balance. My goal today is to give you a precise, practical method for how to thin thick ganache frosting so it flows beautifully through a piping bag, ready for those fine details. We’ll get into the nitty-gritty of temperatures, liquid ratios, and all the little signs you need to look for. By the end, you will feel confident tackling any piping project.
**Understanding Your Ganache’s Thickness**
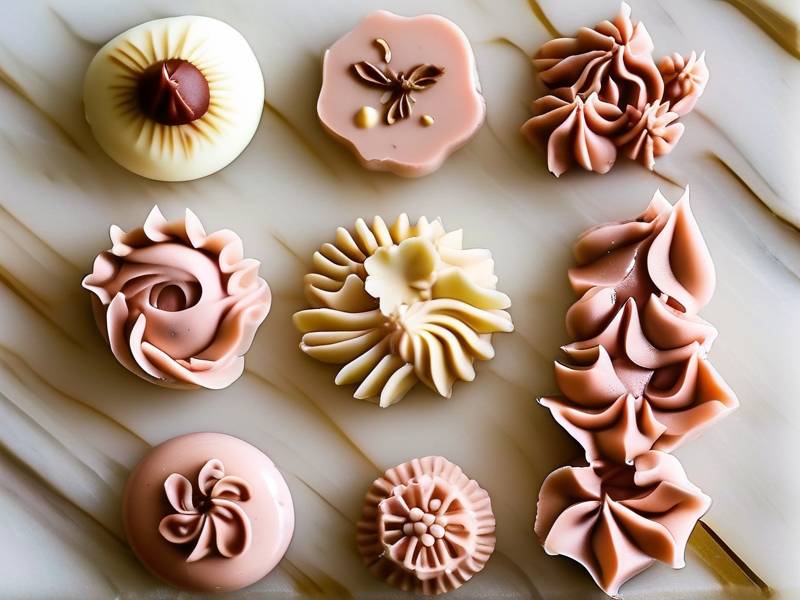
You might wonder why one batch of ganache is perfect for pouring and another is so stiff you could almost sculpt with it. Simple. It’s all about the ratio of chocolate to cream and the temperature. A standard ganache might be one part cream to two parts chocolate, which sets firm. For piping that holds its shape but is still smooth to push out, you often need a slightly softer set.
I remember messing this up badly when I first started. I made a beautiful dark chocolate ganache for a friend’s birthday cake, intending to pipe little swirls around the bottom. I filled the piping bag, and nothing. Not a single swirl. The ganache was just too thick. I squeezed harder, and the bag split right at the seam, sending a mountain of rich chocolate across the counter. What a mess! Since then, I’ve been a stickler for testing the consistency before filling my bag.
What should the ideal texture feel like? When you stir it, it should feel like a very thick pudding, maybe like a soft frosting. It should hold a ribbon shape when you drop some back into the bowl for a second before it sinks in. It should not be stiff or look like a solid block. Also, temperature is huge. Ganache that is 70°F (21°C) is much thicker than ganache at 80°F (27°C). Sometimes, the easiest fix is just letting the bowl sit over a warm water bath for a couple of minutes or giving it a few short blasts in the microwave.
**My Step-by-Step Process for Thinning Ganache**
Alright, let’s get down to business. Here is the exact order of operations I use to thin out a thick ganache for small decorative piping.
Step 1: The Warm Water Bath Method (The Safest Bet)
I actually believe this is the best way for precise control. Instead of adding liquid right away, try heat first. Because a thick ganache often just needs a little warmth to loosen up. So, set up a bain-marie, a simple bowl over a pot of barely simmering water.
Take your thick ganache and place it in the bowl. You don’t want the bottom of the bowl to touch the water, just the steam. Stir it slowly and consistently. And I mean, don't walk away. It could take just 30 to 60 seconds to get back to a sauce-like consistency. I watch it like a hawk. As soon as I see the edges just starting to soften and get glossy, I take it off the heat. Then, I stir it vigorously off the heat to even out the temperature. You want it cool enough that it thickens back up slightly but is still pipeable. If you’re planning on piping very intricate small patterns, you want it to be fluid enough that a smooth squeeze yields a fine line, but not so runny that the line flattens out.
Step 2: The Liquid Injection Method (When Heat Isn’t Enough)
Okay, so maybe you took it off the heat and stirred, and it’s still pretty stiff. That usually means the ratio of chocolate is super high, and you need a bit more liquid. But, don't just pour in milk! That’s a classic mistake. Adding cold cream or milk can seize the chocolate and make it grainy and lumpy.
What I do is heat up a small amount of heavy cream, or sometimes even whole milk, until it’s just hot to the touch. Then, I add it a teaspoon at a time. Honestly, a little goes a long way. For a cup of very thick ganache, you probably won’t need more than 1 to 2 tablespoons of warm liquid. After each teaspoon, I mix it super thoroughly with a rubber spatula, making sure it’s fully incorporated before I add more. You really want to get the mixture smooth and silky again.
Step 3: Warm It Again Gently (The Double Duty)
If you add warm liquid, it will drop the temperature of the whole mixture. You’ll often need to pop it back over the warm water bath for a quick 10-15 seconds to get everything to combine smoothly. This is a trick I picked up from a pastry chef I used to work with. He always said, “Warm to combine, cool to set.” It’s all about finding that sweet spot.
I generally repeat this cycle: warm a little, add warm liquid, stir, check the texture. You’ll see it transform from a stiff paste into a smooth, glossy frosting that slowly falls off the spatula.
**Piping Techniques for Intricate Small Patterns**
So, now your ganache is perfectly thinned. Great. But piping small, detailed work is totally different from piping a big border. I want to share some of my specific setup and hand-movement tips.
Choosing the Right Tools for Fine Detail
Let me tell you, the bag and tip make all the distinction. You cannot pipe filigree with a large star tip. For tiny dots, you need a round tip like a #1, #1.5, or #2. For small leaves, you’d use a small leaf tip. For stars, a tiny closed star tip.
Also, I avoid using those flimsy, disposable plastic bags for fine work. They’re just too hard to control. I prefer a canvas or a sturdy, reusable plastic piping bag that you can fold at the top. This gives you much better pressure control. I always cut the tip before I put the metal tip in, so I get a tight fit with no leaks. A leaky bag is just a disaster for detail work. You need to squeeze the top of the bag to push the ganache down and get any air bubbles out first. Air bubbles are your enemy, they cause breaks in a fine line.
Pressure and Speed Control
This is where I see lots of people struggle. They try to pipe too fast. For detailed piping, speed is not your friend. Simple to say, I know. But you need to use even, steady pressure. Stop squeezing before you want to end the line, and gently lower the tip to the surface. Then, you can release the pressure and pull away cleanly.
I practice moving my hand from the shoulder, not just the wrist. It gives you more stable, sweeping lines. For small, repetitive details like dots or stars, I hold the bag perpendicular to the cake. I apply pressure until I get the shape I want, then I stop the pressure and lift straight up.
What If It Gets Too Stiff in The Bag? This happens all the time, even with the perfect ganache! As you work, your hands warm the bag, but if the kitchen is cool, the ganache in the tip will start to firm up. If you feel the pressure building and the line getting thicker, don’t panic. Just put the piping bag down for a minute. Go heat your hands by running them under warm water, or you can hold the metal tip in your closed fist for a few seconds. And sometimes, the easiest thing is to squeeze a small bit out and check the line on a piece of parchment paper. If it’s coming out thick, simply give the whole bag a quick knead to warm it, but be careful – if it’s a plastic bag, you might split it.
**Troubleshooting Common Piping Problems**
Honestly, troubleshooting is the job. I don’t think there’s ever a perfect bake when you are decorating with chocolate. Let’s look at some common problems.
Ganache is Too Runny to See the Pattern - This is the classic opposite problem. If your lines are flattening out or merging into each other, your ganache is too warm or has too much cream. You can pop it in the fridge for 5-10 minutes. But keep an eye on it. You want it to get to the point where it holds its shape but is still glossy. A good rule of thumb is to pipe a small test on the back of your hand. It should feel smooth and hold its shape but not be cold.
Ganache Is Lumpy or Grainy - This is usually a sign of seizing. This can happen if you got a drop of water in the bowl or if you heated it too fast. The texture is totally ruined for smooth piping. I should be straightforward: there’s not much way to fix it once it's grainy. The chocolate and cream have separated. I usually just melt it down completely, add a splash of more hot cream, and use it as a delicious sauce. It’s not good for piping, but it’s great on ice cream. You live and learn.
Ganache Has Air Bubbles When Piping - Those little lines of bubbles can really ruin a clean pattern. To help prevent this, when you’re stirring your ganache, try to stir gently and not to whip air into it. A spatula is your best friend. Also, letting the ganache sit for a few minutes in the bowl gives big bubbles time to rise to the surface. When filling your piping bag, push the ganache down in small spoonfuls to prevent air pockets. I’ve also found that tapping the filled bag on the counter a few times helps dislodge any stubborn bubbles.
**My Pro Tips for Professional-Looking Details**
Through a lot of trial and error, I have a few things I do to make my piping look a bit more polished.
- Clean Lines Start with a Clean Canvas. Before piping your delicate patterns, make sure your cake is chilled. Not super cold, but firm. This makes it easier for your ganache to hold its shape when it hits the surface. If the cake is soft or the crumb coat is sticky, it will mess up your linework.
- Let the Ganache "Rest" Before Piping. Once I have my ganache at the right consistency, I let it sit at room temp for about 5-10 minutes. This lets the thickness even out so I get a consistent line from the first dot to the last. It’s really frustrating when the first quarter comes out beautifully, but the last quarter is thick and blobby.
- Use a slightly chilled baking sheet. If I am piping decorations to set and place on the cake later, I pipe onto a baking sheet that I have put in the fridge for a few minutes. The cool metal surface helps the ganache set up immediately and makes the little pieces super easy to remove later.
What Tools and Ingredients I Use Now, for this section, I’d love to share my personal favorite tools to give you a real look into my workflow.
- Chocolate: I always prefer a high-quality couverture chocolate, like Valrhona or Callebaut. The better the chocolate, the smoother and more fluid the ganache melts, and the less likely it is to seize. The higher cocoa butter content does wonders for that flow.
- Cream: Always use heavy cream with high fat content, at least 35%. It just gives a much more stable emulsion. And make sure it’s fresh. It makes a huge difference.
- Piping Bags: I absolutely love the reusable Joy brand of 14-inch bags. They feel thick and substantial and they are very responsive to hand pressure. They clean up beautifully, too.
- Scale: Use a kitchen scale for measuring your ingredients, especially chocolate and cream. It’s not just a pro habit; it’s the most consistent way. Measuring in cups can lead to inconsistencies that make your ganache too thick or too thin.
- Thermometer: An instant-read thermometer is a lifesaver. Keeping your ganache at the right temp is half the battle.
**The Science Behind the Sweet**
It’s not just magic, although it does feel kind of magical when it works perfectly. There is food science happening right before my eyes. Chocolate is composed of cocoa solids, cocoa butter, and sugar. When you heat it, the cocoa butter melts and gives it that fluid consistency. The cream is an emulsion of water and fat. When mixed, you are creating another emulsion, but this time the fat from the cream and the chocolate combine.
A Quick Note on Ratios I have to mention ratios because it’s the most important thing when you want to control the thickness. If you want a thinner ganache that’s perfect for a glaze, you’d use more cream, maybe a 1:1 ratio (by weight). For a thick frosting that you want to pipe, you might start with a 2:1 ratio of chocolate to cream. And for the very sturdy ganache used for truffles, you might use a 3:1 or even a 4:1 ratio.
When your ganache is too thick for piping, you need to increase the liquid part slightly, or increase the temperature to melt more of the cocoa butter. You’re trying to get that ratio back in balance.
Expert References There is also a great study in the Journal of Food Science from 2020, which I remember reading, that explained how the tempering and cooling process in chocolate is what dictates the final snap and gloss. Honestly, for home use, you don't need to fully temper chocolate for a ganache, but knowing how the fat crystallizes at different temperatures helps a lot in getting that smooth, flowing texture.
**Frequently Asked Questions**
Question: Can I use water or milk to thin my ganache for piping? I wouldn’t recommend using water unless you are making a glaze. Because water can make the ganache seize and turn into a grainy paste. And if you use milk, just like I said, be sure it’s warm. Adding a little bit of cold liquid to a thick ganache is a surefire route to ruining your texture. So, warm cream is your best bet, but a tiny splash of whole milk also works if warmed up.
Question: My ganache is fine when it's in the bowl, but when I try to pipe it, it’s really stiff. Why? This is a classic issue and the main culprit is temperature. Believe it or not, ganache thickens as it cools. When you are piping with your hands, you are adding heat which actually helps, but if your kitchen is cold, the film on the surface of the ganache in the bag can harden quickly. A great way to fix this is to use your hands to warm the bag, or you can fill the bag with a smaller amount of ganache so it doesn't have time to lose heat before you use it all.
Question: How do I thin out ganache for writing a detailed message on a cake? Writing is all about fine lines, so your consistency is key. For that, you want the ganache to be thin enough that it flows out in a continuous stream but thick enough to maintain that line and not bleed or flatten out on the cake. I recommend you target a consistency similar to a thick, hot fudge sauce, but not as runny. The best way to go is to use a piping bag with a fine round tip (#1 or #2). You want to just warm it up until it moves easily in the bowl, and then test it on a small plate to get the feel of it.
A Final Word on Piping Intricate Designs I want to be honest with you. You are not going to master this in one afternoon, and that's okay. My first attempts at piping a latte art style design on a cake showed that I had a long way to go. But the method for getting the correct consistency is the most important foundation. The technical details, like precise temperature and ratios, are what will separate a pretty cake from a jaw-dropping one.
For those tiny, intricate details that you want to make, keep in mind that precision and temperature control are your best friends. Just make sure you have some patience with yourself, as well as your ganache. I highly suggest you practice on a small plate or parchment paper first. I honestly think understanding how control its flow is the biggest key to creating beautifully decorated cakes that consistently surprise people.
Now, one final thought: Play with it. If it’s too thick, add a little warm cream. If it’s too thin for a specific detail, just leave it on the counter to cool down a touch. Since you’re using a natural product, it’s always changing, so you have to learn to change with it. You’ll soon get that feel for it, and that’s all there is to it. The sooner you start experimenting and feeling the consistency for yourself, the better you’ll get.
⚠️ Warning: This cake is high in sugar. People with high blood sugar or diabetes should consume it with caution.





