 bluename
 I have been baking meringue cookies for over a decade now. And honestly, I still remember the first time I tried to whip egg whites into firm stable peaks and how badly it failed. The mixture looked promising for a minute, then it turned grainy and watery, and my baking tray was full of sad, weeping puddles instead of crisp cookies.
It took me a long time and plenty of trial and error to figure out why my technique was wrong. When I finally learned how to whip egg whites firm stable peaks bake perfect crisp meringue cookies, everything changed. My cookies started coming out light, airy, and irresistibly crunchy.
If you have struggled with runny meringue or chewy, sticky cookies that stick to your teeth, I get it. I have been there. The good news is that the solution is simpler than you think. In this guide, I am sharing everything I have learned from my own kitchen experiments, plus what food scientists and pastry experts have confirmed over the years.
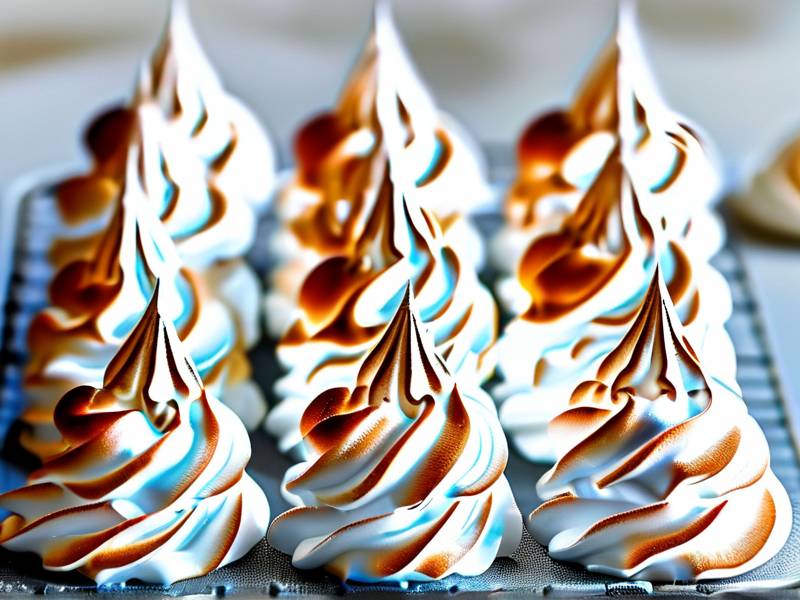
By the time you finish reading, you will know exactly what to do at every single step. We will talk about the right tools, the temperature of your eggs, the right speed for your mixer, and the small signs you need to watch for. I will also include answers to the most common questions I get from my readers about making crisp meringue cookies at home.
Mastering egg whites for baking perfect crisp meringue cookies
One of the hardest lessons I learned early on is that making meringue is not about brute force. You cannot just whip the eggs faster and hope for the best. In fact, I ruined several batches by over-whipping because I thought stiffer meant better. That is how I ended up with clumpy, lumpy foam that released liquid all over my baking sheet.
Meringue is basically a foam. When you whip egg whites, you are incorporating air bubbles and unfolding the proteins inside the whites. Those proteins then form a network that holds the air in place. The goal is to build a structure that is strong enough to hold its shape but flexible enough to expand in the oven.
What surprised me the most when I started studying the science behind this is how much little details matter. A single drop of egg yolk in the bowl can ruin the whole batch because fat interferes with the protein structure. And honestly, I have seen recipes fail simply because someone used a plastic bowl that had a tiny greasy residue on it.
Let us break down everything you need to know, starting with preparation and moving into technique.
Preparing your eggs and equipment for achieving stiff egg whites
If I had to pick the most overlooked step in making meringue, it would be preparation. Most home bakers are in a hurry and just crack eggs into a bowl. That is a huge mistake. The state of your eggs and your tools determines whether you will reach stiff peaks or end up with sweet soup.
Eggs that are too cold straight from the refrigerator are harder to whip. But eggs that are too warm can also cause issues. I have found that room temperature egg whites whip up faster and produce a more stable foam. The proteins can unfold and bond more easily at around 70°F to 75°F.
My habit now is to separate the eggs right after I take them out of the fridge, then let the whites sit in the mixing bowl for about 30 minutes. You do not want to make meringue from eggs that are stone cold. I learned this from an old pastry chef I worked with. She told me that cold whites create a foam that is less voluminous and takes longer to reach the stiff peak stage.
Which types of bowls and mixers work best for whipping egg whites
Not every bowl is suitable for making meringue, and this is something I learned after many sad batches. Copper bowls are considered the gold standard by traditional bakers because copper ions react with the egg whites and stabilize the foam. However, copper bowls are expensive and require careful cleaning.
The good news is you do not need fancy equipment. A glass bowl or a stainless steel bowl works perfectly well. I personally use a stainless steel bowl every single day. What matters is that your bowl and your whisk attachment are completely clean and free of any grease.
Plastic bowls are a risk. I found out that plastic tends to retain invisible oily residue even after washing with soap. That grease will destroy your meringue. If you only have plastic bowls at home, I recommend wiping the inside of the bowl with a slice of lemon or vinegar on a paper towel before using it. Do not add lemon juice to the whites unless the recipe asks for it, just wipe the bowl down.
The condition of eggs and why freshness matters for firm meringue
I used to think that fresher eggs were always better for everything. Meringue is actually one of the few cases where slightly older eggs might be preferable. Here is what I have learned through my own testing. Egg whites are made up of both thick whites and thin whites. Fresh eggs have more thick white, which is harder to whip into a uniform foam.
That said, older eggs are more alkaline and produce a more stable foam. Many professional bakers actually age their egg whites in the refrigerator for a few days before making meringue. I have tried this side by side, and there is a noticeable difference. The aged whites whip up faster and seem to hold their structure longer.
However, do not use eggs that are past their prime in terms of smell or appearance. Food safety always comes first. I generally recommend using eggs that are within a week of their pack date if you want that slight edge.
The role of cream of tartar and acids in egg white stability
I am a huge advocate for using cream of tartar. Even though my earlier attempts skipped it because I did not have any in my pantry, I quickly discovered that adding a small amount of acid changes the game entirely. Cream of tartar is actually powdered tartaric acid.
The acid lowers the pH of the egg whites. This helps the proteins unfold at a more controlled rate and creates a stronger network between them. The result is a foam that is more stable and less likely to collapse.
Here is an important ratio I follow. For every two egg whites, I add about 1/8 teaspoon of cream of tartar. You can also use lemon juice or white vinegar as substitutes. But I find cream of tartar is the easiest to measure and does not add any extra liquid to your mixture.
How to separate egg whites without leaving any yolk behind
Cracking eggs directly into your mixing bowl is risky. One broken yolk can contaminate the entire bowl. I learned this the hard way when I had to throw out a batch of six egg whites because one yolk slipped through my fingers.
Start by cracking each egg into a small separate bowl first. Then transfer the white into your main mixing bowl. This way, if you break a yolk, you only lose that one egg. I also check each individual bowl for any tiny specks of yolk floating in the whites.
Yolks contain fat. And fat is the absolute enemy of egg white foam. Even a tiny speck can reduce the volume of your meringue by up to 50 percent. When you are trying to make stiff peaks that hold up, you simply cannot cut corners here.
The importance of your mixing speed when whipping egg whites
I used to put my stand mixer on high speed right from the start. That was another big error. Starting on high speed creates larger air bubbles that are less stable. You end up with foam that looks fluffy at first but then collapses quickly.
Slow and steady wins the race. Begin whipping the egg whites on low to medium speed until they become frothy and opaque. Once you see the foam start to form and the bubbles become smaller, you can increase the speed to medium high. This gradual speed increase creates small uniform air bubbles that lock into a stable structure.
When you whip egg whites to stiff peaks with sugar added gradually, the process takes longer than you might think. I usually spend about seven to nine minutes for three egg whites. Do not rush it. If you dump in all the sugar at once, the sugar crystals can puncture the air bubbles and release the moisture.
Should you add salt or vanilla before reaching firm peaks
I have seen so many recipe debates about when to add vanilla and salt. Some people add them at the beginning, and others wait until the end. Here is what I found works best through my own process.
Salt is a finicky ingredient when it comes to meringue. Salt helps stabilize the egg whites if it is added early because it strengthens the protein network. However, too much salt can have the opposite effect and inhibit foam formation. I add just a pinch at the start with the cream of tartar.
Vanilla, on the other hand, contains alcohol and sometimes sugar syrup. Adding alcohol too early can disrupt foam formation. I wait until my egg whites are already at soft peaks before adding my vanilla extract. This gives the vanilla enough time to incorporate without sabotaging the structure.
Mastering the granulated sugar addition for crisp cookies
Sugar is not just for sweetness in a meringue recipe. It is actually essential for creating that crisp texture we all love. Sugar works by absorbing moisture from the egg whites and creating a syrup that coats the protein bubbles. When baked, this syrup hardens slightly and gives the cookie its crunch.
This is why meringue cookies made with too little sugar turn out chewy instead of crisp. The sugar is also what gives the cookies their glossy sheen. Without sufficient sugar, your meringue will look dull and matte instead of shiny and smooth.
Choosing the right sugar and how to prepare it for stiff peaks
I rarely use regular granulated sugar straight out of the bag. The problem is that most granulated sugar crystals are too large to dissolve completely in the egg whites. What ends up happening is the cookies have a gritty texture, and during baking, some sugar melts and creates sugary spots.
To fix this, I run my sugar through the food processor for a minute until it is finer and closer to the texture of caster sugar. This finer sugar dissolves faster and creates a more uniform foam. If you live in a place where caster sugar is easy to find, use that instead.
Jimmy, a friend of mine who bakes professionally, once told me that the rate at which you add sugar matters almost as much as the type of sugar you use. He was completely right. You should add superfine sugar one tablespoon at a time. Each addition should take between 15 and 30 seconds. Do not pour the sugar all at once.
I wait until the egg whites reach the soft peak stage first. At soft peaks, the foam is white and pillowy, and when you lift the whisk, the peak droops over. That is the perfect moment to start adding sugar. If you add sugar too early before the whites even start to foam, you will lengthen the whipping time and risk over-beating.
Common meringue mistakes that keep you from achieving firm stable peaks
I have already made most of the mistakes out there, so you do not have to. Let me walk you through the ones that cause the most frustration for beginners and even some experienced bakers.
Over-whipping is one of the most common mistakes that I see in baking forums. When you whip egg whites to stiff peaks and continue beating, the foam starts to break. The proteins bond together so tightly that they squeeze out the water, leaving a grainy, curdled mess. There is no coming back from this.
Under-whipping is equally problematic. If your meringue only reaches medium peaks, the cookies will not hold their shape in the oven. The color will look translucent in spots, and the texture will collapse into flat puddles rather than staying light and round.
Signs that your egg whites are almost at the firm peak stage
If you are a visual person like me, you need to watch for specific cues to know exactly where you are in the process.
When you lift the whisk from the bowl, the peak should stand up straight without falling over. At stiff peaks, the tip of the meringue on the whisk does not curl or bend. It looks exactly like a sharp pointy tower. Additionally, the meringue should stay firmly in place even if you turn the bowl upside down.
But be careful here. Sometimes the meringue looks perfectly glossy at stiff peaks when it is actually beginning to break. I test my meringue by rubbing a tiny bit between my fingers. If it feels gritty, I keep beating for another minute. If it feels completely smooth, my sugar is fully incorporated, and my foam is ready.
Dealing with humidity and weather when baking meringue cookies
Here is a thing that no one warned me about when I started. Meringue cookies are extremely sensitive to humidity. They absorb moisture from the air very easily. Making meringue on a rainy or humid day is honestly a challenge.
The moisture in the air prevents both the meringue foam from forming properly and the cookies from drying out during baking. If you live in a humid climate, consider using a dehumidifier in your kitchen or waiting for a dry day. I have switched to making meringue only when the humidity is below 40 percent.
My grandmother baked meringues exclusively during the dry summer months when she could leave them in a warm oven overnight. That old trick still works today.
Proper piping techniques for even crisp meringue cookies
Once your egg whites are at stiff peaks, you need to shape them quickly. Meringue does not like to wait around, so I always have my piping bag fitted and ready before my foam finishes.
I use a piping bag with a plain round tip for basic meringue cookies, and sometimes a star tip for a fancier look. Fill the bag no more than three-quarters full. Overfilling makes it hard to control the pressure and can create lopsided cookies.
Before I pipe my meringues into rounds, I line my baking sheet with parchment paper. Silicone mats are also fine and provide a non-stick surface. I tried wax paper once, and it stuck terribly, so I advise you do not go that route.
When squeezing out the dough, press firmly from the top of the bag and pull the tip away quickly at the end. I pipe little rounds about one and a half inches wide. They do not spread like cookie dough, so you can place them about an inch apart.
Baking and drying out meringue for that crisp finish
Meringue cookies are famously baked at low temperatures. Low heat does two things. First, it dries out the meringue. Second, it slowly evaporates the moisture so the cookies become crunchy all the way through without browning.
If you bake at too high a temperature, the outside of the cookie hardens too quickly while the inside remains chewy and soft. The result is a meringue that cracks or weeps brown sugar syrup.
My favorite approach is baking at 200°F. I bake for about one hour and then turn off the oven and leave the door slightly ajar with a wooden spoon. The residual oven heat continues to dry them out for another hour or more.
How to tell when your meringue cookies are fully baked and crisp
When meringue cookies are done, they should lift easily off the parchment paper. If a cookie sticks, it needs more drying time. The outside should look dry and smooth, and you should be able to press gently on one side without leaving a dent.
You can also test one cookie by breaking it in half. The inside should be either completely dry and crisp. Fine, slightly tender meringues that crumble without being chewy are considered perfectly baked. But if there is even a hint of gumminess, put them back in the oven for longer.
Storing meringue cookies after you bake perfect crisp meringue cookies
Meringue cookies do not last very long once exposed to air. They pick up moisture from the environment very easily and turn stale and sticky. I always store my meringues in an airtight container immediately after they have cooled completely.
I also add a layer of parchment paper between layers of cookies. That prevents them from sticking to each other and breaking. If you are stacking meringue cookies in a taller jar, keep them in a single layer if you can.
If you live in a humid area, airtight storage is absolutely critical. I even add a small food-safe silica gel packet in my container during the rainy season. Just make sure it is in a separate little bag and not touching the food directly.
FAQ for whipping egg whites to stiff peaks and baking meringue cookies
Can I whip egg whites firm stable peaks with a hand mixer for crisp meringue cookies Yes, you absolutely can. I have used both a stand mixer and a hand mixer. For a hand mixer, be prepared to hold it for a longer time. You also need to move the beaters around the bowl to make sure you are aerating all of the egg whites evenly. The key is patience. Keep the speed on medium instead of full throttle.
What should I do if my egg whites will not form stiff peaks no matter what First check for any hidden oil or yolk in the bowl. Next, check the age of your eggs. Fresh eggs can take a while and sometimes still do not whip properly. Add a tiny pinch of cream of tartar or lemon juice to help stabilize the foam. Also make sure you are not using warm eggs that are too warm, and that your bowl is chilled if your kitchen is warm.
Why are my baked meringue cookies chewy instead of crisp and dry This is a common issue. Chewy meringue indicates that the baking time was too short or the temperature was too high. The moisture inside did not fully evaporate. Try baking at 200°F for at least one hour, then let them rest in the oven with the door slightly open. Also, always store them in a dry airtight container after fully cooling.
One last thing I want to share. Meringue baking is as much about what happens after the whisk stops as it is about the whipping itself. Many batches that look great on the mixing bowl end up chewy in the oven because of poor humidity management or incorrect baking temperatures.
When you want to learn how to whip egg whites firm stable peaks bake perfect crisp meringue cookies, you have to treat the entire process with respect. Follow every step, use room temperature eggs, take time with your sugar, and never rush the low-temperature bake.
I hope that by now you feel more confident to give meringue cookies another try. Remember the small wins. Look for glossy, billowy whites that hold a sharp peak. Bake them low and slow. Let them dry in the oven with the door left open. And store them immediately once they cool if you want to keep that satisfying crunch.
I promise you that once you have your first try of a homemade meringue cookie that melts in your mouth and crackles with every bite, you will know that the effort was worth it. Feel free to come back to this guide whenever you need to refresh your memory. I will be here baking away, and I would love to hear about your meringue adventures too. Go ahead and get cracking. You have got all the tools and the technique now.
⚠️ Warning: This recipe is high in sugar. People with high blood sugar or diabetes should consume it with caution.





