 bluename
 How to Revive Dry Sponge Cake Brush Evenly Flavored Sugar Syrup Solution
I cannot tell you how many times I’ve stared at a beautiful sponge cake that turned into a sad, crumbly brick by day two. You bake it, it looks perfect, then you forget to wrap it properly. The next morning, it’s dry. Actually, it’s beyond dry. It’s dusty. The texture is all wrong, and you’re ready to toss it in the trash. But hold on. Before you do that, let me show you how to revive dry sponge cake brush evenly flavored sugar syrup solution. This is a trick I’ve used in my own kitchen for years, and it genuinely works. It brings that crumbly cake back to life.
The whole process sounds fancy, but it’s really just about moisture. Sponge cake is basically a dried-out foam. It has all those little air pockets that hold structure. Once the water evaporates, the pockets collapse or turn rigid. The solution is simple, we need to reintroduce moisture. But we have to do it carefully. If you just pour water on a dry cake, you get mush. That’s not what we want. We want a soft, tender crumb that feels fresh again. So, I’m going to walk you through the exact method I use, step by step, so you can fix any dry sponge cake in under fifteen minutes.
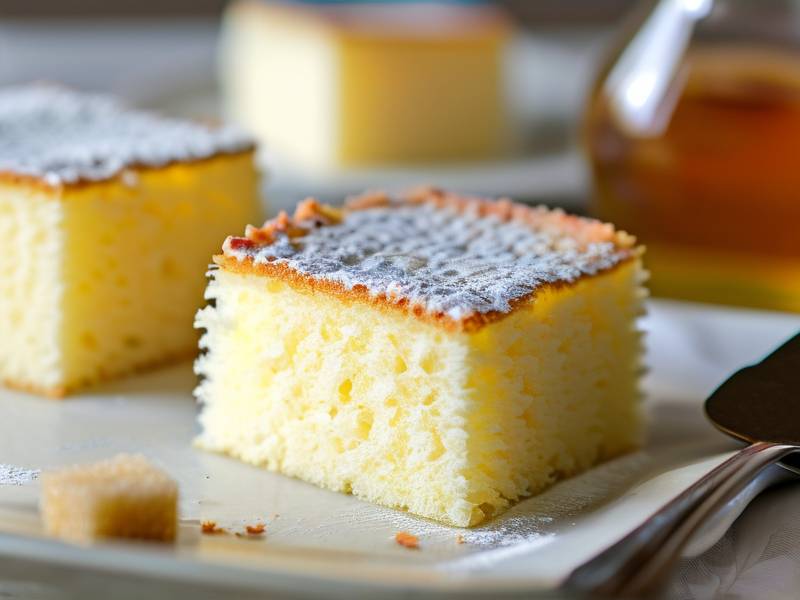
Why Sugar Syrup Is the Secret to Moistening Dry Sponge Cake
Let me tell you why this works so well. A flavored sugar syrup is not just water. It’s a combination of sugar and liquid, usually water, but sometimes you can use milk, juice, or even coffee. The sugar does two things here. First, it adds sweetness back into the cake, which is nice because dry cakes often lose their flavor presence. Second, and more importantly, the sugar acts as a humectant. That means it attracts and holds onto moisture. When you brush a flavored sugar syrup solution onto a dry sponge cake, the syrup seeps into those air pockets and carries moisture with it. Plus, the sugar helps the cake retain that moisture over time, rather than drying out again right away.
I remember the first time I tried this, I was skeptical. I thought, there’s no way this is going to make a difference. But I brushed the syrup on, waited about twenty minutes, and the difference was night and day. The cake was soft, almost like it had just come out of the oven. And the flavor? I added a little vanilla extract to the syrup, and it actually tasted better than the original. That’s the beauty of this technique. You can customize the flavor while you fix the texture.
One thing I want to emphasize, though, is the word evenly. The big mistake beginners make is dumping syrup in one spot. You end up with a soggy corner and a dry center. That’s why the brushing technique is crucial. It’s not just about making syrup; it’s about how you apply it.
Step-by-Step Guide: How to Make a Flavored Sugar Syrup Solution for Cake
Before you even touch the dry cake, you need to prepare the syrup. This part is pretty straightforward, but there are a few rules. The standard ratio I use is one part sugar to one part liquid. So, if I use half a cup of water, I use half a cup of granulated sugar. Simple enough, right? But you need to dissolve the sugar completely. Nobody wants a gritty texture on their cake.
Here is my go-to method for making the basic syrup. Grab a small saucepan. Combine equal parts sugar and water. For a single standard 8-inch cake, half a cup of each is usually plenty. Heat the mixture over medium heat. Stir it gently. It doesn’t need to boil hard. You just want the sugar to dissolve fully into the water. Once the liquid turns clear and there are no sugar crystals left on the spoon, take it off the heat. Let it cool completely. Do not brush hot syrup on cake. It will melt the delicate sponge and turn it into a wet mess.
Now, let’s talk flavor. Plain sugar syrup works, but it’s a little boring. I always add something extra. Vanilla extract is the classic choice. A teaspoon goes a long way. If you’re making a chocolate cake, add a splash of coffee or a teaspoon of rum extract. For a lemon cake, use fresh lemon juice and maybe some zest. The rule of thumb is to keep the flavor complementary. You don’t want a mint syrup on a vanilla cake unless you really like mint. It just gets weird.
Another alternative is to replace the water entirely with a different liquid. Have some leftover orange juice? Use that. Or milk. I did this once with a strawberry cake, and I used strawberry juice from a jar of preserved berries. It was amazing. The flavor soaked right into the cake, and it tasted fresher than the day I baked it. Let the syrup cool to room temperature. Then you’re ready for the next step.
The Right Way to Brush Evenly Flavored Sugar Syrup Solution on a Dry Sponge
This is where the magic happens, but it’s also where people mess up. You’ve got your liquid syrup. You’ve got your dry cake. You cannot just pour it. That’s the worst thing you could do. Instead, you need a pastry brush. I prefer a silicone one because it doesn’t shed bristles, but a natural bristle brush works fine too. The brush gives you control. It lets you distribute the moisture evenly.
Here’s my process. Place the dry sponge cake on a wire rack. This is important. If you leave it on a solid plate, the syrup will pool at the bottom. You want excess liquid to drip off, not soak in from underneath. The rack allows air to circulate. So, set the cake on the rack. Dip your brush into the syrup. You don’t want it dripping wet; just damp. Then, lightly press the brush onto the surface of the cake. Use a dabbing motion rather than a sweeping one. This is the trick. You’re pushing the syrup into the cake with the bristles, but you’re not brushing it off. A gentle press, lift, press, lift. Work in small sections. Start at the edges, then move to the center. This ensures the syrup gets absorbed evenly across the whole surface.
Wait a minute, and then flip the cake over. You need to brush the bottom side too. I know it seems weird, but the bottom is often the driest part. Flip it carefully so you don’t smash the sponge. Then repeat the dabbing process on the bottom. After both sides are brushed, let the cake sit on the rack for about fifteen minutes. You’ll see the color deepen slightly as the syrup absorbs. The texture changes too. It looks less dry, almost moist. That’s the signal that it’s working.
Now, here is a specific technique I use for layered cakes. If I’m planning to slice the sponge horizontally into layers, I brush the inside of each layer. Not just the top and bottom. I use a little more syrup on the cut faces because they have more exposed surface area. This makes the cake assembly much easier because the cake is pliable. It won’t crack when you stack it.
How Long to Wait and How to Test If the Sponge Cake Is Revived
I get this question a lot. How long does it take? The waiting period is essential. You cannot rush this. After brushing the evenly flavored sugar syrup solution onto the dry sponge cake, you need to give it time to redistribute. I usually wait between fifteen and thirty minutes at room temperature. If you chill it, it takes longer. Room temperature is perfect because the syrup is at a similar temperature to the cake.
How do you know it’s done? Gently press your finger in the middle of the cake. Before the syrup, it would feel hard and unyielding. After fifteen minutes, it should feel springy. It should give slightly, and then bounce back. That’s the crumb structure relaxing. Another test is to insert a toothpick or a skewer into the center. Pull it out. The hole should look moist, not dusty. There shouldn’t be any dry crumbs clinging to the toothpick. If you still see dry crumb, you might need a second light coat of syrup. Just do a small section first to see if it helps. Don’t overdo it though. There’s a fine line between revived and soggy.
I actually over-brushed a cake once. I was impatient, and I used too much syrup. The result was a dense, wet slab that collapsed under its own weight. So, trust the process. If you brushed both sides and you can see the cake plump up, that’s your signal to stop. More syrup doesn’t mean better. It just means mush.
Common Mistakes to Avoid When You Brush Evenly Flavored Sugar Syrup Solution
Since I have made just about every mistake in the book, let me save you the trouble. First mistake? Using hot syrup. I already mentioned this, but I’ll say it again. Hot syrup makes the cake soggy and breaks down the structure. Always, always cool your syrup. Second mistake is skipping the rack. If you brush the cake on a flat surface, the syrup that runs off puddles at the bottom. Then your bottom layer turns into a wet mess. Use the rack. It’s non-negotiable for me.
The third mistake is using too much syrup at once. You might think, more is more, but that’s not true here. The sponge cake can only absorb so much liquid. If you overload it, the air pockets collapse, and you lose the light texture. So, use a light touch. You can always add more later. The fourth mistake is ignoring the flavor match. A strong, overpowering syrup can ruin a delicate sponge. I made a batch with pure orange extract and water, no sugar, and it was bitter and acidic. It completely overtook the vanilla cake. Balance is key. Mix sweet with sour, and don’t use too much extract.
Here is one more mistake that’s less obvious. Forgetting to brush the sides. The top and bottom get all the attention, but the sides of the cake dry out too. On a domed cake, the sides often have the least moisture. So, after you do the top and bottom, tilt the cake on its side and brush the perimeter. It takes a little finesse, but it’s worth the effort.
Advanced Tips for Making the Syrup Penetrate Deeper Into Dry Cake
Now, let’s get into the nitty-gritty. Sometimes a simple brush isn’t enough, especially if the cake is really dry. In that case, I use a technique called "poking." Take a toothpick or a thin skewer and poke small holes all over the cake surface. Just the top. Don’t stab all the way through. You just want to break the surface tension. This allows the syrup easier access to the dry interior. The holes close up as the cake absorbs moisture, so you don’t see any marks afterward.
If you’re reviving a cake that’s several days old, I suggest wrapping it in plastic wrap after brushing. Yes, you heard that right. Brush the syrup, then immediately wrap the whole cake tightly in cling film. The plastic wrap traps the moisture inside, forcing the syrup to redistribute throughout the crumb. Let it sit in the plastic wrap at room temperature for about an hour. It’s like a steam bath for your cake. I did this with a leftover pound cake, and it was unbelievably soft afterward. Almost buttery.
Also, consider warming the cake slightly before you brush it. Do not use the microwave for long, just about ten seconds. A slightly warm cake absorbs syrup faster than a cold one. The warmth opens up the pores of the crumb. But be careful, if the cake gets too hot, the butter in the sponge can melt, causing the cake to slump. So, slightly warm, not hot.
How to Store Revived Sponge Cake So It Doesn’t Dry Out Again
Okay, you’ve revived your cake. It’s soft and delicious. Now, what stops it from drying out again? You cannot just leave it on the counter. You need to store it properly. Once the cake is revived, wrap it in plastic wrap. Make sure it’s completely sealed. Then, put it in an airtight container. I prefer a container over just plastic wrap because it adds another layer of protection. A cake stored this way at room temperature should stay moist for two to three days.
If you need to store it longer, you can refrigerate it. But here’s a warning: refrigeration can dry out cake even faster. So, if you refrigerate, keep the cake wrapped tightly and consider adding a piece of bread to the container. The bread acts as a moisture regulator. It will absorb any extra moisture, then release it back to the cake if the cake starts to dry. It sounds crazy, but it works. I use this trick for all my layer cakes, and the cake stays tender for days.
Freezing is another option. Wrap the revived cake in a layer of plastic wrap, then a layer of aluminum foil. Freeze it for up to three months. To thaw, keep it in the plastic wrap and let it come to room temperature. The moisture stays locked in because the rapid freezing creates small ice crystals that don’t damage the crumb. But here is the thing, do not brush a cake with syrup and then freeze it. You want to brush it after it thaws. Otherwise, the syrup can make the texture gummy when it thaws. Trust me on this one.
More Delicious Variations: Fruit Juice, Coffee, and Liqueur Syrups for Cake Revival
Let’s have some fun. The basic sugar syrup is good, but I love experimenting. For a vanilla sponge, I make a vanilla bean syrup. I take a used vanilla bean pod and simmer it in the water and sugar. It infuses for ten minutes and then cools. The flavor is deep and aromatic. For a chocolate sponge, I use cold-brewed coffee instead of water. The sugar dissolves, and I brush the coffee syrup on the cake. It enhances the chocolate flavor without making it taste like coffee. You just get a deeper, darker cocoa note.
You can also use fresh fruit juice. A sponge cake soaked with fresh lime syrup is absolutely divine. Just mix water, sugar, lime juice, and a bit of zest. Simmer until the sugar dissolves. The acidity in the citrus helps to cut through the sweetness of the cake. I’ve also used an orange liqueur like Grand Marnier in the syrup. Of course, that’s not for kids. But for an adult dessert, it adds sophistication. Just use half water and half liqueur. Don’t use full liqueur. It’s too strong and can make the cake bitter. And if you have honey on hand, you can swap some of the sugar for honey. Honey adds a floral aroma and a chewy texture. However, honey makes the syrup thicker, so you might need to warm it slightly to thin it out.
FAQ: Your Three Most Common Questions About Reviving Sponge Cake
Can I use this method on an already frosted cake?
No, this is for unfrosted cakes. If the cake has frosting, the syrup won’t penetrate evenly. You’ll just make a mess. The syrup slides off the frosting. Instead, you should remove the frosting, brush the cake, and then re-frost it. Alternatively, you can brush the inside of each layer before you assemble the cake with the frosting. That works perfectly.
How much sugar syrup solution do I need to revive a dry sponge cake?
It depends on how dry the cake is. Start with half a cup. Brush both sides. If you feel like it needs more, make another quarter cup. It is always best to have extra on hand. But remember, you can’t remove syrup after you add it. So go light. I’d rather have leftover syrup than a soggy cake.
Will the cake taste overly sweet after brushing the syrup?
That’s a common worry. However, the cake absorbs the syrup, which is mostly water. The sugar is diluted. In most cases, the cake’s sweetness is balanced out. If you’re concerned, reduce the sugar to three-quarters of a cup instead of one full cup. You still get the humectant properties of the sugar, but it’s less sweet. You can also use a naturally sweet liquid like pineapple juice and skip the sugar completely.
My Final Thoughts on Restoring That Perfect Crumb
The next time you face a dry sponge cake, take a breath. It’s not lost. With a simple flavored sugar syrup solution and the right brushing technique, you can bring it back to life. I’ve done this with genoise, chiffon, and even pound cake. It’s a reliable skill to have. Everyone in my house knows not to throw away cake, they just ask me to fix it.
I hope this guide helps you as much as it has helped me. Now, go grab that dry cake. Make the syrup, grab your brush, and dab, dab, dab. You’ll be amazed at the transformation. The crumb will be soft, the flavor will be enhanced, and you just saved a dessert from the trash. That’s a win in my book. Happy baking!
⚠️ Warning: This cake is high in sugar. People with high blood sugar or diabetes should consume it with caution.





