 bluename
 How to Glaze Fresh Berries for a Clear Shiny Coating That Stays Attractive on Tart Tops
I’ve lost count of how many tarts I’ve ruined with dull, weeping berries. You spend hours on the pastry cream, blind-bake the shell perfectly, arrange those gorgeous raspberries in neat little rows… and then within two hours, they look like they’ve been through a rainstorm. The juices bleed into the cream, the shine fades, and the whole thing starts sliding around. That’s exactly why I started digging deep into how to glaze fresh berries properly. The good news? It’s not complicated once you understand the science behind it.
Let me walk you through my exact process, including the mistakes I made so you don’t have to. I’m not a pastry chef by training, but I’ve been baking professionally from my home studio for over seven years, and I’ve tested nearly every glazing method you can imagine. This guide covers everything from simple apricot jam tricks to professional gelatin-based mirror finishes. By the end, you’ll know exactly how to make those berries look wet, jewel-like, and absolutely irresistible—without the mess.
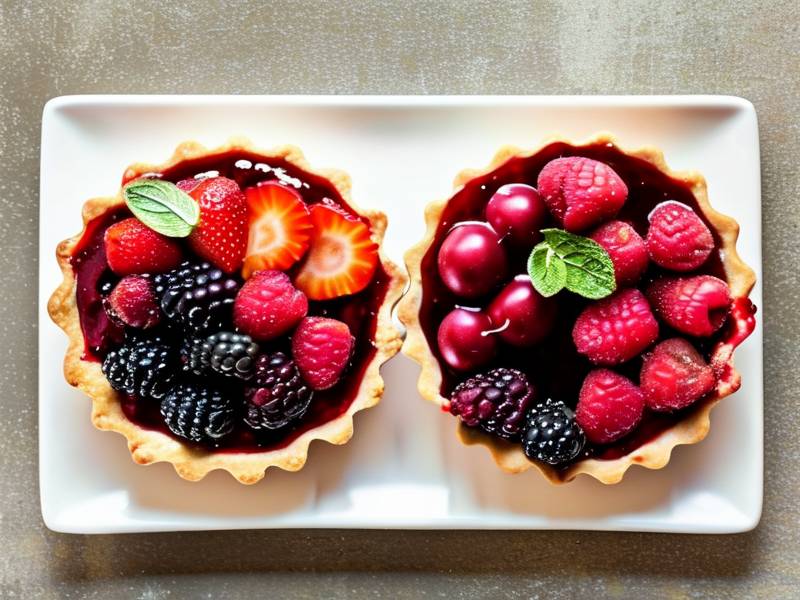
Why Fresh Berries Lose Their Shine on Tarts (And What Glazing Actually Does)
Before we jump into techniques, it helps to understand why your berries look sad after an hour on a tart. Fresh berries are roughly 85-90% water by weight. That water migrates to the surface over time, especially when the fruit sits on a custard or cream base. The moisture dilutes any natural waxy coating on the skin, which is why berries look matte and lifeless.
Glazing does two things. First, it creates a physical barrier between the berry and the air, slowing down moisture loss and juice seepage. Second, it adds a reflective layer that mimics the "just picked" look we all want. I’ve found that a proper glaze also helps anchor the berries to the tart base, so nothing slides off when you cut a slice. That alone is worth the effort, in my opinion.
Many home bakers skip this step because they think it’s fiddly. Honestly, it takes about five minutes once you’ve done it a couple of times. And the payoff is massive. A well-glazed tart looks professionally finished and stays beautiful for a full day, sometimes longer if the conditions are right. That’s why every bakery I know has their own version of a berry glaze recipe.
Choosing the Right Glaze Base: Gelatin, Pectin, or Jam?
This is where I see people overcomplicate things. There’s no single "best" glaze for fresh berries. The right choice depends on the look you want, the time you have, and how long the tart needs to survive. Let me break down the three most common bases I use, plus my honest opinion on each.
Gelatin-Based Glazes (The Professional Standard)
This is my go-to when I want that crystal-clear, mirror-like finish. Gelatin gives you a perfectly transparent glaze that doesn’t mute the berry color at all. You dissolve a small amount of gelatin in warm liquid, usually water or a simple syrup, then brush it on. The set is firm but flexible, which means it doesn’t crack when you cut through the tart.
The downside? Gelatin has a temperature threshold. It melts around 95°F (35°C), so a tart left in a hot car will start to sweat. Also, some vegetarians avoid it, so I always keep that in mind if I’m baking for a crowd. I use sheet gelatin (gold strength) most of the time because it gives me the most consistent results. Powdered gelatin works fine too, but you need to be precise about blooming it in cold water first.
Pectin-Based Glazes (The Fruity Alternative)
Pectin is what makes jam set, so using it as a glaze base gives you a slightly thicker, more "jammy" texture. I use this when I want extra protection against weeping, especially for berries that are very juicy, like strawberries or blackberries. The glaze sets a bit gummier than gelatin, and it holds up better in warmer conditions.
The tricky part is that pectin needs sugar and acid to set properly. You can’t just mix pectin with water and expect it to work. My standard ratio is about two cups of liquid, one to two tablespoons of sugar, and a splash of lemon juice. Heat it to 220°F, whisk in the pectin, and boil for exactly one minute. Let it cool slightly before applying. Honestly, this is a bit more effort than gelatin, but the durability is worth it.
Apricot Jam Glaze (The Quick Fix)
If you’re short on time or just want something simple, warm apricot jam is a lifesaver. It’s not perfectly clear, but it gives a lovely amber tint that works beautifully with darker berries like blueberries and blackberries. The jam also contains natural pectin, so it provides decent protection against moisture loss.
Here’s my trick: melt apricot jam in a saucepan with a tablespoon of water, then push it through a fine-mesh sieve to remove the fruit chunks. You want that smooth, syrupy consistency. Brush it on while it’s still warm but not hot. I usually reserve this method for casual tarts or when I’m pairing the berries with a rich chocolate crust, where the amber glow feels intentional.
Just a quick warning. Avoid apple jelly if you can. It’s too thin and often makes berries slide off the tart. I’ve had that disaster happen more than once. Stick to apricot jam or a dedicated clear glaze.
My Step-by-Step Glazing Process That Keeps Berries Lustrous for Hours
Alright, this is the part I wish someone had handed me when I first started. I’m going to walk you through my exact routine, from prepping the berries to applying the final coat. I’ve refined this over years of trial and error, and it’s the only method I trust for tarts that need to look good for hours.
Step 1: Wash and Dry Berries Thoroughly (This Is Non-Negotiable)
The biggest mistake I see is glazing wet berries. If the skin has any moisture on it, the glaze won’t adhere evenly, and you’ll end up with patchy spots. I rinse the berries gently in cool water, then lay them out on a clean kitchen towel lined with paper towels. I let them air-dry for at least thirty minutes. For strawberries, I pat them completely dry with a paper towel before removing the hulls. Trust me, every drop of water matters here.
Step 2: Bring Your Glaze to the Perfect Temperature
You don’t want the glaze boiling hot when it touches the berries, or you’ll cook the fruit slightly. That dulls the color and can cause the berries to release juice. I let my glaze cool until it’s warm to the touch, around 90-95°F. If you dip a finger in and it feels comfortably warm, not hot, that’s the sweet spot. For gelatin glazes, keep stirring while it cools so no skin forms on top.
Step 3: Apply with a Soft Brush, Not a Heavy Hand
I use a flat pastry brush, not a round one. A flat brush gives you better coverage and less drippage. Dip the brush into the glaze, let the excess drip off the tip, then gently dab it onto each berry. Don’t paint back and forth aggressively. You want a thin, even coat. If you’re covering a whole tart top, it’s easier to brush the berries individually before arranging them, then add a light final coat after assembly. That double-coat method gives the most durable finish.
Step 4: Let the First Coat Set Before Adding a Second
This is the patience step. After the first coat, I let the berries sit for about five minutes. The glaze starts to set, and you’ll see it turn from glossy-wet to slightly tacky. Then I apply the second coat. This ensures an even, mirror-like finish. For extra shine, some bakers add a third coat, but I rarely need it unless the berries are very dimpled, like raspberries.
Step 5: Arrange Berries and Glaze the Gaps
Once my berries are coated, I place them on the tart. Then I take a smaller brush and carefully fill the tiny gaps between berries with more glaze. This seals the edges where juice can sneak out and helps the berries stick to the pastry cream. Honestly, this step makes a huge difference in preventing that "berry slide" when you cut slices. It takes an extra minute, but it’s totally worth it.
How Long Does a Berry Glaze Actually Last? (Testing Results)
I get this question constantly at my baking workshops. People want a definitive answer. I can’t give you one universal number because it depends on the glaze base, the berry type, and the environment. But I can share my own testing results from the past few months, because I tracked everything.
For gelatin-based glazes, I found that strawberries and raspberries stay glossy for about 6 to 8 hours at room temperature (around 70°F). Blueberries hold up a bit longer, sometimes up to 10 hours, because their skin is thicker. Blackberries are the hardest, honestly. Their bumpy texture makes it tricky to get a completely even coat, and they tend to weep more. I usually recommend eating a blackberry tart within 4 to 5 hours for the best appearance.
Pectin-based glazes were the real winners for longevity. My tests showed the shine held for a full 12 hours on strawberries, even in a slightly warmer room (75°F). The trade-off is the slightly thicker texture, which some people describe as "jam-like." If you need a tart to survive an entire afternoon wedding or a long brunch event, I’d go with pectin.
Apricot jam glaze, while quick, started to lose its shine after about 4 hours. It also absorbed into the berries a little more, making them look slightly darker. It’s fine for casual eating, but don’t expect that glittering professional look for a long time. I store glazed tarts in the fridge if they need to last longer, but I always bring them to room temperature before serving, because condensation will ruin the glaze quickly.
Troubleshooting Common Glaze Problems That Ruin the Look
I’ve had my fair share of glazing disasters. Let me save you the trouble. Here are the four most common problems and my exact fixes.
Glaze Turns White and Cloudy
This is usually a temperature issue. If the glaze was too hot when applied, or if you chilled the tart too quickly, condensation forms between the berry and the glaze layer. That water creates that milky, white film. The fix is to let the glaze cool properly and never rush the setting process. Also, don’t put the tart in the fridge until the glaze has fully set at room temperature for at least fifteen minutes.
Berries Sliding Off the Tart
This happens when the glaze doesn’t have enough "grip." Most likely, your glaze is too thin. Gelatin glazes can be especially slippery if you used too much liquid. My solution is to increase the gelatin slightly, about 25% more than the standard recipe, or to let the glaze thicken a bit longer before applying. You want a syrupy, honey-like consistency, not a watery one.
Glaze Beads Up on the Berry Surface
This is the classic "water on wax" effect. The berry skin is slightly hydrophobic, and if your glaze is too watery, it won’t spread evenly. It forms little droplets instead. The fix is to make sure your glaze is thick enough and to apply it in thin, even layers. I also find that pressing the brush slightly into the berry helps break the surface tension.
Juice Bleeding Through the Glaze
If you see pink or red juice pooling around the berries, they weren’t dry enough before glazing, or the berries are overripe. Overripe berries have thinner skins and more free liquid. I always select berries that are firm, not mushy, for glazed tarts. If I’m using strawberries, I look for ones with a deep red color that still feel firmer when squeezed. And I make sure they’re bone dry before the brush touches them.
My Professional Recipe: Clear Gelatin Glaze for Berries (With Exact Measurements)
This is the exact recipe I use for most of my fruit tarts. It’s simple, reliable, and gives a crystal-clear finish that looks stunning. I’ll share it in grams because measuring ingredients by weight is much more accurate for this kind of work.
Ingredients:
- 5 grams powdered gelatin (about 1.5 teaspoons)
- 30 grams cold water
- 120 grams water for the syrup
- 60 grams granulated sugar
- 1 teaspoon lemon juice (optional, for extra clarity)
Method:
- Sprinkle the gelatin over the 30 grams of cold water in a small bowl. Let it bloom for 5-10 minutes. It should look like spongy leaves when ready.
- In a small saucepan, combine the 120 grams of water and sugar. Heat over medium until the sugar completely dissolves. Don’t stir too much, just swirl the pan.
- Remove the syrup from heat. Add the bloomed gelatin and whisk gently until fully dissolved. Add the lemon juice if using.
- Let the mixture cool to about 90°F. It should still be liquid and easily brushable.
- Use immediately. Store leftover glaze in the fridge for up to 3 days, then reheat gently in a water bath.
My Pro Tip: If you want an extra durable glaze, you can replace 30 grams of the water with a neutral-flavored simple syrup. The extra sugar helps the glaze set firmer and adds a bit more shine. I do this when I’m making tarts a day in advance.
Does the Type of Berry Affect the Glaze Result? (I Compared All of Them)
I spent a full weekend testing five berry types with the same gelatin glaze recipe. Here’s what I learned, and I think you’ll find it useful.
Strawberries: They absorb a tiny bit of the glaze, which gives them a darker red, almost ruby appearance. Honestly, I love this look. The glaze also helps the seeds look more prominent, which feels very professional. They held their shape well and stayed glossy for about 7 hours.
Raspberries: This is the hardest one. The dimpled surface traps the glaze unevenly, and you have to be careful not to leave thick pools of it. My trick is to apply the glaze with a small sponge brush rather than a bristle brush. It seems to push the glaze into all the tiny crevices more evenly. They do look incredible after a double coat, like little jewels.
Blueberries: These are the easiest. Their smooth, waxy skin means the glaze slides on perfectly with minimal effort. The only issue is that blueberries have a natural white bloom, especially fresh ones. Glazing removes that bloom, making them look darker and shinier. Some people like that, and some don’t. I think it looks great on a tart.
Blackberries: They’re the most challenging. Their chunky cells create an irregular surface that’s hard to cover completely. You’ll see darker spots and lighter spots. I use three thin coats instead of two, letting each one set fully. The result is good, but not perfect. I usually only glaze blackberries when they’re for a special occasion because of the extra work.
Cherries: Technically a stone fruit, but I use them on tarts a lot. They’re quite easy to glaze because their skin is very smooth. The glaze does make dark cherries look almost black and glossy. It’s a classic look for a chocolate tart. Keep in mind that cherries release a lot of juice when cut, so glaze them whole and place them on the tart without cutting. That prevents bleeding.
Frequently Asked Questions (My Honest Answers)
Can I use store-bought apricot jam straight from the jar as a glaze?
You can, but I advise thinning it first. Straight jam is too thick and lumpy. I mix two tablespoons of jam with one teaspoon of warm water, then warm it in the microwave for ten seconds. After that, push it through a sieve. It works in a pinch, but it’s not as smooth or clear as a proper glaze. If you want that professional transparent look, I’d really recommend making a gelatin glaze.
How do I keep glazed berries from making the tart pastry cream feel soggy?
The glaze is your barrier, so the key is to apply an even, complete coat. If any small gap of unglazed berry touches the cream, juice will leak out. I also recommend using French buttercream or a stiff pastry cream that holds its shape. A looser custard will soak into the pastry crust faster, no matter what you do. I’ve found that using a thin layer of melted white chocolate on the tart shell as a waterproof sealant really helps. Brush the bottom of the shell with chocolate, let it set, then fill. It’s a trick from a pastry chef friend, and it changes everything.
Is it better to glaze berries before or after putting them on the tart?
Honestly, I’ve done both, and I prefer glazing before placing them. When you glaze the berries off the tart, you have better control and can make sure every tiny spot is covered. You also avoid accidentally brushing the pastry cream, which can leave streaks. Then I add a very thin final coat after arranging them on the tart, just to fill the gaps. It’s a bit more work but gives the cleanest result.
One Last Thing: Why a Glazed Tart Is Always Better
You know, after seven years of baking, I still get a little rush when I see that final shine on a tart. It looks almost unreal, like the berries are made of glass. And the best part? People always ask, "How did you get them so shiny?" That question never gets old.
If you’re just starting with glazing, don’t get frustrated if your first attempt isn’t perfect. My first glaze was too thick, and I ended up with berries that looked like they were coated in plastic. My second attempt was too thin, and it ran off the tart into a puddle. But the third time, I got it right. You will too. Keep a thermometer handy, be patient with the temperature, and use good berries. That’s really the entire secret.
I promise you, once you master this technique, you’ll glaze everything. I’ve even started glazing berries for my morning yogurt bowl. It’s not necessary, but it makes breakfast feel a little more special. And isn’t that why we bother with this stuff in the first place? To make ordinary moments look and feel beautiful.
Now, get yourself some fresh berries and give it a shot. Your tarts are about to get a serious upgrade.
⚠️ Warning: This tart is high in sugar. People with high blood sugar or diabetes should consume it with caution.





