 bluename
 How to Trim Domed Cake Tops Flat Even Horizontal Cut Serrated Kitchen Knife
I have baked a lot of cakes over the years. And I have messed up a lot of cake tops too. The domed center is the classic problem. It looks rustic, but it is terrible for stacking or frosting. You need a flat surface. So I am going to show you exactly how to trim domed cake tops flat using a serrated kitchen knife. This is the method I use in my own kitchen. It works every time.
Understanding the Domed Cake Top Problem
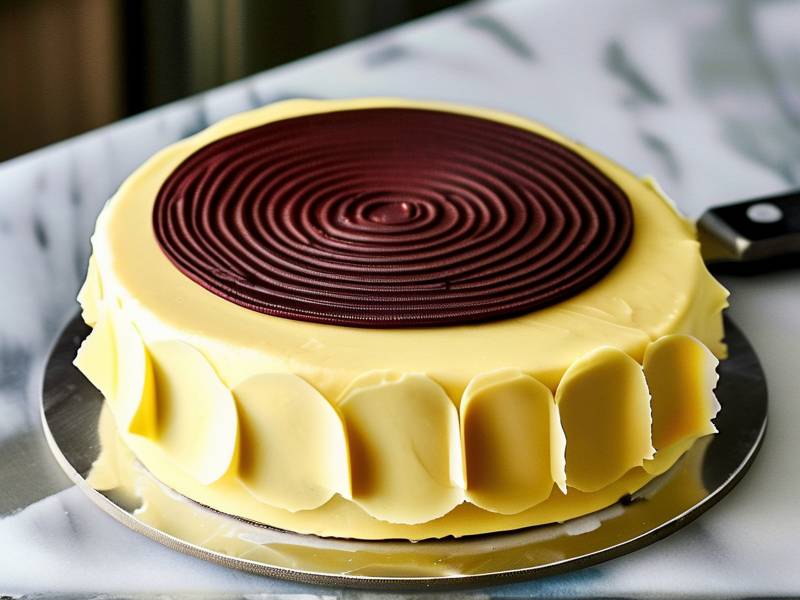
Baking powder and baking soda create gas. The gas pushes the batter up. The edges of the pan heat up faster. So they set earlier. The center keeps rising. That leaves you with a dome. You cannot frost that smoothly. A filling will slide off. A stacked cake will lean.
Many beginners panic here. I did too, honestly. The fix is simple. You just level the cake. But you have to do it right. A wrong cut ruins the whole cake. A good cut gives you a professional base. The key is a sharp serrated knife. And a steady hand. It is not about force. It is about technique.
The goal is a flat, even horizontal cut. You want to remove the raised center only. You do not want a wavy surface. You do not want a wedge shape. A level cut means the cake will sit straight. My technique below solves all of this.
Essential Tools for a Level Cake Cut
Let me talk tools first. You cannot use a regular chef's knife. It will crush the cake. A serrated knife is a must. The little teeth saw through the crumb. They do not press down on it. I prefer a long blade. At least 10 inches. That way you can cut across the whole cake in one pass. A short knife makes multiple cuts. And multiple cuts mean a wavy line.
You also need a turntable. It makes the job so much easier. I know, not everyone has one. But I strongly suggest you get one. It costs about fifteen bucks. If you do not have one, you can use a cake board. Spin the board with your non-dominant hand. It works, but it is slower.
Another tool that changed my game is a cake leveler. Wait, I said serrated knife in the title. The leveler is a string tool. But I actually prefer a knife for control. Let me explain why. The leveler has a wire. It cuts straight through. It is fast. But it tears the crumb. It leaves crumbs everywhere. A serrated knife gives a cleaner cut. You just need to keep it level.
Grab a ruler or a serrated knife guide. These clips attach to the blade. They ensure you cut at the same height everywhere. This is great for beginners. I will go over this in the steps. Honestly, the guide removes most of the guesswork.
Step-by-Step Guide to Trim Domed Cake Tops
The Chill Step is Non-Negotiable
First, chill the cake. A warm cake will crumble. It will tear. A cold cake is firm. It holds its shape. I bake my cake the day before. I let it cool completely. Then I wrap it in plastic wrap. It goes in the fridge overnight. If you are in a hurry, freeze it for 30 minutes. That works too. But just make sure it is cold.
This is where I see people fail. They get impatient. They try to cut a warm cake. The knife drags. The cake sinks. It is a disaster. Trust me, I have been there. Cold cake is the only answer. The crumb structure stabilizes in the cold. You will get a much cleaner cut. It feels almost satisfying to slice through it.
Mark Your Cutting Line
Now we get to the actual cutting. Take the chilled cake out of the fridge. Place it on your turntable. If you have a cake board, use that. Look at the cake from the side. See the dome. You want to remove the dome. But how much do you cut? That depends on your recipe.
I usually aim for a total cake height of two inches. That is standard for layer cakes. Some recipes make a thicker layer. Some make a thinner one. The trick is to find the lowest point of the domed top. The edges of the cake are usually flat. That is your baseline. You want the cut to be just above that flat edge. That way you remove only the dome.
Use the serrated knife to score a line. Just a light cut. You are not slicing through yet. You are marking where you will cut. If the dome is high, you might trim more. If it is slight, you take off less. Remember, you can always cut more. You cannot put the cake back. So take your time here.
Use the Sawing Motion
Now for the main event. Hold your serrated knife horizontally. The blade should be parallel to the counter. Place the knife at the marked line. Now, this is the most important step. Do not press down. Instead, use a gentle sawing motion. Move the knife back and forth. Let the serrations do the work.
I learned this the hard way. I used to push down hard. That caused the knife to sink. The cut went diagonal. The cake ended up lopsided. The sawing motion is key. It slices slowly through the crumb. You do not need much pressure. Just keep the knife steady. Keep it level. The sawing motion should be even and long.
As you saw, rotate the turntable. This makes the cut even. You are essentially cutting in a circle. The knife stays still. The cake turns. It feels odd at first. But it works perfectly. You will feel when the cake separates. The knife will suddenly come through the other side.
Check for a Flat Even Horizontal Cut
Once you have cut all the way around, lift the dome off. Grab the removed dome. And eat it. That is honestly my favorite part. But wait. Check the cut surface. Place a ruler on top. If there are gaps under the ruler, you have a slope. Not great. But do not panic. You can fix it.
A small slope is often okay. It depends on the cake. If the difference is more than a quarter inch, you should fix it. Hold the knife flat against the surface. Use a gentle sawing motion again. Just skim the high spots. You are not cutting the whole cake. You are only evening it out. This is where the serrated knife shines. It does not dig in deep. It just smooths.
Honestly, flatness matters more than people think. A cake that is slightly domed will frost unevenly. The center will have thicker frosting. The edges will be thin. It looks unprofessional. A flat, even horizontal cut makes frosting a breeze. Your spatula will glide across. The cake will look clean and sharp.
Alternative Methods for Different Level of Skills
The Cake Leveler String Method
I promised I would talk more about the leveler. Some people love it. I get it. It is foolproof. You set the wire height. You place the legs on the counter. You pull it across the cake. It cuts a perfectly straight line. No skill is required. I use it when I am baking multiple cakes. It is fast.
But I still prefer the serrated knife for the final result. The string is thick. It tends to tear the crumb. It leaves a slightly rough surface. With a knife, I control the smoothness. With a leveler, I just get a straight line. For a beginner, a leveler might be better. It guarantees a straight cut. Then you can clean up with a knife.
If you use a leveler, do it on a cold cake too. Same rule. You will still get crumbs. But the cut will be straight. You can then use a pastry brush to remove crumbs. I usually use a dry paper towel instead. Whatever works for you.
Using a Knife Guide
A knife guide is a great tool. It clips onto the serrated knife. It has small feet. The feet rest on the counter. This ensures the blade stays level. It is foolproof. It is a good middle ground. You get the clean cut of a knife. And you get the level line of a guide. This is what I recommend for beginners.
You do not need to buy an expensive one. A simple plastic clip works fine. Just make sure it fits your knife. Once attached, place the feet on the counter. Then pull the knife through the cake. The feet keep the blade level. So you never get a lopsided cut. It is a simple mechanism. But it solves the biggest problem people have.
I will say, guides can be tricky with tall cakes. If your cake is higher than the guide, it will not work. But for standard two-inch cakes, it is perfect. And it takes the fear out of cutting. You know the result will be straight. You can focus on the sawing motion only.
Common Mistakes When Trimming Cake Tops
Cutting a Warm Cake
I said it before. I will say it again. Cutting a warm cake is the top mistake. The crumb is too soft. The knife will push the air out. The cake becomes dense. It also sticks to the knife. It is a mess. Always chill. Always. It takes ten minutes of prep time. It saves you a ruined cake.
Some people think a cool cake is enough. Room temperature is still too soft. You need it straight from the fridge. Or from the freezer. The colder, the better. The cake should feel firm to the touch. If you press it and it springs back fast, it is still too warm. Wait longer.
Pressing Down on the Knife
The second mistake is pressing down. A serrated knife cuts with its teeth. It does not need downward force. When you press down, you crush the bottom of the cake. The top part might look fine. But the bottom is compressed. This ruins the crumb texture. It also makes the cut uneven.
I like to think of it as a saw. You are sawing wood, not chopping it. Gentle back and forth. Let the teeth grip. Let the blade guide itself. The knife will cut from the bottom up. If you press down, you will feel resistance. Stop. Adjust your pressure. Saw again.
My Personal Experience with Tricky Cake Textures
I want to share a specific experience. I baked an olive oil cake. It was moist and dense. Not like a sponge at all. I thought a serrated knife was unnecessary. I used a regular chef's knife. Big mistake. The knife crushed the cake. The oil in the cake made it stick. The top came off in crumbles. It was almost a disaster.
I learned my lesson. The serrated knife is not just for light cakes. It is for all cakes. The teeth grip the crumb and slice cleanly. Even dense cakes cut well with a serrated knife. Now I use it for everything. Sponge cakes, pound cakes, even cheesecakes. A serrated knife is my best friend.
Another issue is very airy cakes. Angel food cake is a nightmare. It is so light. The knife can tear through it. But the sawing motion helps. It minimizes contact. It makes a clean cut. Just go slow. Do not rush. With a fruit cake, it is the opposite. It is sticky. The knife gets gummed up. I wipe the blade after each pass. It keeps the cut smooth.
How to Fix a Lopsided Cut
So you messed up. The cut is not flat. One side is higher. Do not throw it away. There is always a fix. Place the cake, cut side down, on a board. Look at it. The cut side is now the bottom. So you see the unevenness. You need to trim the high side.
Use your serrated knife. Saw off a thin layer from the higher side. Take off a little at a time. Check your progress after each pass. It is slow work. But it saves the cake. You just need it to sit flat. Once the top is level, flip it over. Now the cut side is on top. And you have a flat surface.
This happens to everyone. It happened to me many times. The key is patience. Do not try to cut the whole side off in one go. Take small passes. You will get there. And honestly, a slightly imperfect cake is still delicious. A little frosting hides many flaws.
The Best Type of Serrated Knife for Cake
Let me talk about knives for a moment. Not all serrated knives are the same. A bread knife is the most common. It has long, wide serrations. It works great for bread. It works okay for cake. But I prefer a smaller serrated knife. The teeth are finer. They make a cleaner cut on cake.
Look for a knife with a thin blade. A thick blade will wedge into the cake. It will push the cake apart. A thin blade just slices through. It is more precise. Also, a straight blade is better than a curved one. A curved blade is great for bread. A straight blade is better for cake. You want a flat cutting edge.
A longer knife is better than a shorter one. This means fewer passes. You do not want to cut the cake in multiple strokes in different places. You want one long, smooth movement. A 10 to 12 inch blade is ideal. If you have a small 6 inch knife, it will work. But it takes more skill to keep it level.
I recommend a knife with a comfortable handle. You will be holding it for a while. A weighted handle helps. It balances the blade. It reduces hand fatigue. And for chocolate cakes, I wipe the knife clean often. The crumbs and frosting get sticky. Wipe it with a damp cloth. Keep the blade clean. It cuts better.
Why a Sharp Knife is Non-Negotiable
A dull serrated knife is dangerous. It does not cut cleanly. It tears. It requires more force. Which means you are more likely to make a mistake. I know some people think you cannot sharpen serrated knives. That is a myth. You can. There are sharpeners designed for serrated edges. Use them.
I sharpen my serrated knife a few times a year. It makes a huge difference. When it is sharp, the cut is effortless. I can saw through a cake in ten seconds. When it is dull, it takes a minute. And the result is worse. So do not overlook knife maintenance. It is part of the process.
A sharp knife is also safer. I know it sounds counterintuitive. But a dull blade slips more. It requires more force. Slipping and forcing lead to accidents. A sharp blade bites into the cake. It stays where you put it. It moves where you want it. This is true for all knives. But it is extra true for cake cutting.
The Role of Cake Temperature in Cutting
I keep bringing up temperature. Because it really is the most important factor. Let me give you some specific numbers. I bake my cake and cool it for two hours at room temperature. Then I wrap it. It goes in the fridge for at least three hours. That is my standard routine. The cake is cold but not frozen. The crumb is firm but not solid.
If you need to cut it immediately, you can freeze it. Freeze the cake for 30 minutes. Then cut it. It works fine. The cake is very firm. It cuts beautifully. But be careful. A frozen cake is harder to slice through. You need a really sharp knife. You also need to use gentle sawing. Do not force it.
If your cake is too cold, it might crack. Some delicate cakes crack when cut too cold. A sponge cake, for example. It is all air. It needs to be just chilled. Not frozen solid. I have cracked a sponge cake before. It was too cold. The blade could not slice through. It pressed down. Crack. So there is a balance. You want firm but not hard.
How to Stack Cakes After Trimming
Now you have a flat cake. Good. The next step is stacking. Do not rush this. A flat cake is the foundation. But you still need to handle it with care. Place a dab of frosting on the cake board. This holds the bottom layer in place. Then place your first layer, cut side down. This is important. The cut side is the flattest. So put it down. Even a slightly uneven cake will sit better this way.
Add your filling. Use a spatula to spread it. Keep it even. I like to use a lot of filling. But do not let it spill over the sides. When you add the next layer, it should be cut side up. The flat, cut side faces the filling. This gives you two flat surfaces together. It makes the stack perfectly stable.
If you skipped trimming, stacking is wobbly. The dome creates a gap. It puts pressure on the filling. The cake slides. Trust me, I have had a cake collapse. It is heartbreaking. It is easily preventable. Just spend the five minutes to trim the cake flat. It makes such a difference.
A Real-Life Example of a Perfectly Truncated Cake
Let me describe a perfect scenario. I baked a vanilla chiffon cake. It was for a friend's birthday. I used my standard technique. Chilled it overnight. Got the serrated knife. Marked my line. Sawed around the edge. The dome came off in one piece. The surface was as flat as glass.
I measured it with a ruler. It was exactly two inches high across the entire cake. No slopes. No dips. I then sliced it in half horizontally. I got four even layers. The frosting looked amazing. The layers were perfectly even. It was one of the best cakes I have ever made. The key was taking my time with the initial cut.
This kind of result is achievable. It is not luck. It is technique. It is using the right tool. And it is respecting the process. A serrated knife makes it possible. But you still need to do the work. Chilling, marking, sawing. It is a simple process. But each step matters.
What to Do with the Leftover Dome Pieces
So you have removed the dome. What do you do with it? Do not throw it away. That is delicious. Some people call these "baker's treats." You can eat them as is. You can toast them. You can crumble them into a dessert. There are so many uses.
I like to cut the dome into chunks. Then I layer them in a glass. I add some fruit. I add some whipped cream. It is a quick dessert. It looks fancy but takes five minutes. Another idea is to crumble it. Use the crumbs as a topping for ice cream. Or mix them into cake pops. They add moisture and flavor.
If you are baking a layer cake, save the dome for later. Wrap it in plastic. Freeze it. You can use it for a future dessert. Or you can just eat it. I am not going to judge. One of the best parts of baking is snacking on the scraps. The dome is the best part. It always has a crispy edge. It is great.
Avoiding the Bowl-and-Knife Disaster
I want to warn you about something. I call it the bowl-and-knife disaster. Some people try to use the cake pan bowl to cut the cake. They put the cake back in the pan. Then they run the knife along the edge. This is dangerous. The pan is metal. The knife can slip. You can cut the pan. You can scrape the coating. It is a bad idea.
Always cut the cake on a flat cutting board. Not in a pan. The pan has a rim. It gets in the way. It limits your hand movement. It is much harder to keep the knife level. A cutting board gives you free access. You can move the knife freely. You can rotate the cake easily. It is the only way to get a straight cut.
Also, ignore any advice about using a fork to hold the cake. That creates holes. That compresses the crumb. Do not use a fork. Hold the cake with your fingers. Very lightly. Or let it rest on the board. The cake should not move. But you do not need to grip it hard. The same goes for the dome piece. Do not press on it. Just lift it off after cutting.
The Timing of the Trim
When should you trim the cake? There are two options. You can trim before you fill and stack. Or you can trim after. I strongly suggest before. Why? Because after you add the filling, the cake is sticky. It is harder to handle. The knife will get sticky. The crumbs will stick to everything. It is a mess.
Trimming before filling is clean. The crumb is dry. The cut is clear. You can brush off the crumbs easily. Then you can add your frosting. The process is much more manageable. I always trim my cakes right after chilling them. Before I make the frosting. That way, the frosting stays fresh.
If you trim later, you risk damaging the filling. And you cannot get a clean slice. You might press the frosting up into the cake. It will ruin the texture. So do it early. Make it the first thing you do after the cake is cold. It sets you up for success.
Cleaning and Storing Your Serrated Knife
You did it. The cake is flat. You have cut the dome off. Now take care of your knife. Wash it by hand. Do not put it in the dishwasher. The heat can dull the blade. And the detergent can be harsh. I wash mine with warm water and soap. Then I dry it immediately. No rust issues.
Store it in a knife block or a drawer. Do not just toss it in a drawer. That can nick the blade. And the blade could cut you when you grab for it. I store my serrated knife in a separate section. It protects the blade and my hands. This is a small habit that keeps your knife working well.
A good serrated knife lasts for years. Mine has been with me for over five years. I use it almost daily. I just take care of it. The sawing motion wears the teeth slowly. But with proper care, it stays sharp. It keeps making clean cuts. It is worth the investment.
A Simple Recipe That Benefits from This Technique
Let me talk about which cakes benefit the most. A classic layer cake is number one. Think of a vanilla or chocolate cake. They always dome. They always need a trim. A chiffon cake is another one. They are tall and airy. They often dome significantly. It is worth trimming them.
Sponge cakes and angel food cakes also benefit. They are delicate. Trimming them is tricky. But the technique is key. A serrated knife makes it possible. A knife will crush them. So use a gentle sawing. Try a genoise sponge. It is dry and dense. It cuts easily. And it is perfect for layering.
But do not trim cheesecakes. They do not dome the same way. They usually bake flat. If they crack, you do not trim. You hide the crack with frosting. Or you flip the cheesecake. The bottom becomes the top. This is a different technique entirely. Stick to cutting the domed cakes. Cheesecakes are a different beast.
An Advanced Tip for Perfectly Even Layers
If you want to take this to the next level, try this. After you cut the dome off, measure each layer. Use a ruler. If one is slightly thicker, trim it. This ensures every layer is exactly even. This makes a huge difference in the final cake. It makes sure the cake is symmetrical. It also makes sure the frosting is uniform.
I also maintain a consistent height across my cakes. I always bake the same amount of batter. I use a kitchen scale. It ensures every cake is the same. But even with a scale, the oven bakes unevenly. So I always check the height after baking. Trimming is my final step to perfection.
Another tip is to use a hot knife. Dip the serrated knife in hot water. Dry it. Then cut. Wait, I said not to do this. It is for a regular knife with cream cakes. For a plain cake, you do not need a hot knife. A cold, sharp serrated knife is better. It keeps the crumb intact. A hot knife melts the fat in the cake. It makes a gummy cut. So do not do it.
Troubleshooting Sticky or Crumbly Cakes
Some cakes are inherently sticky. A carrot cake has pineapple. A pineapple upside-down cake is obviously sticky. A very moist banana bread can be tricky. If your cake is sticky, wait longer before cutting. Chill it longer. The extra time helps it firm up. You might also try wiping the knife more often. The sticky crumb clings to the blade. A clean blade cuts better.
If your cake crumbles, the issue is usually a lack of gluten. Or it is too delicate. This happens with gluten-free cakes. Or with recipes using almond flour. In this case, the sawing motion is essential. Do not press down. Just let the knife glide. You might also need to use a cake leveler instead. The straight line can handle delicate crumb better.
Crumbly cakes also benefit from a crust. Bake the cake a little longer. Or use a different pan. But do not trim a crumbly cake directly after baking. Let it cool completely. Then chill it. The crumb is firmer when cold. This reduces crumbling. You will always have some crumb loss with these cakes. Accept it and move on.
The Emotional Side of Cake Trimming
I do not want to sound dramatic. But I enjoy cake trimming. It is meditative. You have a messy cake top. You fix it. It becomes perfect. There is satisfaction in that. The sawing motion is rhythmic. The knife goes back and forth. The dome comes off cleanly. You see the flat surface underneath. It is a small victory.
I also think it is about control. Baking is scientific. Trimming is art. You take the baked cake. You shape it. You make it yours. It is the moment the cake becomes a canvas. I love that. And I love that a simple tool like a serrated knife gives me that control. It is a skill anyone can learn.
For new bakers, this is a milestone. When you can trim a cake flat, you are no longer a beginner. You are an intermediate baker. You understand the technique. You respect the process. You will produce cakes that look professional. It is a skill worth learning.
Key Takeaways on Using a Serrated Knife for Cake
I have given you a lot of information. Let me boil it down. Chill the cake. It is non-negotiable. Mark your cut line. It guides you. Use a serrated knife. Saw, do not press. Keep the knife level. Rotate the cake to make it even. Check your work. Fix any slopes. And practice.
You will not get it perfect the first time. I did not. But with practice, you will. Every cake you trim gets a little easier. You will develop a feel for it. You will see how much pressure to use. You will feel when the knife is level. It becomes second nature.
And the reward is a beautiful cake. A cake that looks like it came from a bakery. A cake that holds its layers. A cake that frosts cleanly. This is the goal. And it is achievable.
FAQ
Can I use a bread knife to trim a cake top?
Yes, you can. A bread knife is a serrated knife. It works well on cake. I actually use a bread knife most of the time. It is long. It has deep serrations. It cuts through the cake easily. The key is the sawing motion. Just make sure the knife is sharp. A dull bread knife will tear the cake.
Why is my cake top so domed even after trimming?
There are a few reasons. Your batter might be too full. The center rises more. Try reducing the batter. Or you might have a hot oven. The edges set too fast. Turn the oven down by 25 degrees. Also, check your baking powder. It might be old. Fresh leavener creates a more even rise. If the cake still domes, you just need to trim more.
What is the best way to get an even horizontal cut?
The best way is to chill the cake completely. Then use a long, sharp serrated knife. Mark your line first. Then use a sawing motion. Keep the knife parallel to the counter. Rotate the cake as you cut. If you want to be extra sure, use a knife guide clip. It keeps the blade level for you.
Should I trim the cake before or after it is cool?
You should always trim a cold cake. Never trim a warm cake. A warm cake is soft and tears easily. Cool it for at least two hours at room temperature. Then chill it. This makes the crumb firm. It holds its shape. The knife cuts through cleanly. This is the only way to get a professional result.
How much cake top should I trim off?
You want to remove the entire dome. Usually this is about a quarter to a half inch. It depends on the height of the dome. You cut until the surface is flat. The cut should be parallel to the bottom. Look at the side of the cake. Keep the knife level with the counter. When the dome is gone, you are done.
⚠️ Warning: This cake is high in sugar. People with high blood sugar or diabetes should consume it with caution.





