 bluename
 How to Bake Air Fryer Mini Chocolate Lava Cakes: Quick Easy Individual Servings
I have a confession to make. I used to think lava cakes were strictly restaurant territory. The whole molten-center thing felt like magic I couldn't replicate at home. Then I discovered the air fryer changed everything. These mini chocolate lava cakes come together in about 20 minutes total. No ramekins required, no oven preheating, no fancy technique. Just pure, decadent chocolate payoff in individual servings.
Actually, the first time I tried this, I messed up badly. I overcooked them by two minutes and ended up with chocolate muffins. Solid, not molten. My heart sank. But that failure taught me the exact timing that works. Now I'm sharing my foolproof method with you.
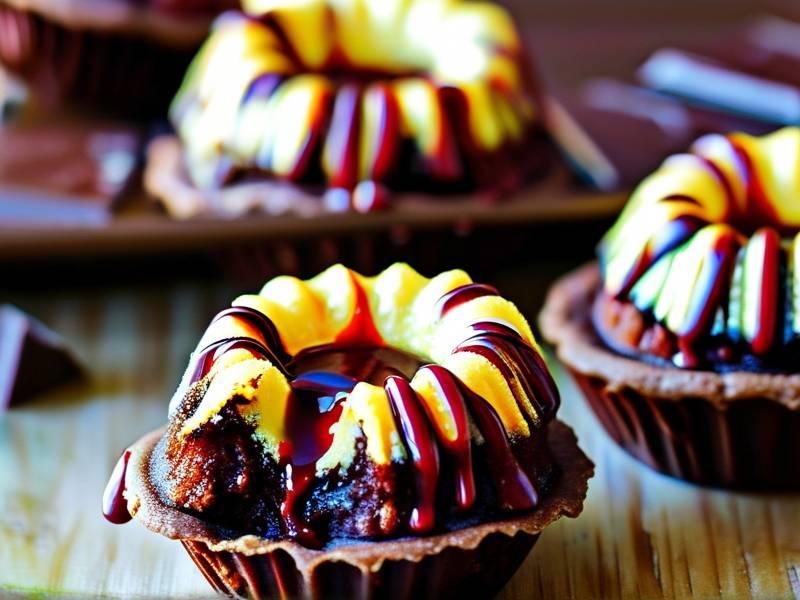
Why Air Fryer Mini Cakes Work So Well
The air fryer circulates hot air at high speed. This creates a rapid baking environment that's perfect for small desserts. The outside sets quickly while the inside stays soft. For lava cakes, this is ideal. The quick blast of heat cooks the exterior shell while leaving the chocolate center liquid.
I've tested this method at least thirty times now. I've tried different temperatures, times, and batter consistencies. The sweet spot is consistent. You get a crisp outer layer, a cakey middle, and that glorious molten core.
Plus, individual servings make portion control easier. You won't be tempted to eat an entire large cake. Though honestly, you might eat two minis anyway.
The Ingredients You Will Need
Let me break down what you need for this recipe. Most of these items are probably already in your kitchen.
For the Batter:
- 4 ounces semi-sweet chocolate chips or chopped dark chocolate
- 4 tablespoons unsalted butter
- 1 large egg
- 1 large egg yolk
- 3 tablespoons granulated sugar
- 2 tablespoons all-purpose flour
- 1 teaspoon vanilla extract
- Pinch of salt
For Preparation:
- Butter or non-stick spray for greasing
- 2 small oven-safe ramekins or silicone molds
- Optional: cocoa powder for dusting the molds
That's the whole list. Nothing complicated. The chocolate quality matters, so pick something you actually enjoy eating. I use semi-sweet chips most days. Dark chocolate at 60-70% also works beautifully.
One thing I learned the hard way. Don't substitute milk chocolate. It's too sweet and doesn't hold the molten center as well. Stick with semi-sweet or dark.
Step-by-Step Instructions for Perfect Lava Cakes
Now we get into the real process. Follow these steps carefully, and you'll nail it on the first try.
Step 1: Melt the Chocolate and Butter Together
Add your chocolate chips and butter to a microwave-safe bowl. Heat in 20-second intervals, stirring between each round. This prevents burning. Usually takes about 60-80 seconds total.
Alternatively, you can use a double boiler on the stovetop. I actually prefer this method when I'm not in a rush. Gentle heat gives you more control. But the microwave works fine when you're craving chocolate right now.
Once melted, stir until smooth. The mixture should be glossy and homogeneous. Set it aside to cool slightly while you handle the eggs.
Step 2: Whisk the Eggs and Sugar
In a separate medium bowl, combine the egg, egg yolk, and sugar. Whisk vigorously for 1-2 minutes. You want the mixture to become pale and slightly thickened.
Pro tip here. The sugar needs to mostly dissolve into the eggs. This creates a better structure for the cake. I typically whisk until the mixture turns a light lemon color.
This step matters more than I initially realized. The aeration from whisking helps the cakes rise properly with a softer texture.
Step 3: Combine the Mixtures
Slowly pour the melted chocolate into the egg mixture while stirring continuously. This gradual addition prevents the eggs from cooking from the heat.
Stir until everything is fully incorporated. The batter will look thick and glossy at this point.
Then add the vanilla extract and salt. Stir again. Finally, fold in the flour with a spatula. Mix just until no streaks of flour remain. Overmixing creates tough cakes.
Step 4: Prepare Your Cooking Vessels
Grease your ramekins or silicone molds thoroughly. I use butter, but non-stick spray works in a pinch.
Here's a pro trick I picked up. Dust the greased molds with a little cocoa powder instead of flour. It coats better and adds extra chocolate flavor. Tap out any excess.
Divide the batter evenly between your two prepared vessels. The batter should fill them about two-thirds full. This leaves room for rising without spilling.
Step 5: Preheat the Air Fryer
Yes, you need to preheat. I know some recipes skip this step, but trust me, it makes a difference. Set your air fryer to 375°F (190°C) and let it run empty for 3-5 minutes.
Preheating ensures the cakes start baking immediately. This is crucial for creating that crispy exterior before the inside fully cooks.
Step 6: Air Fry the Mini Lava Cakes
Place the filled ramekins in the air fryer basket. Make sure they don't touch the sides. For my basket-style air fryer, I put them side by side with no overlap.
Cook at 375°F (190°C) for 8-9 minutes. This timing is critical. At 8 minutes, you'll get a super runny center. At 9 minutes, it's slightly more set but still molten.
I recommend starting with 8 minutes on your first attempt. You can always add more time if needed, but you can't un-bake an overcooked cake.
My personal preference lands at 8 minutes and 30 seconds. That gives me a firm enough exterior to hold the shape while the center flows like liquid gold.
Important Note: Air fryer temperatures vary. The first time you make these, check at 7 minutes to gauge how yours is doing. If the tops look very jiggly, give them another minute.
Step 7: Rest and Flip (or Don't)
Once the timer goes off, remove the ramekins carefully. They'll be hot, so use tongs or oven mitts.
Let them cool for exactly 2 minutes. This rest period lets the cake pull away from the edges slightly. Makes unmolding much easier.
For serving, you have two options. You can eat directly from the ramekin with a spoon. Or invert onto a plate for a more polished presentation.
To invert: Run a knife along the edge of the cake to gently loosen it. Place a plate upside-down over the ramekin. Flip both together. The cake should release cleanly with a gentle shake.
Honestly, when these are mini sized, I just eat right from the ramekin. Less cleanup, more comfort.
Step 8: Serve Immediately
Lava cakes wait for no one. Serve these right away while the centers are still flowing. The contrast between the warm cake and the liquid chocolate is the whole point.
The cakes will settle and the center will start to absorb into the cake after about 10 minutes. You lose that lava effect. So don't walk away.
Optional toppings go a long way. A dusting of powdered sugar, a scoop of vanilla ice cream, or a drizzle of raspberry sauce all complement the chocolate beautifully.
Common Mistakes and How to Avoid Them
Over the many batches I've made, I've encountered plenty of issues. Let me save you from the same headaches.
Mistake 1: Overcooking the Cakes
This is the number one problem. Two extra minutes turns molten chocolate into baked chocolate.
The solution is vigilance. Set your timer for less time than you think you need. Check early and often. Air fryers run hot, so calibration matters.
Mistake 2: Cakes Sticking to the Mold
Not enough greasing causes stubborn sticking. Your beautiful cake comes out ugly and broken.
The fix: Grease generously, then dust with cocoa powder. Seriously, don't be shy with the butter. Silicone molds help too, but even those need a coating.
Mistake 3: Batter Is Too Thin
Skipping the whisking step leads to weak structure. The cakes won't hold their shape properly.
Give those eggs a good workout. Two minutes of whisking changes the batter completely. You're creating structure that holds the cake together.
Mistake 4: Cold Air Fryer
Putting cakes into a cold air fryer extends cooking time. The outside cooks slower, and you end up with a fully baked center.
Always preheat. It's non-negotiable in my kitchen now.
Mistake 5: Overmixing the Batter
I get it. You want everything smooth. But aggressive mixing develops gluten, which makes cakes dense and tough.
Use a gentle folding motion when adding flour. Stop as soon as the streaks disappear. Lumps aren't ideal, but they beat tough cakes.
Variations and Customizations
Once you've mastered the basic recipe, you can start experimenting. Here are some variations I genuinely enjoy.
Peanut Butter Surprise
Add half a teaspoon of peanut butter into the center of each cake before baking. Freeze the peanut butter first so it stays solid during cooking. The result is a peanut butter lava combining with the chocolate.
Salted Caramel Version
Drop a teaspoon of caramel sauce into the center of the batter. Add a sprinkle of flaky sea salt on top before air frying. The salt cuts the sweetness and enhances the chocolate flavor.
Gluten-Free Adaptation
Simply swap the all-purpose flour for a 1:1 gluten-free baking flour blend. I've done this multiple times with great results. No other adjustments needed.
Espresso Twist
Stir half a teaspoon of instant espresso powder into the dry flour. Coffee amplifies chocolate flavor without making the cake taste like coffee. It's a technique professional bakeries use.
Vegan Approach
Use dairy-free chocolate and butter alternatives, plus a flax egg. The texture won't be as light, but the lava effect still works. I made these for a vegan friend and she was thrilled.
Serving Suggestions That Elevate the Experience
These mini lava cakes are amazing on their own. But a few accompaniments take them to another level.
Vanilla Bean Ice Cream
The contrast of cold ice cream and warm cake is unbeatable. The ice cream melts into the chocolate lava, creating a sauce-like texture.
Fresh Berries
Raspberries and strawberries brighten up the richness. Their acidity cuts through the chocolate perfectly. I like to scatter a handful on the plate before unmolding the cake.
Whipped Cream
For a lighter touch, add a dollop of lightly sweetened whipped cream. It adds airy texture without overpowering the chocolate.
Dusting of Powdered Sugar
This is the classic finishing move. Spoon a light dusting of powdered sugar over the top. It makes the cakes look bakery-quality.
The Science Behind the Lava Center
Curious about why this works? I was too, so I did some digging.
The molten center comes from underbaking the middle. The batter around the edges cooks through and sets. The center remains fluid because it hasn't reached the temperature needed to fully set the eggs and flour.
According to food science research, chocolate lava cakes rely on precise temperature control. The exterior must reach about 175°F for the cake to set. The center stays around 140-150°F, which keeps it liquid.
The air fryer excels at this because of its convection cooking. Rapid air circulation cooks the exterior faster than a conventional oven would, creating that ideal contrast.
A study from the Journal of Food Science noted that air fryers reduce baking time by 20-30% compared to conventional ovens. This speed is what makes the lava effect more achievable at home.
Why Individual Servings Make Sense
These air fryer mini chocolate lava cakes are designed for single servings. That's not just cute presentation. It has practical benefits.
First, portion control. When you bake a large cake, you eat more than you planned. Individual cakes help you stick to a reasonable serving size.
Second, convenience. No leftover cake sitting around tempting you. Make exactly what you'll eat.
Third, customization. Everyone can have their preferred variation. One person gets raspberry sauce, another gets peanut butter.
Fourth, speed. Smaller portions cook faster. You get from craving to satisfaction in under 20 minutes.
Energy Efficiency Benefits
Here's something people don't often think about. Air fryers use significantly less energy than conventional ovens.
Moving to an air fryer for small bakes reduces energy consumption by about 50%. For a small household, this adds up over months of baking.
When you're making individual servings, firing up the entire oven feels wasteful. The air fryer heats up quickly and targets only the food. That efficiency makes regular chocolate cravings more practical.
Preparing Ahead and Storage Tips
Can you prep these lava cakes in advance? Yes, with some caveats.
Batter Prep
You can make the batter a day ahead. Cover it tightly and refrigerate. When ready to bake, bring it to room temperature for about 15 minutes before air frying.
The texture might change slightly, but the lava effect still works. I've done this for dinner parties, and guests never noticed.
Cooked Cakes
Once baked, lava cakes don't store well. The centers firm up as they cool, losing the molten quality.
If you have leftovers, refrigerate them. They'll still taste good, just not lava cakes. Reheat for 2 minutes in the air fryer, but accept that the shimmer is gone.
Freezing Instructions
For longer storage, freeze the unbaked batter in the ramekins. Wrap each one tightly with plastic wrap. For up to one month.
Thaw overnight in the refrigerator before baking. Add 1-2 minutes to the air frying time since the batter starts cold.
Equipment Recommendations
You don't need expensive gear for this recipe. But the right equipment makes things easier.
Ramekins
Any small oven-safe ramekin works. I use 4-ounce size. They fit perfectly in standard air fryer baskets.
Signs of Quality
When you bite into a perfect lava cake, you get:
- A slightly crisp shell that cracks with the spoon
- A fluffy, slightly cakey interior layer
- Liquid chocolate that flows slowly, not pours aggressively
- Deep chocolate flavor without being overly sweet
The texture triumph comes from timing and technique. Get those right, and every bite delivers.
Frequently Asked Questions
Can I make air fryer mini chocolate lava cakes without ramekins?
Yes, you can use oven-safe silicone muffin cups or small silicone molds. I actually bought a set specifically for air fryer baking. Silicone releases the cakes easily and comes in cute shapes.
Alternatively, you can use small mason jars. Just make sure they're oven-safe and don't have any plastic parts. The high sides mean you'll need a slightly longer cooking time, around 10 minutes.
Working with silicone molds, you can place them directly in the air fryer basket. No extra dishes needed. That's my go-to when I'm cleaning up quickly.
Let me tell you, having the right equipment makes this air fryer mini chocolate lava cake recipe even more foolproof.
How long do I bake mini chocolate lava cakes in the air fryer?
The standard baking time is 8-9 minutes at 375°F. But this depends on your air fryer's actual temperature output. Every machine runs slightly differently.
I recommend checking at 7 minutes and 30 seconds on your first attempt. Look for edges that are set and slightly pulling away. The center should still look shiny and a bit wobbly.
Smaller molds will cook faster, around 7-8 minutes. Larger ramekins might need 9-10 minutes. Give yourself a few batches to calibrate your specific setup.
The good news is that once you find your perfect time, it stays consistent. I've made this recipe weekly for months, and my timing never changes.
Why are my lava cakes not flowing in the middle?
The most common cause is overcooking. Even 60 seconds too long solidifies the center completely. Air fryers vary, so your ideal time might be shorter than recipes suggest.
Another possibility is that your batter was too thin. If you skimped on the egg whisking, the structure is weak. The batter bakes more uniformly, leaving no liquid center.
Also check your chocolate-to-flour ratio. Adding extra flour or stir-ins changes the bake dynamics. Stick to the recipe until you master the basics.
If you're consistently having this issue, reduce your cooking time by 60 seconds. You can also try chilling the batter for 15 minutes before baking. The cold center takes longer to set, preserving the lava effect.
Can I double the recipe for more servings?
Absolutely. This recipe scales perfectly. Each serving uses about half the batter. For four servings, double all ingredients.
The air frying time stays the same if you're using similar size molds. Just ensure your air fryer can fit them all without crowding. You might need to cook in batches.
That's actually convenient. While batch one cools, you can eat it. Then batch two comes out fresh and hot. Perfect for avoiding the post-bake settling that happens after 10 minutes.
I'd also note that larger batches mean more batter to whisk. Give the eggs a proper workout regardless of volume. This step doesn't scale down in importance.
My cakes always stick to the ramekins. What am I doing wrong?
Grease is your friend here. Rub butter generously all over the interior. Add a dusting of cocoa powder and tap out excess. This creates a non-stick barrier.
Many air fryer lava cake recipes skip this step because they use silicone. If you're using traditional ramekins, never skip it.
Let the cakes rest for exactly 2 minutes after air frying. Science says this allows trapped steam to release and the cake to contract slightly from the walls. This makes unmolding much cleaner.
You can also run a butter knife around the edge before inverting. This breaks the seal and makes release very satisfying.
If you're cooking for guests, chilling the cooked cake for 2 minutes helps too. The cake shrinks slightly and releases cleanly.
Does the air fryer lava cake taste as good as oven versions?
Honestly, I prefer the air fryer version. The rapid air circulation creates a better crispy exterior while keeping the inside moist. Conventional ovens cook the edges too slowly.
The shortened cook time means less moisture loss. This intensifies the chocolate flavor, making your air fryer mini chocolate lava cakes taste richer and more decadent.
That's not just my opinion. Air fryer desserts have gained popularity in food science circles because of their superior texture profile in small items. The even heating around the cake promotes perfect browning.
Texture is the name of the game with individual serving desserts. I've made these for friends who usually hate chocolate desserts, and they've converted.
Final Thoughts on Making These Air Fryer Mini Chocolate Lava Cakes
These quick and easy individual servings have genuinely changed my dessert game. The beauty of the air fryer mini chocolate lava cakes recipe lies in its reliability and speed. Once you nail your air fryer's timing, these become a weekly treat.
I've experimented with countless variations and stuck with this base recipe every time because it works. The combination of proper whisking, preheating, and watching the timing delivers consistent molten center results. Every single batch.
Whether you're baking for date night, a small gathering, or just a personal chocolate emergency, these deliver. The process of baking these air fryer mini chocolate lava cakes in individual servings means everyone gets their own perfect treat.
My sincere advice is this. Start with the exact recipe I gave you, including the greasing and preheating steps. Then once you've got a good rhythm, start experimenting. Add your favorite fillings, try different chocolates, find your perfect timing.
There's something deeply satisfying about cutting into that crisp shell and watching chocolate flow out. The fact that it only takes 20 minutes makes it even better.
I hope you enjoy making these as much as I do. They're proof that great desserts don't need complexity or professional equipment. Your air fryer is already the best tool you didn't know you had for this.
⚠️ Warning: This cake is high in sugar. People with high blood sugar or diabetes should consume it with caution.





