 bluename
 How to Make Lemon Cheesecake? A Classic Tangy & Refreshing Masterpiece
There's something about a perfect lemon cheesecake that feels like pure sunshine on a plate. The creamy, rich filling paired with that bright, tangy citrus punch is a combination that’s hard to beat. Yet, so many home bakers tell me they’re intimidated. The fear of cracks, a soggy crust, or a filling that’s too dense or not set properly holds them back from creating this classic dessert. I’ve been there too. After years in my kitchen, perfecting everything from intricate French pastries to health-conscious bakes, I’ve learned that the secret to a flawless lemon cheesecake lies in understanding the science behind its simplicity. Today, I’ll guide you through every step, sharing the professional techniques and little secrets that guarantee a tangy, refreshing, and visually stunning lemon cheesecake every single time.
Understanding the Anatomy of a Perfect Lemon Cheesecake
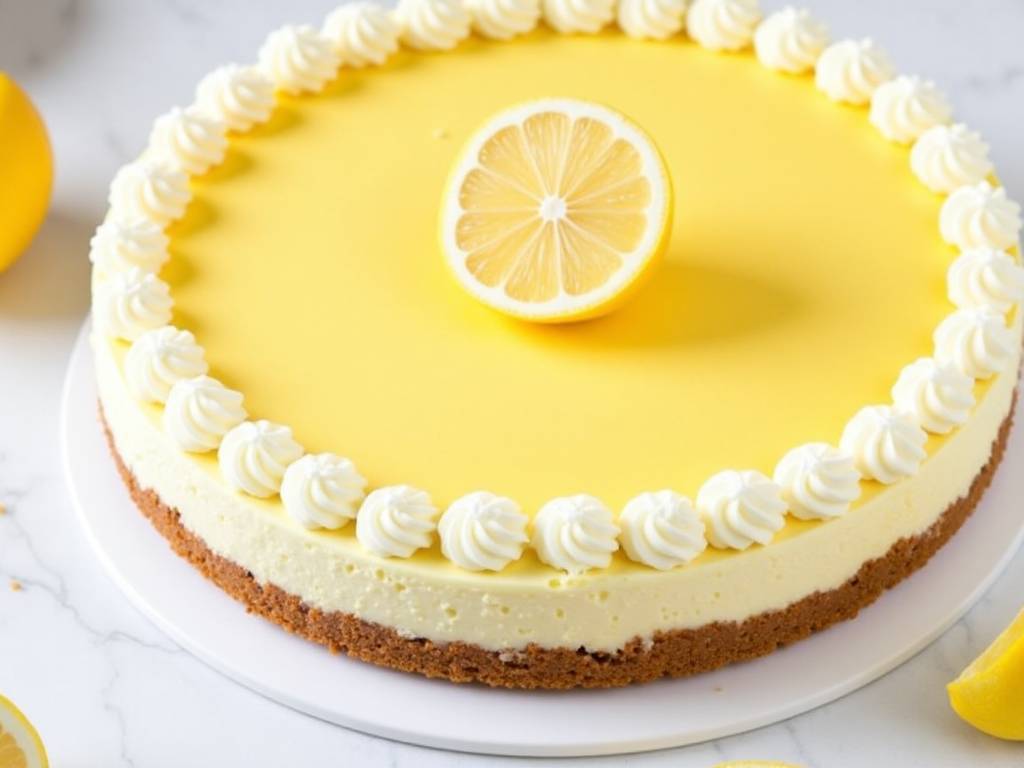
Before we preheat the oven, let's talk about what makes this dessert special. A great cheesecake is a balance of textures and flavors. The crust should be sturdy and buttery, providing a counterpoint to the lush filling. The filling itself should be supremely creamy, smooth, and carry the vibrant, aromatic essence of lemon without being overly sour. Achieving this isn't magic; it's a matter of quality ingredients and controlled technique.
Gathering Your Ingredients: Quality is Key
For the crust, you’ll need graham cracker crumbs, melted butter, and a touch of sugar. For a more complex flavor, try substituting half the graham crackers with digestive biscuits or ginger snaps. The star, of course, is the filling. Use full-fat, brick-style cream cheese. The low-fat varieties contain more water and stabilizers, which can lead to a weepy or less creamy texture. Let it soften completely at room temperature—this is non-negotiable for a lump-free batter. You’ll need fresh lemons for both zest and juice. The zest holds the potent citrus oils, giving that true lemon fragrance you can’t get from bottled juice. Eggs, sour cream (for tang and moisture), sugar, vanilla extract, and a bit of flour or cornstarch (to help stabilize the structure) round out the list.
Step-by-Step: Crafting the Foundation – The Crust
First, preheat your oven to 325°F (160°C). Combine the crumbs, sugar, and melted butter until the mixture resembles wet sand. Press it firmly and evenly into the bottom of a 9-inch springform pan. I use the bottom of a measuring cup to tamp it down—this creates a compact, solid base that won’t crumble when sliced. Bake the crust alone for about 10 minutes. This step, often skipped, is crucial. It toasts the crumbs, deepening their flavor and creating a moisture barrier that helps prevent a soggy bottom. Let it cool while you prepare the filling.
The Heart of the Matter: Preparing the Lemon Cheesecake Filling
Here’s where patience pays off. In the bowl of a stand mixer fitted with the paddle attachment, beat the softened cream cheese on medium-low speed until it’s completely smooth and creamy. This could take 2-3 minutes. Scrape down the bowl and beater thoroughly. Add the sugar and beat again until just combined. Over-beating at this stage incorporates too much air, which can cause the cheesecake to puff and then collapse, leading to cracks.
Next, add the eggs one at a time, beating on low speed after each addition until just incorporated. Remember, we are not making a cake; we do not want to aerate the batter. Add the sour cream, vanilla, lemon zest, and lemon juice. Finally, sprinkle in the flour or cornstarch and mix on low until the batter is homogenous and silky. It should be thick but pourable. Taste it—the bright lemon flavor should shine through the creamy base.
The Baking Ritual: Low, Slow, and Steady Wins the Race
Pour the filling over the cooled crust. Smooth the top with an offset spatula. Now, for the most professional trick: the water bath. Wrap the bottom and sides of your springform pan tightly with heavy-duty aluminum foil to prevent water seepage. Place the pan in a large roasting dish and pour hot water into the dish until it comes about halfway up the sides of the springform pan.
The water bath creates a gentle, humid environment. It ensures even, gentle heating, which is the absolute best defense against cracks and a curdled texture. As noted in professional baking guides from institutions like the CIA (Culinary Institute of America), this method is essential for custard-based desserts to achieve that signature creamy mouthfeel. Bake for 55 to 70 minutes. The edges should be set, but the center should still have a slight jiggle—like set Jell-O—when you gently shake the pan. The center will firm up as it cools.
The Critical Cooling Process
Turn off the oven, crack the door open with a wooden spoon, and let the cheesecake cool in the oven for about an hour. This gradual temperature change further prevents cracking. Then, remove it from the water bath, take off the foil, and let it cool completely on a wire rack. Once at room temperature, run a thin knife around the edge to loosen it from the pan—this prevents it from sticking and pulling as it chills. Refrigerate it, uncovered, for at least 4 hours, but ideally overnight. This extended chilling sets the structure and allows the flavors to fully meld and intensify.
Serving and Storing Your Masterpiece
Unmold the cheesecake only when you’re ready to serve. Use a hot, clean knife (dipped in hot water and wiped dry between each cut) for pristine slices. A dollop of lightly sweetened whipped cream and a twist of lemon zest make for a beautiful, classic garnish. Store any leftovers covered in the refrigerator for up to 5 days.
Frequently Asked Questions
Can I use bottled lemon juice? I strongly advise against it. Fresh lemon juice provides a cleaner, brighter acidity, and you absolutely need the fresh zest for that authentic lemon aroma. Bottled juice often has a flat or metallic taste that will dull your final dessert.
My cheesecake cracked! What went wrong? The most common culprits are over-mixing the batter (incorporating too much air), oven temperature being too high, or cooling too quickly. The water bath and gradual cooling steps outlined above are your best insurance policies. Even if it cracks, it will still taste incredible—you can always cover it with a lovely lemon whipped cream topping.
Can I make this gluten-free? Absolutely. Simply use certified gluten-free graham crackers or other gluten-free cookies for the crust, and ensure your cornstarch is gluten-free if using it as the stabilizer. The filling is naturally gluten-free.
Creating the perfect lemon cheesecake is a rewarding journey. It teaches you about temperature control, texture, and the transformative power of a few simple, quality ingredients. By following these detailed steps, you’re not just following a recipe; you’re applying time-tested baking principles that lead to consistent, professional results. So, embrace the process, zest those lemons with joy, and get ready to share a slice of tangy, refreshing heaven.
⚠️ 温馨提示:本款蛋糕含糖量较高,高血糖/糖尿病患者请谨慎食用。





