 bluename
 How to Lay Down Crumb Coat First, Eliminate Loose Crumbs, and Nail the Final Frosting Pass
I still remember the first time I tried to frost a cake straight out of the oven. I was so proud of those layers. Then I dragged my spatula across the top, and a cascade of little brown crumbs rolled into my beautiful white buttercream. It looked like dirt mixed into snow. If you have ever felt that sinking feeling, you are in the right place. I have decorated hundreds of cakes since that disaster, and I can tell you the secret is not talent. It is a simple sequence: how to lay down crumb coat first eliminate loose crumbs final frosting pass. That exact order changes everything. In this article, I am sharing my real kitchen experience, the small mistakes I see beginners make, and the exact steps that give you a smooth, professional finish every single time. No fancy tools required. Just patience and a little technique.
Why the Crumb Coat Is Not Optional
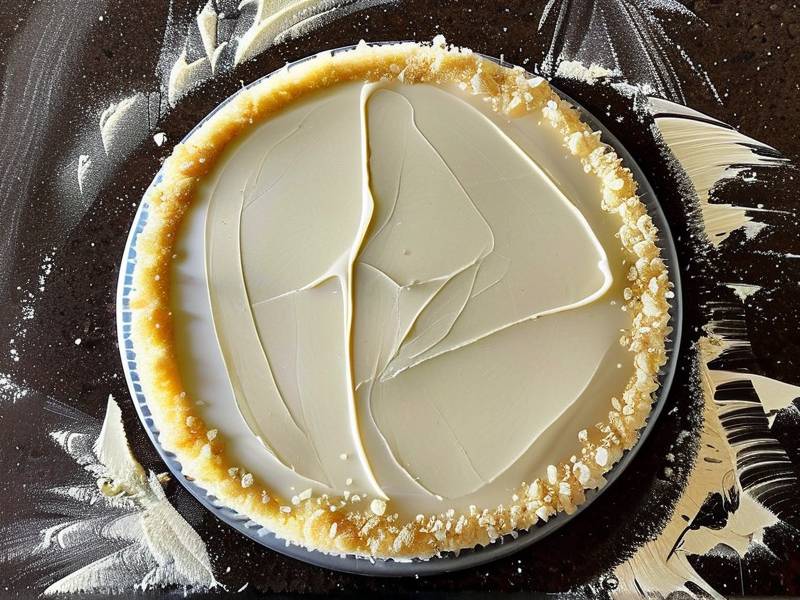
Many home bakers skip the crumb coat because they think it is an extra step for perfectionists. I used to think that too. Then I realized the crumb coat is actually a protective shield. It traps all the loose bits so your final layer stays clean. Think of it like priming a wall before painting. You would not paint a bare, dusty wall and expect a smooth finish. Same logic applies here.
What Exactly Is a Crumb Coat
A crumb coat is a very thin layer of frosting that you spread over the entire cake. It does not need to look pretty. In fact, it should look a little messy. Its only job is to grab onto every stray crumb and lock it in place. After you apply it, you chill the cake. The frosting firms up. Then when you add your final frosting pass, your spatula glides over a smooth, stable surface. No crumbs break free. No streaks of cake show through.
I like to use a slightly thinner frosting for my crumb coat. If my buttercream is too stiff, it drags on the cake surface and creates more crumbs. A good rule is to thin it with one or two teaspoons of milk or cream per cup of frosting. You want it spreadable but not runny. It should stick to the cake, not slide off.
How to Lay Down Crumb Coat First for a Clean Base
This is the step where most people rush. I get it. You are excited to see the finished cake. But rushing here costs you double the time later. Let me walk you through my exact method. I have refined it over years of trial and error, and it works for round cakes, square cakes, and even carved shapes.
Step 1: Start with a Chilled Cake
Your cake layers must be completely cool. I mean room temperature at the very least. If they are even slightly warm, the frosting will melt and slide. I usually bake my layers the night before. I wrap them in plastic wrap and refrigerate them. Cold cake is firm cake. Firm cake is easier to handle. This one habit eliminated about half of my early frosting problems.
Step 2: Level and Tort Your Layers
If your cake domed in the oven, slice off the top with a serrated knife. You want a flat surface. A cake that rocks back and forth will crack your crumb coat. I also like to torte my layers, which means slicing each thick layer horizontally into two thinner ones. This gives you more filling and a better cake-to-frosting ratio. But if you are short on time, skip the torting. Just make sure the top is level.
Step 3: Apply a Glue Layer of Frosting
Before you place your first cake layer, put a small dollop of frosting on your cake board or plate. This acts like glue. It stops the cake from sliding around while you work. I cannot tell you how many times a cake shifted on me before I learned this trick. It is a tiny step with a huge payoff.
Step 4: Fill and Stack
Place your first layer down. Add a generous amount of frosting on top. I use about half a cup to three-quarters of a cup for an eight-inch round. Spread it evenly with an offset spatula. Do not go all the way to the edge. Leave about a half-inch border. When you press the next layer on top, the frosting will squish out to the edges naturally. That gives you a perfect seal. Repeat until all layers are stacked. Then give the whole stack a gentle press with your hands to level it.
Step 5: The Initial Crumb Coat Application
Now for the part you have been waiting for. Take a large scoop of your thinned frosting. Plop it on top of the cake. Use your offset spatula to spread it outward and down the sides. Do not lift your spatula too much. Short, gentle strokes work best. The goal is to cover every exposed surface with a thin layer. You will see crumbs mixing into the frosting. That is exactly what you want. They are being trapped. Do not try to get a smooth finish here. Just cover the cake. I usually spend about two to three minutes on this step. Any longer and the frosting starts to warm up from the friction.
Step 6: Chill the Crumb Coat
This is non-negotiable. Put the cake in the refrigerator for at least thirty minutes. I prefer an hour. The frosting needs to firm up completely. If you touch it and it feels tacky, it is not ready. When it is cold and set, you can run your finger lightly across the surface without leaving a mark. That is your green light.
Eliminate Loose Crumbs Before the Final Frosting Pass
Even with a perfect crumb coat, you might find a few stray crumbs on the surface. Maybe they got stuck on your spatula. Maybe a tiny piece of cake flaked off during chilling. This is where the elimination step comes in. It is quick, but it makes a visible difference.
The Light Touch Technique
After your crumb coat has chilled, take a clean paper towel or a soft pastry brush. Gently brush the entire surface of the cake. You are looking for any loose particles that are sitting on top of the frosting. Do not press hard. You do not want to dig into the crumb coat. Just a light sweep. I do this over the sink or a garbage can so the crumbs fall away. You will be surprised how many little bits come off. These are the bits that would otherwise end up in your final frosting.
Why This Step Matters for Smooth Buttercream
I once skipped this elimination step because I was in a hurry. The cake looked fine at first. But as I spread the final frosting, I could see tiny dark specks dragging through the white buttercream. It looked like pepper. I had to scrape everything off and start over. That was a painful lesson. Now I always take sixty seconds to brush away loose crumbs. Sixty seconds saves me twenty minutes of rework.
Pro Tip: Use a Damp Cloth for Sticky Crumbs
Sometimes crumbs are stuck to the crumb coat and a dry brush will not get them. In that case, wrap a clean kitchen towel around your finger, dampen it slightly with cold water, and gently wipe the surface. The cold water keeps the frosting firm. The damp cloth picks up any stubborn bits. Just do not soak the cake. A barely damp cloth is all you need.
The Final Frosting Pass: Getting That Bakery Finish
Now we arrive at the fun part. The final frosting pass is where your cake transforms. It goes from a lumpy, crumb-covered mess to something you are proud to serve. But it requires a different technique than the crumb coat. You are no longer just covering. You are smoothing and shaping.
Use the Right Consistency of Frosting
Your final frosting should be thicker than your crumb coat frosting. It needs to hold its shape. If it is too thin, it will slide off the chilled crumb coat. If it is too thick, it will tear the crumb coat. I aim for a consistency like soft peanut butter. It spreads easily but does not drip. If you are using American buttercream, this usually means room temperature butter and powdered sugar. If you are using Swiss meringue buttercream, it should be silky and cool but not cold.
The Two-Coat Final Pass Method
I almost always do two thin final coats instead of one thick one. Here is why. A single thick coat is hard to smooth. You end up with ridges and air bubbles. Two thin coats give you more control. Each coat chills for fifteen minutes before the next one. The result is a perfectly flat, smooth surface. It takes a little longer, but the difference is night and day.
For the first final coat, use a large offset spatula. Start on top. Spread the frosting from the center outward. Let the excess hang over the edges. Then work on the sides. Hold your spatula at a slight angle and spin your turntable slowly. Let the spatula do the work. Do not press hard. The frosting should glide on. Once the whole cake is covered, chill it for fifteen minutes. Then repeat with the second coat. This time, you can focus on smoothing. Use a bench scraper or a cake comb to create sharp edges or a textured finish.
Smoothing Tricks I Swear By
- Warm your spatula. Dip it in hot water, dry it completely, then run it over the frosting. The heat melts the surface just enough to create a glass-like finish.
- Work in a cool room. If your kitchen is hot, your frosting will sweat. I turn up the AC or work early in the morning.
- Do not overwork the frosting. The more you spread it, the more air bubbles you create. If you see bubbles, pop them with a toothpick and chill the cake before smoothing again.
Common Problems and How I Fix Them
Even with the right steps, things can go wrong. I have dealt with every issue below. Here is what I do.
Problem: Crumbs Still Appearing in Final Frosting
If you see crumbs in your final coat, your crumb coat probably was not chilled enough. Or you pressed too hard with your spatula and broke through the crumb coat. The fix is simple. Scrape off the affected area. Apply a fresh patch of crumb coat. Chill it for fifteen minutes. Then redo the final frosting pass. Do not try to smooth over a crumb breach. It will only get worse.
Problem: Frosting Is Tearing the Cake
This usually means your frosting is too stiff or your cake is too cold. If the cake is very cold, let it sit at room temperature for five minutes before frosting. If the frosting is stiff, add a teaspoon of milk and stir. You want a spreadable consistency. Tearing happens when the frosting pulls at the cake instead of gliding over it.
Problem: The Final Surface Looks Lumpy
Lumps come from air bubbles or uneven crumb coat. The solution is to use a bench scraper. Hold it at a forty-five-degree angle against the side of the cake. Spin the turntable slowly. The scraper will shave off the high spots and fill in the low spots. Do this after each final coat. It is a game-changer.
Frequently Asked Questions
How long should I chill the crumb coat before the final frosting pass? I recommend at least thirty minutes in the refrigerator. For best results, go for one hour. The crumb coat should be firm to the touch. If it feels sticky or soft, it needs more time. A properly chilled crumb coat is the foundation for a clean final frosting pass. Do not rush this step.
Can I use a crumb coat with any type of frosting? Yes, almost any frosting works. Buttercream, cream cheese frosting, and ganache all make great crumb coats. The only exception is a very runny glaze. It will not set firm enough to trap crumbs. For those, you might need to skip the crumb coat and pour the glaze directly over a chilled cake. But for traditional frosting, the crumb coat method is universal.
What is the best way to eliminate loose crumbs after the crumb coat? Use a soft pastry brush or a clean paper towel. Gently sweep the surface of the chilled crumb coat. Do not press hard. If crumbs are stuck, use a barely damp cloth wrapped around your finger. The cold surface keeps the frosting firm while you wipe away the bits. This step takes less than a minute and prevents dark specks in your final frosting.
Final Thoughts and My Advice for Your Next Cake
Learning how to lay down crumb coat first eliminate loose crumbs final frosting pass is honestly the most important sequence in cake decorating. I wish someone had told me this when I started. I spent years wondering why my cakes looked homemade in the worst way. The answer was not fancier tools or expensive ingredients. It was patience and order. Chill your cake. Apply a thin crumb coat. Chill again. Brush away every loose crumb. Then do your final frosting pass in thin layers. Smooth it with a warm spatula. Chill between steps. That is it. You do not need to be a professional pastry chef. You just need to respect the process. I still make mistakes sometimes. But now I know how to fix them. And you will too. So go bake a cake this weekend. Take your time. Enjoy the messy crumb coat phase. Because the final reveal is worth every minute. Happy baking.
⚠️ Warning: This cake is high in sugar. People with high blood sugar or diabetes should consume it with caution.





