 bluename
 How to Smooth Buttercream Surface: Slow Careful Motion for a Mirror Finish Effect
I still remember the first wedding cake I ever delivered. The tiers were stacked, the flowers were perfect, and the buttercream looked like the surface of the moon. Lumpy. Streaky. A little bit sweaty. The bride was kind about it, but I drove home with a knot in my stomach. That night I decided I would figure out how to smooth buttercream surface slow careful motion mirror finish effect once and for all. It took me years, a lot of wasted batches, and more late-night practice sessions than I care to count.
But here is the good news. You do not need a professional pastry chef whispering in your ear. You do not need fancy equipment either. What you need is patience, the right technique, and an understanding of why slow, careful motion creates that glass-like mirror finish. In this article, I am sharing everything I have learned from over a decade of cake decorating. I will walk you through the tools, the timing, the temperature tricks, and the exact hand movements that changed my buttercream game forever. Whether you are a home baker or a cottage food entrepreneur, this guide will help you get that flawless, reflective surface you have been chasing.
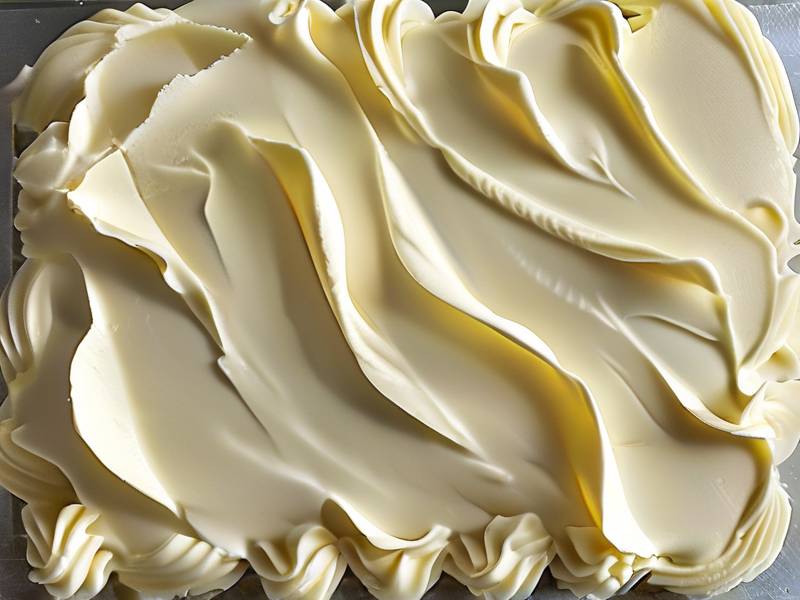
What Causes a Rough Buttercream Surface in the First Place
Before we talk about fixing the problem, let us talk about why it happens. I see this all the time in my classes. Someone whips up a beautiful batch of American buttercream, plops it on a cake, and then panics when it looks gritty. Most of the time, it is not your recipe. It is your technique and your timing.
The Temperature Tango
Buttercream is basically an emulsion of fat, sugar, and air. That means it is incredibly sensitive to temperature. If your buttercream is too cold, it will tear when you try to smooth it. Little chunks will drag across the surface. If it is too warm, it will slump and slide, and you will never get a sharp edge. I always tell my students to aim for a buttercream that feels like soft peanut butter. It should hold a peak but still yield when you press it.
I also learned the hard way that room temperature matters as much as buttercream temperature. On a hot July day, I tried to smooth a cake in my non-air-conditioned kitchen. It was a disaster. The buttercream started melting under my scraper. Now I always chill my kitchen if I can, or at least work early in the morning before the heat kicks in.
The Crumb Coat Mistake
A lot of people skip the crumb coat. I get it. It feels like an extra step. But a proper crumb coat is non-negotiable if you want a mirror finish. The crumb coat seals in all the little cake crumbs and creates a level playing field for your final layer. Without it, those crumbs will migrate to the surface and ruin your smooth finish. I thin my crumb coat buttercream with a tablespoon of milk or cream. It spreads easier and chills faster. Then I pop the cake in the fridge for at least thirty minutes. That firm base makes all the difference.
Tools That Actually Help You Get a Smooth Finish
You do not need a million gadgets. But there are a few tools that genuinely make this process easier. I have tested almost everything on the market, and these are the ones I keep coming back to.
The Right Scraper for the Job
A good bench scraper or cake scraper is your best friend. I prefer a stainless steel scraper with a comfortable handle. The blade should be tall enough to cover the full height of your cake. If you are working on a tall tier, get a taller scraper. Plastic scrapers work in a pinch, but metal ones give you more control and a sharper edge. I have a collection of scrapers in different heights. For a standard six-inch cake, a six-inch scraper is perfect. For a taller tier, I switch to an eight or ten-inch scraper.
The Turntable Truth
A sturdy turntable is worth its weight in gold. I used a cheap plastic one for years, and it wobbled so much that my cakes looked like they were leaning. When I finally upgraded to a heavy-duty cast iron turntable, my smoothing improved instantly. The cake stays stable, and you can rotate it with one hand while you work the scraper with the other. That steady rotation is key to the slow careful motion that creates a mirror finish.
Why Slow and Careful Motion Creates a Mirror Finish
Here is where the magic happens. You have probably seen videos of decorators spinning their turntable like crazy and getting a perfect finish in three seconds. Let me tell you a secret. Those videos are often sped up. And the decorators have years of muscle memory. For the rest of us, slow and careful motion is the way to go.
The Science of Scraping
When you drag a scraper across buttercream, you are essentially leveling the surface. The scraper pushes excess buttercream ahead of it and fills in low spots. If you move too fast, you create friction. Friction generates heat. Heat melts the buttercream. And melted buttercream means streaks and tears. I cannot tell you how many times I ruined a perfectly good crumb coat because I was impatient. Now I count in my head. One revolution should take me about five to seven seconds. That is slow. That is deliberate. And that is what gives you the mirror finish effect.
The Angle of the Scraper
The angle of your scraper matters just as much as your speed. I hold my scraper at about a twenty to thirty-degree angle from the cake. If you hold it too flat, you will not shave off enough buttercream. If you hold it too upright, you will dig into the cake. I also adjust the angle depending on whether I am filling in a low spot or shaving off a high spot. For filling, I use a slightly flatter angle. For shaving, I go a little steeper. It takes practice, but you will feel it once you get it right.
Step-by-Step: My Slow Motion Smoothing Method
Okay, let us get into the actual process. This is the method I use in my bakery every single day. It works for American buttercream, Swiss meringue buttercream, and Italian meringue buttercream. The principles are the same.
Step 1: Chill Your Crumb Coated Cake
After you apply your crumb coat, refrigerate the cake for at least thirty minutes. I usually go for an hour if I have the time. The crumb coat should be firm to the touch but not rock hard. If it is too cold, your final layer of buttercream will not adhere properly. If it is too warm, it will slide around. I look for a surface that feels like a cold stick of butter. Firm but with a little give.
Step 2: Apply Your Final Layer Generously
Do not be shy with your final layer of buttercream. You need enough to work with. I pile it on top first, then spread it down the sides with an offset spatula. I do not worry about how it looks at this stage. I just want full coverage. I use about one and a half cups of buttercream for a six-inch cake. For an eight-inch cake, I use about two and a half cups. It is better to have too much than too little. You can always scrape off the excess.
Step 3: The Initial Rough Smooth
Before I go for the mirror finish, I do a rough smooth. I spin my turntable slowly and hold my scraper against the side of the cake. I am not trying to get it perfect yet. I am just distributing the buttercream evenly and removing the big lumps. This step takes me about thirty seconds. I also do a quick pass on the top edge, pulling the excess buttercream toward the center. Then I chill the cake again for fifteen to twenty minutes. This sets the buttercream just enough so it does not slide around during the final smoothing.
Step 4: The Slow Careful Motion Pass
This is the money step. I take my time here. I position my scraper against the side of the cake at that twenty to thirty-degree angle. I start the turntable spinning slowly. I am talking one full revolution every five to seven seconds. I hold the scraper steady. I do not press hard. I let the scraper do the work. I make three to four passes around the cake. Between passes, I wipe the scraper clean with a paper towel. If I see a low spot, I add a tiny bit of buttercream to that spot with my offset spatula. Then I smooth it again. I repeat this until the surface looks even and smooth.
Step 5: The Hot Water Trick
Here is a trick I picked up from a pastry chef in France. After I get the sides smooth, I dip my scraper in hot water and dry it off. Then I do one final, very slow pass around the cake. The warmth of the scraper gently melts the very top layer of buttercream, filling in any tiny imperfections. This is what gives you that mirror finish effect. But be careful. If your scraper is too hot, it will melt too much buttercream and create drips. I run my scraper under hot water, dry it thoroughly, and then wait a few seconds before using it. The scraper should feel warm, not scorching.
Step 6: The Top Edge
The top edge of the cake is often the trickiest part. You want a sharp, clean edge where the top meets the sides. I use a smaller offset spatula for this. I hold it flat against the top of the cake and pull the excess buttercream toward the center. Then I use my bench scraper to clean up the edge. I go around the top edge with the scraper held at a slight angle, just barely touching the buttercream. This creates that crisp line that makes a cake look professional.
Common Problems and How I Fix Them
Even after years of practice, I still run into issues. Here is how I troubleshoot the most common buttercream smoothing problems.
Streaks and Tears
If your buttercream is tearing, it is too cold. I let the cake sit at room temperature for five to ten minutes. Then I try again. If it is still tearing, I warm my scraper slightly. Sometimes I will also add a tiny bit of warm buttercream to the surface and smooth it in.
Air Bubbles
Air bubbles are the enemy of a mirror finish. They usually come from whipping too much air into your buttercream. To fix this, I use a paddle attachment instead of a whisk for the final mix. I also press my buttercream against the side of the bowl with a spatula to pop any large bubbles before I apply it to the cake. If I see bubbles after smoothing, I prick them with a toothpick and smooth over them with a warm scraper.
Uneven Sides
Uneven sides usually mean your cake is not level or your crumb coat is lumpy. I always use a cake leveler to trim the tops of my layers. And I make sure my crumb coat is as smooth as possible. If I am working with a particularly uneven cake, I will do two crumb coats. It takes longer, but it is worth it.
The Buttercream Is Too Soft
If your buttercream is too soft, it will slide down the sides of the cake. I pop the whole cake in the fridge for twenty minutes. Then I do a quick smoothing pass with a cold scraper. If it is a hot day, I might need to chill the cake multiple times during the process. I also use a cooler buttercream recipe in the summer. A little extra powdered sugar or a tablespoon of cornstarch can help firm things up.
Pro Tips for a Flawless Mirror Finish
These are the little things that make a big difference. I wish someone had told me these when I was starting out.
Work in a Cool Room
I cannot stress this enough. If your kitchen is above seventy-five degrees Fahrenheit, you are fighting an uphill battle. I keep my kitchen at around sixty-eight degrees when I am smoothing cakes. I also avoid working near the oven or dishwasher. A fan can help, but do not point it directly at the cake. That will dry out the surface.
Use a Light Touch
Beginners tend to press too hard with the scraper. I know I did. A light touch is all you need. The scraper should glide across the surface, not dig into it. If you find yourself pressing hard, your buttercream is probably too cold or your scraper is at the wrong angle.
Practice on a Fake Cake
I practiced on a styrofoam dummy cake for weeks before I felt confident. I would make a batch of buttercream, cover the dummy, smooth it, scrape it off, and do it again. It saved me so much frustration on real cakes. You can find styrofoam cake dummies at any craft store. It is worth the few dollars.
Chill Between Passes
If you are struggling to get a smooth finish, chill the cake for fifteen minutes between smoothing passes. The buttercream will firm up, and your next pass will be much more effective. I know it feels like it slows you down, but it actually saves time in the long run.
FAQ
How long should I let my buttercream cake chill before the final smoothing?
I recommend chilling for at least thirty minutes after the crumb coat. For the final smoothing, fifteen to twenty minutes is usually enough. If your kitchen is warm, go a little longer. The buttercream should be firm but not hard.
Can I use this slow careful motion technique with cream cheese frosting?
Yes, but cream cheese frosting is softer and more prone to sliding. I chill it longer between steps and use a colder scraper. I also add a little extra powdered sugar to firm it up. It will not get quite as shiny as buttercream, but you can still get a very smooth surface.
What is the best way to fix a buttercream surface that already has a mirror finish but got bumped?
If the surface gets bumped, I let the cake come to room temperature for a few minutes. Then I dip my scraper in hot water, dry it, and do one very slow, very gentle pass over the damaged area. Sometimes I need to add a tiny bit of fresh buttercream to fill the dent. Then I chill it again.
Final Thoughts
Learning how to smooth buttercream surface slow careful motion mirror finish effect is not about having steady hands or expensive tools. It is about understanding the science of buttercream and respecting the process. I have been doing this for over a decade, and I still learn something new every time I smooth a cake. Some days it comes together in minutes. Other days I have to chill and re-smooth three or four times. That is normal. That is baking.
The key is to be patient with yourself. Slow down your turntable. Use a light touch. Chill your cake when things get warm. And practice on a dummy cake until the motion feels natural. I promise you, the mirror finish is achievable. I have seen complete beginners get beautiful results after just a few practice sessions. You do not need to be a professional pastry chef. You just need to be willing to take your time.
My advice? Start with a simple six-inch cake. Make a batch of your favorite buttercream. Do not stress about the outcome. Just focus on the motion. Feel the scraper against the cake. Listen to the sound it makes. Adjust your angle. Chill when you need to. And remember that every imperfect cake is just practice for the next one. You have got this. And once you nail that mirror finish, you will never go back to lumpy buttercream again.
⚠️ Warning: This cake is high in sugar. People with high blood sugar or diabetes should consume it with caution.





