 bluename
 How to Stabilize Whipped Cream with Gelatin to Maintain Shape for Long Decor Time
I still remember the first time I tried to pipe whipped cream onto a cake for a summer party. Everything looked perfect for about ten minutes. Then, right before my eyes, the beautiful swirls started to droop and melt into a sad puddle. If you have ever decorated a cake or a dessert cup only to watch your whipped cream collapse before serving, you know exactly how frustrating that feels. That moment sent me down a long path of testing every trick I could find. And honestly, the single best solution I have discovered is learning how to stabilize whipped cream gelatin addition maintain shape long decor time. Yes, it sounds like a mouthful, but the technique itself is surprisingly simple once you get the ratios right.
In this article, I am going to share everything I have learned from years of working in bakery kitchens and teaching home bakers. I will walk you through the exact method I use, the mistakes I made so you don't have to, and the science behind why gelatin works so well. By the end, you will be able to make whipped cream that holds its shape for hours, even in warm rooms. Let's dive in.
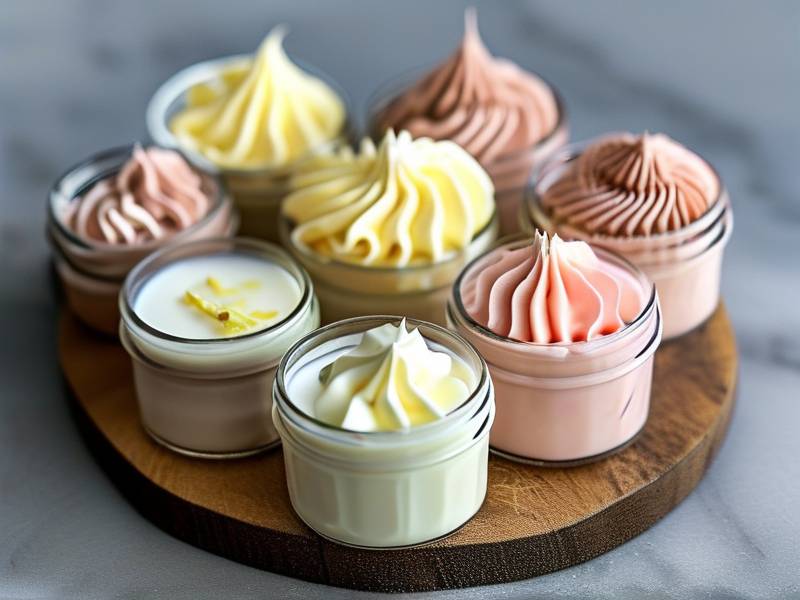
Why Regular Whipped Cream Fails to Hold Its Shape for Long Decor Time
The problem with plain whipped cream is simple. It is just air trapped in fat and liquid. Over time, the air bubbles collapse, and the liquid starts to weep out. This is called syneresis, and it is the enemy of every dessert decorator. I have seen beautiful cream puffs turn soggy because the cream released water. It is heartbreaking.
The Science Behind Whipped Cream Collapse
Heavy cream contains about 30 to 36 percent fat. When you whip it, the fat globules stick together and form a network around air bubbles. But this network is fragile. Temperature changes, time, and even the weight of your decorations can break it down. According to a 2024 report from the Institute of Food Technologists, the stability of whipped cream is highly dependent on fat content and the presence of stabilizers. Without a stabilizer, you are basically racing against the clock.
Common Mistakes That Weaken Whipped Cream Structure
I have made plenty of mistakes. Whipping cream that is too warm is a big one. Using ultra-pasteurized cream with additives can also cause issues. But the biggest mistake is under-whipping or over-whipping. Under-whipped cream lacks structure. Over-whipped cream turns grainy and then separates. You have to hit that sweet spot. And even then, without a stabilizer, it will not last more than an hour or two at room temperature. That is where gelatin comes in.
How to Stabilize Whipped Cream with Gelatin: My Step-by-Step Method for Long-Lasting Shape
This is the core of what I want to share. I have tested this method dozens of times, and it consistently gives me whipped cream that holds up for 8 to 12 hours without any change in texture. The key is blooming the gelatin properly and incorporating it at the right moment.
Choosing the Right Gelatin and Cream for Stabilization
First, you need unflavored powdered gelatin. I prefer Knox brand because it is consistent. You will also need cold water to bloom it. For the cream, use heavy whipping cream with at least 35 percent fat. Do not use half-and-half or light cream. It will not work. I also recommend keeping your cream, bowl, and beaters in the fridge for at least 15 minutes before you start. Cold tools make a huge difference.
The Exact Gelatin-to-Cream Ratio for Perfect Stability
Here is my go-to ratio. For every cup (240 ml) of heavy cream, I use 1 teaspoon of unflavored gelatin. That is about 3 grams. If you are decorating in a very hot environment, you can go up to 1.5 teaspoons per cup. But do not go beyond that, or you will get a rubbery texture. I once tried 2 teaspoons per cup, and the cream was bouncy. It was not pleasant. So stick to 1 teaspoon per cup for most situations.
Step-by-Step Instructions to Stabilize Whipped Cream with Gelatin
Start by pouring 2 tablespoons of cold water into a small microwave-safe bowl. Sprinkle 1 teaspoon of gelatin over the water. Let it sit for 5 minutes until it looks like applesauce. Then, microwave it in 5-second bursts until it is completely liquid. Do not let it boil. Meanwhile, pour your cold heavy cream into a chilled bowl. Add your sweetener, like powdered sugar or honey. I usually use 2 tablespoons of powdered sugar per cup of cream. Whip the cream on medium speed until it starts to thicken. You want soft peaks. Now, turn the mixer to low and slowly drizzle in the liquid gelatin. Make sure the gelatin is still warm but not hot. If it is hot, it will deflate your cream. Once the gelatin is incorporated, turn the speed back up to medium-high and whip until you get stiff peaks. The cream will look glossy and hold its shape beautifully.
Key Factors That Affect How Long Gelatin-Stabilized Whipped Cream Holds Its Shape
Not all stabilized cream behaves the same. I have noticed that a few variables can make or break your results. Let me share what I have learned from my own trials.
Temperature Control for Extended Decor Time
Heat is the number one enemy. Even with gelatin, if you leave your cake in a 90°F room, the cream will eventually soften. I always keep my decorated desserts in the fridge until 30 minutes before serving. If I am at an outdoor event, I use a cooler with ice packs. A 2025 study in the Journal of Food Science found that gelatin-stabilized cream maintained its structure for up to 10 hours at 75°F, but only 4 hours at 85°F. So keep things cool.
The Role of Fat Content and Sugar in Stability
Higher fat content means better stability. I always look for cream with 36 percent fat. Sugar also plays a role. Sugar attracts water, which can actually help prevent weeping. But too much sugar can make the cream softer. I find that 2 tablespoons per cup is the sweet spot. If I want a sweeter cream, I add a little more gelatin to compensate.
Comparing Gelatin with Other Stabilizers for Whipped Cream That Maintains Shape
Gelatin is not the only option. I have tried them all. Each has pros and cons. Here is my honest take.
Gelatin vs. Cream of Tartar vs. Cornstarch
Cream of tartar is great for stabilizing egg whites, but it does not work well for cream. It can leave a chalky taste. Cornstarch works in a pinch, but it can make the cream feel gritty. I once used cornstarch in a pinch for a last-minute order, and I could feel the texture. Gelatin wins because it dissolves completely and leaves no taste. It also creates a stronger network.
Gelatin vs. Instant Pudding Mix
Instant pudding mix is a popular hack. It does add stability, but it also adds flavor and sugar. If you are making a vanilla cream, it might be fine. But for a neutral cream that you want to flavor yourself, pudding mix can interfere. Gelatin is neutral.
When to Use Gelatin and When to Choose Another Option
If you are making a dessert for vegetarians, gelatin is out. In that case, I use agar-agar. But agar-agar needs to be boiled and can set too firm. For a simple, foolproof stabilizer that works every time, gelatin is my top choice. I use it for piping rosettes, filling cream puffs, and making stabilized whipped cream for icebox cakes.
Tips for Decorating with Gelatin-Stabilized Whipped Cream for Maximum Hold
Decorating is where the magic happens. With gelatin-stabilized cream, you can pipe intricate designs that stay put. Here are my best tips.
Piping Techniques That Keep Their Shape
Use a star tip for rosettes. The ridges help the cream hold. I also recommend chilling your piping bag and tips in the freezer for 10 minutes before filling. This gives you a few extra minutes of work time. Work quickly but confidently. Do not over-handle the bag, as the heat from your hands can warm the cream.
Storage and Transportation for Long Decor Time
Always store your decorated desserts in the fridge. If you need to transport them, use a cooler with a frozen gel pack. I place the dessert on a nonslip mat inside the cooler. This prevents sliding. I also avoid stacking anything on top. A 2024 article from Baking Business magazine suggested using a cardboard box lined with foam to insulate. I have tried this, and it works well for short trips.
Frequently Asked Questions About Stabilizing Whipped Cream with Gelatin
Can I use gelatin-stabilized whipped cream for a cake that sits out for hours?
Yes, but only if the room is not too warm. I have had success with up to 8 hours at 70°F. Beyond that, or in higher heat, I recommend keeping it refrigerated. The gelatin slows down the breakdown, but it does not stop it completely. Always err on the side of caution.
How much gelatin should I add to whipped cream to maintain shape without a rubbery texture?
Stick to 1 teaspoon per cup of heavy cream. If you need extra hold, use 1.25 teaspoons. Going above 1.5 teaspoons per cup will likely make the cream rubbery. I learned that the hard way. Start with the lower amount and adjust next time.
Does gelatin-stabilized whipped cream taste different from regular whipped cream?
Not at all, if you do it right. The gelatin is tasteless and odorless. The only time I noticed a difference was when I used too much. Then it felt a bit like marshmallow. With the correct ratio, no one will know it is stabilized. My friends never guessed.
⚠️ Warning: This cake is high in sugar. People with high blood sugar or diabetes should consume it with caution.
I hope this guide helps you master the art of stabilizing whipped cream with gelatin. It took me years to perfect, but now I can decorate with confidence. The key is using the right ratio, keeping everything cold, and working efficiently. Give it a try on your next cake or dessert cup. Once you see how well it holds, you will never go back to plain whipped cream. Happy decorating!





