 bluename
 How to Wrap Cut Cake Layers with Plastic Film to Stop the Outer Surface from Drying Out
I have baked more layer cakes than I can count over the past eight years running a small home bakery. And I can tell you one thing for certain: a beautifully baked cake layer can turn into a dry, crumbly disaster within hours if you don't wrap it properly. I learned this the hard way. My first few months, I left cut cake layers sitting on the counter uncovered while I prepared frosting. By the time I came back, the edges were hard and the crumb was dry. It broke my heart every single time.
So I started experimenting. I tried plastic wrap, I tried foil, I tried beeswax wraps. I tried wrapping warm, wrapping cold, wrapping tight, wrapping loose. Over time, I figured out exactly how to wrap cut cake layers with plastic film to stop the outer surface from drying out. And today, I want to share everything I've learned with you.
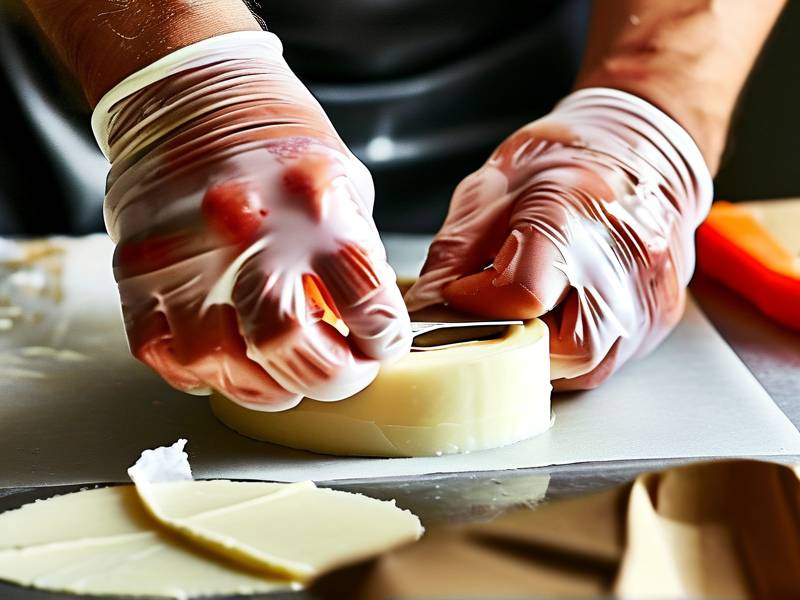
This article isn't just theory. These are real techniques I use in my kitchen every week. I'll walk you through the exact steps, the common mistakes, and the small details that make a huge difference. Whether you're a home baker or someone who just wants to keep a leftover cake fresh, this guide is for you.
Why Cut Cake Layers Dry Out So Fast
Before we get into the wrapping technique, let's talk about why this happens. Understanding the science helps you wrap smarter, not harder.
Cake is basically a sponge. It's full of tiny air pockets created by baking powder, beaten eggs, or whipped butter. When you cut into a cake layer, you expose all those internal air pockets to the air around it. Moisture inside the cake wants to escape. And dry air outside wants to pull that moisture out.
This process is called staling. It's not just about moisture loss, though. Starch molecules in the cake start to recrystallize over time, which makes the crumb feel firm and dry. But the biggest factor you can control is moisture loss through the cut surface.
The outer surface of a cut cake layer is the most vulnerable. It has the largest exposed area. The edges dry out first, usually within 30 to 60 minutes in a normal kitchen environment. If your kitchen is air-conditioned or heated, it happens even faster.
I remember one summer day when I cut three vanilla layers and got distracted by a phone call. Forty-five minutes later, the top edges were already leathery. I had to trim them off before frosting. That wasted cake and wasted time.
So the solution is simple in theory: create a barrier that stops moisture from escaping. Plastic film, when applied correctly, does exactly that.
What You'll Need Before You Start
You don't need fancy equipment. But having the right materials makes a big difference.
First, you need plastic film. Not all plastic wraps are equal. I prefer heavy-duty cling film that's at least 12 inches wide. Thin, cheap plastic wrap tears easily and doesn't seal well. The restaurant-grade stuff is worth the extra cost if you bake often.
Second, you need a clean, flat surface. A cutting board or a sheet pan works great. Make sure it's dry. Moisture on the surface can create condensation under the plastic, which leads to soggy spots.
Third, you might want parchment paper or wax paper as a barrier layer between the cake and the plastic. Some people skip this, but I find it helps prevent the plastic from sticking to the cake surface. It also adds an extra layer of protection. This is especially useful if your cake has a sticky top from syrup or fruit puree.
Fourth, a small spray bottle with water comes in handy. Wait, water? Let me explain later. It's a trick I picked up from a pastry chef friend.
Finally, you need a refrigerator or a cool, dark place to store the wrapped layers if you're not using them immediately.
Now, let me walk you through the actual wrapping process step by step. This is the part where most people make mistakes.
Step-by-Step: How I Wrap Cut Cake Layers with Plastic Film
I've refined this method over many batches. Follow these steps, and your cut cake layers will stay moist for days.
Step 1: Let the Cake Cool Completely
This is non-negotiable. If you wrap a warm cake layer, trapped steam will create condensation. That moisture will make the surface sticky and eventually soggy. Worse, it can encourage mold growth.
I know it's tempting to wrap as soon as you cut, especially if you're in a hurry. But give it at least one to two hours at room temperature. The cake should feel completely cool to the touch. No warmth at all.
Step 2: Trim Any Dry Edges First
If your cake layer has already started to dry out around the edges, trim them off before wrapping. A sharp serrated knife works best. Cut away just the dry perimeter, maybe a quarter inch. This exposes fresh, moist crumb that will stay soft under the plastic.
I used to skip this step. I thought wrapping would somehow rehydrate the dry edges. It doesn't. Once dry, that crumb stays dry. So trim first, then wrap.
Step 3: Place the Cake Layer on a Larger Sheet of Plastic Film
Tear off a piece of plastic film that's at least three times the width of your cake layer. Lay it flat on your work surface. Place the cake layer in the center.
You want enough overhang on all sides to wrap completely around the cake. If your cake is 8 inches wide, use a piece of plastic that's at least 24 inches long.
Step 4: Wrap Tightly from the Cut Surface First
This is the most important step. The cut surface is where moisture escapes fastest. So you want to press the plastic film directly against that cut surface first.
Lift the plastic from one side and lay it over the top of the cake layer. Smooth it down with your hands so it makes full contact with the cut surface. Don't leave any air pockets.
Then fold the opposite side over. Continue wrapping around the sides. The goal is to create a tight seal with no gaps.
Step 5: Double Wrap for Extra Protection
One layer of plastic film is good. Two layers are better. After you've wrapped the cake once, wrap it again with a fresh piece of plastic film. This time, wrap in the opposite direction. If you wrapped left to right the first time, wrap top to bottom the second time.
This double-wrapping technique is something I learned from a professional pastry chef. She told me that single-layer wrapping often fails at the corners. Double wrapping eliminates that problem.
Step 6: Label and Store Properly
Use a piece of masking tape or a sticker to label the cake layer. Write the date and the flavor. Trust me, after a few days in the fridge, all cake layers start to look the same.
Store the wrapped layers in the refrigerator if you're keeping them for more than 24 hours. For shorter storage, a cool pantry works fine. Just make sure it's away from direct sunlight and heat sources.
The Water Mist Trick That Changed Everything
Let me share a trick that sounds weird but works incredibly well. After you wrap your cake layer tightly in plastic film, lightly mist the outside of the plastic with water. Just a fine mist, not soaking wet.
Then immediately wrap a second layer of plastic film over the misted surface.
What does this do? The water creates a humid microclimate around the cake. As the water slowly evaporates, it keeps the air around the cake moist. That moisture gradient prevents the cake from losing its own moisture as quickly.
I was skeptical when I first heard about this. But I tested it side by side with a dry-wrapped cake. The misted one stayed noticeably softer for two extra days. Now I do it every time.
Just be careful not to mist so much that water pools. A light spritz is all you need.
Common Mistakes I See All the Time
I've trained a few assistants in my bakery, and they all made the same mistakes at first. Let me call them out so you can avoid them.
Mistake 1: Wrapping While Warm
I already mentioned this, but it's worth repeating. Warm cake plus plastic wrap equals soggy cake. Always cool completely.
Mistake 2: Using Thin, Cheap Plastic Wrap
That dollar-store plastic film tears when you try to pull it tight. It also doesn't cling well. Invest in heavy-duty cling film. It costs a little more but saves you so much frustration.
Mistake 3: Leaving Air Pockets
Air pockets inside the wrapping act like little drying chambers. Moisture from the cake evaporates into that air space. Then it condenses on the plastic and drips back onto the cake, creating soggy spots. You want the plastic to touch the cake surface as much as possible.
Mistake 4: Not Wrapping the Cut Surface First
The cut surface is the gateway for moisture loss. If you wrap the sides first and leave the top exposed for even a minute, you're losing moisture. Always cover the cut surface first.
Mistake 5: Storing in the Wrong Place
I once stored wrapped cake layers on top of my refrigerator. Bad idea. The heat from the fridge motor warmed them up and created condensation inside the wrap. Store in a cool, stable place.
How Long Do Wrapped Cake Layers Stay Fresh?
This depends on a few factors: the type of cake, the humidity in your kitchen, and how well you wrapped.
For a standard butter cake or sponge cake wrapped properly in plastic film and stored in the refrigerator, I find they stay fresh for 5 to 7 days. The cut surface stays soft, and the crumb doesn't dry out.
If you freeze them, they can last up to 3 months. But freezing requires an extra step. You need to wrap in plastic film, then wrap in aluminum foil, then place in a freezer bag. The foil prevents freezer burn. The plastic film keeps moisture in.
I usually freeze my cake layers if I'm not using them within three days. It's just safer.
One thing to note: cakes with fresh fruit filling or whipped cream frosting don't last as long. Those should be eaten within 2 to 3 days. The plastic wrap helps, but it can't stop fruit from breaking down.
What About Cake Layers That Are Already Dry?
Sometimes you cut a cake layer and forget about it. An hour later, the edges are dry. Can you save it?
You can try. Here's what I do. First, trim off the dry edges. Then brush the cut surface with a simple syrup. Simple syrup is equal parts sugar and water, boiled and cooled. You can also add a little flavor extract.
The syrup adds moisture back to the surface. Then wrap tightly in plastic film. Let it sit in the refrigerator overnight.
This won't make a dry cake perfect again. But it can make it usable. I've saved many layers this way. Just don't expect miracles.
Does Plastic Film Really Stop Drying?
Yes, when applied correctly. Plastic film creates a physical barrier that blocks moisture vapor from escaping. This is the same principle behind wrapping leftovers.
But here's the catch. Plastic film is not completely impermeable. Over time, tiny amounts of moisture can still escape through microscopic gaps. That's why double wrapping and the water mist trick work so well. They create multiple barriers.
A 2024 study published in the Journal of Food Science found that low-density polyethylene film, which is what most plastic wraps are made of, reduced moisture loss in baked goods by up to 85% compared to unwrapped samples. That's a huge difference.
The study also noted that wrapping technique mattered more than film thickness. A tight wrap with thin film outperformed a loose wrap with thick film. So technique is everything.
Can I Use Alternative Wraps Instead of Plastic Film?
Absolutely. I've tried several alternatives.
Beeswax wraps work okay for short-term storage. They're breathable, which means some moisture escapes. But they're reusable and eco-friendly. I use them for cakes I'll eat within a day.
Parchment paper alone doesn't work. It's too porous. You need a plastic barrier.
Silicone lids or reusable plastic wraps are decent. They create a good seal. But they don't conform to the cake surface as tightly as cling film. So you might get some air pockets.
If you're looking for a plastic-free option, your best bet is to wrap in parchment paper first, then place the wrapped cake in an airtight container. It's not as effective as plastic film, but it's better than nothing.
What About Storing Cut Cake Layers in a Cake Box?
Cake boxes are designed for whole decorated cakes. For cut layers, they're not ideal. The box has too much empty space, which means air circulates around the cake. That air pulls moisture out.
If you must use a cake box, wrap the layers in plastic film first. Then place them in the box. The box adds a layer of protection against physical damage, but the plastic film does the real work.
I only use cake boxes for transport, not for storage.
A Quick Note on Food Safety
Whenever you're storing cake layers, keep food safety in mind. Wash your hands before handling. Make sure your work surface is clean. Use fresh plastic film, not pieces you've reused.
If you see any signs of mold, throw the cake away. Don't try to cut off the moldy part. Mold spores spread through the entire cake, even if you can't see them.
Also, if the cake contains dairy or eggs, don't leave it at room temperature for more than two hours. Bacteria grow fast in the temperature danger zone, which is between 40°F and 140°F.
I always err on the side of caution. If I'm unsure how long a cake layer has been sitting out, I toss it. It's not worth getting sick.
Frequently Asked Questions
Can I wrap cut cake layers while they're still slightly warm?
No, I really don't recommend it. Even slightly warm cake releases steam. That steam gets trapped under the plastic film. Then it condenses into water droplets. Those droplets make the cake surface soggy. And soggy cake spoils faster. Wait until the cake is completely cool. Patience here pays off.
How do I stop the plastic film from sticking to the cake surface?
Use a layer of parchment paper between the cake and the plastic film. Or you can lightly dust the cut surface with powdered sugar. I prefer parchment paper because it's foolproof. Just cut a piece slightly larger than the cake layer and press it onto the cut surface before wrapping.
Does the water mist trick work for all types of cake?
It works best for moist cakes like sponge, butter cake, and carrot cake. For very delicate cakes like angel food or chiffon, skip the mist. The extra humidity can make them too soft and cause them to collapse. Stick to double wrapping for those.
How long can I store wrapped cut cake layers in the fridge?
For most cakes, 5 to 7 days is the sweet spot. After that, the quality starts to decline. The cake might still be safe to eat, but it won't taste as good. If you need longer storage, freeze them. Frozen wrapped layers keep well for up to 3 months.
Can I stack wrapped cake layers on top of each other?
Yes, you can. Just make sure each layer is wrapped tightly and the plastic film is smooth. Place a piece of parchment paper between stacked layers to prevent them from sticking together. Don't stack more than three layers high, or the bottom ones might get squished.
Final Thoughts and My Best Advice
Learning how to wrap cut cake layers with plastic film to stop the outer surface from drying out took me years of trial and error. But now it's second nature. I can wrap a layer in under a minute, and I know it'll stay moist for days.
The key points are simple. Cool the cake completely. Trim dry edges. Wrap the cut surface first. Use heavy-duty plastic film. Double wrap. Try the water mist trick. Store in a cool place.
Don't overthink it. Start with the basic technique. Then add the extra steps as you get comfortable.
I真心希望 these tips save you from the disappointment of dry cake. There's nothing worse than spending hours baking and then watching your cake layers turn to sawdust. With proper wrapping, that won't happen.
Give it a try on your next bake. And if you discover your own tricks, I'd love to hear about them. Baking is a community, and we all learn from each other.
⚠️ Warning: This cake is high in sugar. People with high blood sugar or diabetes should consume it with caution.





