 bluename
 How to Bake Individual Jelly Fruit Tarts: Chilled Small Handheld Desserts
I still remember the first time I tried to make individual jelly fruit tarts at home. My kitchen looked like a tiny pastry crime scene. The crusts slumped. The jelly refused to set. The fruit turned into sad, soggy little islands. That was years ago, back when I was just a home baker with more enthusiasm than skill. These days, I run a small pastry blog and teach weekend baking classes. I have made these chilled small handheld desserts probably two hundred times. So I know exactly where people mess up. And I know how to fix it. In this article, I will walk you through how to bake individual jelly fruit tarts that actually hold their shape. They are chilled small handheld desserts perfect for parties, lunchboxes, or just a quiet afternoon treat. I will cover everything from the crust to the jelly to the fruit. No fancy equipment. No restaurant tricks. Just real, tested methods.
Why Mini Jelly Fruit Tarts Beat Full-Size Ones
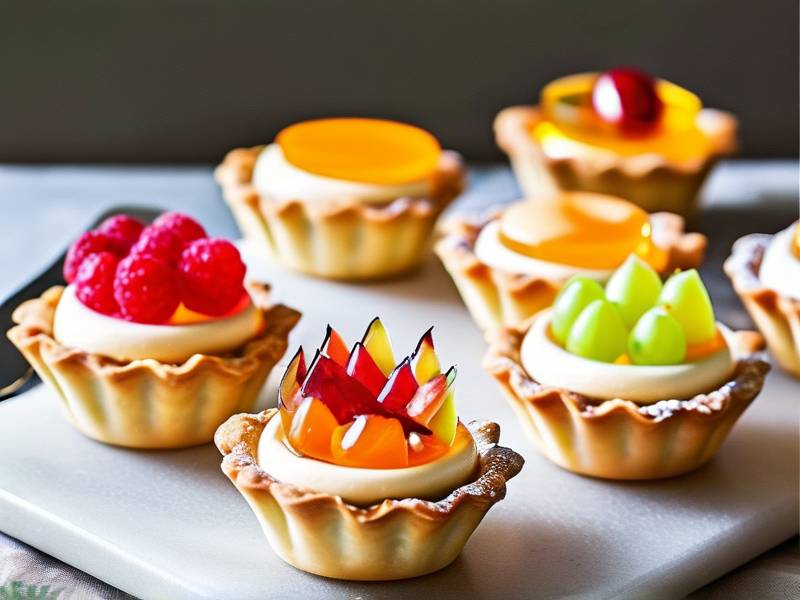
Honestly, I used to think mini desserts were just extra work. Smaller pan, more batches, same cleanup. But after years of baking, I changed my mind. Individual tarts bake faster and chill faster. That means you go from craving to eating much sooner. They also portion perfectly. Nobody has to cut a messy slice. Everyone gets their own little jewel box of fruit and jelly. Plus, kids love them. I have seen picky toddlers who hate "big pie" happily eat three mini tarts. And these chilled small handheld desserts travel well. I have packed them for picnics, potlucks, and even a friend's backyard wedding. They held up beautifully. The key is getting the crust sturdy and the jelly firm.
What Makes a Good Individual Jelly Fruit Tart
A good tart has three layers working together. First, a crisp but tender crust. It should not crumble into dust when you pick it up. Second, a thin layer of something creamy or jammy to keep the jelly from soaking in. Third, a clear, firm jelly that hugs the fruit. The fruit itself should be fresh, dry, and cut small. I have tested this with strawberries, blueberries, kiwi, mango, and grapes. Soft fruit like raspberries works too, but you must be gentle. The jelly should be just set, not rubbery. And the whole thing must be served cold. That is why I call them chilled small handheld desserts. Warm jelly tarts are a sad, runny mess.
My Go-To Equipment for Mini Tarts
You do not need a bakery filled with gadgets. Here is what I actually use. A 12-cup mini muffin tin. The kind with shallow cups, not deep ones. A round biscuit cutter about 2.5 inches wide. A small rolling pin. A silicone brush for butter. A fine mesh strainer for the jelly. And a small offset spatula for pressing crusts. That is it. I also keep a rimmed baking sheet nearby to hold the muffin tin. It makes moving things in and out of the oven way easier. One more thing. Parchment paper. Not for the crust, but for chilling the tarts later. You will see why.
The Crust: Where Most People Go Wrong
Let me be blunt. The crust is the hardest part of this whole recipe. If your crust is too thick, the tart feels doughy. Too thin, and it cracks when you unmold it. Too wet, and it puffs up like a pillow. I have tried store-bought pie dough. It works in a pinch, but it tastes flat and often contains too much water. My advice: make your own shortcrust. It takes ten minutes. And you control the texture.
My Shortcrust Recipe for Mini Tart Shells
Here is the formula I use for about 24 mini tarts. One and a half cups of all-purpose flour. Half a cup of cold unsalted butter, cut into cubes. A quarter cup of powdered sugar. One egg yolk. A tablespoon of ice water. A pinch of salt. I pulse the flour, sugar, and salt in a food processor. Then I add the butter. Pulse until it looks like coarse sand. Add the egg yolk and water. Pulse until the dough just comes together. Do not overmix. You will get tough crusts. I flatten the dough into a disk. Wrap it in plastic. Chill for at least 30 minutes. This rest period is non-negotiable. It relaxes the gluten. It also makes the dough easier to roll.
How to Shape and Bake the Mini Crusts
Preheat your oven to 350°F. Roll the dough to about 1/8 inch thick. Cut circles with your biscuit cutter. Press each circle into a mini muffin cup. Use your fingers or a small tamper. Make sure the dough goes up the sides. But do not stretch it. Stretched dough shrinks back during baking. Prick the bottom of each crust with a fork. This stops it from puffing. Now here is a trick I learned from a pastry chef in Portland. Freeze the shaped crusts for 15 minutes before baking. That extra chill keeps the walls from sliding down. Bake for 12 to 15 minutes. The edges should be light golden. Let them cool completely in the pan. Then gently twist each crust to release it. If a crust sticks, run a thin knife around the edge.
The Secret Layer: Why You Need a Barrier
You cannot put jelly directly on a baked crust. The jelly will seep in. The crust will get soggy. And your beautiful chilled small handheld desserts will turn into sad, wet crackers. So you need a barrier. I use two options. Option one: a thin layer of melted white chocolate. Brush it on the cooled crust. Let it set. Option two: a thin layer of seedless jam. Raspberry or apricot works great. Warm it slightly so it is spreadable. Then brush a thin coat inside each crust. Both methods create a waterproof seal. I prefer white chocolate for fruit tarts because it adds a subtle sweetness. But jam is faster. And it adds a fruit flavor boost.
Choosing and Prepping the Fruit
Fruit choice matters. You want fruit that is firm, dry, and colorful. Strawberries, blueberries, kiwi, mango, and grapes are my top picks. Stay away from watermelon, oranges, or anything super juicy. They release too much water and make the jelly weep. Wash your fruit. Then dry it completely. I mean completely. Pat it with paper towels. Let it air dry for ten minutes. Any water on the fruit will cause the jelly to break down. Cut the fruit into small pieces. They should fit inside the mini crust without poking out too much. For blueberries, leave them whole. For strawberries, slice them thin. For kiwi, quarter them. Arrange the fruit in the crust. Do not overcrowd. Leave a little space between pieces. The jelly needs to flow around them.
How to Make the Jelly That Actually Sets
This is the part that trips up most home bakers. Jelly for tarts is not the same as jelly for toast. You need a firm, clear set. And you need it to stay firm at room temperature for at least an hour. I use unflavored gelatin. Not pectin. Not agar. Gelatin gives that lovely, glossy, melt-in-your-mouth texture. Here is my formula. One packet of unflavored gelatin, about 2.5 teaspoons. A quarter cup of cold water. One cup of fruit juice or flavored liquid. I like apple juice, white grape juice, or a light simple syrup with lemon. Three tablespoons of sugar. Sometimes less, depending on the juice. A squeeze of lemon juice. The lemon brightens the flavor and helps the gelatin set.
Step-by-Step Jelly Instructions
Sprinkle the gelatin over the cold water in a small bowl. Let it bloom for five minutes. It will look like applesauce. That is normal. Meanwhile, warm the juice and sugar in a small saucepan. Do not boil. Just warm until the sugar dissolves. Remove from heat. Add the bloomed gelatin. Stir until fully dissolved. Add the lemon juice. Strain the mixture through a fine mesh strainer. This removes any undissolved bits. Let the jelly cool to room temperature. It should be slightly thick but still pourable. If it is too hot, it will melt the white chocolate barrier. If it is too cold, it will set before you pour it.
Pouring the Jelly Without Making a Mess
Place your fruit-filled crusts on a rimmed baking sheet. This catches any drips. Pour the cooled jelly slowly into each crust. Fill just to the top of the fruit. Do not overflow. If you get bubbles, pop them with a toothpick. Now here is the hard part. Do not move the tray. Carefully slide it into the refrigerator. Chill for at least four hours. Overnight is better. The jelly needs time to fully set. I know it is tempting to check after an hour. But wait. The texture changes dramatically with longer chilling. Trust me on this.
Unmolding and Serving Your Chilled Small Handheld Desserts
After chilling, the tarts should release easily from the mini muffin tin. If they do not, run a thin knife around the edge. Or dip the bottom of the pan in warm water for five seconds. Do not get water in the tarts. Place them on a serving platter. Keep them cold until serving. These are chilled small handheld desserts. They taste best straight from the fridge. If you are serving them outdoors, keep them in a cooler with ice packs. They will hold for about two hours at room temperature. After that, the jelly starts to soften. And the crust gets soggy. So plan accordingly.
Common Problems and How I Fix Them
I have made every mistake possible. Here are the big ones. Problem: Jelly will not set. Fix: You probably used fresh pineapple, kiwi, or papaya. These fruits contain enzymes that break down gelatin. Use canned or cooked versions instead. Or skip those fruits. Problem: Crusts stick to the pan. Fix: You did not grease the pan enough. Or you did not chill the crusts before baking. Problem: Jelly leaks under the crust. Fix: Your barrier layer had gaps. Brush it on more carefully. Problem: Fruit turns brown. Fix: This happens with apples or bananas. Use a little lemon juice on cut fruit. Or just use berries and kiwi.
Flavor Variations I Actually Love
Once you master the basic recipe, you can play. I love a strawberry basil version. I steep fresh basil in the warm juice. Then strain it out. The jelly tastes like summer. Another favorite is mango chili. I add a tiny pinch of chili powder to the jelly. It sounds weird. But it works. For a holiday version, I use pomegranate juice and fresh pomegranate seeds. The tart looks like a little ruby. I also make a tropical version with coconut water jelly and fresh mango. My kids go crazy for that one. Just remember to keep the fruit dry and the jelly firm.
Make-Ahead Tips for Busy Bakers
These tarts are perfect for parties because you can make them ahead. I bake the crusts up to three days in advance. I store them in an airtight container at room temperature. I do not refrigerate them. That makes them soggy. I prep the fruit the morning of serving. I make the jelly and pour it. Then I chill for at least four hours. You can also freeze the baked crusts for up to a month. Thaw them at room temperature before filling. Do not freeze the finished tarts. The jelly gets watery when thawed.
FAQ: Your Top Questions Answered
Can I use store-bought jelly instead of making my own? Yes, but be careful. Most jams and jellies are too soft. They will run. You can firm them up by warming them with a little extra gelatin. But honestly, homemade jelly takes ten minutes. And it tastes better. I recommend making your own for these individual jelly fruit tarts.
How do I keep the crust from getting soggy? The barrier layer is key. White chocolate or a thin jam coat. Also, make sure your fruit is completely dry. And do not pour warm jelly over the barrier. Let the jelly cool to room temperature first. That prevents melting.
Can I make these tarts without gelatin? Yes. You can use agar agar for a vegetarian version. Use the same amount. But agar sets firmer and has a slightly different texture. It also does not melt in your mouth. Some people love it. Some do not. I suggest trying a small batch first.
What is the best way to transport these chilled small handheld desserts? Use a cupcake carrier. Or a sturdy box with a flat bottom. Place the tarts in mini paper liners. Pack them snugly so they do not slide. Keep them cold with a gel ice pack. Do not stack them. The jelly will smudge.
My Final Thoughts on Baking Individual Jelly Fruit Tarts
Learning how to bake individual jelly fruit tarts changed my dessert game. These chilled small handheld desserts look impressive. But they are really just a few simple steps. Good crust. A barrier. Firm jelly. Fresh fruit. And patience while they chill. I still make them every few weeks. Sometimes I mess up. The jelly is too soft. The crust is too thick. But I learn something each time. That is the thing about baking. You get better by doing. So pick a fruit. Make a batch. Invite a friend. And enjoy the little jewels you created. Just remember to keep them cold. And do not skip the barrier layer. Your future self will thank you.
⚠️ Warning: This cake is high in sugar. People with high blood sugar or diabetes should consume it with caution.





