 bluename
 How to Make Honey Oat Crumble Topping for Seasonal Baked Apple Fruit Desserts
There’s something about the smell of baked apples with cinnamon drifting through the kitchen that just feels like fall. I’ve made a lot of fruit desserts over the years, and honestly, the topping can make or break the whole dish. A soggy, flavorless crumble is my absolute pet peeve. That’s why I started perfecting my own honey oat version, and I genuinely think it’s the best I’ve tried.
So, if you’ve been wondering how to make honey oat crumble topping for seasonal baked apple fruit desserts, you’re in the right place. I’ll walk you through my exact method, including the little tricks I learned after several slightly burnt batches. This isn’t just a recipe. It’s a guide to getting that perfect, golden, buttery crunch every single time.
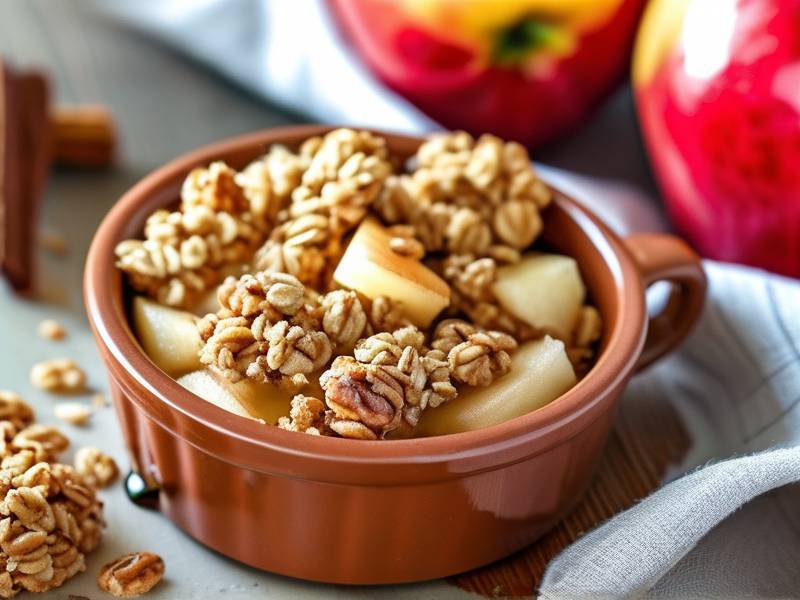
Let’s dive right in, because I have a feeling you’re as ready for apple season as I am. Or maybe you just have a bag of apples sitting on the counter that needs some love.
Why Honey and Oats Are the Perfect Pair for Apple Desserts
Before I get to the steps, let’s talk about why this specific combo works. I often see recipes using white sugar and plain flour, but honey brings something different to the table. It’s not just about sweetness, though that helps. It’s about moisture and depth of flavor.
Honey acts differently than sugar when baked. It caramelizes quicker and adds a slightly floral, complex note. When you mix that with the earthy chew of oats, you get a topping that contrasts beautifully with soft, baked apples. The apples get jammy, and the topping stays crisp. Or, at least, it does if you follow the right method.
I remember the first time I tried swapping sugar for honey in my standard crumble. I didn’t adjust the liquid content. The result? A sticky, wet mess that sank right into the fruit. It tasted okay, but the texture was all wrong. After a few more tries, I realized the ratio of dry to wet ingredients is the real secret.
The way I see it, the honey isn’t just a sweetener. It’s a binding agent. It helps the oats and flour clump together into those lovely, craggy pieces. Those irregular chunks are what give you the perfect crunch against the softer filling. And when you use good, thick honey—not the watery stuff—it coats the oats much better.
Selecting the Right Oats and Apples for a Seasonal Bake
This sounds basic, but it’s worth mentioning. The ingredients you pick determine how well your dessert holds up. I learned this the hard way when I used quick-cook oats once. They turned to powder. It wasn't great.
Whole Rolled Oats are Non-Negotiable for Me
You really need old-fashioned rolled oats for this. They have enough structure to stay chewy and crisp after baking. Quick oats get mushy. Steel-cut oats are too hard and won't cook through in the same time as the apples. So, rolled oats it is.
I usually test a batch with whatever I have in the pantry, but I’ve found that the texture difference is massive. If you only have quick oats, you can still use them, but reduce the bake time by about five minutes and check them early. They burn faster because they are thinner.
Which Apples Should You Actually Use?
The apple variety matters more than you might think. For baking, you want an apple that holds its shape. Apples like Granny Smith or Honeycrisp are my favorites. They are tart and firm. The tartness balances the sweet honey topping perfectly.
If you use a soft apple like McIntosh, you’ll end up with applesauce. That isn’t a bad thing if you like a mushier dessert, but I prefer distinct chunks of apple in my bake. I usually mix two varieties—one tart and one sweet—for a more complex flavor profile. It makes the dessert taste more "seasonal," if that makes sense.
The honey you choose also plays a role. I use wildflower honey for most things. It has a robust taste that stands up to the cinnamon and apples. A very mild honey, like clover, can get lost. Try a darker honey if you want the flavor to really sing in your honey oat crumble topping.
The Core of Your Honey Oat Crumble Topping: Step-by-Step Guide
Okay, let’s get to the actual how-to. The secret to a great topping is in the technique of mixing the butter. You don't want to overwork it. This is the core of the whole process, so let’s take it slow.
Mixing the Butter, Honey, and Dry Ingredients
Here is the thing about making crumble. You have to work fast but gently. I start with cold butter. I know some people melt it, but I don’t. Cold butter creates steam in the oven, which helps make the topping flaky.
I take a large bowl and add my rolled oats, flour, and a pinch of salt. Then I cut the cold butter into small cubes and toss them in. Now, using my fingertips, I rub the butter into the flour and oats. It sounds messy, but it's actually the best way to judge the texture.
You want the mixture to look like coarse breadcrumbs. Some bigger pea-sized pieces are good too. They create clusters. When it looks like that, I drizzle the honey over the top. Instead of mixing it all in at once, I use a fork to toss it. This prevents the honey from making the whole thing a sticky paste. I stop as soon as it starts to clump together.
The Ratio I Swear By
Let’s talk numbers. For a typical 8x8 or 9x9 baking dish, I use:
- 1 cup (120g) rolled oats
- 1/2 cup (60g) all-purpose flour
- 1/2 cup (170g) honey
- 1/2 cup (113g) cold unsalted butter, cubed
- 1/2 teaspoon ground cinnamon
- A pinch of salt
This ratio works consistently. It’s enough to cover a generous layer of apples. If you are making a larger dessert, just double it. People often ask me if they can swap the flour for almond flour. You can, but it changes the crunch. Keep it simple the first time.
Another tiny detail— I always add a splash of vanilla extract to the mixture. It’s not in every recipe, but I find it rounds out the flavor of the honey. It makes the topping taste more indulgent than it actually is. It's a small step but a good one.
Assembling the Seasonal Baked Apple Fruit Desserts
Once your topping is ready, you need to prepare the apples. The filling is where the seasonal magic happens. You don't want the sweetness of the topping to be the only flavor. The apples should have their own identity.
I slice my apples about 1/4-inch thick. If they are too thin, they vanish. If they are too thick, they won't cook by the time the topping is golden. In a bowl, I toss the apple slices with a little lemon juice, sugar, cinnamon, and sometimes a spoonful of cornstarch.
The cornstarch is a pro move. It absorbs the juice from the apples as they bake. Without it, you get a runny dessert. The bottom layer of crumble gets soggy. By thickening the filling, you keep everything cohesive.
When you are ready to bake, pour the apples into your buttered dish. Press them down slightly so they are even. Then, sprinkle your honey oat crumble topping over the apples. Don't press the topping down. Leave it loose. This allows air to circulate and helps it crisp up nicely.
Baking Time and Temperature Tips
This is where I messed up a couple of times initially. The crumble was brown, but the apples were still hard. Or the apples were perfect, and the topping was burnt. The solution is the oven temperature and the dish size.
I bake this at 375°F (190°C). That’s the sweet spot. It’s hot enough to caramelize the honey but gentle enough to cook the apples through. I place the dish on a baking sheet to catch any drips. The bubbling filling can spill over, and cleaning melted honey off the oven floor is rough.
Bake it for 35 to 45 minutes, depending on your oven. The topping should be deep golden brown. The filling should be bubbling around the edges. If you find the topping is getting too dark before the apples are tender, loosely cover the dish with foil for the last 10 minutes. That shield protects the crust while the inside finishes cooking.
Tweaking the Recipe: Making it Vegan and Gluten-Free
I get a lot of requests for dietary swaps. It’s pretty easy to adapt this recipe if you want to make it without butter or gluten. The texture will change slightly, but the flavor stays solid.
Swapping the Butter
For a vegan version, I use a high-quality vegan butter block. The kind that comes in a stick form is best. The tub versions have too much water. They make the topping greasy. You also need to make sure your oats are certified gluten-free if that is a concern. I personally like using coconut oil sometimes. It gives a subtle flavor that works with the apple nicely.
If you use solid coconut oil, make sure it’s chilled. It acts just like butter in this recipe. Keep the net weight the same as the butter. And ensure your honey is raw or just pure maple syrup for a vegan option. Honey is not considered vegan by some, but if you want the "honey" flavor, you need actual honey. If you want it plant-based, use agave or maple syrup.
Finding the Right Flour
Gluten-free flour blends work well here. I have used a 1:1 baking blend that contains xanthan gum. It worked perfectly. I haven't had great luck with a single type of alternative flour, like almond meal alone in the topping. It tends to brown too fast. Stick to a blend if you can.
It’s good to know that making these substitutions won't ruin your dessert. You just have to watch the oven closely. The baking time might be a little shorter. So, check around the 30-minute mark just to be safe.
Storage, Reheating, and Preventing a Soggy Topping
This leads me to one of the biggest questions I see online: "How do I keep the topping crunchy?" The truth is, you don't. Not fully. But you can manage it.
The moisture from the apples will eventually soften the oats. This is physics. It happens to almost any crumble or crisp once stored. That's just the nature of the dish.
Storing Leftovers Properly
Let the dessert cool completely on the counter. Then, cover the dish with plastic wrap or a lid. Store it in the fridge for up to four days. The topping will lose its crunch. It will be more like a chewy granola layer.
To get some crunch back, reheating is key. Don't use the microwave if you can avoid it. The microwave turns everything to mush. Instead, place a portion in a small oven-safe dish and reheat it in a toaster oven or standard oven at 350°F for about 10 minutes. That helps re-crisp the edges again. It isn't exactly like fresh, but it works well enough.
Can You Freeze it?
Yes, you can freeze the baked dessert. It holds up very well. I’ve come to appreciate this. If you have a busy week ahead, making one of these on a Sunday and freezing it is a lifesaver. Just make sure it’s fully cooled before you wrap it tightly in a layer of foil and plastic. It will keep for up to three months.
Reheat it from frozen, covered, at 350°F for about 30 to 40 minutes, or until warmed through. Let it sit for a few minutes before serving. This specific recipe is honestly one of the best seasonal baked apple fruit desserts because it doesn't lose quality in the freezer.
Enhancing the Flavor Profile with Seasonal Spices and Nuts
While the basic version I shared is great, sometimes I like to shake things up. It depends on the season and my mood. The fall season offers so many wonderful spices that can really make this your own.
I have a habit of adding a pinch of nutmeg or ginger to the topping. It’s subtle, but it adds a warm undertone. You could also add some cardamom. That one is my secret weapon.
Adding Some Texture with Nuts
Nuts in the crumble are a fantastic addition. Chopped pecans or walnuts pair beautifully with apples and honey. I usually toast them lightly before adding them to the topping mixture. Raw nuts in the oven can get a bit soft. Toasting them first keeps them crunchier.
Just don't overload the topping with nuts. You still want the oat flavor to come through. About a 1/4 cup of chopped nuts is plenty for my standard batch. When you add them right at the end with the honey, they get distributed nicely through the clusters.
Another tip that some people think is weird—I sometimes add a little bit of finely grated lemon zest to the crumble. It sounds out of place, but it wakes up the honey. It cuts the sweetness just enough to make it addictive.
Serving Suggestions and Pairings
You’ve made the perfect topping, baked the apples, and your kitchen smells like heaven. Now, how to serve it? This comfort food is fantastic on its own, but a little enhancement takes it to the next level.
I like to serve the baked apple fruit desserts warm. This is non-negotiable for me. A cold crumble just doesn't have the same magic.
The Ice Cream Rule
Vanilla ice cream is the classic pairing. The cold, creamy texture against the warm, crunchy topping is a sensory experience. I specifically use a good quality vanilla bean ice cream. The fat from the ice cream cuts the tartness of the apples and the sweetness of the honey perfectly.
If you aren't a fan of ice cream, try a drizzle of heavy cream or crème fraîche. I have also whipped up some lightly sweetened mascarpone cheese to serve on the side. It’s thicker and slightly tangy, which is another excellent match. You can’t really go wrong with any cold, creamy topping.
A Breakfast Twist
Honestly, this dessert is great the next morning. I’ve been known to eat the leftovers for breakfast with a big spoonful of Greek yogurt. The tartness of the yogurt mirrors the ice cream trick, but it feels a bit more responsible at 8 AM.
Since the oats are a whole grain, it sort of feels like a baked oatmeal. If I want to feel extra healthy, I’ll sprinkle some fresh pomegranate seeds over the top. They pop in your mouth and add a burst of juice that really changes the whole dynamic. It’s seasonal and festive during the winter holidays.
Common Mistakes and How to Fix Them
Having made this recipe so many times, I’ve seen it all. I’ve had crumbles that were too dry, too sweet, or completely liquid. I want to help you skip those frustrating steps.
Mistake #1: The Crumble Melts Into the Apples
This is the most common. It creates a cake-like layer on top of the apples instead of a crumble. This usually happens if the butter is too soft or if you over-mix the butter into the dry ingredients.
You need to work fast, have cold butter, and stop mixing as soon as it looks like small peas. If it becomes a paste, it will melt into a solid layer. If this happens to you, just crumble it up with a fork before baking and let it chill in the fridge for 20 minutes in the dish.
Mistake #2: The Topping is Burnt, but the Apples are Hard
This is all about oven dynamics. Your oven might run hot. I always use a thermometer to check my oven’s actual temperature. Also, the dish matters.
A deep dish insulates the apples, meaning they take longer to cook. A shallow dish cooks the apples faster but exposes the topping to more heat. If the top is burning, tent it with foil. Your apples should be soft enough to pierce easily before you take the dish out of the oven.
Frequently Asked Questions
Can I prepare this honey oat crumble topping in advance? Yes, I often make the topping ahead of time. You can store the unbaked crumble in a sealed container in the fridge for about two or three days. It also freezes well for up to three months. When you are ready to bake, just sprinkle it over your prepared apples. You don’t need to thaw it first. Baking from cold or frozen often yields a better, crumbly texture since the butter melts slowly in the oven.
Why is my oat topping not getting crispy? The main culprit is usually moisture. If your topping isn’t crispy, you might not have used enough oats relative to the wet ingredients. Also, make sure the butter is cold. If the mixture is too warm, it blends together into a dough that doesn't crispen up. Another trick is to bake the dessert on the lower rack of the oven for the first part of the baking process to help the bottom cook, then move it to the middle rack to finish browning the top.
What is the best way to use up slightly bruised apples for this dish? This is the perfect way to rescue bruised apples. Since you are peeling and slicing them anyway, those spots don't matter. Just make sure to cut away any truly brown or mushy parts. Bruised apples actually work perfectly for baking because they are often full of flavor, even if their texture isn't great for fresh eating. The heat will soften them completely, and the crumble topping will hide any imperfections.
Wrapping It Up
I realize that learning how to make honey oat crumble topping for seasonal baked apple fruit desserts is a small skill. But it’s one that pays off enormously. Once you have this base recipe, you can use it for pears, plums, or even rhubarb. It changes your dessert game completely.
Remember the key points: cold butter, rolled oats, and don't overmix the dough. Trust the process. Let the bubbling filling tell you when it's ready. Be patient, and make sure you let it rest for at least ten minutes after it comes out of the oven. This lets the juices thicken up a bit.
For me, this dessert is all about comfort. It’s about the scent of cinnamon and toasted oats filling my home. I love sharing this with my family, piled high with ice cream.
I genuinely hope your kitchen smells as amazing as mine does when I make this. Go on, grab those apples and give it a shot. You’ll be glad you did.
⚠️ Warning: This dessert is high in sugar. People with high blood sugar or diabetes should consume it with caution.





