 bluename
 How to Smooth Chilled Ganache Surface Ready to Apply Outer Fondant Covering
There is nothing more frustrating than spending hours making a perfect chocolate ganache cake, only to have it peek through your fondant like a lumpy mattress. I have been there. Honestly, I used to dread the moment of covering a ganache cake because I knew the bumps and air bubbles would show up. You spend all that time on flavor, and then the finish ruins the look.
The good news is that smoothing a chilled ganache surface for fondant is a learnable skill. It is not about talent. It is about technique, temperature, and having the right tools. In this guide, I will break down my exact process that I use in my own bakery. I will show you how to get a razor-sharp, perfectly smooth ganache base so your outer fondant layer looks flawless. We will cover everything from the right chilling times to the tools that actually work. Let’s dive straight in because I know you want to stop fighting with your cakes.
Why a Smooth Ganache Base Matters for Fondant
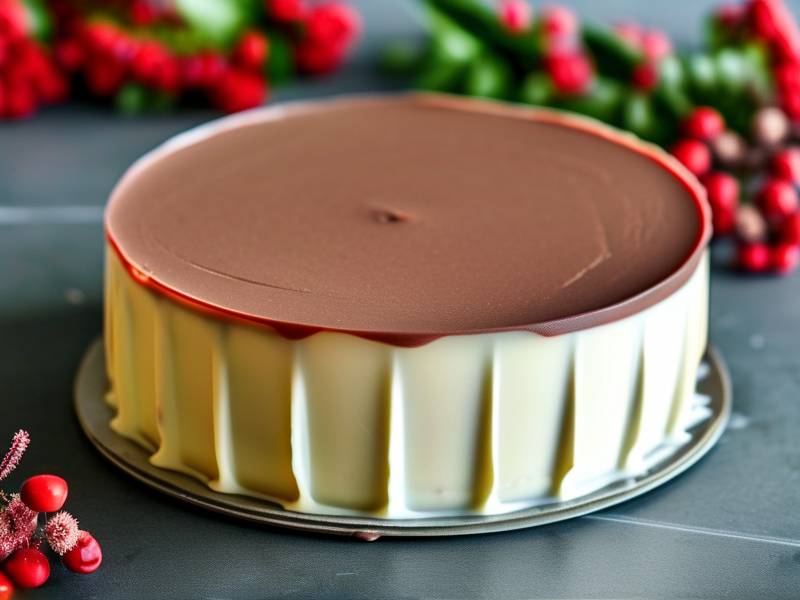
Fondant is unforgiving. It does not hide flaws. In fact, it magnifies them. When you roll out a thin sheet of sugar paste, it will perfectly mirror everything underneath it. Every single bump, every little air bubble, and every wavy line on your ganache will show up on the outside of your cake. This is why the smooth chilled ganache surface is not just a nice-to-have. It is the absolute foundation for a clean, professional cake finish.
I have seen so many home bakers skip this step or rush it. They pour the ganache, let it set for ten minutes, and then try to throw fondant on top. The result is always the same. Bumpy edges, visible imperfections, and a lot of frustration. The fondant is not the problem. The ganache is. The simple truth is that you cannot fix a poor ganache surface with fondant. You have to get it right before you even think about rolling out your sugar paste.
So, let’s focus on the prep work. Getting that silky smooth layer takes a little patience. But once you master it, your cakes will look like they came out of a high-end patisserie. I promise you, this is the secret weapon.
The Right Way to Chill Ganache Before Smoothing
Temperature is everything here. If your ganache is too soft, it will just smear around. If it is too hard, you will fight it and create crumbs and dents. The ideal window for smoothing is when the ganache is set but still slightly pliable. It should feel like a firm putty, not rock solid.
For me, the trick is to chill the cake in the refrigerator for about 20 to 30 minutes after the initial ganache pour. This sets the outer layer enough to handle. But the timing depends on your fridge. Some fridges run colder, some warmer. I usually start checking at the 20-minute mark. I press my fingertip lightly against the side. If it leaves a small indentation that slowly bounces back, it’s perfect. If it leaves a dent that stays, it needs more time. If it is hard as a rock, I let it sit at room temperature for a few minutes to soften slightly.
Many people ask me if they can freeze the cake. You can, but you have to be careful. A frozen ganache surface is too hard. It will resist your smoother and cause little craters. If you do freeze it, let it thaw in the fridge overnight. Then, let it sit on the counter for 10 minutes before you attempt to smooth it. This brings it back to that workable putty stage. The goal is a surface that is firm enough to hold its shape but soft enough to manipulate without cracking.
Tools You Need for a Flawless Ganache Finish
You do not need a million fancy tools, but you do need the right ones. I have tried everything from the back of a spoon to specialized scrapers. Trust me, the tool makes a massive difference.
First, you need a good bench scraper or cake scraper. I prefer a stainless steel one with a flat edge. Make sure it is taller than your cake. If the scraper is shorter than the cake, you will get wavy lines as you pull it across. Get one that is at least 5 inches tall for a standard 4-inch layer cake.
Next, you need a hot water bath. I keep a tall pitcher of very hot water next to my workstation. I dip the scraper into the hot water and dry it off before each pass. The heat glides through the ganache, melting the surface just enough to smooth out any ridges. This is the same technique professional bakers use. If the scraper is cold, it will tug at the ganache and create drag marks. A warm scraper is your best friend.
You will also want a small offset spatula. This is great for fixing small imperfections, especially around the bottom edge where the scraper is harder to angle. Keep a bowl of hot water and a clean towel handy. You will be dipping and drying the spatula constantly. The heat is what does the magic.
The Step-by-Step Process to Smooth Chilled Ganache
Alright, let’s get into the actual process. Once your ganache is chilled to the right consistency, it is time to work. I work on a turntable because it is easier to keep the angle consistent. Here is my exact method.
First, I dip my scraper into the hot water. Then I dry it completely with a towel. A wet scraper will leave water streaks on the ganache, which is a mess. The blade needs to be dry and hot.
Next, I place the back edge of the scraper flush against the cake. I hold it at a slight angle, tilted just a few degrees away from the cake. Then, I rotate the turntable in a smooth, steady motion. I keep the pressure even. It takes about two or three rotations to get the sides smooth.
I repeat the dip, dry, and scrape process until the sides are perfectly flat. It usually takes me about five or six passes to get it right. Do not panic if you see slight imperfections on the first pass. The warm scraper will always fix them on the next rotation. You are literally melting and re-positioning the chocolate.
Finally, I tackle the top edge. I use the same hot scraper technique, but I do this very lightly. Pressing too hard on the top will make a lip or a divot. Just barely skim the surface. The warmth will do the work. Once the top is level, I use a small offset spatula to clean up the bottom edge where the cake meets the board. That little bit of extra care makes everything look sharp.
Fixing Common Ganache Smoothing Problems
Let’s be real. Even with the right technique, things go wrong. I have had my fair share of disasters. The good news is that most of them have simple fixes. The most common issue is air bubbles. You think you have a smooth surface, and then you see tiny pinholes appearing. That happens when air gets trapped during the initial pour.
If you see air bubbles after chilling, you can fix them. Take a small clean finger and dip it in warm water. Dry it fully. Then, gently press the bubble to flatten it. The warmth will soften the ganache just enough to push the air out. Let that spot re-chill for a few minutes before you do the final scrape. It works, but it takes a bit of patience.
Another common problem is sticky or melting ganache. This usually means you rushed the process. If the ganache is too warm, the scraper will just push it around and create waves. Stop, put the cake back in the fridge for 15 minutes, and try again. There is no shame in re-chilling. I do it all the time.
Sometimes, you get a rough, textured surface because your ganache was too cold. In that case, the solution is the opposite. Let the cake sit out for 5 minutes so the surface can soften. Then, use a slightly hotter scraper. The heat will smooth the roughened texture. Remember the goal is always that putty-like consistency.
How to Know When Your Ganache Is Ready for Fondant
You might be tempted to check if the surface feels smooth to the touch. But actually, the best test is visual. Look at the cake from eye level. Tilt it towards the light. If you see any lines, bumps, or shadows, you are not done yet. A truly smooth surface will reflect light evenly with no distortion.
I also check the bottom edge carefully. This is the area where most bakers fail. It is hard to get the scraper perfectly flush at the bottom. If there is a small lip there, it will look terrible once you add fondant. I run the offset spatula along the bottom edge until it is flush with the cake board. That little detail makes the biggest difference.
Another sign that you are ready is that the ganache feels slightly tacky but not wet. If it is tacky, the fondant will adhere to it perfectly. I actually prefer to add a very thin layer of simple syrup or a bit of water over the ganache right before covering. This gives the fondant something to grab onto. But do not overdo it. A dry ganache will cause the fondant to slide, and a wet one will cause air pockets. Just a light mist works.
Preparing the Cake Board and Final Checks
Before you even start smoothing, make sure your cake is on a sturdy cake board. I like to use a drum board that is at least two inches larger than the cake itself. This gives me room to work with the scraper. You also want to secure the cake with a tiny bit of ganache or buttercream to the board so it does not slide around. A sliding cake is the fast track to a ruined finish.
Once the ganache is smooth and you are satisfied, let it chill again for about 10 minutes. This re-sets the surface so it is firm before you add fondant. Do not skip this step. A slightly soft ganache will cause the fondant to stretch and tear. You want a firm, stable base.
I also recommend wiping the board clean with a damp cloth. Little chocolate smudges on the board will be visible in photos and can get onto the fondant. It takes two seconds and it keeps your presentation clean. Your cakes should look as good from the bottom as they do from the top.
Step-by-Step Recipe for a Basic Dark Chocolate Ganache
Since we are talking about ganache, let me share my go-to recipe that has never failed me. It is simple, but the ratios are important.
Ingredients:
- 200g dark chocolate (55-70% cocoa), finely chopped
- 200g heavy cream (35% fat content)
Method: Heat the cream in a small saucepan until it just starts to bubble around the edges. Do not let it boil. Pour the hot cream over the chopped chocolate. Let it sit for two minutes. Then, slowly stir with a spatula. Start from the center and work your way out. This creates a smooth emulsion. Once it is glossy, it is ready to pour.
Let it cool to about 30°C for a pourable consistency. I use this for a crumb coat or a first layer. For a cake that you want to cover with fondant, I actually recommend a thicker ganache. Use a ratio of 2 parts chocolate to 1 part cream. This sets up firmer and is easier to smooth. The texture is more like a paste, which is perfect for the scraping method I described.
This recipe is reliable, and the texture holds up beautifully. I have used it for years in my bakery.
Personal Tips for a Stress-Free Cake Covering Experience
I want to share a few things that took me way too long to learn. First, do not stress about getting it perfect on the first try. Honestly, even seasoned bakers have to do multiple passes. The process is a bit tedious, but that is what makes the end result so satisfying.
Second, invest in a good turntable. I know they can be pricey, but a heavy, sturdy one makes a world of difference. A wobbly turntable will ruin your smooth finish. If your budget is tight, look for a used one. It is worth every penny. I bought my first one used, and it lasted for years.
Third, work in a cool room. If your kitchen is hot, the ganache will never stay firm. I turn on the air conditioning or open a window in the winter. If that is not possible, chill your tools as well. You can even put your cake board in the fridge before you start. Every degree counts when working with chocolate.
Also, keep a spray bottle with water nearby. If you see the ganache starting to tear or drag, a tiny mist of water on the surface can help it glide. It sounds weird, but it really works. Just a light spray, not a soak.
Covering the Chilled Ganache with Fondant
Once your smooth chilled ganache surface is ready, you can apply the outer fondant covering immediately. Before you roll out the fondant, dust your work surface with a mixture of powdered sugar and cornstarch. Roll the fondant to about 3-4 mm thickness. It needs to be large enough to cover the top and sides completely.
Now, brush the ganache lightly with a simple syrup or clear alcohol like vodka. This helps the fondant stick. Alternatively, you can use a dab of cold water. I personally prefer a 50/50 mix of water and corn syrup. It dries a little tacky, which creates a solid bond.
As you drape the fondant, be careful not to stretch it too much. Stretching causes the fondant to tear later. Place it gently, then use a smoother to press it down from the top edge, working your way down the sides. Smooth out any air bubbles with a small needle or a pin. Pop the bubble and smooth it flat. The smooth ganache beneath will ensure the fondant lies completely flat with no weird lumps.
Final Thoughts and Frequently Asked Questions
This process has completely changed the way I work. Once I figured out the correct temperature and started using a hot scraper, my cakes leveled up immediately. The key takeaway is simple. The smoother your chilled ganache surface, the easier it is to apply outer fondant covering that looks flawless. Do not rush. Do not skip steps. Give yourself time to get it right.
I know covering a cake can be intimidating, but practice really does make perfect. I suggest starting with a simple dummy cake or a practice cake. Use cheap chocolate and just work on the technique. Once you get the hang of the warm scraper motion, it becomes second nature. You will be able to do it quickly, and your cakes will look professionally finished.
FAQ
Q: Can I use milk chocolate instead of dark chocolate for the ganache? A: You can, but I recommend adjusting the ratio. Milk chocolate is softer, so you need more of it to get the same firmness. Use 3 parts milk chocolate to 1 part cream. Even then, it can be a bit soft for smooth chilled ganache surfaces. Dark chocolate is always more reliable for a smooth finish.
Q: Should I smooth the ganache with the fundant immediately after chilling? A: It depends on your room temperature. Ideally, let the cake sit for 5-10 minutes after taking it out of the fridge. This softens the surface slightly. If you apply fondant right away, the cold ganache can cause condensation. That moisture will make the fondant sweat.
Q: How do I fix a wavy ganache surface if I already started smoothing it? A: You can fix waves by re-warming the surface. Dip your scraper in hot water, dry it, and run it over the wavy area in steady strokes. You might need to do this multiple times. If you have large waves, combine the scraper with a heat gun or hairdryer for a few seconds. The heat will level the ganache out.
Final Wrap Up
So, here is the bottom line. You need a firm but pliable ganache, a hot dry scraper, and a little patience. That is the secret to a smooth chilled ganache surface. Once you practice this a few times, you will never dread covering a cake again. Before you know it, you will be turning out cakes so clean and sharp, people will think you bought them from a pro bakery.
Take your time, keep your tools warm, and do not rush. You have all the skills you need. I hope this guide helps you finally get the polished look you have been chasing. Now, go out there and make something beautiful.
⚠️ Warning: This cake is high in sugar. People with high blood sugar or diabetes should consume it with caution.





