 bluename
 I still remember the first time I tried to decorate a frosted cake with praline almond crunch. It was a total disaster. The nuts slid right off the frosting and landed all over the counter. My kitchen looked like a war zone. But after years of trial and error, I finally figured out the exact method that works. And now I want to share everything with you.
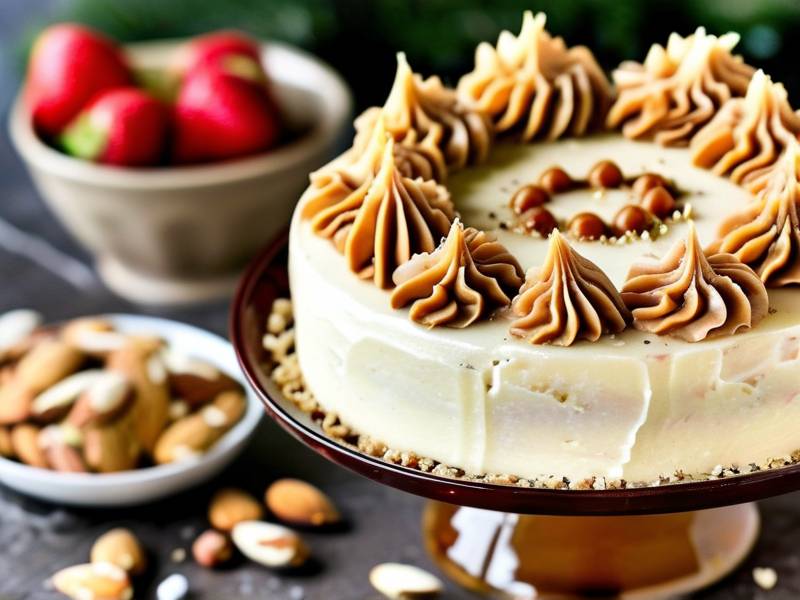
Learning how to make praline almond crunch decorate frosted cake surface toppings is actually simpler than most people think. The key is understanding the texture, the timing, and the technique. Once you get those three things right, you will never go back to plain sprinkles again.
Let me walk you through my complete process, including all the mistakes I made so you do not have to make them yourself.
Understanding the Basics of Praline Almond Crunch for Cake Decoration
Before we jump into the actual steps, let us talk about what praline almond crunch really is. I get asked this question all the time by my baking students.
Praline almond crunch is essentially caramelized sugar mixed with roasted almonds. The mixture hardens into a brittle texture that you can crush into various sizes. When you sprinkle it over frosted cake surfaces, it adds both visual appeal and a satisfying crunch.
Here is the thing though. Not all praline crunch is created equal. The texture matters immensely depending on how you plan to use it.
What Makes Praline Almond Crunch Different from Regular Sprinkles
Regular sprinkles are basically colored sugar. They add sweetness but zero texture. Praline almond crunch is completely different. It brings a nutty depth and an audible crunch that makes every bite interesting.
I personally prefer a mix of fine and coarse pieces. Fine pieces adhere better to the frosting. Coarse pieces give that dramatic presentation. You need both for the best result.
Another difference is the flavor profile. Store-bought sprinkles taste like nothing but sugar. Homemade praline almond crunch has that deep, toasted nut flavor. It pairs beautifully with vanilla, chocolate, and even coffee-flavored cakes.
The Science Behind Getting Crunch That Stays Fresh
Here is something that took me way too long to figure out. Praline crunch can go soft if you apply it too early. The moisture from the frosting seeps into the caramelized sugar and ruins that crispy texture.
I learned this the hard way. I decorated a cake the night before a party, and by the next morning, my beautiful crunch had turned into a chewy mess. It was disappointing, to say the least.
The solution is quite simple. You need to apply the praline almond crunch shortly before serving. Or, you can create a barrier between the frosting and the crunch. A thin layer of melted chocolate works wonders for this.
Tools You Will Need for This Project
You do not need fancy equipment for this. I use basic kitchen tools that most people already own.
A heavy-bottomed saucepan is essential. Thin pans heat unevenly and burn the sugar. Trust me on this one. I have ruined plenty of batches with flimsy pans.
A candy thermometer helps, but you can also use the cold water test. I will explain both methods later.
Also, get yourself a good rolling pin or a food processor. You will need one of these to crush the praline into your desired size.
Finally, parchment paper is non-negotiable. It prevents sticking and makes cleanup so much easier.
Making the Perfect Praline Almond Crunch from Scratch
Now, let me walk you through my exact recipe for praline almond crunch. This is the version I use in my bakery. It has never let me down.
Stage One: Preparing Your Almonds
First things first. You need to toast your almonds. Trust me, skipping this step is a huge mistake. Raw almonds will not develop that deep, nutty flavor you want in your crunch.
Spread your almonds on a baking sheet and toast them at 350°F for about 8-10 minutes. Do not walk away from the oven. Almonds go from perfectly toasted to burnt in about thirty seconds.
Let me share a little trick I discovered. Rub the toasted almonds in a clean kitchen towel. This removes some of the skin and gives a nicer appearance. It is completely optional, but it does elevate the final look.
Once toasted, let them cool completely. Warm almonds will seize up the caramelized sugar and ruin everything.
Stage Two: Making the Caramel Base
This is the part that intimidates most people. But honestly, it is just sugar and water. The trick is patience.
In a heavy-bottomed saucepan, combine sugar and a splash of water. Use medium heat. Do not stir. I repeat, do not stir. This is the most common mistake I see beginners make.
Stirring encourages crystallization, which creates grainy, lumpy caramel. Just let the sugar melt naturally. You can gently swirl the pan if you need to, but no stirring.
Watch the color carefully. You want a deep amber, similar to the color of maple syrup. At this point, quickly add your toasted almonds and stir to coat them evenly.
Stage Three: Setting and Hardening the Praline
Pour the mixture onto a parchment-lined baking sheet. Spread it as thin as possible. This step is crucial for even hardening.
Wait for it to cool completely. Do not touch it. I know it is tempting to test it, but you will burn your fingers. Let it sit for at least 30 minutes.
Once fully hardened, break it into pieces. You can smash it with a rolling pin for chunky pieces. Or use a food processor for a finer texture. It really depends on the look you are going for.
I usually process my praline into three different sizes. Fine powder for base coverage, small chunks for texture, and larger shards for dramatic decoration.
How to Make Praline Almond Crunch Decorate Frosted Cake Surface Toppings Effectively
This is the main event. You have your beautiful praline crunch ready. Now the question is how to apply it to your frosted cake surface without losing all of it to the floor.
I have experimented with dozens of techniques. Let me share the ones that actually work.
The Pressing Technique for Straight Sides
If your cake has exposed frosting on the sides, the pressing technique is your best friend. Hold the cake in one hand. Gently press handfuls of praline crunch onto the sides with the other hand.
Work in sections. Do not try to cover the entire cake at once. It becomes messy and uneven.
Here is a pro tip. Use a small offset spatula to press the crunch in. This gives you more control and keeps your hands clean. The crunch adheres to the spatula and transfers nicely to the cake.
So here is what I learned from experience. Do the sides first, then the top. This order prevents bits of crunch from falling onto your perfectly smoothed top surface. Makes sense, right?
The Sprinkling Method for Top Surfaces
For the top of the cake, sprinkling works beautifully. But there is a technique to it. Simply dropping handfuls of crunch creates clumps and bare spots.
Instead, cup the praline in your hand and let it fall through your fingers evenly. Move your hand around the surface to distribute the crunch uniformly.
I find that a light touch works best. Heavy-handed sprinkling buries the frosting completely. You want the crunch to complement the frosting, not hide it entirely.
Creating a Decorative Border
Borders are where praline almond crunch really shines. You can create an elegant rim around the top edge of your cake. It frames the cake beautifully and adds sophistication.
Use tweezers or a small spatula to place individual pieces carefully. This takes longer, but the result is absolutely stunning. I do this for my special order cakes.
Another border option is a crushed base. Press finer praline around the bottom edge of the cake. This creates a lovely transition between the cake and the cake board. It looks professional and hides any imperfections.
Common Mistakes and How to Fix Them
I have made every mistake in the book. Let me save you the trouble and share the most common issues people face.
Mistake One: The Praline Slides Off the Cake
This happens when the frosting is too soft or too smooth. The crunch simply cannot grip onto the surface.
The fix is to chill your frosted cake for 15-20 minutes before applying the praline. A firmer frosting surface gives the crunch something to grip onto.
Alternatively, you can lightly dab the areas where you will place the crunch with a bit of corn syrup. This creates a sticky surface. I prefer the chilling method though. It is cleaner and less messy.
Mistake Two: The Praline Melts or Becomes Soft
This is the moisture problem I mentioned earlier. The water in the frosting softens the caramelized sugar.
To fix this, melt some white or dark chocolate and brush a thin layer over the frosted surface. Let it set completely before adding the praline. The chocolate acts as a moisture barrier, keeping your crunch crispy for longer.
I know this adds an extra step but it is so worth it. Especially if you need to prepare the cake a day in advance.
Mistake Three: The Praline Burns in the Pan
Burned caramel is bitter and ruined. This happens when you walk away from the stove or use too high heat.
Always keep your heat at medium. And pay attention. The entire caramelization process takes only a few minutes. Put your phone away and just watch the pan.
If you do end up with burnt caramel, do not try to fix it. Start over. Trust me, there is no saving burnt sugar. I have tried everything, and it always tastes bitter.
Advanced Decoration Ideas with Praline Almond Crunch
Once you have mastered the basics, you can get creative. Here are some of my favorite advanced techniques.
Layered Textures for Visual Interest
Do not limit yourself to one texture. Combine fine praline powder with larger chunks for a dynamic visual effect.
Start with a base layer of fine powder. Then add scattered chunks on top. The contrast in textures creates depth that photographs beautifully.
Praline Drip Effects
This one is a showstopper. Melt your praline crunch with a little cream and butter to create a sauce. Drizzle it over the top of your frosted cake and let it drip down the sides.
The result is elegant and delicious. I use this technique for my signature chocolate praline cake. Customers go absolutely crazy for it.
Mixing with Other Decorations
Praline almond crunch pairs beautifully with other decorations. Chocolate curls, fresh berries, and edible flowers all complement the nutty flavor.
Do not overdo it though. Too many elements make the cake look busy. I usually pick two or three elements maximum and keep the rest simple.
Personalized Messages with Crunch
Here is a fun idea. You can create letter stencils and sprinkle fine praline powder through them. This creates personalized messages on top of your cake.
It takes a steady hand and some patience. But the payoff is impressive. I did this for a wedding cake once, and the guests could not stop talking about it.
Storing and Preserving Your Decorated Cake
Proper storage is essential. You do not want all your hard work to go to waste.
Short-Term Storage
If you are serving the cake within a few hours, keep it at room temperature. The praline crunch will stay crunchy for up to six hours.
Make sure the cake is uncovered or only lightly covered. Tight wrapping traps moisture and makes the crunch soft.
Long-Term Storage Options
For longer storage, refrigerate the cake. But be warned, condensation is your enemy. The praline will soften in the fridge.
I recommend adding the praline crunch after refrigerating the cake. This way, the cake stays cold and fresh, but the crunch remains perfectly crisp.
If you have leftover crunch, store it in an airtight container at room temperature. It will keep for about two weeks. Do not refrigerate it. The moisture in the fridge will ruin its texture.
Health Considerations and Allergen Awareness
Praline almond crunch is delicious, but it is not for everyone. Almond allergies are common and can be severe.
Always label your cakes if you are selling them. Even if you are baking for friends, mention the nuts. It might embarrass you to ask, but it is better than an allergic reaction.
Nutritional Information You Should Know
Praline almond crunch is high in calories and sugar. The almonds do provide healthy fats and protein. But the caramelized sugar significantly adds to the caloric content.
A single tablespoon of praline crunch contains roughly 50-70 calories. Most of that comes from sugar. Enjoy it in moderation.
Sugar-Free and Diabetes-Friendly Modifications
You can make praline almond crunch with sugar substitutes. Erythritol and monk fruit sweetener both caramelize reasonably well. The texture is slightly different, but the taste is close.
If you use a sugar substitute, be aware that the caramelization process is faster. Watch your pan carefully. You do not want burnt sugar substitute ruining your cake.
Also, sugar-free praline does not get as hard as traditional praline. Keep this in mind when crushing it. It will be slightly softer but still delicious.
Frequently Asked Questions
How long will praline almond crunch stay crunchy on a frosted cake?
The crunch will stay crisp for about 6-8 hours at room temperature. Moisture from the frosting eventually softens it. To extend the crunchiness, brush the frosted surface with chocolate before applying the praline. This creates a barrier against moisture.
Can I use store-bought praline instead of making my own?
Yes, you can. Store-bought praline works fine for decoration. However, making your own gives you control over texture and flavor. Homemade praline tastes fresher and has a deeper nutty flavor. If you are in a hurry, store-bought is a decent shortcut.
What is the best frosting type for praline almond crunch decoration?
Buttercream frosting works best. It is firm enough to hold the crunch in place. Cream cheese frostings also work well. Whipped cream frostings are too soft and moist. They will cause the praline to slide off and soften quickly.
My praline turned out sticky. What did I do wrong?
Sticky praline means your sugar did not reach the hard crack stage. The temperature needs to reach 300°F. Use a candy thermometer for accuracy. If it is sticky, reheat the praline in a low oven and try again.
Can I freeze a cake decorated with praline almond crunch?
Freezing is not recommended. The freeze-thaw cycle creates condensation that ruins the praline texture. If you must freeze, leave off the praline until after thawing. Decorate fresh once the cake is at room temperature.
Final Thoughts
Learning how to make praline almond crunch decorate frosted cake surface toppings takes practice. I ruined at least five batches before I got it right. But once you understand the basics, the possibilities are endless.
My advice is simple. Start with a small batch. Practice the techniques without pressure. Focus on the texture and timing. The decoration skills will come with repetition.
Your friends and family will be so impressed when you bring a professionally decorated cake to the table. They will ask you for the recipe. They will want to know your secret.
And honestly, the secret is not fancy equipment or expensive ingredients. It is patience and attention to detail. That is what separates professional-looking cakes from home-baked ones.
So go ahead and try this. Your frosted cake will never look boring again.
⚠️ Warning: This cake is high in sugar. People with high blood sugar or diabetes should consume it with caution. The almonds are a common allergen. Always inform guests about the presence of nuts before serving.





