 bluename
 Thinning royal icing the right way completely changed how I decorate cookies. I still remember my first attempt at flooding a large flat cookie. The icing sat there like a heavy paste. It would not move an inch. I almost gave up on the whole idea of smooth royal icing cookies. Then I learned how to thin base royal icing correctly. That changed everything. The difference between a lumpy mess and a glass-like finish is actually quite simple. It comes down to consistency. Getting that consistency right is the real skill behind flooding large flat cookie surfaces smoothly. This guide will walk you through every single step I use. No fluff. Just the practical stuff that works.
Everyone talks about cookie decorating being fun. But nobody warns you about the frustration of thick icing. You pipe it onto a smooth surface. You wait for it to self-level. It just sits there. I have been there. It is not fun. The good news is that the fix is easy. You just need to understand the right way to thin your royal icing. Once I figured this out, my cookie game leveled up massively. I will share all those details with you here. By the end, you will know exactly how to thin base royal icing for flooding. You will feel confident handling even the biggest cookie surfaces.
Why Consistency Matters When You Thin Base Royal Icing
Before we get into the how, let’s talk about the why. You cannot simply add water and hope for the best. I tried that once. The result was a runny disaster that flowed right off my cookie edge. Broken borders. Wasted icing. A frustrating afternoon.
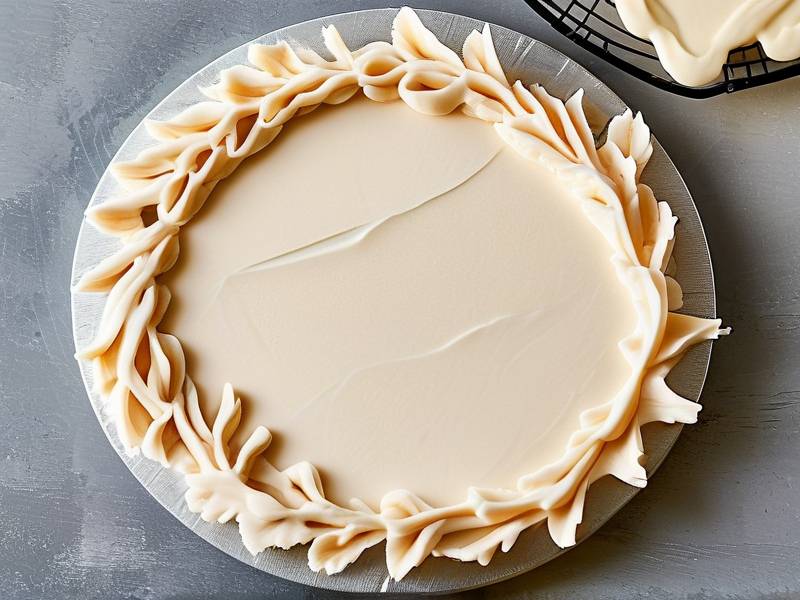
The right consistency for flooding is often described as the 10-15 second rule. This means when you lift your spatula or spoon out of the icing, the ribbon that falls back into the bowl should disappear into the surface within 10 to 15 seconds. This is the sweet spot. It is thin enough to spread out nicely on its own. But it is thick enough that it will not overflow your piped borders.
When you are dealing with large flat cookie surfaces, that timing matters even more. A big surface means more area for the icing to travel. If your icing is too thick, it will leave swirls and peaks. These are hard to fix once they dry. But if you get the consistency perfect, gravity does all the heavy lifting for you. The icing spreads smoothly. It creates that beautiful, polished finish everyone loves.
Understanding Royal Icing Components
Royal icing is basically sugar and water. Well, it is a bit more than that. The classic recipe uses confectioners’ sugar, meringue powder, and water. Sometimes people add a little corn syrup or glycerin. These extras help keep the icing soft once it dries. That is optional though.
For flooding, we are not talking about the stiff icing used for piping borders. That needs to hold its shape. We are talking about base icing. This is what you use to fill in large areas.
Many beginners think you need a completely different recipe for flooding. You actually do not. The recipe stays the same. You simply adjust the liquid content. That is the essence of how to thin base royal icing. You are manipulating the ratio of liquid to dry ingredients to achieve a different texture.
I usually make a big batch of thick icing. Then I split it into smaller bowls. Each one gets a different amount of thinning. This saves so much time. You are not constantly standing over a mixer making new batches.
The Role of Water in Thinning Royal Icing
Water is your primary tool. But small amounts matter a lot. Start with tiny additions. We are talking teaspoons, not cups.
The tricky part about water is that it takes a moment to fully incorporate. You add a teaspoon. You stir. It still looks thick. So you add another teaspoon. Trust me, I have ruined many batches by being too hasty. The icing continues to loosen up even after you stop stirring. If you are not patient, you will overshoot the consistency.
Another thing I found useful is to let the thinned icing rest for a minute or two. This gives the sugar time to absorb the liquid fully. You will see the consistency change slightly even without touching it. That little pause has saved me so many times. It is a simple trick that has become part of my routine.
How to Thin Base Royal Icing Without Breaking It
Now for the main event. I am going to give you my exact process. This is how I get royal icing to flood large flat cookie surfaces smoothly every time.
First, you start with thick royal icing. This should be your freshly made or stored and revived icing for outlining. You need a good base to work with. If your icing has been in the fridge, bring it to room temperature first. Mix it well until it is smooth and pliable. You should see no lumps. A spoonful of this should hold its shape completely.
Next, add a small amount of warm water. Why warm? It incorporates more easily than cold water. Cold water tends to create little pockets of liquid that are hard to mix in. Warm water blends right in. You will get a smoother result.
Use a rubber spatula. Stir slowly. The idea is to gently fold the water into the icing, not whip it. Whipping introduces air bubbles. Air bubbles are the enemy of a smooth surface. They leave tiny craters when they pop. So keep your stirring gentle and consistent.
After your first addition of water, stir for about 30 seconds. Then stop. Look at the icing. Does it look glossier than before? That is a good sign. Now do the spoon test. Dip a clean spoon. Lift it up. Let the icing drizzle off. Count the seconds before the surface smooths out. If it takes longer than 20 seconds, you need more water. If it disappears in under 5 seconds, you went too far. You are aiming for that 10 to 15 second window.
A Common Mistake That Ruins Flooding Consistency
Let me tell you about a mistake I see constantly in cookie groups online. People get impatient. They add a huge splash of water at once. The icing instantly becomes soup. Then they try to fix it by adding more powdered sugar. That usually makes it clumpy. And it never tastes as good because the ratio is off.
Please do not do this. I know it is tempting. It seems faster. It is not. Taking your time with small additions is actually quicker in the long run. Because you will not have to fix mistakes.
Another common issue is over-stirring. Once you have added water, you should stir just enough to combine. Over-stirring the thinned icing can break down the structure too much. This can actually make the icing less stable. It may not set properly. That leads to sticky or soft spots on your cookies. We do not want that.
Tools That Help Me Get Consistent Results
I use a few simple tools to make this whole process easier. A spray bottle filled with water is one of them. Instead of measuring out a teaspoon every time, I use a few quick sprays. It is much easier to control the amount. You can add just the tiniest bit if needed.
Another tool is a small offset spatula. This is perfect for testing the consistency. You can lift some icing and watch it drop back into the bowl. The timing is very accurate. Plus, you will need the spatula anyways to spread the icing on your cookie. So it is a two-for-one deal.
Finally, invest in some squeeze bottles. You will need to transfer your flooding icing into these for piping. Squeeze bottles also help you get a feel for the consistency. If the icing flows easily out of the tip, it is likely correct. If you have to squeeze hard, it is too thick.
Adjust the Consistency for Large Flat Cookie Surfaces
Now that you know the basics, let us talk specifically about big cookies. Large flat surfaces are a different beast. The trick is getting the consistency slightly thinner than what you would use for small cookies. Why? Because a bigger area encourages the icing to pull away from the edges as it dries. If the icing dries too quickly on the edges, you get those ugly gaps and cracks.
When I work on a large round cookie or a big rectangle, I aim for a faster flood consistency. I am looking for the 8 to 10 second mark instead of the usual 15. This is thin enough to flow all over the surface. It reaches the edges effortlessly. And it levels itself evenly. The risk is that it might be too thin. You just have to be careful.
I also recommend warming the cookie slightly before flooding. Just a few seconds in a low oven. This thins the icing slightly as it hits the warm surface. That extra fluidity helps it settle into every corner. But be careful. Warm cookies can cause the icing to spread too evenly. Wait a minute for the cookie to cool a little first.
Working with Edges and Corners When Flooding Large Surfaces
Have you ever flooded a large cookie and watched the icing creep right over the piped border? That is so frustrating. You spent time piping a perfect outline. Now it is ruined.
To avoid this, let your piped border dry completely. I mean completely. It should not feel tacky at all when you touch it. A dry border acts as a dam. It holds in the flood icing.
But there is another factor here. Gravity works against you on large cookies. The sheer weight of the wet icing can push against the border. I have found that letting the piped border set overnight is best for large surfaces. That hardened border can handle the pressure much better. If you are in a hurry, at least give it an hour. But honestly, overnight is the safest.
How to Flood a Large Cookie Step by Step
Let me walk you through my go-to method for flooding a large flat cookie. It is simple once you get the hang of it.
First, place your cookie on a completely level surface. I use a small cake turntable. But a flat tray works fine too. You need to make sure there are no slopes. If the surface is tilted, your icing will pool to one side. That ruins the finish.
Second, fill your squeeze bottle with the thinned icing. I like to fill it about three quarters full. This gives me good control over the flow.
Now start at the center of the cookie. Gently apply gentle pressure. Let the icing flow out and spread organically. As it spreads, move the bottle in a circular motion. Work from the center outward. Let the icing do most of the work. You are just guiding it slowly. You should never need to force the icing anywhere. If you do, it is too thick.
Once the icing has covered almost the whole surface, use a toothpick to nudge it into any remaining unflooded spots. This is also how you pop any air bubbles that might have formed. Just glide the toothpick across the surface. The icing will self-heal and close the mark. It is very satisfying to see.
Avoiding Traps on Large Cookies
Large cookies have one problem small ones do not. The risk of your icing drying before you finish flooding. If your icing is too thick or your room is too warm, the edges start to crust over while the center is still wet. This causes a bumpy, textured finish.
A simple fix is to work a little faster. But you cannot rush too much or you will make a mess. Another trick is to keep a damp paper towel over your squeeze bottle tip. This keeps the icing inside from drying out.
The best solution is perfect consistency. Once you learn how to thin base royal icing correctly, this issue disappears. The icing flows at a speed that allows you to cover the whole surface before it starts to dry.
The Best Icing for Flooding Large Cookies
For those of you wondering, yes, there are specific recipes better suited for flooding. Some icings set harder than others. Some are more forgiving. In my experience, a royal icing made with meringue powder works best for flooding. It is stable and predictable.
I have tried egg-white based royal icing. It tastes nice. But I find meringue powder more consistent. It never varies in strength. That matters when you are aiming for precise consistency.
You can also add a small amount of corn syrup to your flooding recipe. A teaspoon per cup of icing is enough. This helps the icing stay soft once dried. It also gives a slightly glossier finish. This is great for large cookies because they are often eaten after a day or two. The softer bite is more pleasant.
Testing Your Icing Before Committing to a Cookie
Always test your thinned icing before you start on your actual cookie. I cannot emphasize this enough. Grab a small off-cut piece of cookie or a silicone mat. Flood a tiny shape. Watch how it behaves.
Does it spread too fast? Does it stay where you put it? Does it look smooth when it dries? A quick test takes less than five minutes. It saves you from wasted effort and disappointment. I almost always do this now. It is part of my routine.
Many people skip this step because they feel confident. But a sudden change in humidity or temperature can affect your icing unexpectedly. That test is your safety net.
How to Store Thinned Icing for Later
Sometimes you thin too much icing. Or you have leftovers. Can you store it? The answer is yes, but with caveats. Thinned royal icing does not store as well as thick icing. But you can still rescue it.
Put it in an airtight container. Press a piece of plastic wrap directly onto the surface of the icing. This prevents a skin from forming. Then put the lid on. Store it in the fridge for up to three days.
When you take it out, it will have thickened significantly. You will need to re-thin it. Just follow the same process as before. Add water a little at a time. This works fine. But note that the texture will never be quite as smooth as fresh icing. So for the best results, try to use it within 24 hours.
The Environmental Factor You Cannot Ignore
Here is one thing people rarely mention. Humidity. If you live in a humid area like I do, your icing will behave differently. Sugar absorbs moisture from the air. This can thin out your icing even after you have set the consistency. It is frustrating.
I always keep a dehumidifier running in my kitchen during cookie season. That simple machine has solved so many problems. If you do not have one, you might need to use slightly less water than normal. Keep that in mind.
Alternatively, a warm, dry room is your best friend. Open a window on a sunny day. Or use a fan on low. Just do not let it blow directly on your cookies. That will cause the surface to crust too quickly.
What Happens If You Over-Thin Your Icing?
So you added a few too many drops of water. Now your icing is runny. Do not panic. There is a fix. You just need to thicken it again.
The safest way is to add a little sifted powdered sugar. Sifting is essential. Lumps in the sugar will just create bumps in your icing. Add the sugar a tablespoon at a time. Stir gently. Check the consistency between each addition. This restores the right texture. The flavor will be slightly sweeter, but that is usually fine.
Another trick is to let the thinned icing sit uncovered for a while. The water will evaporate slowly. This thickens the icing without adding more sugar. This is not fast though. It can take 15 to 20 minutes. But it works in a pinch. Do not be tempted to use the microwave. That will ruin your icing for sure.
Knowing When the Icing Is Right
I know I keep emphasizing the timing rule. But there is another way to tell. Look at the icing in the bowl. Does it have a slight sheen? Too-thick icing looks dull. Perfectly thinned icing has a subtle gloss. You can see it reflecting light.
Also, touch the surface. With a clean finger, make a small swirl on the top. If the mark holds its shape, your icing is too thick. If the mark smooths out quickly, it is closer to the right consistency. If the mark disappears instantly, you are probably good to go.
Sometimes I rely on how it feels on my spatula. When I lift the spatula, the icing should fall off in a smooth ribbon. That ribbon should fold back into the icing without leaving any visible lines. That is a sign you have success.
My Honest Advice for Beginners
If you are new to this, I want you to save yourself some frustration. Start with small cookies. Learn the process. Then work your way up to bigger sizes. Large flat cookie surfaces are not the best place to practice.
Also, do not aim for perfection on your first try. Enjoy the process. The first few batches might not be flawless. That is okay. Every baker has a drawer full of not-perfect cookies. You learn from those. You get better.
I truly believe anyone can learn how to thin base royal icing. It just takes a little patience and some practice. Once you get it, you will wonder why you ever thought it was hard. The proof will be in those beautiful, smooth, glossy cookies you make.
A Reminder About Sugar Content
Before I wrap this up, I need to mention something important. Royal icing is loaded with sugar. That is what makes it taste good. But it is not great for everyone. Please be mindful of your dietary needs. Large cookies covered in royal icing are a real sugar bomb. There is no way around it.
If you are making these for someone with blood sugar issues, you might want to consider alternatives. A simple glaze might be better for them. Or you could look into sugar-free recipes. These exist. They behave a little differently, but they work.
I always let friends and family know what is in the cookies I bring. Transparency is important. It keeps everyone safe and happy.
Frequently Asked Questions
Can I thin royal icing with lemon juice instead of water? You can. Lemon juice can add flavor. But it also changes the acidity. This can make the icing set softer. I personally stick with water for consistency reasons. If you do use lemon juice, strain it first. Seeds and pulp will ruin your smooth finish. Also use less than you would water because lemon juice is thinner.
Why does my royal icing get air bubbles when I thin it? Air bubbles usually come from stirring too vigorously. When you mix water into your icing, do it slowly. Fold the mixture gently. You want to avoid whipping air into it. If you still see bubbles, let the icing sit for five minutes. The air will rise to the top. Then you can pop them with a toothpick.
How thick should royal icing be for outlining vs flooding? Outlining icing needs to hold a stiff peak. It should stand up straight when you touch it. It is almost like soft toothpaste. Flooding icing is much thinner. It flows easily and self-levels. The 10 to 15 second rule applies here. Outline icing does not have a timing rule because it is not meant to flow anywhere.
Wrapping This Up
Learning how to thin base royal icing is honestly a game changer. Once you get that consistency right, the whole process of decorating cookies becomes more fun. You are no longer fighting against your tools. You are working with them. Large flat cookie surfaces stop being intimidating. They become satisfying canvases for your creativity.
Just remember the basics. Use small amounts of water. Stir gently. Test your consistency. Work on a level surface. Let your borders dry completely before you flood. All of these small details add up to a smooth, professional-looking finish.
I hope this guide gives you the confidence to try it yourself. Do not be afraid to experiment. You will probably mess up a few cookies. That is normal. But with each attempt, you will improve. That is how everyone learns. And soon enough, you will be the one teaching others.
Now go make something beautiful. I am rooting for you.
⚠️ Warning: This cake is high in sugar. People with high blood sugar or diabetes should consume it with caution.





