 bluename
 I still remember the first time I watched a beautifully frosted cake slowly turn into a glossy, sad puddle on my kitchen counter. It was July, the air conditioning was struggling, and I had spent three hours on that buttercream. Within forty minutes, the edges were drooping, and the once-crisp piping details were just soft lumps. That was the day I realized that knowing how to protect buttercream frosting in warm ambient temperature to avoid melting is not just a nice skill to have—it is essential for anyone who bakes even semi-regularly. I have tested every trick in the book since that disaster, and I am here to share what actually works.
Why Buttercream Melts in Warm Weather and How to Protect Buttercream Frosting Warm Ambient Temperature Avoid Melting
The science here is pretty straightforward, but it took me a while to really get it. Buttercream is essentially a mixture of fat (usually butter), sugar, and sometimes liquid like milk or cream. When the ambient temperature rises above roughly 75°F (24°C), the butter in your frosting starts to soften. Push that temperature closer to 85°F or 90°F, and you have a structure that simply cannot hold its shape.
I used to think that the type of buttercream mattered way more than the temperature. To some extent, it does, but not the way you might expect. American buttercream, which is just butter and powdered sugar, has the least structural integrity in heat. Swiss meringue buttercream is slightly more stable because the sugar is dissolved into the egg whites, giving it a silkier, more cohesive texture. Italian meringue buttercream, made with hot sugar syrup, actually fares the best among the traditional options.
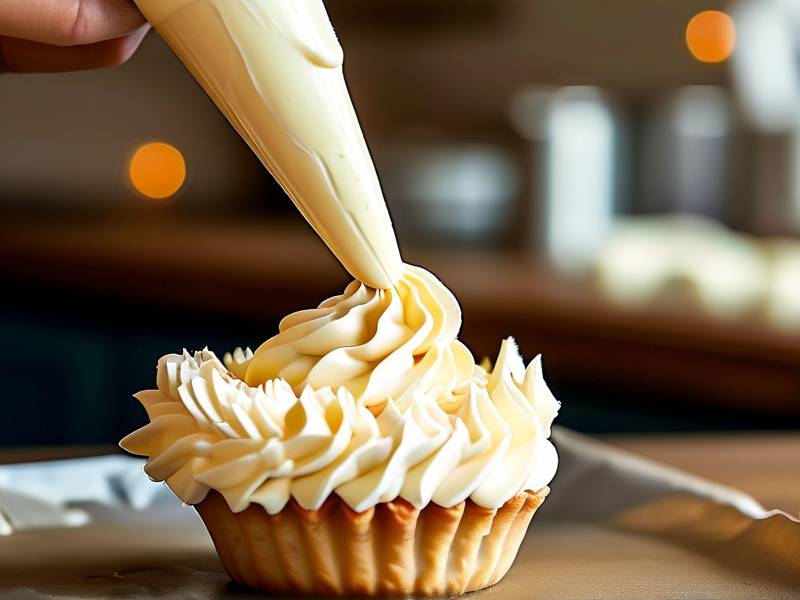
But even the most stable buttercream has its limits. I learned that lesson the hard way at a bakery I briefly worked at. We had a wedding cake sitting in a display case near a large window, and the afternoon sun did more damage than the actual oven did that day. So the first step is understanding that you cannot just rely on one technique—you need a layered approach.
When you think about how to protect buttercream frosting warm ambient temperature avoid melting, you have to consider the entire environment, not just the cake itself. Is the cake near a window? Is the room humid? Humidity actually makes things worse because moisture softens the sugar structure. I have baked in humid coastal towns and dry desert climates, and believe me, the same recipe behaves completely differently.
Choosing the Right Buttercream Recipe for Warm Weather Stability
Not all buttercream is created equal when the mercury rises. If you are planning to bake outdoors or in a warm room, I would strongly suggest skipping the classic American buttercream. It is too soft, too sweet, and honestly, it gives up at the first sign of heat. Instead, consider these alternatives.
The Surprising Stability of Meringue-Based Buttercreams
I used to be terrified of making Swiss meringue buttercream. It seemed fussy, with all that heating and whisking. But once I got the hang of it, I realized it was not that difficult, and the heat stability is leagues better than American buttercream. The protein structure from the egg whites acts like a scaffold, holding the butter in place far better than sugar alone ever could.
For warm weather, I honestly recommend Italian meringue buttercream. The hot sugar syrup cooks the egg whites, which creates a denser, more stable emulsion. It pipes like a dream and holds sharp edges much longer. The one downside is that it tastes slightly less sweet, so if you have a serious sweet tooth, you might need to adjust your expectations.
How Stabilized Buttercream Extends Shelf Life in Heat
There is another trick I picked up from a pastry chef friend who worked in New Orleans. She swears by adding a small amount of cornstarch to her buttercream during the final mixing stage. The starch absorbs excess moisture and adds structure. It does change the mouthfeel a touch—makes it slightly more matte—but for a cake that needs to sit out in warm weather, it is a game changer.
Another option is to incorporate a tiny bit of gelatin into your buttercream. Now, I know that sounds weird, but bear with me. Gelatin melts at a much higher temperature than butter, so it helps the frosting hold its shape. You use a very small amount—like half a teaspoon of powdered gelatin dissolved in a tablespoon of water, melted and added during mixing. I have used this method for outdoor summer weddings, and it works beautifully.
Real Talk on Vegetable Shortening and Commercial Stabilizers
Some bakers swear by replacing half of the butter with vegetable shortening. Shortening has a higher melting point than butter, so this method absolutely helps with heat stability. But here is my honest take: it changes the flavor profile. Butter is what gives buttercream that rich, creamy taste. Shortening makes it taste a little flat and waxy. I only use this approach when the cake truly has to withstand extreme conditions, like an outdoor fair or a beach party.
There are also commercial stabilizers you can buy, like Cremor Tartar-based products or proprietary frosting stabilizers. They work, but I have found they are hard to source for home bakers. Plus, you need to be careful with measurements—too much, and you get a rubbery texture that nobody wants to eat.
The Key to Protecting Buttercream in Warm Rooms: Pre-Chilling and the Right Environment
Okay, so you have chosen a stable recipe. That is only half the battle. The next step is how you manage the environment around the cake. I have a few routines that I never skip now, and they have saved me from countless disasters.
How to Pre-Chill a Cake to Prevent Frosting Melting on Hot Days
This is the step most home bakers skip, and honestly, it causes so many problems. If your cake layers are even slightly warm when you frost them, the heat will transfer directly into the buttercream. That warmth rises from the inside, and soon you have sliding layers and drooping frosting.
I always bake my cake layers a day in advance. Once they are completely cool and wrapped in plastic wrap, I let them sit in the refrigerator overnight. The next day, I apply a crumb coat and pop the whole thing back in the fridge for at least thirty minutes. Then I apply the final coat.
Here is the thing—the crumb coat acts like insulation. It seals in the cold and prevents the moisture from the cake from seeping into the outer layers of frosting. I know you might be tempted to skip this step, but I highly recommend you do not. It genuinely makes the difference between a cake that holds up for hours and one that starts sweating within minutes.
Another trick I use is chilling the frosted cake for at least an hour before it needs to go out. If I know the cake will be sitting in a warm room for more than two hours, I will even keep it in the fridge until the last possible minute. It might seem obvious, but you would be surprised how many people forget this basic step.
Using Cold Trays and Insulation to Maintain a Cool Base
Here is a pro tip that changed the way I handle summer cakes. When you are setting up a cake display, place the cake board on top of a chilled tray. I keep a few ceramic tiles or slate boards in my refrigerator. When I set up a cake outdoors or in a warm room, I swap out the regular cake board for a pre-chilled tile. This keeps the cake base cool, which in turn keeps the lower portion of the buttercream from softening.
I also wrap the cake board with a damp paper towel in extreme cases. The evaporation cools the surrounding air, which gives you a few extra degrees of protection. It is not a permanent solution, but it buys you time.
And don't forget about the humble ice pack. I have seen professional bakers place ice packs under the cake table, not directly touching the cake but close enough to keep the ambient temperature down. It is a bit gimmicky, but it does work for short events.
Application Techniques That Support Buttercream Structure in Heat
How you apply the buttercream matters much more than I initially thought. It took me a few melted cakes to realize that the thickness of the frosting and how it is applied can affect its ability to survive warm conditions.
Why a Thick Crumb Coat Improves Frosting Stability in Warm Weather
I already touched on this, but let me go a bit deeper. A thick crumb coat creates a barrier between the moisture of the cake and the buttercream exterior. Moisture migrates from the cake sponge into the frosting, which softens it. That is why a simple sheet cake can sometimes look fine on the inside but have a sweaty frosting layer on top.
By applying a generous crumb coat and letting it completely set in the fridge, you create a dry barrier. I like to apply my crumb coat, then refrigerate for 45 minutes. When I pull the cake out, the surface feels slightly tacky but firm. That is the sweet spot.
If you are making a layer cake with filling, the same logic applies. Chill each layer with its filling before stacking. It takes longer, yes, but the stability you gain is enormous. I remember skipping this step once because I was in a hurry. The cake absolutely did not survive an hour in a warm living room. The layers slid, and the filling oozed out. Lesson learned.
Piping Techniques That Resist Melting and Sagging
Here is a small thing that makes a big difference: how you pipe. Thick, bold designs hold up better than delicate, intricate ones. Fine details, like thin vines or intricate lace, are the first to soften and lose definition.
I personally prefer using a closed star nozzle for heat-exposed cakes. The ridges add visual texture, but they also create more surface area for the buttercream to hold its own weight. It sounds counterintuitive, but the structure of the ridges actually provides support. You will notice that, even as the buttercream softens, the basic shape remains recognizable.
Another trick is to pipe directly before the cake is served, rather than hours in advance. If the cake is going to be displayed, I will pipe the delicate edges at the venue itself. This is not always possible, but when it is, it makes a world of difference.
How Humidity and Airflow Affect Buttercream in Hot Weather
This is the part that most tutorials gloss over, but I think it deserves its own section. Humidity is the enemy of buttercream, and warm air is often humid air.
Controlling Ambient Moisture: A Simple Trick for Preventing Melted Frosting
I learned this trick from an old baker who ran a stall at a farmer's market. She would place a box fan at a low setting, pointed toward the bake table but not directly at the cakes. The gentle airflow helped reduce the stagnant humidity around the cakes. Hurried air does not carry as much moisture, and that little bit of circulation can stop condensation from forming on the frosting surface.
If you are indoors, run a dehumidifier in the room for a few hours before the cake needs to be out. I know this sounds excessive, but for a celebration cake that needs to survive a two-hour outdoor ceremony, it is worth the effort.
Personally, I also avoid making buttercream cakes on rainy days or days with extremely high forecast humidity. Some things are just not worth fighting.
Transporting Buttercream Cakes in Warm Weather: Protecting the Cake During Travel
This is a critical part of how to protect buttercream frosting warm ambient temperature, and I see so many people get this wrong. The car is often the hottest part of the whole journey, especially if you are running errands before the event.
First, always transport the cake in an air-conditioned car. If you have a cooler, put the cake inside and add some ice packs on the side (never on top of the cake). The cold air inside the cooler will keep the buttercream stable even on a long drive.
Second, never leave the cake in the car, even for five minutes. I have made this mistake, and it is devastating. Five minutes in a hot car can soften the buttercream to the point of no return. If you must stop for gas or groceries, take the cake with you or have someone stay in the car with the A/C running.
Another tip that I like is to keep the cake on a flat, stable surface during transport. Sudden stops and sharp turns can shift the layers, and with warm buttercream, that shift becomes permanent. If you have a rubber mat in your trunk that stops things from sliding, use it.
Long-Term Solutions: Recipe Modifications and Substitutes for Warm Weather
Sometimes you know from the very beginning that the cake will be out in the heat for hours. In those cases, a few recipe modifications can save you a lot of trouble.
Using Cream Cheese and Mascarpone for Temperature-Stable Buttercream Alternatives
Cream cheese buttercream is a popular alternative, and it actually has a thicker texture that holds up fairly well. The reason is that cream cheese has more solids and less water than butter, so it does not soften as quickly. Same with mascarpone.
I have made a mascarpone-based frosting for a summer baby shower, and it held up for a solid three hours without any sign of melting. It does taste different—less buttery, a bit tangier. But for a warm-weather cake, trade-offs are okay.
A few notes on this: ensure the cream cheese or mascarpone is full-fat. Low-fat or reduced-fat versions have more water and will not provide the same stability. And refrigerate the final cake longer before serving to let the fats fully set.
How to Store a Buttercream Cake at Home in Summer Without a Fridge
This is a common question from readers, especially those who live in older houses without proper air conditioning. If you absolutely cannot refrigerate, then place the cake in the coolest room of the house, ideally away from windows. Use a cake dome to shield it from dust but also to trap a small amount of cool air inside. Some folks keep a piece of bread in the cake dome—strange but useful—the moisture goes into the bread rather than the cake.
If temperatures are above 80°F and you have no fridge, you need to keep the cake covered but in a spot with a floor draft. Use a fan on the floor to push cooler air upward. This is not a perfect solution, but it can keep the cake stable for a few extra hours.
FAQ: Protecting Buttercream Frosting in Warm Temperatures
Can I use store-bought buttercream in hot weather without it melting?
Not really, in my experience. Store-bought buttercream is made to have a longer shelf life, which means it contains more stabilizers and less actual butter. It might hold up slightly better than homemade American buttercream, but it will still melt if left in a hot room for long. I would treat it the same as homemade—refrigerate until just before serving.
What is the best way to fix already-melted buttercream?
You cannot fully reverse it, but you can salvage it. If the cake has been out for a short time and the piping has just softened slightly, return it to the fridge for thirty minutes. It will firm back up partially. If the buttercream is truly drippy and the cake structure is compromised, you are better off scraping it off, chilling the cake, and re-frosting it. I have done this twice, and it is a pain but it works.
Is it okay to put a buttercream cake in the fridge overnight before a warm event?
Absolutely, yes. In fact, I recommend it. A fully chilled buttercream cake can sit at room temperature for about an hour before it starts to soften. That gives you a good window for serving. Just remember to let it come up slightly before cutting if you want clean slices—super cold buttercream will crack when you try to cut it. Wait about 15 minutes after taking it out of the fridge.
Does adding corn syrup or glucose make buttercream more heat-resistant?
Actually, no. Corn syrup and glucose are hygroscopic, which means they attract moisture. That extra moisture in the frosting will help it stay soft, which is not what you want in heat. I tried this once thinking it would help, and the frosting stayed soft even after refrigeration. It was great for a cake that needed to stay moist, but terrible for structure. Skip it for warm weather.
How long can buttercream cakes sit out in 75-80°F weather?
In my experience, a standard American buttercream cake starts showing signs of softening after 30-45 minutes. A meringue-based buttercream can last 1.5 to 2 hours. If you have used gelatin or shortening, you might get up to 3 hours. But honestly, no buttercream is bulletproof. I always plan for the cake to be displayed no more than 45 minutes before serving.
What You Should Do Right Now
If you take nothing else away from this, remember three things. Start with a sturdier buttercream recipe when you know it will be warm. Pre-chill everything—the cake, the frosting, and hopefully the room. And keep a backup plan for emergency chilling, like a cooler or a spare chilled tile.
I have been baking professionally for years, and I still get nervous when the temperature climbs. But with these techniques, I have cut down my melted-cake disasters by at least ninety percent. The first few times you try these methods, it will feel like extra work. Stick with it, because the result is worth every extra minute in the kitchen.
And please, if you are planning a cake for an outdoor summer event, do not wait until the day before to test your recipe. Bake a trial run in the actual environment you will be serving in. That is the most reliable way to know for sure that your buttercream will survive the heat. Trust me, you do not want to learn that lesson the hard way like I did.
⚠️ Warning: This cake is high in sugar. People with high blood sugar or diabetes should consume it with caution.





