 bluename
 How to Bake Pear Oat Crumble: A Warm Spiced Autumn Baked Fruit Dessert
There’s something about the first crisp day of October that makes me want to turn on the oven. I’m not talking about a quick sheet pan dinner. I mean a slow, fragrant bake that fills the whole kitchen with cinnamon, butter, and caramelized fruit. For me, that recipe has always been a pear oat crumble. It’s the kind of warm spiced autumn baked fruit dessert that feels like a hug in a bowl. I’ve made this dish dozens of times, tweaking the topping ratio and testing different pear varieties. Honestly, I’ve messed up my fair share of crumbles too. But after years of practice, I’ve landed on a method that works every single time. In this guide, I’m going to walk you through how to bake pear oat crumble from scratch, with all the little tips I wish someone had told me sooner. Let’s dig in.
Why This Warm Spiced Autumn Baked Fruit Dessert Deserves a Spot in Your Rotation
I get it, apple crisp gets all the glory. But pears? They’re the underdog that deserves way more attention. When baked, pears turn buttery and tender, almost like a natural caramel. Unlike apples, which can hold their shape a bit too firmly, pears melt into the crumble topping. That soft texture paired with a crunchy oat layer? It’s pure magic. This warm spiced autumn baked fruit dessert also happens to be incredibly forgiving. You don’t need fancy equipment or advanced baking skills. If you can chop a pear and stir oats, you can nail this recipe.
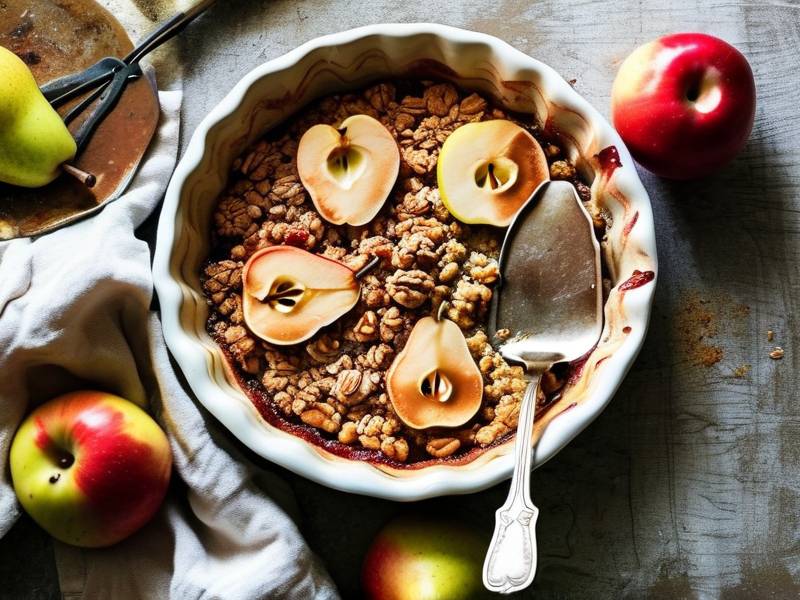
The other reason I love this dish is its versatility. It works as a casual weeknight treat or a showstopper for Thanksgiving. You can double the recipe and bake it in a big dish for a crowd. Or make a small ramekin version just for you on a quiet Sunday. I’ve done both, and each has its charm. The aroma alone is worth the effort. Cinnamon, nutmeg, and brown sugar wafting through the house? That’s what autumn smells like in my book.
Selecting the Perfect Pears for Your Pear Oat Crumble
Before we talk about the baking process, let’s talk fruit. Not all pears are created equal when it comes to baking. I’ve learned this the hard way. If you pick pears that are too firm, they’ll stay crunchy in the middle of a soft dessert. If you pick ones that are overripe, you’ll end up with pear soup. Neither scenario is ideal.
Best Pear Varieties for Baking
For a pear oat crumble, I usually reach for Bosc or Anjou pears. Bosc pears have a firm, dense flesh that holds up beautifully under heat. They also have a slightly honeyed flavor that intensifies when baked. Anjou pears are a close second. They’re juicy but not overly watery, which is key for a good crumble texture. Bartlett pears work too, but they tend to break down more. Use them if you prefer a jammy, softer filling.
How to Check Ripeness
Here’s my simple trick. Press gently near the stem of the pear. If it gives slightly, it’s ready. If it’s rock hard, let it sit on the counter for a day or two. A perfectly ripe pear should be fragrant near the stem as well. Honestly, I’ve bought pears that were rock hard at the store and left them for three days. By the time I baked them, they were perfect. Patience pays off with fruit.
Prep Tips for the Fruit Filling
Peel the pears before slicing. I know some people skip this, but the peel can get chewy and tough. Not pleasant. Cut each pear into roughly half-inch chunks. Uniform size matters here. If some pieces are too big, they won't cook through. Too small, and they'll disintegrate. I also toss the pears with lemon juice immediately after cutting. This prevents browning and adds a subtle brightness that balances the sweetness.
How to Bake Pear Oat Crumble: Step-by-Step Instructions
Alright, let’s get to the actual baking. This pear oat crumble recipe is straightforward, but a few details can make or break the final result. I’ll break it down by layer, starting with the fruit base.
Preparing the Pear Filling Layer
In a large mixing bowl, combine your sliced pears with sugar and spices. I use about a quarter cup of granulated sugar for four medium pears. You can adjust this based on your sweetness preference. Add one tablespoon of lemon juice, one teaspoon of ground cinnamon, and a pinch of nutmeg. A tiny pinch of salt helps too. It seems counterintuitive, but salt actually enhances the fruity flavor.
Mix everything together gently with a spatula. Make sure every pear slice is coated. Then let the mixture sit for about ten minutes. This maceration step draws out some liquid from the pears. It also helps the spices penetrate the fruit. I used to skip this step when I was in a hurry. But now I always wait. That short resting period makes a noticeable difference in flavor depth.
Making the Perfect Oat Crumble Topping
The topping is where the magic happens. In a separate bowl, combine one cup of old-fashioned rolled oats, half a cup of all-purpose flour, half a cup of packed brown sugar, and a teaspoon of cinnamon. Mix these dry ingredients until everything is evenly distributed. Then add half a cup of cold, cubed butter. This is crucial. The butter needs to be cold. I cannot stress this enough.
Use your fingertips or a pastry cutter to work the butter into the dry mixture. You’re aiming for a crumbly texture with some pea-sized butter bits remaining. A few larger chunks are fine, they’ll melt and create crispy pockets. If you overwork the butter, the topping becomes dense and doughy. My first attempt at crumble was more like a cookie sheet. It tasted fine, but the texture was off. Lighter hands make lighter crumbs.
Assembling the Crumble
Now, pour the macerated pears into a baking dish. I typically use an 8x8 inch glass dish for a batch using four pears. Spread the pears into an even layer. Then sprinkle the oat mixture evenly over the top. Don’t press it down. Just let it fall naturally. Scattered clumps will bake up crispier than a packed layer.
I like to add a few thin slices of butter on top of the crumble just before baking. It’s an extra touch that promotes browning. This step isn’t mandatory, but I find it makes the top extra golden and buttery. It’s one of those small details that elevate a good crumble to a great one.
Baking Temperature and Timing
Preheat your oven to 375°F (190°C). Place the assembled dish on a baking sheet to catch any bubbling juices. This saves you from scrubbing the bottom of your oven later. Bake for 35 to 40 minutes. The crumble is done when the top is golden brown and the filling is bubbling around the edges. The fruit should be soft when pierced with a fork.
Here’s a common issue: the topping browns too quickly while the fruit isn’t done. If you notice the top getting dark after 20 minutes, loosely cover the dish with foil. Leave it on for the remaining baking time. I’ve had to do this regularly depending on the oven. Every oven has hot spots, so keep an eye on it.
Cooling and Serving Suggestions
Let the crumble rest for at least 10 to 15 minutes after pulling it from the oven. I know it’s tempting to scoop it right away, but the filling needs time to set. If you serve it too soon, the juices run everywhere. The texture becomes messy and watery. Give it a little patience.
The classic way to serve this warm spiced autumn baked fruit dessert is with vanilla ice cream. The cold, creamy scoop melting over the warm crumble? Unbeatable. If ice cream isn’t your thing, try a dollop of whipped cream or a drizzle of heavy cream. A spoonful of Greek yogurt also works if you want a tangy contrast. Honestly, even plain is delicious.
Pro Tips for Avoiding Common Crumble Mistakes
Over the years, I’ve accumulated a bunch of small tricks that help consistently produce an amazing pear oat crumble. Let me share the ones that matter most.
Fixing a Soggy Bottom
Soggy crumble bottoms happen when the fruit releases too much liquid. To prevent this, I always macerate the pears with sugar and lemon juice first. This pulls out excess juice before baking. You can also toss the pears with a tablespoon of cornstarch or flour before adding the topping. This thickens the juices as they cook. I use cornstarch when my pears are particularly juicy. It really works.
Getting That Crisp Oat Texture
The secret to a crisp oat topping is using old-fashioned rolled oats, not instant oats. Instant oats turn mushy and dusty when baked. Rolled oats keep their shape and provide that satisfying crunch. Also, be generous with the butter in the topping. If the mixture looks dry, add a touch more melted butter. A dry topping will never crisp up properly. It’ll just end up as a dense, sandy layer.
Adjusting for Different Pans
If you’re baking in a deeper dish, you’ll need to increase the baking time. A thicker layer of fruit takes longer to soften. Conversely, a wider, shallower dish will bake faster. Check the dish at the 30-minute mark. Insert a knife into the fruit. If there’s resistance, give it more time. You can always add extra minutes, but you can't reverse an overdone crumble.
Spice Variations to Customize Your Autumn Dessert
While the classic cinnamon and nutmeg combo is beautiful, you can absolutely switch things up. I like to experiment based on my mood and what I have on hand.
Apple Crumble Fusion
Mix chopped pears with a few chopped apples. Apples add a firmer texture and a tart edge that complements sweet pears. This is a great way to use up leftover fruit in your fridge. The bake time stays the same since both fruits cook at a similar rate.
Cardamom and Ginger Twist
Try swapping nutmeg for cardamom and adding a teaspoon of ground ginger. This creates a warmer, more complex spice profile. It reminds me of chai tea. It’s a lovely variation for a cozy evening. Just be careful not to overdo the ginger, a little goes a long way.
Maple Brown Sugar Crumble
Replace the white sugar in the topping with an equal amount of maple sugar or just drizzle maple syrup over the assembled crumble before baking. The maple flavor pairs beautifully with pears. I did this last Thanksgiving and it was a huge hit. It added a deeper, almost woodsy sweetness to the dessert.
Storing and Reheating Leftover Pear Oat Crumble
If you somehow have leftovers, don’t worry. This warm spiced autumn baked fruit dessert keeps well for a couple of days. Store it in an airtight container in the fridge. It will hold for up to four days.
To reheat, pop a portion in the microwave for about 30 seconds. Just know that the topping will lose some of its crispness. For a better texture, reheat in a toaster oven or regular oven at 350°F until warmed through. The oats won't be quite as crunchy, but the flavors improve overnight. The spices have time to meld together, which is kind of nice.
Frequently Asked Questions
Can I make pear oat crumble ahead of time?
Yes, you can assemble the crumble completely and refrigerate it unbaked for up to 24 hours. When you’re ready, just pop it in the oven. You might need to add five extra minutes to the bake time since the dish starts cold. This is a lifesaver for holiday hosting.
What is the best gluten-free option for the topping?
Use a gluten-free all-purpose flour blend in place of regular flour. The oat topping works well with these blends. Just check that your oats are certified gluten-free if you have a serious intolerance. The texture stays surprisingly close to the original.
Can I use frozen pears instead of fresh?
Frozen pears work in a pinch. Thaw them completely and drain off any excess liquid before using. They won't be quite as firm as fresh pears, but the overall dessert will still taste great. Try not to stir them too much while combining with the sugar so they don't break apart.
Final Thoughts and a Friendly Warning
This pear oat crumble has become a staple in my autumn baking rotation. It’s comforting, forgiving, and endlessly customizable. I genuinely believe it’s one of the best ways to enjoy seasonal pears. Whether you’re baking for a crowd or just treating yourself, this recipe delivers.
Now, a quick word of caution. This warm spiced autumn baked fruit dessert is sweet and buttery. It’s meant for special occasions. If you manage blood sugar levels, be mindful of portion sizes. The crumble topping and the fruit both contain natural and added sugars. Pairing it with plain yogurt or unsweetened whipped cream can help balance the sweetness. Moderation is key, as with most baked treats.
⚠️ Warning: This cake is high in sugar. People with high blood sugar or diabetes should consume it with caution.
Thanks for reading along with my guide. I hope you give this recipe a shot and enjoy every warm, spiced bite. If you’re curious about other fruit-based desserts, I’ve written a few pieces on autumn baking that you might find useful. Happy baking!





