 bluename
 How to Apply Buttercream Barrier Coat to Stop Cake Filling Leaking Sideways
I have lost count of how many cakes I ruined before I figured this out. You spend hours baking the perfect sponge, whip up a silky filling, assemble everything with care—and then it happens. The filling seeps out from between the layers and pools around the base. Total mess.
The good news? There is a simple fix. A buttercream barrier coat. It works every single time. Honestly, I wish someone had shown me this trick years ago. Let me walk you through exactly how I do it in my own kitchen, step by step.
Why Cake Filling Leaks Sideways in the First Place
Before we jump into the how, let us talk about the why. Because understanding the problem makes the solution so much easier to remember.
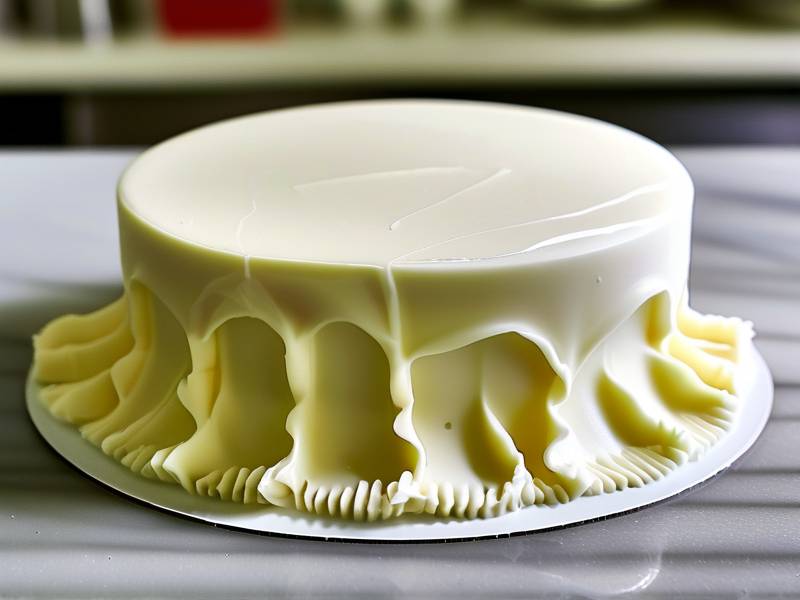
Most fillings—curds, jams, custards, even some ganaches—are much thinner than buttercream. When you stack a cake layer on top, the weight pushes down. That soft filling spreads outward. There is nowhere for it to go except out the sides. Gravity wins every single time.
I remember my first lemon curd cake. It looked incredible for about twenty minutes. Then the curd started dripping down the sides like a sad, yellow waterfall. I almost cried. Contact with this problem for years has taught me one thing: you need a physical barrier. Buttercream is perfect because it is thick, stable, and completely edible.
The Core Principle: Build a Dam Before You Fill
Here is the idea in plain terms. You pipe a ring of stiff buttercream around the edge of your cake layer. That ring acts like a dam. When you add your loose filling inside, it has nowhere to escape. The buttercream holds everything in place.
This simple technique works with nearly any filling. Lemon curd, raspberry jam, pastry cream, caramel sauce—you name it. The buttercream barrier keeps it all locked inside. I have been using this method professionally for over a decade, and it has never let me down.
What You Need to Prepare Before Starting
Gathering your tools first saves so much hassle later. You do not need anything fancy. Most of these items are probably already in your kitchen.
Essential Tools for a Strong Buttercream Dam
A piping bag is non-negotiable. I prefer a reusable cloth bag because it gives me better control, but disposable ones work fine too. You will also need a round piping tip. I use a Wilton 12 or any large round tip around ½ inch in diameter. That size creates a thick enough barrier without being overkill.
A turntable makes the job dramatically easier. It allows you to spin the cake while piping, giving you a smooth, even ring. If you do not own one, place the cake board on an upside-down bowl. That makeshift setup works in a pinch.
Choosing the Right Buttercream Type
Not all buttercream is created equal. For a barrier coat, you want something stiff. American buttercream is my go-to choice—it is sturdy, holds its shape well, and pipes like a dream. Swiss meringue buttercream also works, but make sure it is not too soft. If your buttercream is runny, it becomes part of the problem instead of the solution.
I tell my baking clients to use a 2:1 sugar-to-butter ratio for the barrier. That extra sugar firms everything up. You can also chill the piped ring for ten minutes before adding the filling. That extra step hardens the wall further.
Step-by-Step Guide: How to Apply Buttercream Barrier Coat to Stop Cake Filling Leaking Sideways
Alright, this is the heart of it. Follow these steps carefully and you will see immediate results. Let me break it down into clear, manageable stages.
Step 1: Level Your Cake Layers
A crooked cake makes everything harder. Use a serrated knife or a cake leveler to trim the tops flat. This gives you even surfaces for both the filling and the buttercream barrier. Uneven layers create gaps, and gaps become escape routes.
Tips: Chill your cakes in the fridge for twenty minutes first. Cold cake crumbs less and cuts cleaner. This tiny step makes a noticeable difference.
Step 2: Pipe the Buttercream Ring Along the Edge
Place your first cake layer on your board. Load your piping bag with the stiff buttercream. Now, pipe a continuous ring around the perimeter, about ½ inch inward from the edge.
Do not stop mid-circle. Keep a steady, even pressure as you move around the cake. Overlap the starting point slightly to seal the loop. That seal is critical. Any break in the ring becomes a weak spot where filling can escape.
Step 3: Make the Dam Thick Enough
One thin layer of buttercream is rarely enough. I pipe a second ring on top of the first, creating a wall that is about ½ inch tall. Think of it like building a sandcastle wall—you want it tall enough to hold back the water.
If you are using a very runny filling, like a thin fruit compote, go even taller. Pipe the dam a little higher than the filling level you plan to use. It is better to overshoot than to see your filling seep out later. I cannot stress this enough.
Step 4: Fill the Center Without Overfilling
Now comes the fun part. Spoon your filling into the middle of the buttercream ring. Use a spatula to spread it evenly, but do not let it touch the buttercream barrier.
Leave a small gap, about ¼ inch, between the filling and the dam. When you place the next cake layer on top, the weight will naturally push the filling outward. That gap gives it breathing room without breaking your wall.
Step 5: Repeat for Every Layer
Each layer of your cake needs its own buttercream barrier. I know it feels repetitive, but skipping even one layer can cause a landslide. I always pipe a fresh ring on every single layer, no exceptions.
The top layer does not need a dam unless you are filling the top too. It only takes a few extra minutes per layer, and the payoff is huge.
My Personal Workflow for a Three-Layer Cake
Let me walk you through a complete example so you can see how this fits together in practice. This is exactly what I do when making a three-layer vanilla cake with strawberry jam filling.
First, I bake and chill all three layers. Then I place the bottom layer on my turntable and pipe my buttercream ring. I fill the center with jam, leaving that small gap. Next, I position the second layer on top, apply gentle pressure to level it, and repeat the process.
After the third layer goes on, I chill the entire cake for twenty minutes. This hardens the buttercream and stabilizes the filling. Then I apply the crumb coat and final frosting. The result is always clean, sharp edges with zero leaking.
One small tip: let the cake sit at room temperature for about fifteen minutes before slicing. This softens the buttercream slightly and makes cutting so much smoother. Your knife will glide through like magic.
Common Mistakes That Ruin a Buttercream Barrier
I have made every mistake in the book so you do not have to. Here are the most common pitfalls I see—and how to avoid them.
Using Soft Buttercream for the Dam
If your buttercream is too soft, your dam will collapse. I know it is tempting to use whatever you have, but it is worth making a fresh, stiff batch for the barrier. Room-temperature buttercream that has been sitting out too long is a recipe for disaster.
Solution: If your buttercream is soft, pop it in the fridge for fifteen minutes to firm up. Re-whip it briefly before piping, and you are good to go.
Piping the Ring Too Far Inward
Some bakers pipe their dam right in the middle of the layer. That leaves a huge gap between the dam and the edge. Your filling pools outside the barrier instead of inside it. That gap defeats the entire purpose.
Keep the ring close to the outer edge. About ½ inch inward is perfect. You want the dam to hug the boundary, not sit in the middle of the cake.
Overfilling the Center
You might think more filling means more flavor. But overfilling just puts extra pressure on your buttercream wall. When you stack the next layer, the filling has nowhere to go—except over the dam.
Moderation is key. Use just enough filling to cover the center area without mounding it up. Your taste buds will not miss that extra spoonful, and your cake will stay neat.
Skipping the Chill Time
Patience is part of baking. If you assemble your cake and immediately start frosting it, you risk shifting everything. The buttercream needs time to set before you add any more.weight.
Chill the cake for at least fifteen minutes after assembly. This makes the barrier firm and keeps your filling exactly where it belongs.
Creative Variations: When to Use Different Buttercream Flavors
Your barrier does not have to be plain vanilla. I love matching the buttercream flavor to the cake. A chocolate buttercream dam works wonderfully with chocolate cakes and raspberry filling. Almond buttercream adds a subtle nuttiness to fruit cakes.
One of my favorite combinations is brown butter buttercream with apple cider filling. The flavor boost is noticeable. Get creative with it—just keep the consistency stiff.
I do recommend using a lighter.color buttercream for your final coat. If your barrier is dark chocolate and your outer frosting is white, you might see it shadow through. Not a huge deal, but worth keeping in mind for a polished finish.
How This Technique Works with Different Filling Types
Let me break down how the buttercream barrier works with specific types of fillings. Each one has its own quirks.
High-Moisture Fillings like Curds and Jams
These are the worst culprits for leaking. Lemon curd, passion fruit curd, strawberry jam—they are all thin and slippery. The barrier is absolutely essential here. And I always chill the assembled cake before frosting to give the filling extra time to set.
You might also consider reducing thick jams slightly before using them. Simmer them for a few minutes to cook off excess moisture. This makes them thicker and less prone to leaking, even with a barrier.
Pastry Creams and Custards
Pastry cream is a bit thicker, but still softer than buttercream. The dam works just as well. One trick I use is to pipe a thin layer of buttercream directly over the custard before adding the next cake layer. That seals the filling and prevents it from soaking into the sponge.
Ganache and Chocolate Sauces
Ganache behaves differently. If you whip it, it thickens into a spreadable texture. That whipped ganache rarely leaks. But if you use a pourable ganache, it definitely needs a barrier. The warm liquid will find any crack and flow right through it.
For ganache, I let it cool until it is just barely pourable, then pour it inside the buttercream ring. The barrier catches anything that tries to sneak away.
How to Fix a Cake That Has Already Leaked
Okay, what if you are past the point of no return? Your filling is already seeping out the sides. Do not panic. It is fixable.
First, chill the cake completely. A frozen cake is much easier to work with. Once it is firm, scrape off the excess filling from the sides using a bench scraper. Be careful not to gouge the cake.
Then, apply a thick crumb coat and chill again. Sometimes you need two coats to fully cover the damage. Add a final layer of buttercream and smooth it out. The cake will look perfect, and the leaking stops because everything is cold and set.
Prevention is always better, of course. But it is good to know there is a backup plan. I have saved more than one cake this way.
Simple Tools Upgrades That Make a Big Difference
If you are serious about cake decorating, a few upgrades are worth it. These items have transformed my workflow.
Reusable Piping Bags with Screw Tips
The bags with screw-on tips are genius. You can switch tips in seconds without emptying the bag. And when you need to quickly refill, just unscrew the tip and load more buttercream. No mess, no fuss.
Cake Turntable with a Non-Slip Base
My turntable is one of my favorite tools. I bought a heavy-duty one five years ago, and it still spins like new. It gives me consistent speed and control, which makes piping a barrier ring feel effortless.
Bent Icing Spatulas
A bent spatula is perfect for spreading fillings without accidentally hitting your buttercream dam. The bent angle keeps your hand away from the cake. It is a small thing, but it makes a real difference.
Frequently Asked Questions
Can I use whipped cream as a barrier instead of buttercream?
Whipped cream is generally too soft to hold its shape against runny fillings. It does not form a firm enough wall. If you want to try it, I recommend gelatin-stabilized whipped cream. That version holds better, but honestly, buttercream is the smarter choice. It is sturdier and more reliable.
My buttercream ring keeps breaking. What am I doing wrong?
Low chance this happens with a thickened buttercream. If it is breaking, the buttercream may be too soft or your piping pressure is inconsistent. Chill your buttercream for ten minutes before piping. Also, apply more pressure when you start and finish the ring to overlap the seal. A broken ring is the most common reason fillings leak.
Do I need to chill the cake before adding the buttercream barrier?
Yes, please do. Chilling the cake layers makes them firmer and easier to work with. It also prevents crumbs from mixing into your barrier. Cold cakes are simply easier to handle. I always chill mine for at least thirty minutes before I start assembling.
My Final Thoughts on Preventing Sideways Leaks
I genuinely believe a buttercream barrier coat is the most underrated technique in cake decorating. It is simple, fast, and completely effective. Every baker, from beginners to pros, should have this skill in their toolbox.
The biggest lesson I have learned is that preparation beats correction every time. Taking those few extra minutes to pipe a proper dam will save you hours of frustration later. I have baked hundreds of cakes with this method, and I have never regretted it.
Give this a try the next time you make a cake with loose fillings. The results will speak for themselves. Your cakes will stay put, your edges will stay neat, and your guests would be none the wiser. Happy baking.
⚠️ Warning: This cake is high in sugar. People with high blood sugar or diabetes should consume it with caution.





