 bluename
 How to soak lemon pound cake warm glaze fully penetrate inner cake crumb
There’s nothing worse than cutting into a lemon pound cake and finding dry, pale crumbs on the inside. I’ve been there too many times, honestly. You glaze the top, it looks gorgeous, and then one bite reveals the sad truth. The flavor just doesn’t make it past the surface. That’s why I spent months testing every technique I could find. The goal was simple. I wanted the warm glaze to sink all the way through, not just sit on top like a shiny coat of armor.
The answer, I discovered, is way more about timing and temperature than most recipes let on. People assume a runny glaze will naturally soak in. It won’t, not if the cake is too cool or the pores are too tight. So, let me walk you through how to soak lemon pound cake warm glaze fully penetrate inner cake crumb. I’ll share the exact steps, the mistakes I made, and the little tricks that actually work. Maybe you’ll skip the trial and error phase entirely.
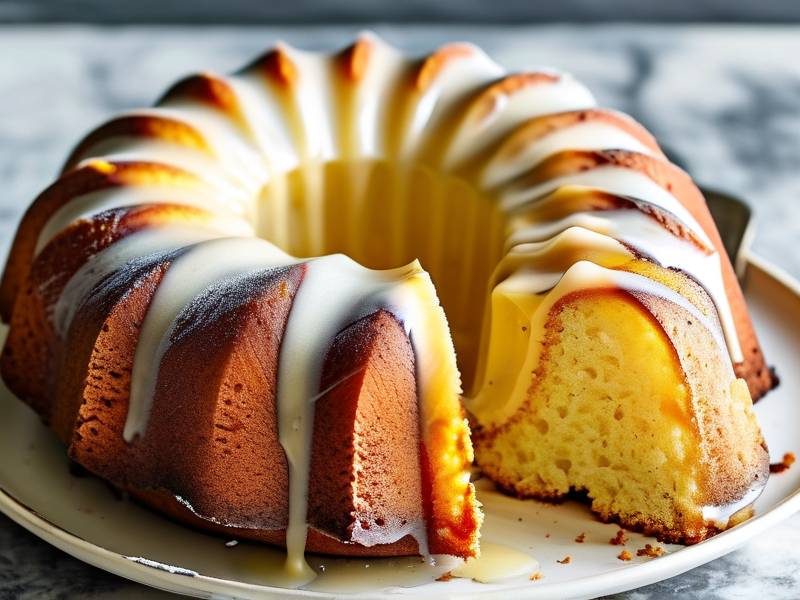
Warm glaze soaking into a lemon pound cake isn’t just about flavor. It’s about texture. The liquid physically changes the crumb structure. It rehydrates the flour proteins and starch granules that dried out during baking. Without that penetration, you’re basically eating a lemon-flavored sponge. So pay attention here. This method will save your next bake.
Why the warm glaze fails to reach the inner crumb
Let’s be real. Most warm glaze stays on the surface because of one huge mistake. The cake is fully cooled. I used to wait for the pan to cool completely, then pour the glaze on. Big error. The crumb tightens up as it cools. The air pockets shrink. The surface forms a thin, dry skin. It becomes almost water-resistant. That glaze just beads up and runs off the sides. It looks pretty, but it’s useless.
The science is pretty straightforward. When a cake cools, the starches retrograde. That’s a fancy term for them firming up and squeezing out moisture. The structure becomes less hospitable to liquid. So even a warm glaze, poured over a cold cake, struggles to move beyond the top layer. You need to strike while the crumb is still open and slightly warm. There’s a sweet spot, roughly 15 to 20 minutes after the cake comes out of the oven.
Another failure point is the glaze itself. If it’s too thick, it stays put. If it’s too thin, it runs right off before it can absorb. People mix powdered sugar with lemon juice and call it a day. That combination often creates a surface coating rather than a soaking liquid. For deep penetration, you need a lighter, more absorbent mixture. Something closer to a syrup than a frosting. I know, it feels counterintuitive. But trust me, the texture improves dramatically.
The temperature of the glaze matters just as much. Lukewarm glaze works best. Hot glaze can actually shock the crumb and cause it to steam, which pushes moisture out. Cold glaze doesn’t move. Room temperature finds a happy middle ground. So I always warm my glaze gently, just until it’s slightly warm to the touch. This helps it flow into the cake without damaging the structure.
How to soak lemon pound cake warm glaze fully penetrate inner cake crumb using a fork-tender method
The fork-tender method changed everything for me. Honestly, it sounds destructive, but it’s so precise. You take a skewer or a fork and poke holes all over the top and sides of the cake. Then you pour the warm glaze over it. Those little channels act like highways. The glaze travels down, through the crumb, and reaches spots it never could before.
Before you do this, here’s the key. Wait until the cake is about 80% cool. It should hold its shape but still feel slightly warm in the center. If it’s too hot, it will crumble when you poke it. If it’s too cold, the holes will seal up quickly and the glaze won’t move. That window usually hits around the 20-minute mark. I check by touching the side of the pan. If it’s just warm, not hot, we’re good to go.
Now, how deep should you poke? I insert the skewer about two-thirds of the way down. You don’t want to hit the bottom and create a leak, but you also don’t want shallow holes. Those shallow ones only soak the top layer. The goal here is to create a network of channels that reach the center of the cake. That’s how to soak lemon pound cake warm glaze fully penetrate inner cake crumb without leaving any dry spots.
After poking, I pour the glaze in batches. Slow and steady. I start with half, wait a minute, then add the rest. This gives the cake time to drink it down. If you dump it all at once, the liquid overwhelms the surface and runs off. Patience is your friend here. You’ll literally see the glaze disappear into the holes. It’s pretty satisfying, if I’m being honest.
The perfect warm lemon glaze recipe for maximum absorption
Let me share the glaze ratio I’ve settled on. It’s taken a while, but I’ve tested quite a few versions. You want a mixture that’s about 60% liquid and 40% sugar. That’s the sweet spot. Too much sugar makes it thick and surface-bound. Too little sugar and it tastes bland, even after soaking. I use fresh lemon juice and a bit of zest. The zest adds aromatic oils that help carry flavor deep into the crumb.
Here’s my go-to warm glaze recipe. Mix 1/2 cup of fresh lemon juice with 1/4 cup of granulated sugar. Add the zest of one lemon. Heat it on the stove or in the microwave for about 30 seconds. Stir it until the sugar completely dissolves. The mixture should look slightly syrupy but still very fluid. If it looks like a paste, add more juice. If it runs like water, add a pinch of sugar.
Some people add butter to the glaze. I’ve tried that and found it creates a barrier. The fat coats the crumb and blocks water absorption. So I skip butter for soaking purposes. If you want a shiny finish, you can brush a thin butter glaze on afterward. But for deep penetration, keep it lean and acidic. The acid in the lemon juice actually helps soften the crumb slightly, making it more receptive to liquid.
One thing I learned the hard way. Don’t boil the glaze. High heat breaks down the sugar structure and makes it sticky in a bad way. It also makes the liquid too hot, which can cause the cake to release its own moisture. Just warm it until the sugar melts. That’s all you need. I’ve ruined cakes with boiling glaze, and it’s not a fun cleanup.
The best resting time for lemon pound cake after glazing
After you pour the glaze, the resting time matters a lot. This is part of how to soak lemon pound cake warm glaze fully penetrate inner cake crumb that people overlook. The cake needs time to redistribute the moisture. If you cut into it immediately, the center might still be dry while the edges are soaked. That’s frustrating. I wait at least 2 hours before slicing. Overnight is even better, if you can resist.
During the first 30 minutes, the glaze is still moving. You’ll notice the surface drying slightly as liquid pulls inward. That’s a good sign. It means absorption is happening. After an hour, the texture stabilizes. The crumb becomes uniformly tender. At the 2-hour mark, the cake is at its best. The flavor has mellowed and the whole slice feels moist, not soggy.
I always cover the cake loosely with foil or a clean kitchen towel during resting. This traps a little steam and prevents the surface from drying out completely. But don’t seal it tightly. Too much trapped moisture can make the top sticky. A loose cover is perfect. It lets the cake breathe while keeping the environment slightly humid.
If you’re in a hurry, there’s a shortcut. You can microwave individual slices for 10 seconds before serving. That gently redistributes moisture. I’ve done this when guests show up early. The texture is pretty close to the rested version. But honestly, nothing beats the full resting period. It’s like letting a steak rest. The cake just needs time to reach its potential.
Using a brush to work the lemon syrup into the crumb structure
Sometimes, poking holes isn’t enough. If you have a dense crumb, the holes might close up before the glaze reaches the center. That’s where a pastry brush becomes your best friend. I brush on the warm glaze in layers. This method controls the absorption rate and pushes the liquid deeper with each pass.
Here’s how I do it. After poking holes, I dip the brush into the warm glaze and paint the entire surface. I use long, gentle strokes. The first layer sinks in almost immediately. Wait 60 seconds. Then I brush again. Each layer adds more moisture and forces the previous layer further down. I repeat this until the glaze is gone. Usually takes about 6 to 8 passes.
This technique is fantastic for bundt cakes or pound cakes with intricate shapes. The brush reaches into crevices where poured glaze can’t go. It also prevents pooling on the bottom. I genuinely feel like this gives me more control. Pouring is fine, but brushing feels deliberate. Each stroke is intentional.
One mistake I made early on was using a silicone brush. It doesn’t hold liquid well. I switched to a natural bristle brush and the difference was huge. It holds more glaze and releases it evenly. If you don’t have one, a regular spoon can work, but it’s more tedious. The brush is worth the investment. I think I spent like seven dollars on mine. Best seven bucks I’ve ever spent in the kitchen.
Why the crumb texture affects glaze absorption and moisture retention
The texture of your cake determines how much glaze it can hold. A tight, dense crumb acts like a barrier. It has fewer air pockets for liquid to fill. A light, open crumb is like a sponge. It drinks up glaze quickly. I’ve found that using cake flour instead of all-purpose flour creates a more open structure. The lower protein content yields a tender, porous crumb. That makes the warm glaze soaking process way more effective.
Overmixing is another texture killer. The more you mix, the more gluten develops. That creates a tough, closed crumb. I mix the batter just until the flour disappears. Then I stop. There are still streaks of butter, and that’s fine. They bake out in the oven. This keeps the texture light and airy. Trust me, your cake will thank you later.
The baking temperature also affects absorption. Baking at a high temperature, like 350°F (175°C), can create a thick crust. That crust slows down liquid penetration. I bake my lemon pound cake at 325°F (165°C) now. It takes a bit longer, but the crust is thinner and more permeable. The inside cooks evenly, leaving a uniform crumb that absorbs glaze beautifully.
Remember, the glaze is not a substitute for good baking. If your cake is dry before you glaze it, you’re just masking a problem. The glaze should enhance, not rescue. Start with a solid, moist cake. Then use the glaze to push it over the top. I’d rather have a moist cake with light glaze than a dry cake with heavy glaze. The texture really is the foundation.
The foolproof sequence for soaking a lemon loaf from top to bottom
Let me break down the exact sequence I follow every time now. First, I bake the lemon pound cake at 325°F (165°C) for about 60 to 70 minutes. I use a loaf pan lined with parchment paper. Once it’s out of the oven, I let it cool in the pan for exactly 15 minutes. Then I flip it out onto a wire rack. This part is crucial. If you leave it in the pan too long, it steams and gets gummy. The crumb tightens up and won’t take glaze well.
At the 20-minute mark, I check the temperature. The center should still feel warm but not hot. That’s my cue. I poke holes all over with a skewer, spacing them about an inch apart. I also poke the sides. Then I brush on the first layer of warm glaze. I let it soak in, then brush again. I repeat this until the glaze is finished. The whole process takes about 10 minutes.
Now here’s a secret I learned. I flip the cake upside down before glazing the bottom. The bottom of the cake is usually flatter and denser, so it absorbs glaze differently. I poke holes in the bottom too and brush it. Then I flip it back over and glaze the top. This ensures every surface gets treatment. The bottom side gets the least glaze from normal methods, so this little step fixes that imbalance.
After glazing, I let the cake rest at room temperature, loosely covered, for at least 2 hours. Then I transfer it to the fridge for 30 minutes. The cold helps set the structure without drying it out. When I slice it, the crumb is uniformly moist from edge to center. Every bite has that bright lemon flavor. No dry patches. No sad surprises. That’s the whole goal.
Personal experience with dense pound cakes and the double soak fix
I hit a wall with dense pound cakes for a while. My cake kept coming out too tight. The holes would seal up almost instantly. The glaze just sat on top. It was frustrating, to say the least. Then I tried the double soak method. It changed everything. Here’s what I mean. You do one full soak, let the cake rest for an hour, then do a second, thinner soak with a more diluted glaze.
The second soak fills in any remaining dry pockets. The crumb has relaxed by then, so it’s more receptive. I use a mixture of lemon juice, water, and a touch of sugar for the second soak. It’s lighter and less sweet. This adds moisture without turning the cake into a heavy, sugary mess. I found this works especially well for gluten-free pound cakes, which tend to be denser.
I remember one holiday season where I had to bake four pound cakes in a row. By the third one, I had the process down. The double soak added about 15 extra minutes, but the result was worth it. My aunt, who is notoriously picky about cake texture, asked me what I did differently. She couldn’t believe the center was that moist. That’s when I knew the method was solid.
The real lesson here is that every cake is different. Don’t be afraid to adjust. If your cake is dense, do a double soak. If it’s light and airy, a single soak is enough. You develop a feel for it over time. I still occasionally mess up, but honestly, those cakes still taste good. Just maybe have a little extra glaze ready to pour over each slice when you serve it.
Why I always warm the lemon syrup before pouring onto the cake
I can’t stress this enough. Warm syrup is non-negotiable. The temperature affects the viscosity and the absorption rate. Warm liquid flows more easily into tiny air pockets. Cold syrup gets sluggish and tends to sit on the surface. I heat mine until it’s just barely warm. If it’s too hot, it’s a problem. But room temperature or slightly warm is perfect.
There’s a physical reason behind this. Warmth reduces the surface tension of the liquid. That allows it to spread and seep more effectively. I think of it like watering dry soil. You can pour water over dry dirt, but it runs off. If the water is slightly warm and you pour slowly, it seeps down. The same principle applies to cake crumbs.
I also warm my brush if I’m using one. I dip it in hot water and shake it dry before using it with the syrup. This keeps the syrup at a consistent temperature throughout the brushing process. It sounds overly precise, but it helps. The last thing you want is cold syrup hitting a warm cake and seizing up.
Now, the type of pan matters too. A dark metal pan absorbs more heat, causing a thicker crust. I use a light-colored, aluminum loaf pan. It distributes heat evenly and keeps the crust thin. If you use glass, lower your oven temperature by 25 degrees. Glass heats up faster and retains heat longer. This is a small detail that impacts the crust’s porosity, which directly affects glaze absorption.
Using a toothpick to test warm glaze penetration before baking
Before I even think about glazing, I test my cake’s readiness. A toothpick does way more than check for doneness. I insert it into the center of the baked, still-warm cake. When I pull it out, I look for two things. First, no wet batter. Second, the crumb should cling to the toothpick slightly. If it comes out completely clean, the cake might be a bit overbaked and less receptive to glaze.
This check happens about 15 minutes before I actually glaze. It tells me the internal moisture level. If the toothpick comes out with a few moist crumbs, I know the crumb is still open. That’s the green light for glazing. If it’s dry, I reduce my glaze quantity or add a second soak. That way I don’t overdo it.
Some bakers skip this step. They assume the cake is good to go because it passed the toothpick test for doneness. But that test is about cooking, not absorption. I want a sense of both. The crumb texture tells me how much glaze to prepare. It’s a quick, simple check that prevents waste.
I also look at the edges of the cake. If they look pulled away from the pan, that’s actually a good sign. It means the cake is holding its shape. That structure is crucial when you’re poking holes and brushing on glaze. A structure that’s too fragile will collapse. A structure that’s too tough won’t absorb. The sweet spot is right in between.
The best lemon glaze consistency for deep crumb soaking
Consistency is everything. The glaze can’t be too thick or too thin. I aim for something like runny honey. It should pour easily but not be watery. To test this, I dip a spoon into the glaze and lift it out. The glaze should fall back into the pan in a steady ribbon, not in drops. If it clings to the spoon, it’s too thick. If it runs off instantly, it’s too thin.
To fix a thick glaze, add a splash of lemon juice or water. Mix it well. To fix a thin glaze, add a bit more confectioner’s sugar. But be careful, confectioner’s sugar contains cornstarch, which thickens and can create a film. I prefer using granulated sugar dissolved in liquid. It doesn’t leave that starchy residue. A film on the surface can block further absorption.
Another trick is to let the glaze sit for 5 minutes after mixing. This allows the sugar to fully dissolve and the mixture to stabilize. I often mix it, walk away, and come back. It has a different consistency after resting. If you use it immediately, the sugar granules can clog the cake’s pores. That prevents deep soaking. Letting it rest solves that.
Here’s a ratio I like. Start with 1/4 cup of lemon juice. Add 2 tablespoons of sugar or honey. Whisk it. Then adjust from there based on how thick you want it. For a richer flavor, add a teaspoon of vanilla extract. That won’t affect the consistency much but adds depth. It’s a great way to customize your glaze to match the cake.
How to soak lemon pound cake warm glaze fully penetrate inner cake crumb with a resting hydration stage
The resting hydration stage is almost like a secret weapon. After the initial glaze soak, I let the cake rest for 10 minutes. Then I pour a little extra glaze over any dry spots I see. This second drip fills in what the first round missed. It’s a second chance for absorption. You can really see the difference if you compare the top to the center.
I mark the spots that look dry. Usually, they’re near the center or in pockets where the crumb was denser. I use a spoon to carefully dribble glaze just on those areas. This prevents the rest of the cake from becoming overly saturated. It’s targeted hydration. This method ensures the whole cake ends up with a consistent moisture level.
I learned this technique from a pastry chef in a small bakery. He told me that baking is all about control. You control every variable you can. The resting hydration stage is a form of control. You’re not just dumping liquid and hoping. You’re actively observing and responding to what the cake needs. It’s a more thoughtful way to bake.
This stage also allows the flavor to meld. The lemon zest and juice have time to infuse deeper into the crumb. It’s not just about moisture; it’s about flavor distribution. A cake that rests properly tastes more coherent. The top and bottom don’t taste different. Everything is harmonious. That’s what you’re aiming for.
Common mistakes to avoid when soaking a lemon pound cake
Let me list the mistakes I’ve made so you don’t have to. First, pouring glaze over a cold cake. That won’t work. Second, using a glaze that’s too thick. It just sits. Third, not poking enough holes. The glaze has nowhere to go. Fourth, cutting into the cake too soon. It needs rest time. Fifth, using low-quality lemon juice. The flavor won’t penetrate as well.
Another mistake is over-soaking. I did this once. The cake became mushy. The crumb disintegrated. That’s not what you want. The goal is tender, not soggy. So don’t pour too much glaze. Start with less and you can always add more. You can’t remove glaze once it’s in the cake. Moderation is key, especially if you’re new to this.
I also learned to avoid glazing while the cake is still in the pan. The pan traps steam and makes the bottom soggy. Always remove the cake from the pan and transfer it to a wire rack before glazing. This allows excess liquid to drain away instead of pooling underneath. It’s a common mistake, and I’m guilty of it from my early days. Now, I always use the rack.
Here’s another one. Don’t skip the poke test. Even if your cake looks perfect, you don’t know the internal texture. A quick poke with a skewer tells you a lot. It shows you how dense the crumb is. If it feels springy, it’s good. If it feels hard, you need more glaze or different glaze. But don’t poke too aggressively. You don’t want to damage the cake structure.
FAQ
- Can I use cold glaze on a warm lemon pound cake?
No, cold glaze won’t penetrate well. The crumb needs warm liquid to open up. Cold glaze stays on the surface. Always warm the glaze slightly before pouring. Room temperature is okay, but barely warm is better. This is how to soak lemon pound cake warm glaze fully penetrate inner cake crumb.
- Should I poke holes in the pound cake before glazing?
Yes, absolutely. Poking holes creates channels for the glaze to travel deeper. Without them, the glaze only wets the surface. Wait until the cake is about 80% cool. Then poke holes with a skewer or fork. This is essential for deep absorption.
- How long should I wait before slicing a glazed lemon pound cake?
You should wait at least 2 hours. This gives the glaze time to redistribute and the crumb to set. Cutting too soon causes the cake to tear. The texture improves significantly with rest. Overnight is even better, but 2 hours is the minimum.
⚠️ Warning: This cake is high in sugar. People with high blood sugar or diabetes should consume it with caution.
I hope this guide helps you nail that perfectly soaked lemon pound cake. The first time I got it right, I almost cried. Well, maybe that’s dramatic, but I was really happy. The texture was so different. Soft, moist, full of flavor. There were no dry spots anywhere. Honestly, I’ve never gone back to my old method. This process is my new normal.
Give it a try. Your cake deserves it. Start with a good recipe, warm your glaze, poke some holes, and be patient with the rest time. The results will speak for themselves. Happy baking.





