 bluename
 How to Stabilize Whipped Cream with Gelatin Retain Shape Long Decor Working Time
I’ve lost count of how many cakes I’ve nearly ruined because my whipped cream started weeping or deflating right in the middle of piping. You spend twenty minutes getting those perfect rosettes on a cheesecake, and then by the time you finish the border, the first ones are already sliding. It’s frustrating. And honestly, it’s the number one reason so many home bakers are scared of using whipped cream for anything beyond a quick dollop.
Here’s the thing though. You don’t have to switch to buttercream or fake stabilized topping mixes. The solution is actually pretty simple. Gelatin. When you learn how to stabilize whipped cream with gelatin retain shape long decor working time becomes completely doable, even on warm-ish days. I’ve been using this method professionally for years, and it has saved me more times than I can count.
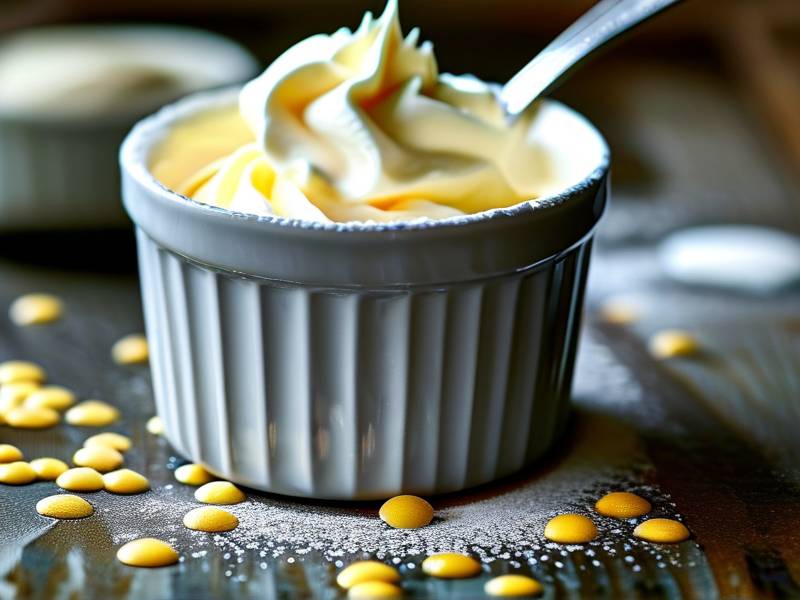
The best part? It barely changes the flavor. The texture stays light. The mouthfeel stays silky. But the structure holds firm for hours, sometimes even overnight. In this guide, I’m going to walk you through exactly how I do it, including the mistakes I made early on so you don’t have to repeat them.
Why Whipped Cream Collapses Without Help
Before I get into the how, let’s talk about the why. Because if you understand what’s actually happening, the fix makes so much more sense.
Whipped cream is basically a foam. Air bubbles get trapped in a network of fat globules from the heavy cream. That network is what holds everything up. When you whip cream, the fat molecules bump into each other and start clustering around the air pockets. If you whip it too little, you get loose, floppy peaks. Too much, and you get butter. There’s a sweet spot in the middle where everything holds beautifully.
But here’s the catch. That network is fragile. It relies on the fat being cold and firm. The moment the temperature rises, the fat starts softening. The air bubbles expand. The liquid seeps out. And boom. You’ve got a slumping mess.
Gelatin works because it adds a secondary structure. It forms a light gel matrix throughout the foam. So even when the fat starts to soften, that gelatin network keeps everything locked in place. Simple enough, right?
What Kind of Gelatin Should You Use
I get this question all the time. Powdered or sheet? Honestly, both work fine. I personally prefer powdered gelatin because it’s easier to measure precisely and it’s more common in American grocery stores.
For sheet gelatin, you’ll need to bloom it in cold water first. The ratio is a bit trickier because sheet strengths vary. I usually suggest sticking with powdered unless you already have a favorite brand.
Okay here’s my honest advice. Use unflavored powdered gelatin. Knox is the brand I grew up with and still use today. It’s reliable. It sets evenly. And it doesn’t come with a weird aftertaste when you dissolve it properly.
Now, let’s talk about the ratio. This is the part where a lot of recipes get it wrong. Too much gelatin and your whipped cream turns into marshmallow fluff. Too little, and you’re back to square one. For every one cup of cold heavy cream, I use about 1 teaspoon of powdered gelatin. That translates to roughly one packet of Knox gelatin per 2 cups of cream. That ratio gives you structure without stiffness.
My Exact Step-by-Step Process
Alright. Let me walk you through my exact method. I’ve refined this over dozens of batches, and it hasn’t failed me yet.
Step one. Measure out your cold heavy cream. I can’t emphasize this enough. The cream has to be really cold. Like straight from the fridge cold. If your kitchen is warm, pop your mixing bowl in the fridge for at least fifteen minutes before you start. Cold cream whips faster and holds better.
Step two. Bloom the gelatin. Put your teaspoon of gelatin into a small heatproof bowl. Add about two tablespoons of cold water. Just enough to cover the powder. Stir it briefly, then let it sit for five minutes. This is called blooming. The gelatin absorbs the water and turns into a thick, sponge-like paste.
Step three. Melt the gelatin. After blooming, you need to melt it down to a liquid. The easiest way? Microwave it in short bursts. About five seconds at a time. Stir between bursts. Stop as soon as it’s fully liquid. You don’t want it boiling. That kills the setting power.
Alternatively, you can place the bowl over a pot of simmering water. That’s gentler and gives you more control. I use this method when I’m making smaller batches.
Step four. Here’s the golden rule. Do not add hot gelatin to cold whipped cream. Ever. It will seize up and turn into little jelly strings when it hits the cold cream. I learned this the hard way. What you need to do is temper it.
Take about two tablespoons of your heavy cream and add it to the melted gelatin. Whisk it together quickly. This warms up the gelatin slightly and lowers its temperature. Then, slowly drizzle that tempered mixture into the rest of your cold cream while you’re whipping.
Step five. Whip your cream. Start on medium speed and watch carefully. You need to have the gelatin added early, not at soft peaks. I usually stream it in during the first minute of whipping. Then continue whipping until you reach soft peaks. Once you hit soft peaks, slow down to low speed and finish until stiff peaks form.
A quick note on stiff peaks. When you lift your whisk, the peak should hold its shape almost completely. The tip may just barely droop, but it doesn’t flop over. That’s what you want.
How to Keep Decorating Longer with Stabilized Cream
So you’ve got your stabilized whipped cream. Now what? The whole point of this was to extend your decorating time. With plain whipped cream, you really only have maybe thirty minutes of reliable work time in a cool kitchen. With gelatin, you can stretch that window significantly.
In my experience, stabilized cream stays pipeable for about two to three hours at room temperature. That’s a huge difference. It means you can pipe one entire cake layer, then do the second, without rushing. You can take breaks. You can fix mistakes.
I’ve even refrigerated piped stabilized cream and added more piping the next day. The original piped rosettes stay firm. As long as you don’t touch them too much, they hold their shape overnight. That’s a total game changer for wedding cakes and party prep.
But there are a few tricks I’ve learned to maximize the working window even further.
Keep your mixing bowl chilled. If you’re doing a big batch, split it into smaller bowls. Only whip what you’re actively piping from. The rest stays cold in the fridge. This prevents overworking the foam and stops it from getting warm in your hands.
Use a piping bag rather than a spoon. The bag keeps the cream in a compact space. Less surface area exposed to air means less drying out. Also, your hands are warm. The less the cream touches your palms, the longer it holds shape.
Work in cooler environments if you can. I know you can’t control your kitchen, but try not to pipe under direct sunlight or near a hot oven. Even stabilized cream has its limits.
Common Mistakes That Ruin Stabilized Whipped Cream
Let me share some mistakes I’ve made so you can skip them. The first one I already mentioned. Hot gelatin hitting cold cream. That gives you stringy bits. The stabilizing effect is ruined because the gelatin has already set into tiny globs before it can distribute evenly.
Another mistake is adding gelatin when the cream is already at stiff peaks. If you do that, the whipping action after adding gelatin will overwhip the cream. You’ll end up with clumps that look like cottage cheese. Trust me. I ruined a whole batch once. I beat it too long trying to make the gelatin incorporate and turned it into butter.
Over-blooming is also a thing. If you leave the gelatin in the water too long, it becomes too strong. The flavor gets slightly off, and the texture turns rubbery. Stick to the five minute bloom time.
One more common issue is using cream that isn’t cold enough. If your cream is even slightly warm, it whips up more aerated but much less stable. You end up with a foam that looks great for a few minutes, then immediately starts collapsing. Make sure the cream carton has been sitting in your fridge for at least twenty four hours before you start.
Can You Add Flavorings Without Ruining Stability
Absolutely. The gelatin doesn’t interfere with flavorings. In fact, many of my favorite recipes include a little bit of stabilized cream as a base for fruit mousse or layered parfaits.
My rule of thumb is to add sugar and vanilla after the cream starts showing the first signs of thickening. If you throw everything in at once, you might not reach stiff peaks because the sugar takes time to dissolve.
For every cup of cream, I use two tablespoons of powdered sugar. It dissolves faster than granulated sugar, and it actually helps stabilize the foam a little bit. Add about half a teaspoon of vanilla per cup, or adjust to your taste.
If you want to add cocoa powder or espresso powder, mix them with the sugar before adding. That prevents clumps. The gelatin doesn’t mind this one bit. You still get a stable, pipeable result.
One thing I would avoid is adding alcohol. A little bit of liqueur can add great flavor, but alcohol weakens the foam structure. If you want a boozy cream, I suggest reducing the alcohol amount and making sure your gelatin bloom is extra strong. Honestly, I’d rather do a separate flavored syrup drizzle over the cake than mess with alcohol in the cream.
What Is the Best Way to Store Cakes with Stabilized Whipped Cream
This piece of advice had a huge impact on how I organize my baking schedule. Stabilized whipped cream handles refrigeration better than regular chiffon cake toppings or standard fruit cakes with plain cream.
Now, I need to be clear here. Even stabilized cream will not hold up forever under extreme conditions. But for normal home use, you can refrigerate a frosted cake for up to twenty four hours without noticeable changes. I’ve done this for cakes that needed to be delivered the next morning.
Before you stick that cake in the fridge, give the cream a little time to set at room temperature for about thirty minutes. If you chill it immediately, condensation can form on the surface. That condensation sits on top of the piped cream and makes it look blotchy. Also, wrap the cake loosely with plastic wrap, but don’t let the wrap touch the cream directly. Those little dips in piping catch moisture.
When you pull the cake out of the fridge, don’t leave it out too long either. The gelatin holds firm, but Extended room temp exposure will still soften it. A party that lasts two hours is fine. A party that lasts six hours might start showing droop.
Actually, let me share something I discovered by accident. If you freeze stabilized whipped cream desserts, they hold their shape beautifully after thawing in the fridge overnight. The gelatin prevents the cream from separating as ice crystals melt. I’ve done this with frozen mousse cakes, and the texture is remarkably close to freshly whipped cream.
My Favorite Variations and Tweaks
Over the years, I’ve adjusted my base recipe for different situations. Let me run through some variations that might suit your needs.
For warmer climates, I sometimes increase the gelatin slightly. Instead of one teaspoon per cup, I go to one and a quarter teaspoons. The texture is slightly firmer, but still very smooth. Just don’t go over one and a half teaspoons. That starts tasting like jelly.
If you’re making a cream that needs to hold up under a heavy layer of fruits or chocolate shards, add a little cream cheese. Not a lot. Maybe one tablespoon of softened cream cheese per cup of heavy cream. Beat it smooth before whipping. This adds extra stability, and honestly, the taste is incredible.
For a vegan version, I’ve had mixed results with gelatin substitutes like agar agar. Agar sets much harder than gelatin. You need about half the amount, and you have to work quickly because it sets fast. I don’t recommend it for beginners. But if you’ve got practice with agar, it can work.
One tip I tell every home baker. Make a tiny test batch first. Two tablespoons of cream, a tiny pinch of gelatin. Whip it in a small bowl. Pipe a little rosette. See how it holds for thirty minutes. That takes five minutes and saves you from wasting a whole carton of cream.
Now let me answer some specific questions you might have.
FAQ
How long does gelatin stabilized whipped cream last in the fridge?
It stays stable for at least 24 hours in the fridge without weeping. In my experience, it still looks presentable at 48 hours, but the texture changes slightly. It becomes denser and less airy. I would use it within those 24 hours for optimal flavor and mouthfeel. Beyond that, it’s not worth eating as fresh cream.
Can I use gelatin stabilized whipped cream on a warm cake or fresh fruit tart?
I advise against it. The heat from a warm cake will melt the gelatin and break down the structure. If you have to assemble quickly, make sure your cake layers are completely cooled and the fruit tart base is chilled for one hour before piping. That protects the cream and buys you more decorating time.
Does stabilized whipped cream taste different from regular whipped cream?
No. Not when you measure the gelatin correctly. One teaspoon per cup is too small to taste. What I’ve noticed is that stabilized cream feels ever so slightly thicker in the mouth. It’s barely noticeable. If you can subtly taste a metallic or weird flavor, you likely used too much gelatin or you over-bloomed. Stick to the ratio and you’ll be fine.
Alright, let’s wrap this up nicely.
What You Should Remember from This Guide
If there is one thing I want you to take away from this whole article, it’s that stabilizing whipped cream with gelatin is not complicated. The process adds about five minutes to your prep time. And that’s it. In exchange, you get a cream that holds its shape, stays pipeable, and gives you the freedom to decorate at your own pace.
Here’s my quick recap of the exact steps. Bloom your gelatin for five minutes in cool water. Melt it gently. Temper it with a little cream. Whip it into your cold heavy cream during the first minute. Whip to stiff peaks. Keep your work area cool. And store finished cakes in the fridge.
Once you’ve done this method a couple of times, it becomes second nature. I genuinely don’t bother making plain whipped cream anymore unless I’m serving it immediately straight from the bowl. The gelatin version is superior in every way that matters for baking and decorating.
For those of you who decorate larger cakes or work in warm kitchens, this truly is the difference between stress and peace of mind. No more last-minute emergency fridge trips. No more watching your beautiful piping job turn into a puddle. Just clean edges, firm peaks, and a long, happy decorating session.
Start with my base ratio of one teaspoon gelatin per cup of cream. Whip to stiff peaks, not beyond. And practice the tempering step. Trust me. Once you nail that, you’ll never look back. Your cakes will be sturdier, your whipped cream will look gorgeous for hours, and you’ll wonder why you didn’t try this sooner.
⚠️ Warning: This cake is high in sugar. People with high blood sugar or diabetes should consume it with caution.





