 bluename
 How to Bake Almond Shortbread: Light Powdered Sugar Dust Finish Sweet Cookies
I have baked a lot of cookies in my time, both for my own kitchen and for friends who begged me for the recipe. Honestly, almond shortbread is one of those treats that looks fancy but is secretly simple to pull off.
The magic really happens with that light powdered sugar dust finish. It transforms a humble cookie into something that melts in your mouth. The nutty flavor, the crumbly texture, and that sweet, snowy top—it’s a combination that has won over even my pickiest relatives.
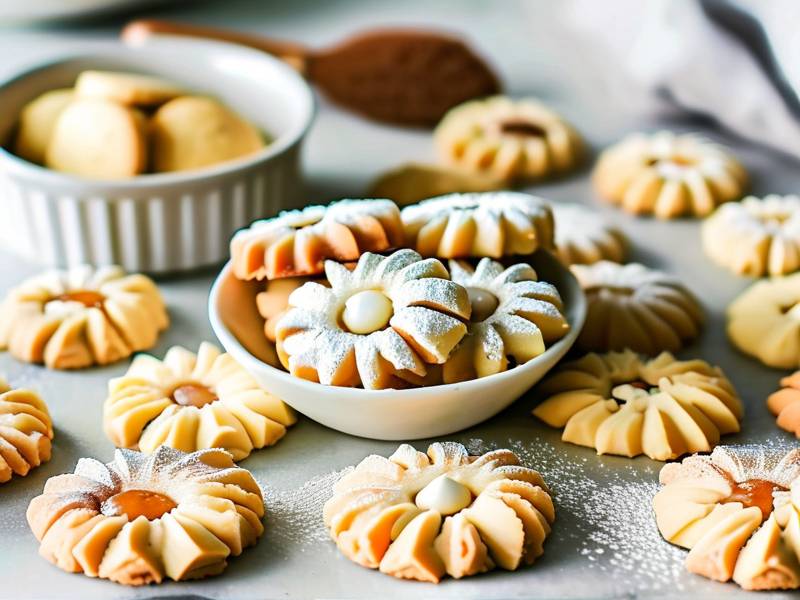
So, today I am walking you through the entire process. We will cover the ingredients, the steps, and the little tricks that make the difference between a good cookie and a great one.
Why Almond Shortbread Stands Out in My Kitchen
Let me be honest for a second. I used to think shortbread was just butter and flour. Then I started experimenting with almond flour and extracts, and everything changed. The almond adds a natural sweetness that lets you cut back on the sugar a bit, which I really appreciate.
The texture is another win. A classic shortbread is dense and sandy. When you add ground almonds, it becomes more tender and slightly fragile, which sounds bad but actually feels amazing. Biting into it, you get that initial crisp snap, and then it crumbles softly on your tongue. I love pairing it with tea or coffee because it is not overly sweet on its own.
This base recipe is incredibly forgiving, too. I have made it in a stand mixer, with a hand mixer, and even by hand with a wooden spoon. It works every single time, as long as you respect the butter temperature. That is the one rule I never break.
What You Need to Get Started
Before you preheat the oven, gather everything you need. Mise en place is my secret weapon, even for a simple bake. It saves you from that frantic search for vanilla extract while your mixer is running.
Ingredient List
I prefer using unsalted butter here. The salt control is important because we add a pinch later. It balances the sweetness and wakes up the almond flavor.
- 1 cup (226g) unsalted butter, softened
- 1/2 cup (100g) granulated sugar
- 1 teaspoon pure vanilla extract
- 1/2 teaspoon almond extract (this is non-negotiable for me)
- 2 cups (240g) all-purpose flour
- 1/2 cup (60g) almond flour or finely ground almonds
- 1/4 teaspoon salt
- 1/4 cup powdered sugar for that light dust finish on top
The almond extract is where the flavor pops. Many people skip it, but I strongly encourage you to find it. It gives the cookies that unmistakable, aromatic bakery flavor.
Equipment Checklist
You do not need a professional kitchen setup for this recipe. If you have a basic baker’s toolkit, you are good to go.
Here is what works best for me:
- Electric mixer (hand or stand)
- Large mixing bowl
- Whisk for dry ingredients
- Plastic wrap for chilling
- Rolling pin and cookie cutters for shaping
- Baking sheets lined with parchment paper
- A fine-mesh sieve for the sugar dusting at the end
Do not worry if you do not have fancy cookie cutters. You can roll the dough into logs, chill them, and slice them. That is actually my preferred method because it gives you uniform, round cookies. It looks more artisanal, too.
Step-by-Step Instructions for How to Bake Almond Shortbread
I will break this down into clear stages. It is a simple recipe, but the order of operations matters a lot. You cannot rush the chilling steps. Trust me, I have tried to skip them in a hurry, and the cookies spread too thin in the oven.
Step One: Cream Butter and Sugar Correctly
Let that butter sit out for at least 30 minutes before you start. It should be soft enough that a finger presses into it easily, but not so soft that it looks melted or oily.
Put the butter and granulated sugar into your mixing bowl. Beat them together on medium speed for about 2 to 3 minutes. You want the mixture to become pale and fluffy.
I recommend scraping down the sides of the bowl halfway through. This ensures everything mixes evenly. When you add the vanilla and almond extracts, beat again for 30 seconds. The smell at this point is already intoxicating.
Step Two: Combine Dry Ingredients
In a separate bowl, whisk the all-purpose flour, almond flour, and salt together. Whisking aerates the mixture. It helps make the shortbread lighter, which sounds odd for a dense cookie, but it works.
Slowly add the dry mix to the butter mixture. I usually add it in two parts to avoid a dusty explosion in my kitchen. Turn the mixer on low. Stop as soon as the dough comes together.
Do not overmix. Overworking the dough develops gluten, which will make your shortbread tough and hard. Shortbread is supposed to be tender, so we keep the mixing time short.
Step Three: Chill the Dough
This step is essential. I usually split the dough in half and shape each portion into a log, about 2 inches in diameter. Wrap them tightly in plastic wrap and refrigerate for at least 1 hour.
If you let it chill overnight, the flavor develops even more. The flour hydrates fully, and the extracts marry together. Honestly, the dough is good for up to 3 days in the fridge.
When you are ready to bake, preheat your oven to 325°F (163°C). This lower temperature is key. It bakes the cookies slowly, allowing them to cook through without coloring too much. You want a pale golden edge, not a brown cookie.
Step Four: Slice and Arrange
Take the chilled dough logs out of the fridge. Use a sharp knife to slice them into rounds, roughly half an inch thick. I rotate the log slightly after each cut to keep it from flattening on one side.
Place the cookies on a parchment-lined baking sheet, leaving about an inch of space between them. They do not spread a huge amount, but they need a little breathing room.
Step Five: Bake to Perfection
Bake the cookies for 15 to 18 minutes. The edges should look just barely golden. The tops should stay pale. That is exactly what I am looking for.
Here is my biggest tip: pull them out of the oven when they look slightly undercooked in the center. They will continue to set as they cool on the hot pan.
Let them rest on the baking sheet for 5 minutes. Then transfer them to a wire rack to cool completely. Handle them with care at this stage, as they are fragile when warm.
The Art of the Light Powdered Sugar Dust Finish
This is my favorite part. The dusting is what makes these cookies look like they came from a boutique bakery.
Once the cookies are totally cool, put the powdered sugar in a fine-mesh strainer. Hold it over the cookies and gently tap the side. A light, even snow falls onto the surface.
The phrase "light powdered sugar dust finish" is the goal here. You do not want thick clumps. You want a delicate veil of sweetness.
I usually hold the sieve about 10 inches above the cookies. This gives a wider, softer distribution. It looks elegant and professional.
Variations and Add-Ins for Your Own Twist
Sometimes I play with this base recipe. It is versatile, and I love how small tweaks change the flavor profile.
Chocolate Drizzle
Melt some semi-sweet chocolate and drizzle it over the baked cookies after dusting. The bitterness of the dark chocolate pairs wonderfully with the sweet almond.
Citrus Zest
Add a teaspoon of lemon or orange zest to the dough in step one. The citrus brightness cuts through the richness of the butter. It is incredibly refreshing.
Chopped Nuts
Fold a handful of toasted, chopped almonds into the final dough. This adds a crunch that makes the cookie even more satisfying.
Spiced Version
Add a 1/4 teaspoon of ground cardamom or cinnamon to the dry ingredients. It gives the shortbread a subtle warmth that feels perfect for fall.
Each of these keeps the character of the original. The almond and the light powder sugar remain the stars.
Common Mistakes and How to Avoid Them
I have baked a lot of shortbread in my day, and I have definitely hit some bumps. Let me save you the trouble.
Overly Sticky Dough
If your dough is too sticky to shape, it is probably too warm. Wrap it and pop it back in the fridge for 20 minutes. It will firm right up.
Flat Cookies
If your cookies lose their shape and spread out, your butter was too soft, or you did not chill the dough enough. Always go for the full 1-hour chill time.
Dry Crumbly Dough
If it crumbles and refuses to come together, you likely used too much flour. Almond flour is denser, so be gentle with your measuring. Use the spoon-and-level method.
Bitter Almond Flavor
Pure almond extract is strong. If you use a cheap imitation or over-pour, your cookie will taste bitter. Stick to 1/2 teaspoon and buy a good brand. I have had success with Madagascar vanilla and real almond extract.
Hard as Rocks
Overbaking is the culprit. Set a timer for 15 minutes and check the edges. You want them set but not browned. Take them out early if you have any doubt.
Why This Recipe Works for Beginners
I always tell my friends that this is a perfect gateway recipe. It looks complicated, but the technique is simple.
You do not need a piping bag or a candy thermometer. You do not need to worry about curdling or folding egg whites. It is just butter, flour, and sugar, mixed with a bit of patience.
The small list of ingredients makes it an easy win. Plus, you most likely have everything in your pantry right now.
Even if the cookies crack a little on the edges or look rustic, they will taste incredible. The powdered sugar hides a multitude of imperfections, too. That is a huge confidence boost for a new baker.
Storing Your Baked Almond Shortbread
These cookies store really well, which is another reason I love them. Keep them in an airtight container at room temperature for up to a week. The texture might soften slightly, but the flavor stays great.
If you want to freeze them, do it in a single layer in a freezer bag. They will keep for up to 3 months. Thaw them on the counter for about 15 minutes before serving.
Here is a small trick I use: store them with a slice of bread. The bread releases a little moisture, which keeps the cookies from drying out. It is an old pastry chef trick that works every time.
Nutritional Considerations and Honest Thoughts
As with all butter-based cookies, moderation is key. A serving of two cookies contains a reasonable amount of calories, but they are not a health food.
I have checked some nutrition data through the USDA’s FoodData Central from 2024. A single shortbread cookie similar to this recipe averages around 120-150 calories, depending on the size. That assumes you cut them into standard rounds.
The almond flour adds a small boost of healthy monounsaturated fats. It also lowers the carbohydrate count slightly when compared to all-purpose flour alone.
That said, I do not eat a dozen at once. I savor two with a cup of black tea. The sweetness is satisfying without being cloying.
Frequently Asked Questions
Do I need to use almond flour, or can I skip it?
I strongly suggest using it. The almond flour is what gives this cookie its unique crumbly texture. If you skip it and use extra all-purpose flour, you will get a basic shortbread. It is good but lacks the special nuttiness.
How do I get the perfect light powdered sugar dust finish?
Make sure the cookies are 100% cool before you dust. Use a fine-mesh sieve and tap lightly from a height. Do not press the sugar through. If the cookies are warm, the sugar melts and disappears, which ruins the look.
Can I make this dough gluten-free?
Absolutely. Swap the all-purpose flour for a 1:1 gluten-free baking blend. The almond flour already provides structure. The texture will be slightly more delicate, so chilling is even more important.
Why is my dough cracking when I slice it?
This happens when the dough is too cold. Let it sit at room temperature for 10 minutes before slicing. Also, use a sharp, thin-bladed knife. A dull edge crushes the dough instead of slicing through it.
Final Thoughts on Baking These Sweet Cookies
If you have ever wondered how to bake almond shortbread that looks and tastes like it came from a Parisian patisserie, this is the recipe for you. It has become my go-to for holiday gift boxes and casual movie nights alike.
The process is straightforward. Cream the butter, mix the dry ingredients, chill, slice, and bake. Then comes that delightful moment when you dust the tops with snowy powdered sugar. That light powdered sugar dust finish is truly the crowning touch.
I really hope you give these a try. I have baked them so many times that I can do it with my eyes closed. Once you taste a warm batch, it will become a regular in your rotation, too.
Happy baking, and do not forget to save a few for yourself before they disappear.





