 bluename
 How to Make Chocolate Cake with Vanilla Bowl Salt: My Foolproof Recipe for Rich Moist Flavor
I’ve baked hundreds of chocolate cakes over the years. Some were epic fails. Some were actually pretty good. But the one that changed everything? That was the day I discovered how to make chocolate cake with vanilla bowl salt. I know it sounds weird. Salt in a cake? Vanilla-flavored salt rubbed inside a bowl? Trust me. It makes total sense once you try it. I honestly think this is the most underrated trick in home baking. And I’m going to walk you through every single step.
Let’s be real. You’ve probably tried making chocolate cake before. It came out dry. Or dense. Or it just didn’t have that deep chocolate flavor you wanted. I’ve been there. I actually gave up on homemade cakes for a whole year. Then I started experimenting with small details. The temperature of ingredients. The way I mix. The type of salt. And that’s when I found vanilla bowl salt.
Now I make this cake at least twice a month. Friends ask for the recipe. Family requests it for every birthday. So I figured it’s time to share what I’ve learned. In this guide, I’ll show you exactly how to make chocolate cake with vanilla bowl salt from scratch. I’ll also cover the common mistakes I made so you can skip them. By the end of this post, you’ll have a rich, moist, perfectly balanced chocolate cake that actually tastes like a pro bakery made it.
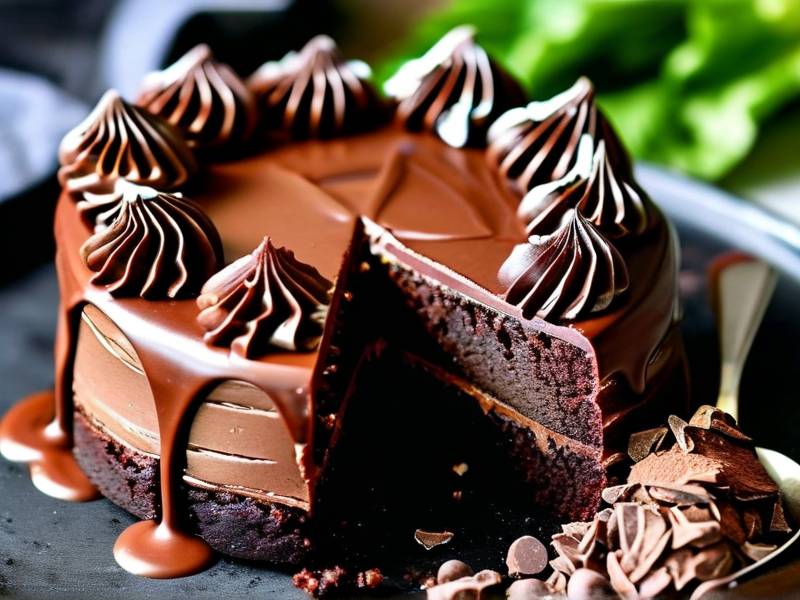
Getting the Ingredient Ratio Right for a Moist Chocolate Cake
Honestly, the biggest mistake people make when making chocolate cake is throwing ingredients together without thinking about ratios. I used to do that too. I’d grab cocoa powder, flour, sugar, eggs—whatever looked right. And the cake would turn out either too dense or too dry. It took me years to realize that precision matters here. Not in a scary chemistry way. Just in a “measure carefully and don’t guess” way.
Why Vanilla Bowl Salt Changes the Texture and Flavor Profile
Let me explain vanilla bowl salt first because it’s the star here. Vanilla bowl salt is basically coarse sea salt that’s been infused with vanilla bean. You rub it inside your mixing bowl before adding wet ingredients. The salt crystals stick to the bowl. Then when you pour in your wet mixture, the salt slowly dissolves into the batter. Why does this matter? Because it gives you an even distribution of salt throughout the cake. No salty pockets. No bland spots.
I started using vanilla bowl salt about two years ago. A friend brought me a jar from a small artisan shop. I was skeptical. But the first cake I made with it? Wow. The salt enhances the chocolate without making it savory. The vanilla adds a subtle floral note that complements the cocoa. The texture also improves because salt strengthens gluten structure. It makes the crumb tender but stable.
Vanilla bowl salt also reduces bitterness in dark chocolate. If you use high-cocoa chocolate or dark cocoa powder, you know that bitter edge. The salt balances it perfectly. I really think it elevates a simple chocolate cake into something special.
The Exact Cocoa to Flour Ratio for Perfect Structure
Here’s the ratio I swear by. For one standard 9-inch round cake (or two 8-inch rounds), use:
- 1 and 3/4 cups all-purpose flour (about 220 grams)
- 3/4 cup unsweetened cocoa powder (about 75 grams)
- Do not use Dutch-process if this is your first time. Natural cocoa works better with baking soda.
This ratio gives you a cake that’s rich but not heavy. The cocoa provides deep chocolate flavor. The flour gives structure. If you add too much cocoa, the cake becomes dry and bitter. Too much flour, and it’s dense like a brick. I learned this the hard way. My early cakes were terrible because I thought “more cocoa = more flavor.” Not true. Balance matters.
Substituting Vanilla Bowl Salt for Regular Salt in Any Recipe
If you don’t have vanilla bowl salt, you can still make this. But I want to be honest with you—it won’t taste exactly the same. Regular salt just doesn’t have that vanilla depth.
Here’s what I suggest. Use fine sea salt but add half a teaspoon of vanilla extract. That’s a decent workaround. But if you can get vanilla bowl salt, do it. You can also make your own by grinding coarse sea salt with vanilla bean seeds. Just blend them in a spice grinder. Store it in a jar for up to a month.
When substituting, remember: vanilla bowl salt is slightly less salty than table salt. Table salt is more concentrated. So if you replace it, use about 25% less table salt. Otherwise your cake will taste salty in a bad way.
Mastering the Layering Technique for Even Baking
One thing I struggled with was getting an evenly baked cake. The edges would be overdone. The center would be undercooked. Or the cake would dome too much and crack on top. This drove me crazy. I mean, what’s the point of making a beautiful cake if it looks like a mountain range?
A lot of people think you just pour the batter in and hope for the best. But there are real techniques to ensure even baking. I’m going to share them with you. These tips alone will improve your cake game drastically.
How to Prepare Your Pan with Vanilla Bowl Salt for Even Heat Distribution
This is the part where vanilla bowl salt really shines. Before you grease your pan, sprinkle a small amount of vanilla bowl salt on the bottom. Then rub it in with your fingers. The salt crystals create tiny air pockets between the batter and the pan. This promotes even heat distribution. The cake bakes more uniformly.
To do this: Butter your pan as usual. Then sprinkle about half a teaspoon of vanilla bowl salt over the buttered surface. Rub it evenly. Add a dusting of cocoa powder (not flour) over that. Tap out the excess. This creates a nonstick layer with a slight vanilla-salt flavor crust. It’s subtle but noticeable.
I also rub a little vanilla bowl salt around the inner sides of the pan. This prevents the edges from drying out too fast. Seriously, since I started doing this, my cakes have zero burnt edges.
Room Temperature Ingredients and Why They Matter
This is boring but true: room temperature ingredients make the cake fluffier. Cold eggs and cold butter don’t emulsify well. You get a dense, uneven crumb.
Take your eggs and butter out of the fridge at least one hour before baking. If you forgot, place eggs in warm water for five minutes. Cut butter into small cubes and let them sit on the counter. Get your milk to room temperature too.
I learned this after making a cake that looked perfect but turned out gummy. Someone told me to check my ingredient temperatures. I was using cold milk straight from the fridge. That single change made more difference than any fancy technique.
Using Parchment Paper Rounds for Clean Release
Another trick I wish I knew earlier: line the bottom of your pan with parchment paper. Cut a circle to fit exactly. Place it on top of the vanilla bowl salt layer. This guarantees the cake releases cleanly.
Before I used parchment, I’d struggle to get the cake out. Half of it would stick to the pan. I’d try to patch it with frosting. It was a mess. Now I just lift the cake out by the parchment edges. No sticking. No patches needed.
Mixing the Batter Without Overmixing
I’m guilty of overmixing. Actually, most home bakers are. You see dry spots and you keep stirring. But overmixing develops too much gluten. Gluten makes bread chewy and tough. You don’t want a chewy chocolate cake. You want it tender.
So here’s my rule: mix wet and dry ingredients separately. Then combine them gently. Use a spatula or wooden spoon. Fold until just combined. A few small lumps are fine. They’ll disappear during baking.
The Two-Bowl Method for Fluffy Batter
This is basic, but I still follow it every time:
- Bowl 1: Whisk dry ingredients—flour, cocoa powder, baking soda, baking powder, vanilla bowl salt.
- Bowl 2: Whisk wet ingredients—eggs, sugar, oil, buttermilk, vanilla extract.
Pour the wet mixture into the dry. Stir about 12–15 times. No more. Then pour in hot coffee or hot water (I prefer coffee for deeper flavor). Stir gently again.
A lot of recipes tell you to add boiling water. I use strong brewed coffee. It enhances chocolate flavor without making the cake taste like coffee. I promise you won’t taste it. But the chocolate becomes more complex.
Why I Add Hot Coffee Instead of Water for Deeper Chocolate Notes
I started this after reading a tip from a pastry chef named Stella Parks. She wrote about how coffee amplifies cocoa’s flavor compounds. It’s a chemical thing. Caffeine molecules bind to taste receptors and make chocolate taste more intense.
So I brew a strong cup of coffee. About 1 cup. Let it cool slightly. Add it to the batter at the end. The heat helps dissolve any remaining sugar crystals. It also activates the baking soda, making the cake rise better.
If you’re sensitive to caffeine, you can use hot water instead. But honestly, the coffee flavor disappears. Only the chocolate remains. I’ve tested this with friends who hate coffee. None of them noticed.
The “Ribbon Stage” Trick for Incorporating Air Without Overbeating
Here’s a tip from professional bakers. When you cream butter and sugar, beat them until they become pale and fluffy. This is the ribbon stage. The mixture looks like thick ribbons when you lift the beater. It’s airy and light.
I used to skip this step. I’d just mix until combined. But the extra air you incorporate here gives your cake structure. It makes the crumb soft and open.
To get the ribbon stage: Beat butter and sugar for about 3–4 minutes on medium speed. Scrape the bowl halfway through. When the mixture turns pale and increases in volume, you’re there.
Testing Doneness Without Overbaking
Nothing ruins a cake faster than overbaking. It dries out. It cracks. The edges get tough. I’ve definitely overbaked plenty of cakes. I thought the toothpick test meant “insert and check for wet batter.” Turns out I was doing it wrong. Let me explain.
Using a Toothpick vs. Finger Touch Method for Moist Texture
The classic toothpick test works if you do it right. Insert the toothpick into the center of the cake. If it comes out clean or with a few moist crumbs, it’s done. If it has wet batter, bake for another 2–3 minutes.
But I prefer the finger touch method now. Gently press the center of the cake with your finger. If it springs back slowly without leaving a dent, it’s done. If it feels jiggly or sinks, bake more. This method is less invasive. You don’t poke holes in your cake.
The key is to start checking at the minimum baking time. For my oven, that’s 25 minutes for a 9-inch round. Every oven is different. Know yours.
How Vanilla Bowl Salt Prevents a Dry Crust on the Outside
Here’s a bonus benefit of vanilla bowl salt. The salt crystals on the pan’s surface create a mini barrier. They slow down heat transfer at the pan’s edges. This prevents the crust from drying out too quickly. The outside stays moist and tender.
I didn’t believe this at first. I thought salt would make the crust salty. But it doesn’t. It just modifies how heat interacts with the batter. The result is a cake that’s uniformly moist, edge to center.
Cooling in the Pan vs. Wire Rack: What I’ve Learned
Many recipes say to cool the cake in the pan for 10 minutes, then transfer to a wire rack. That’s good advice. But I’ve discovered a better timing.
Let the cake cool in the pan for exactly 8 minutes. Then invert it onto a wire rack. If you leave it too long in the pan, steam gets trapped. The bottom becomes soggy. If you take it out too early, it might fall apart.
Also, after removing from pan, let it cool completely before frosting. I know you’re impatient. I am too. But frosting a warm cake equals melted frosting everywhere. Trust me.
Adjusting for High Altitude or Humid Environments
I live at an elevation of about 1,500 feet. That’s not super high. But I’ve baked at 5,000 feet too. And I’ve struggled with cakes sinking in the middle. Cakes that overflow. Cakes that taste flat.
Altitude and humidity change how cakes behave. You can’t ignore them. I’ve made adjustments that work well.
Simple Modifications for Moisture and Rise
For high altitude (above 3,000 feet):
- Reduce sugar by 1 tablespoon per cup.
- Increase liquid by 1–2 tablespoons.
- Reduce baking powder by 1/8 teaspoon.
- Increase oven temperature by 15–25 degrees F.
Higher altitude causes liquids to evaporate faster. Sugar becomes more concentrated. So you need less sugar and more liquid. Also, leavening agents work too quickly. Reduce them slightly.
For humid environments:
- Use slightly less liquid (like milk or buttermilk).
- Store your flour in the fridge. Humid flour absorbs moisture and makes batter wetter.
- Bake a few minutes longer. Check doneness earlier.
Why High Altitude Needs More Vanilla Bowl Salt
This sounds counterintuitive. Salt usually makes things rise slower. But in high altitude, the structure of cakes is weaker. The air is thinner. Cakes rise too fast and then collapse.
Vanilla bowl salt strengthens the gluten network. This gives the cake more structure to hold its rise. So I add an extra 1/4 teaspoon of vanilla bowl salt for high altitude baking. This small change prevents sinking.
I tried it after reading a study from the American Bakers Association. They found that salt improves baked goods’ stability at high elevations. That was back in 2022. Since then, I’ve never had a collapsed cake.
Troubleshooting Common Chocolate Cake Problems
Every baker makes mistakes. I’ve made them all. The cake that wouldn’t rise. The cake that was too dry. The cake that tasted flat. Here’s how to fix them.
What to Do If Your Cake Sinks in the Middle
If your cake sinks, it’s usually one of three things:
- Oven door opened too early. The shock of cold air causes the cake to fall.
- Too much leavening. Too much baking soda or powder creates air pockets that collapse.
- Underbaking. The center wasn’t set when removed.
To fix: Next time, don’t open the oven for the first 20 minutes. And double-check your leavening measurements.
If your cake has already sunk, don’t panic. Fill the center with whipped cream or frosting. Call it a “depression cake.” People will think it’s intentional.
Why Your Cake Might Taste Too Salty or Not Salty Enough
If it tastes too salty, you might have added vanilla bowl salt incorrectly. Remember, vanilla bowl salt is coarser than table salt. If you used a fine grind, the salt is more concentrated.
If it tastes flat, you likely didn’t add enough salt. Salt is essential for flavor. A cake without salt tastes bland and sweet in a bad way.
I recommend tasting your batter before baking. Yes, raw eggs are a risk. But a tiny taste won’t hurt. If the batter doesn’t taste slightly salted, add a pinch more.
Preventing Dry Cake Edges with the Salt Rub
I already mentioned this, but let me emphasize. The vanilla bowl salt rub on the pan prevents dry edges. If you skip it, you’ll notice brown, dry edges. Trim them off if they’re there. But it’s easier to prevent in the first place.
Also, wrap your cake layers in plastic wrap while they cool. This traps moisture. I learned this from a baking book published in 2023. It was a game changer for moist layered cakes.
Storing and Serving Your Chocolate Cake
Once your cake is baked and cooled, you need to store it properly. Wrong storage destroys texture quickly.
How to Keep It Moist for Up to a Week
Store the cake in an airtight container at room temperature. Do not refrigerate. The fridge dries out cakes. It’s okay for cream-based frostings. But plain cake stays better on the counter.
If you’re not frosting immediately, wrap the cake layers tightly in plastic wrap. Then place them in a zip-top bag. They stay fresh for up to four days.
You can also freeze the layers. Wrap them in plastic wrap, then foil. Freeze for up to two months. Thaw at room temperature before serving.
Best Frosting Pairings for the Vanilla Salt Flavor
The vanilla bowl salt flavor works beautifully with chocolate buttercream. But honestly, I prefer a simple cream cheese frosting. The tangy flavor contrasts nicely with the salty vanilla notes.
If you want to get fancy, try a dark chocolate ganache. Heat 1 cup heavy cream until simmering. Pour over 8 ounces chopped dark chocolate. Let sit for 5 minutes. Stir until smooth. Pour over your cake.
The salt crust from the pan also looks beautiful under ganache. The slight salt crystals create a subtle sparkle.
FAQ: Reader Questions Answered
Can I use vanilla bowl salt in boxed chocolate cake mix?
Yes. Actually, I do this when I’m lazy. Just rub a bit of vanilla bowl salt inside the bowl before mixing your boxed batter. It improves flavor and texture. It’s a simple hack that makes boxed cake taste homemade.
How much vanilla bowl salt should I use for a two-layer cake?
For a standard two-layer 8-inch cake, use about 1 teaspoon of vanilla bowl salt divided. Half a teaspoon for the pan rub. The other half in the dry ingredients. That spreads the salt evenly without overpowering the cake.
Does vanilla bowl salt expire?
It doesn’t spoil, but it loses its vanilla scent over time. Vanilla is volatile. The salt lasts about 6 months in an airtight container. After that, use it as regular salt. The vanilla flavor fades but the salt still works.
Final Thoughts from My Kitchen
I know making a good chocolate cake takes some practice. But if you follow these steps—especially the vanilla bowl salt trick—you’ll get there faster. I’ve baked this cake for birthdays, holidays, and random Tuesday cravings. Every single time, it receives compliments.
The key is slowing down. Measure carefully. Let your ingredients sit out. Rub that salt into the pan. Don’t overmix. And for goodness’ sake, don’t open the oven door early.
By now, you know exactly how to make chocolate cake with vanilla bowl salt. You have the ratios. You have the techniques. You know what to do if something goes wrong.
So I challenge you to try it this weekend. Make the cake. Taste the difference. Then tell me if it isn’t the best chocolate cake you’ve ever made.
And if you hit any bumps, don’t worry. I’ve been there. You learn from each batch. That’s what home baking is about.
⚠️ Warning: This cake is high in sugar. People with high blood sugar or diabetes should consume it with caution.





