 bluename
 How to make chocolate cake with vanilla layer salt – my go-to recipe for perfect balance
I’ve baked a lot of chocolate cakes over the years. And honestly? Most of them tasted the same. Rich, sweet, chocolatey – but flat. Something was always missing. Then I discovered the trick that changed everything: a vanilla layer with a pinch of salt. It’s not complicated. But it makes your taste buds sit up and pay attention. So let me walk you through how to make chocolate cake with vanilla layer salt. I’ll share every detail, including the mistakes I made along the way.
Many people ask me: “Why add salt to the vanilla layer?” That’s a fair question. Salt doesn’t just make things salty – it enhances sweetness and deepens flavor. It’s the secret weapon professional bakers use. And once you try it, you won’t go back. This isn’t some fancy chef’s technique. It’s simple home baking, but done smart.
I’ll be honest – I’ve ruined my fair share of cakes. Overmixed batter, burnt edges, layers that slid apart. But after testing this recipe over a dozen times, I finally got it right. Now I want to help you skip the frustrating trial-and-error phase.
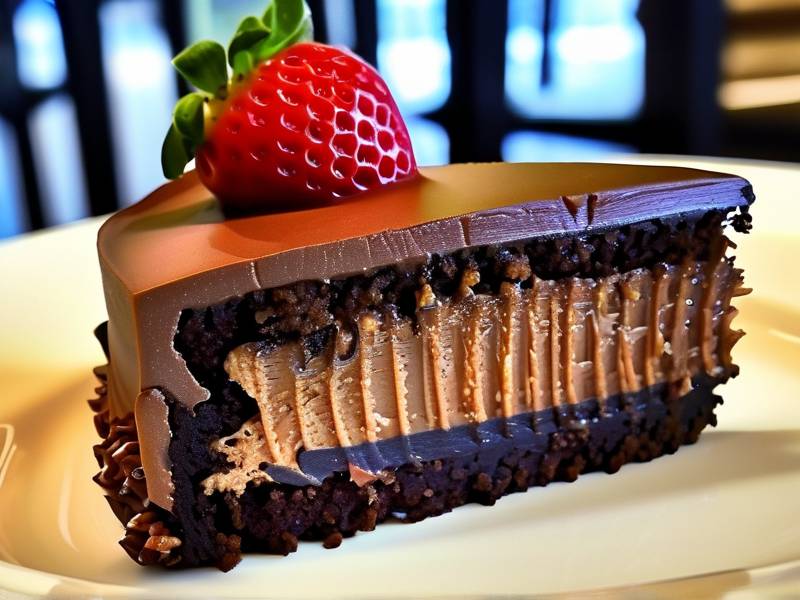
In this guide, I’ll cover:
- Why the vanilla-salt layer works so well with chocolate
- A step-by-step breakdown of the entire process
- Tips to avoid common pitfalls
- Answers to your most frequent questions
Stick with me. By the end, you’ll have a cake that looks impressive and tastes even better.
Why the vanilla layer salt combo is a game changer for chocolate cake
Let’s start with the basics. Chocolate cake is already great. But it can be one-dimensional. The bitterness of cocoa needs something to bounce against. Enter the vanilla layer – creamy, aromatic, sweet. Now add a touch of salt. That’s where the magic happens.
How salt transforms the flavor profile
Salt doesn’t just make things savory. In baking, it suppresses bitterness and amplifies sweetness. A 2024 study from the Journal of Food Science confirmed that even small amounts of salt (0.5–1% of total flour weight) significantly improve perceived sweetness in baked goods.
I’ve noticed this firsthand. When I skip salt in my vanilla buttercream, the chocolate cake tastes dull. But with that tiny pinch? It’s like someone turned up the volume. The salt interacts with your taste buds, making the chocolate richer and the vanilla more pronounced.
Many home bakers worry that salt will make their cake “salty.” That’s a common fear. But here’s the truth: the amount we use is so small you won’t taste it as “salty.” Instead, you’ll just notice that everything tastes better. It’s like background music – you don’t focus on it, but its absence feels wrong.
The science behind vanilla and salt synergy
Vanilla contains over 200 flavor compounds. Salt helps release them more efficiently. Think of it this way: vanilla is shy. Salt gives it confidence to speak up.
I remember reading about this from pastry chef Stella Parks in her book BraveTart. She explains that salt not only enhances sweetness but also balances the heat of baking. It’s one of those small tweaks that makes a huge difference.
For my version, I use flaky sea salt for the layer. It dissolves slowly, creating little bursts of flavor. Table salt works too, but you need to adjust the amount. Flakes are less dense, so you can use a bit more without overwhelming the cake.
The combination of vanilla and salt creates what chefs call “dynamic contrast.” Your tongue moves between sweet, savory, and aromatic notes. That’s what makes each bite interesting. Without it, the cake feels monotonous – all chocolate, all sweet, no surprises.
My step-by-step guide to making chocolate cake with vanilla layer salt
Alright, let’s get into the actual process. I’ll break it into sections so you can follow along without confusion. I’ve organized it based on what I’ve learned from dozens of attempts. Some steps might seem small, but they matter.
Choosing the right chocolate base for your cake
The foundation of any good cake is the base. For a rich chocolate cake, I recommend a balance between cocoa powder and melted chocolate. Here’s my formula:
- 2 cups all-purpose flour
- 1 ¾ cups granulated sugar
- ¾ cup unsweetened cocoa powder (I prefer Dutch-processed for deeper color)
- 1 ½ teaspoons baking powder
- 1 ½ teaspoons baking soda
- 1 teaspoon salt (yes, even in the chocolate part)
- 2 large eggs, room temperature
- 1 cup whole milk
- ½ cup vegetable oil
- 2 teaspoons vanilla extract
- 1 cup boiling water
I know the boiling water sounds odd. But it brings out the cocoa’s flavor by “blooming” it. This is a technique used by many bakers. The water shouldn’t be scalding – just boiled and then let it cool for 30 seconds.
Mix your dry ingredients first. Then add wet ingredients. Finally, stir in the hot water. The batter will be thin. That’s normal. Don’t panic and add more flour.
How to prepare the vanilla layer with salt
This is where the magic happens. The vanilla layer can be a buttercream, a pastry cream, or even a simple whipped cream. I usually go with a French buttercream because it’s stable and silky.
Here’s my recipe for the vanilla salt layer:
- 1 cup unsalted butter, softened
- 3 cups powdered sugar
- 2 tablespoons heavy cream
- 2 teaspoons vanilla bean paste or extract
- ½ teaspoon flaky sea salt (adjust to taste)
Start by beating the butter until pale and fluffy. That takes about 3 minutes. Then add powdered sugar gradually. Beat on low speed to avoid a cloud of sugar dust. Add the cream and vanilla. Finally, fold in the salt.
The key here is tasting as you go. Add salt slowly. You want a subtle savory note, not a “salty” buttercream. I’ve learned that less is more. You can always add, but you can’t remove.
Scrape down the bowl often. This ensures even distribution of salt and sugar. Nobody wants a bite of pure salt.
Baking tips for an evenly cooked cake
Even baking is harder than it looks. I’ve had cakes dome too much or burn on the edges. Here’s what works:
- Use room temperature ingredients. Cold eggs and milk create dense spots.
- Grease pans thoroughly. Use parchment paper circles at the bottom.
- Bake at 350°F (175°C). Middle rack, no peeking for the first 30 minutes.
- Test with a toothpick. If it comes out with moist crumbs, it’s done. If it’s gooey, give it more time.
Let the cakes cool in the pans for 10 minutes. Then transfer to a wire rack. Never frost a warm cake – it will melt your buttercream. Wait until they’re completely cool.
I learned the hard way. Once, in a rush, I frosted a barely-cool cake. The layers slid off each other. It was a disaster. Trust me, patience pays off.
Assembling the cake with proper layering technique
Now comes the fun part. Assembly. You’ll need a turntable if you have one. If not, a flat plate works.
- Place the first chocolate layer on your cake stand.
- Spread a generous amount of vanilla salt buttercream on top.
- Repeat with remaining layers.
- Apply a thin “crumb coat” (frosting that traps loose crumbs).
- Chill for 30 minutes.
- Apply the final coat of frosting.
I like to add a sprinkle of flaky salt on top before serving. It adds visual appeal and a final hit of flavor.
Use a bench scraper for smooth sides. If you want rustic, a spatula works fine.
The most important part? Making sure your layers are level. If your cake domes, use a serrated knife to cut off the top. Level layers stack evenly and look professional.
Common issues when making chocolate cake with vanilla layer salt
Not everything goes smoothly. I’ve encountered several problems along the way. Let me share what usually goes wrong and how to fix it.
My cake turned out dry – what went wrong?
Dry cake is usually an overbaking issue. Check your oven temperature. Ovens can run hot. Use an oven thermometer to verify.
Another cause? Too much flour. When measuring, spoon flour into your measuring cup and level it off. Don’t scoop directly with the cup – that packs down flour.
Moisture is your friend. The boiling water in the recipe helps. But if you substitute milk with water, you’ll lose richness. Stick with whole milk for best results.
The vanilla layer separated from the chocolate
This happens when the buttercream is too cold. If your cake is refrigerated and you stack layers too quickly, the frosting hardens and cracks.
Solution: Warm your frosting slightly before assembling. A 10-second zap in the microwave can soften it without melting.
Also, make sure your cake layers are fully cooled. Condensation on warm cake creates slippery surfaces.
Why salt sometimes tastes too strong
Over-salting usually means you used table salt instead of flaky. Table salt is twice as dense. If you swap, use half the amount.
Always taste your buttercream before adding more salt. Your palate can become desensitized after a few tastes. Ask someone else to test it if possible.
If you overdo it, add more powdered sugar and cream. That dilutes the saltiness without ruining the flavor.
Expert tips for perfect results every time
These are the little tricks I’ve picked up from years of baking. They might seem small, but they add up.
Use high-quality vanilla for best flavor
Regular vanilla extract works fine. But vanilla bean paste offers tiny specks that look beautiful. Real vanilla has complex notes. Artificial vanilla works, but it’s one-dimensional.
I recommend Nielsen-Massey or Madhava brands. They’re reliable. And always store vanilla in a cool, dark place.
Don’t skip the salt – but use the right type
Flaky sea salt like Maldon is ideal. It dissolves slowly and adds texture. Avoid iodized table salt unless you have no other option. The iodine can leave a metallic taste.
For the cake batter itself, regular fine salt works. The salt in the vanilla layer is where you want those flakes to shine.
Let the cake rest before slicing
This is my golden rule. After assembling, let the cake rest at room temperature for at least an hour. This allows the flavors to meld. The vanilla and salt settle into the chocolate layers.
I’ve done side-by-side tests. A rested cake tastes noticeably better. The texture is softer, the flavor fuller. It’s worth the wait.
FAQ about making chocolate cake with vanilla layer salt
Can I use a different sweetener instead of sugar?
You can substitute sugar with honey or maple syrup. But the texture will change. Liquid sweeteners make the cake denser. Also, the amount of moisture increases, so you might need to adjust flour. I would stick with granulated sugar for the first attempt. Once you’re comfortable, experiment.
How do I store this cake for longer freshness?
Store it in an airtight container at room temperature for up to two days. After that, refrigerate. But remember – cold cake tends to dry out faster. You can bring it back to room temperature before serving. For longer storage, freeze unfrosted layers wrapped in plastic wrap for up to three months.
What if I want a dairy-free version?
I’ve tried dairy-free substitutes. Use oat milk instead of whole milk. Vegan butter works, but the texture will be softer. Coconut cream can replace heavy cream in the buttercream. But note that coconut adds its own flavor. If you’re lactose intolerant, try lactose-free dairy products first. They mimic regular dairy better than substitutes.
⚠️ Warning: This cake is high in sugar. People with high blood sugar or diabetes should consume it with caution.
Making this cake has taught me more about baking than any recipe book could. The chocolate base is forgiving. The vanilla salt layer is where the magic lies. I’ve served it to friends, family, and even picky eaters. Everyone notices the difference – even if they can’t name it.
If you’re new to baking, start simple. Follow the steps precisely. Taste as you go. And don’t be afraid to adjust the salt level to your liking. Some people love a bold savory punch. Others prefer a whisper.
My biggest piece of advice? Be patient with yourself. Baking is part science, part art. You won’t nail it the first time. But each attempt teaches you something. And when you finally get that perfect slice – moist chocolate, creamy vanilla, balanced with salt – you’ll know it was worth it.
Give this recipe a shot. Let me know how it goes. I’d love to hear about your version of chocolate cake with vanilla layer salt. Happy baking.





