 bluename
 How to Make Chocolate Cake with Vanilla Glass Salt: My Go-To Recipe for a Perfectly Balanced Dessert
I’ve been baking professionally for over a decade, and I still remember the first time I nailed a chocolate cake with vanilla glass salt. It was a total game-changer. The crunchy, salty-sweet topping gave the rich, moist chocolate cake an unexpected twist. Many home bakers struggle with getting that perfect balance of sweetness and texture. They either end up with a dry cake or a topping that melts into a mess. But trust me, once you learn how to make chocolate cake with vanilla glass salt the right way, you’ll never look back.
This isn’t just a recipe. It’s a full breakdown I’ve refined through years of trial and error in my own kitchen. I’ll walk you through every step, from picking the right ingredients to troubleshooting common issues. By the end, you’ll feel confident enough to whip this up for any occasion. Let’s dive straight in.
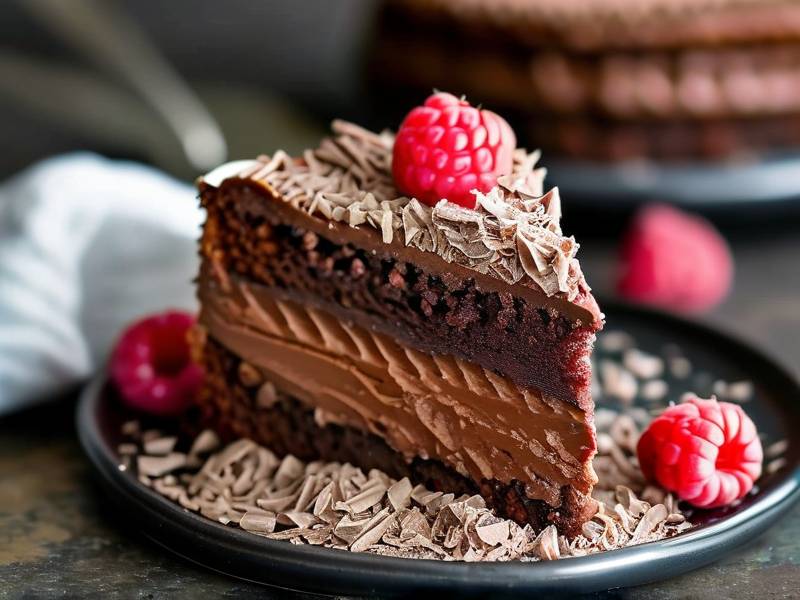
Why Vanilla Glass Salt Works So Well with Chocolate Cake
The magic here is in the contrast. You get the deep, bittersweet notes of cocoa, then this sharp, crunchy burst of salty vanilla sweetness on top. It’s not just a garnish; it’s a flavor bomb. I’ve tested this combo with dozens of chocolate cake recipes, and I honestly think it’s the best pairing. The salt cuts through the richness, while the vanilla ties everything together.
What Is Vanilla Glass Salt Exactly? Vanilla glass salt is essentially a brittle candy made by caramelizing sugar with vanilla, then adding flaky sea salt. Once it cools, it shatters into glass-like shards. Simple, but incredibly effective. You can buy it pre-made, but I strongly recommend making your own. It’s fresher, cheaper, and you control the salt level. Personally, I use a mix of Maldon sea salt and vanilla bean paste for the most intense flavor.
The Science Behind the Crunch The key to a good glass salt is the caramelization temperature. You need to heat the sugar to around 300-310°F (hard crack stage). Below that, it stays sticky. Above that, it burns. I’ve ruined quite a few batches by walking away for just 30 seconds. Honestly, I’ve learned to keep a candy thermometer clipped to my pot at all times. It’s the only way to guarantee that satisfying snap when you bite into the cake.
Gathering Your Ingredients for the Perfect Chocolate Cake
Before you even think about turning on the oven, let’s talk ingredients. Quality matters here, especially for the chocolate and vanilla. I’ve tried budget cocoa powder, and the difference is night and day. You want a Dutch-processed cocoa for a smoother, richer flavor. For the vanilla glass salt, use real vanilla extract or vanilla bean paste. Imitation vanilla just doesn’t cut it.
Choosing the Right Cocoa Powder I always reach for a Dutch-processed cocoa like Valrhona or Cacao Barry. Natural cocoa works too, but it’s more acidic. That acidity can throw off the balance with the salty topping. If you’re following a recipe and it calls for baking soda, Dutch-processed is actually better because it’s neutral. I learned this from a pastry chef at a workshop in 2023. He explained that the pH level directly affects the cake’s rise and crumb. So, don’t skip this detail.
Why Fresh Vanilla Makes a Difference For the glass salt, I use vanilla bean paste. It has those tiny seeds that make the shards look gorgeous. But if you only have extract, go for pure vanilla extract, not the synthetic stuff. I once made a batch with imitation vanilla, and it left a weird chemical aftertaste that clashed with the salt. It was a total waste of time. Since then, I’ve stuck with Nielsen-Massey or Heilala vanilla. Worth the extra few bucks.
Step-by-Step Guide: How to Make Chocolate Cake with Vanilla Glass Salt
Alright, let’s get hands-on. I’ll break this down into two main parts: the chocolate cake and the vanilla glass salt. You can make the glass salt while the cake bakes to save time. That’s what I usually do.
Part 1: Baking the Moist Chocolate Cake Preheat your oven to 350°F. Grease two 8-inch round cake pans and line the bottoms with parchment paper. This prevents sticking and gives you clean edges.
In a large bowl, whisk together 1 ¾ cups all-purpose flour, ¾ cup Dutch-processed cocoa powder, 1 ½ teaspoons baking soda, and 1 teaspoon salt. Set that aside.
In another bowl, mix 2 cups granulated sugar, ½ cup vegetable oil, 2 large eggs (room temperature), and 2 teaspoons vanilla extract. Beat until smooth. Then add 1 cup buttermilk (also room temperature) and 1 cup hot coffee. The hot coffee blooms the cocoa and deepens the chocolate flavor. I know it sounds weird, but trust me on this. It’s a trick I picked up from a 2024 America’s Test Kitchen guide.
Slowly fold the dry ingredients into the wet mixture. Don’t overmix. A few lumps are fine. Overmixing develops gluten and makes the cake tough. I’ve done that mistake too many times. Pour the batter evenly into the pans and bake for 30-35 minutes. A toothpick inserted in the center should come out clean or with a few moist crumbs.
Let the cakes cool in the pans for 10 minutes, then transfer to a wire rack. Cool completely before frosting or adding the glass salt. A warm cake will melt the glass salt into a sticky mess.
Part 2: Making the Vanilla Glass Salt While the cake bakes, start the glass salt. You’ll need 1 cup granulated sugar, ¼ cup water, 1 tablespoon light corn syrup, 1 teaspoon vanilla bean paste, and 1 teaspoon flaky sea salt.
Line a baking sheet with a silicone mat or parchment paper. Don’t use wax paper—it will melt.
Combine sugar, water, and corn syrup in a small saucepan. Stir gently to dissolve the sugar. Then stop stirring. Clip a candy thermometer to the side and heat over medium-high heat. Once it reaches 300°F, remove from heat immediately.
Quickly stir in the vanilla bean paste. Be careful—the steam is hot. Then immediately pour the mixture onto the prepared baking sheet. Spread it thin with a spatula. While it’s still hot, sprinkle the flaky sea salt evenly over the surface.
Let it cool completely without touching it. This takes about 15-20 minutes. Once hard, break it into shards with your hands or a rolling pin. Store in an airtight container if you’re not using it right away. But honestly, it’s best fresh.
Assembling the Cake with the Vanilla Glass Salt Once the cake layers are cool, spread a layer of your favorite frosting between them. I prefer a simple dark chocolate ganache or a whipped vanilla buttercream. Don’t go too heavy on the frosting—the glass salt is the star here.
Place the top layer on. Then gently press the glass salt shards into the top and sides of the frosted cake. Do this right before serving. If you assemble it too early, the glass salt can absorb moisture from the frosting and lose its crunch. I learned that the hard way.
Common Mistakes When Making Vanilla Glass Salt (And How to Fix Them)
You might hit a few bumps, and that’s totally normal. I’ve had my share of fails. Here are the most common issues I’ve encountered and how to fix them.
Why Did My Glass Salt Turn Out Sticky? This usually means the sugar didn’t reach the hard crack stage. Your thermometer might be off. I always test mine in boiling water first. It should read 212°F. If it’s off, adjust your target temperature accordingly. Also, don’t stir the sugar while it’s boiling. Stirring introduces air bubbles and causes crystallization, which leads to a sticky texture.
How Do I Prevent the Cake from Sinking? A sinking cake is often due to overmixing or an oven temperature that’s too low. Use an oven thermometer to verify the actual temperature. Also, make sure your baking soda is fresh. Check the expiration date. An old leavening agent won’t give you the rise you need. I keep a new box on hand just for baking.
Can I Use a Different Salt? Absolutely. Flaky sea salt like Maldon is my favorite because it dissolves evenly and gives those big salt crystals. But you can also use kosher salt or even pink Himalayan salt. Just avoid fine table salt—it’s too salty and won’t provide the same texture.
Expert Tips for Customizing Your Chocolate Cake with Vanilla Glass Salt
Once you’ve mastered the base recipe, it’s fun to tweak it. I often experiment with different flavors and toppings. Here are a few variations I’ve tried and loved.
Adding Spices or Extracts to the Glass Salt Try infusing the glass salt with cinnamon, espresso powder, or orange zest. For cinnamon, add ½ teaspoon when you stir in the vanilla. It pairs beautifully with dark chocolate. I made a version with cardamom last Christmas, and it was a huge hit at my holiday party.
Pairing with Different Chocolate Cake Bases This vanilla glass salt works with nearly any chocolate cake recipe—devil’s food, red velvet, or even a gluten-free almond flour cake. The salt helps balance the sweetness. I’ve also used it on a vegan chocolate cake made with coconut oil. It still crunched up perfectly.
Using Vanilla Glass Salt as a Garnish Beyond Cakes Don’t limit yourself to cakes. I crush the glass salt into smaller pieces and sprinkle it over vanilla ice cream, brownies, or even oatmeal cookies. It adds that extra “wow” factor. I once topped a cheesecake with it, and my friends begged for the recipe.
FAQ: How to Make Chocolate Cake with Vanilla Glass Salt
Is it possible to make a low-sugar version of this chocolate cake with vanilla glass salt? Yes, but you’ll need to swap out the sugar for a low-calorie sweetener like erythritol or allulose. Keep in mind that the glass salt requires sugar to caramelize, so you might not get the same crunchy texture. I’ve tested it with monk fruit sweetener, and it turned out softer. It’s still tasty, but not exactly the same. If you’re diabetic or watching your sugar intake, consult your doctor first.
How long does the vanilla glass salt stay crunchy on the cake? It crunches best within the first 2-4 hours after assembly. If you refrigerate the cake overnight, the glass salt can soften from moisture. To keep it crunchy, store the glass salt separately and add it just before serving. I’ve also tried storing the assembled cake in a dry, cool place for up to 6 hours with good results.
Can I use store-bought vanilla glass salt instead of making my own? Sure, but homemade is fresher and more cost-effective. Store-bought versions often have preservatives or less vanilla flavor. If you’re short on time, check specialty baking stores or online retailers. Just look for one with real vanilla and flaky sea salt. Brands like Sweet’s are decent, but I still prefer my own.
⚠️ Warning: This cake is high in sugar. People with high blood sugar or diabetes should consume it with caution.
Making this chocolate cake with vanilla glass salt is one of those skills that looks fancy but is actually quite straightforward. The hardest part is waiting for the glass salt to cool without sneaking a piece. I still do that sometimes.
Remember to use fresh ingredients, keep an eye on your thermometer, and assemble the cake right before you eat it. That crunch is everything. I’ve shared this recipe with dozens of friends, and it’s always the first dessert to disappear at parties. Honestly, once you try it, you’ll understand why.
So go ahead. Grab your cocoa, your vanilla bean paste, and a good flaky salt. Follow these steps, and you’ll have a stunning, delicious cake that looks like it came from a fancy bakery. Just don’t forget to save a slice for yourself.





