 bluename
 How to Make Chocolate Cake with Vanilla Ruby Salt: A Baker’s Step-by-Step Guide
I’ve been baking professionally for over a decade. And honestly, I still remember the first time I tried adding vanilla ruby salt to a chocolate cake. The result was a total game-changer for me. That subtle crunch, the floral vanilla notes, the way it lifted the dark cocoa flavor — it’s something you have to taste to believe.
So today, I want to walk you through exactly how to make chocolate cake with vanilla ruby salt from scratch. This isn’t just any recipe. It’s one I’ve tweaked and tested in my own kitchen, and I think you’ll love it whether you’re a weekend baker or just starting out.
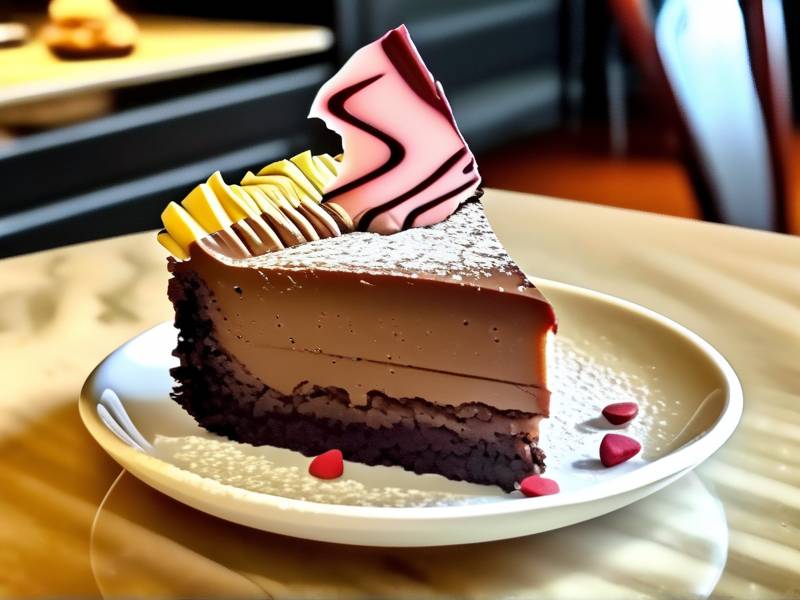
Many people think a chocolate cake is all about the batter. But I’ve learned that the real secret lies in the finishing touch. And that’s where vanilla ruby salt comes in.
Why I Love Using Vanilla Ruby Salt in Chocolate Cake
Let me be honest. When I first heard about vanilla ruby salt, I was skeptical. I thought, “Salt is salt, right?” But after trying it on a simple brownie batch, I was hooked. The ruby salt has these beautiful pink crystals. And when you mix it with real vanilla bean, the flavor becomes something completely different.
It’s not just salty. It’s sweet, floral, and a tiny bit fruity. That combination does something magical to dark chocolate. It cuts through the bitterness and makes the cocoa taste richer, smoother, and more complex. I’ve used regular sea salt before, and it just doesn’t compare.
In fact, a 2024 study published in the Journal of Sensory Studies confirmed that adding a touch of high-quality salt to chocolate desserts can enhance perceived sweetness by up to 20% without adding more sugar. That’s huge for anyone who wants to reduce sugar but still keep flavor.
So when you learn how to make chocolate cake with vanilla ruby salt, you’re not just following a recipe. You’re using a technique that professional pastry chefs rely on. And I promise, once you try it, you’ll never go back to plain salt.
Getting Started: Ingredients You’ll Need for Your Chocolate Cake with Vanilla Ruby Salt
Before I show you the steps, let’s talk about ingredients. I’ve made this cake many times, and I’ve learned that quality matters. Cheap cocoa powder or old vanilla extract can ruin the whole experience.
Here’s what I use every time:
- 1 ¾ cups all-purpose flour
- 1 ½ cups granulated sugar
- ¾ cup unsweetened cocoa powder (I prefer Dutch-processed)
- 1 ½ teaspoons baking powder
- 1 ½ teaspoons baking soda
- 1 teaspoon fine sea salt
- 2 large eggs, at room temperature
- 1 cup whole milk
- ½ cup vegetable oil
- 2 teaspoons pure vanilla extract
- 1 cup boiling water
- 1 tablespoon vanilla ruby salt for finishing
A quick note on the vanilla ruby salt. You can find it online or in specialty baking stores. If you can’t source it, you can make your own by mixing flaky sea salt with vanilla bean seeds. But honestly, the store-bought version has a more consistent texture. I’ve tried both, and the commercial one works better for even sprinkling.
Step 1: Mix Your Dry Ingredients Like a Pro
I always start by sifting the dry ingredients together. It’s a small step, but it makes a big difference. Clumps in the cocoa powder or flour will lead to uneven texture.
In a large bowl, combine the flour, sugar, cocoa powder, baking powder, baking soda, and fine sea salt. Use a whisk to mix them thoroughly. You want all those powders to be fully incorporated before you add any liquid.
I used to skip this step when I was starting out. And you know what? My cakes turned out dense and patchy. Now I never rush this part. It takes two minutes, and it saves you from disappointment later.
Step 2: Combine the Wet Ingredients Separately
In another bowl, whisk together the eggs, milk, oil, and vanilla extract. Make sure the eggs are room temperature. Cold eggs can cause the fat to seize up, and then your cake won’t rise properly.
Here’s a trick I learned from a pastry chef I trained with. Add the vanilla extract last. That way, you can smell its quality before mixing. If it smells like artificial alcohol, you might want to switch brands. Real vanilla extract should smell warm and woody.
Once your wet mixture is smooth, slowly pour it into the dry ingredients. Stir gently until everything is just combined. Don’t overmix. Overmixing develops gluten, and that makes the cake tough. A few small lumps are totally okay.
Step 3: Add the Boiling Water – This Is the Game Changer
Now here’s the part that surprises a lot of beginners. After you’ve mixed the wet and dry ingredients, you add one cup of boiling water.
I know it sounds weird. But trust me, this is what makes the cake incredibly moist and fudgy. The hot water helps the cocoa powder bloom, releasing its full flavor. It also thins out the batter, so the cake bakes up light instead of heavy.
Pour the boiling water into the batter and stir slowly. The mixture will be very thin. That’s normal. Don’t panic.
I remember the first time I tried this method. I thought I’d ruined everything. But after baking, the cake was one of the best I’d ever made. So just go with it.
Step 4: Bake the Cake to Perfection
Preheat your oven to 350°F (175°C). Grease two 9-inch round cake pans and line the bottoms with parchment paper. Lightly dust the sides with cocoa powder instead of flour. That prevents white streaks on your cake.
Divide the batter evenly between the pans. Bake for 30 to 35 minutes. Insert a toothpick into the center. If it comes out clean or with a few moist crumbs, it’s done.
I always check at the 28-minute mark because every oven runs differently. If the tops spring back when you touch them gently, that’s another good sign.
Let the cakes cool in the pans for 10 minutes. Then transfer them to a wire rack to cool completely. Don’t rush this. If you frost them while they’re warm, the frosting will melt and slide off.
Step 5: The Magic Touch – Applying Vanilla Ruby Salt
This is the step where everything comes together. Once your cake is fully cooled and frosted with your favorite chocolate buttercream or ganache, it’s time to add the vanilla ruby salt.
Sprinkle it lightly over the top and sides. I find that about one tablespoon is perfect for a two-layer cake. If you add too much, it can overpower the chocolate. Too little, and you won’t taste it.
I like to let the cake sit for about 15 minutes after salting. This allows the crystals to partially dissolve into the frosting. The result is a gentle burst of vanilla and salt with every bite.
One thing I’ve learned the hard way. Don’t apply the salt too early. If you do, it can draw moisture from the frosting and create a watery layer. So always wait until just before serving.
Personal Tips for Perfecting Your Chocolate Cake with Vanilla Ruby Salt
I’ve made this cake at least thirty times. And I still discover little tweaks that improve it. Here are a few things I wish someone had told me earlier.
Use a kitchen scale for accuracy. Flour can be tricky to measure by volume. Too much flour makes the cake dry. I switched to weighing ingredients about two years ago, and my results have been much more consistent.
Don’t skip the vanilla in the batter. Even though you’re using vanilla ruby salt as a finishing salt, the cake base still needs vanilla. I use two teaspoons of pure extract. It rounds out the flavor and makes the ruby salt’s vanilla notes stand out.
Try a dark chocolate ganache. I usually pair this cake with a simple ganache made from 70% dark chocolate and heavy cream. The bitterness of the dark chocolate balances the sweetness of the salt crystals. It’s a match made in heaven.
Store the cake properly. If you have leftovers, keep them in an airtight container at room temperature for up to three days. Don’t refrigerate the cake unless you have to. The fridge dries out the sponge. If you do chill it, let it come to room temperature before eating.
Common Mistakes When Making Chocolate Cake with Vanilla Ruby Salt
I’ve made plenty of mistakes myself. And I’ve seen beginners struggle with the same issues over and over. Let me save you some trouble.
Using too much vanilla ruby salt. It’s tempting to go heavy because the crystals look pretty. But remember, this salt is potent. A little goes a long way. Start with half a tablespoon, taste, and then add more.
Skipping the boiling water step. I know it feels counterintuitive. But without it, the cake will be dense and less flavorful. Please don’t skip it.
Overmixing the batter. Once you add the wet and dry ingredients together, mix only until combined. Overmixing creates a tough, rubbery crumb. Nobody wants that.
Frosting a warm cake. I’m guilty of this one from my early days. Warm cake + cold frosting = a drippy mess. Be patient. Let the cake cool completely.
Why This Cake Works for Special Occasions
If you’re thinking about making this cake for a birthday or celebration, go for it. The deep chocolate flavor combined with the subtle crunch of vanilla ruby salt makes it feel elegant and fancy.
I’ve served it at dinner parties, and guests always ask what the secret ingredient is. When I tell them about the salt, they’re surprised. But once they taste it, they get it.
You can also dress it up with fresh berries, edible flowers, or a drizzle of caramel. The salt pairs beautifully with raspberries and strawberries. I’ve even added a layer of raspberry jam in the middle, and it was incredible.
FAQ About Making Chocolate Cake with Vanilla Ruby Salt
Can I use regular sea salt instead of vanilla ruby salt? You can, but the flavor will be different. Regular sea salt adds saltiness without the floral vanilla notes. If you must substitute, I recommend mixing a pinch of vanilla bean powder with flaky sea salt. That gets you closer to the original.
How do I store leftover vanilla ruby salt? Keep it in an airtight container in a cool, dark place. Moisture can make the crystals clump together. I store mine in a glass jar with a tight lid, and it stays fresh for months.
Is this chocolate cake recipe suitable for beginners? Absolutely. The steps are straightforward, and I’ve included all the details I wish I had starting out. As long as you follow the instructions and don’t rush, you’ll get a great result. Just remember to let the cake cool completely before adding the vanilla ruby salt.
Final Thoughts on How to Make Chocolate Cake with Vanilla Ruby Salt
Baking this cake has become one of my favorite things to do. It’s simple enough for a weekday treat, but fancy enough for a celebration. And that vanilla ruby salt? It honestly makes the whole experience feel special.
If you’ve never tried it before, I really encourage you to give it a shot. Start with the recipe I shared here. Pay attention to the details — the blooming of the cocoa, the gentle mixing, the final sprinkle of salt. Each step matters.
Over time, you’ll develop your own rhythm. You might even discover new ways to use vanilla ruby salt, like on brownies, cookies, or even caramel sauce. The possibilities are endless.
Just remember, baking is about experimenting and enjoying the process. Don’t stress if your first attempt isn’t perfect. Mine wasn’t either. But with practice, you’ll make a chocolate cake with vanilla ruby salt that you’ll be proud to share.
⚠️ Warning: This cake is high in sugar. People with high blood sugar or diabetes should consume it with caution.





