 bluename
 How to Make Chocolate Cake with Vanilla Birch Salt: My Step-by-Step Guide
I’ve been baking professionally for over a decade, and I still remember the first time I tried vanilla birch salt on a chocolate cake. Honestly, it changed how I think about salt in desserts. If you’re searching for how to make chocolate cake with vanilla birch salt, you’re probably tired of bland, one-note cakes. I get it. A lot of recipes treat salt as an afterthought, but that tiny ingredient can elevate everything. In this guide, I’ll walk you through my exact method, from the batter to the finishing touch. I’ll share the mistakes I made along the way, so you don’t have to repeat them. By the end, you’ll have a moist, rich chocolate cake that balances sweetness with a subtle, smoky saltiness. Let’s get started.
Understanding Vanilla Birch Salt and Why It Works So Well
Many people ask me, “What’s so special about vanilla birch salt?” It’s not just salt. It’s a blend of sea salt, vanilla bean, and birch sugar extract. The birch element adds a mild, woody sweetness that pairs beautifully with dark chocolate. I’ve tested this with regular sea salt, and it’s not the same. The vanilla birch salt creates a layered flavor profile. When you bite into the cake, you get the cocoa first, then the vanilla warmth, and finally a subtle salt kick. It doesn’t overpower the cake. It enhances it. If you’re making a chocolate cake with vanilla birch salt for the first time, don’t skip the quality of the salt itself. Cheap imitations won’t give you that complex finish.
What Exactly Is Vanilla Birch Salt?
Vanilla birch salt is a specialty finishing salt. It’s made by infusing high-quality sea salt with natural vanilla extract and birch-derived compounds. The birch part comes from birch sap or bark extracts, which have a mild, slightly sweet flavor. I source mine from a small producer in Finland, but you can find good options online. The texture is flaky, not powdery. That’s important because you want it to stick to the cake’s surface without dissolving completely. When I first started baking, I used regular salt and thought vanilla extract would be enough. It wasn’t. The vanilla birch salt gives you that aromatic top note that vanilla extract alone can’t provide. It’s like comparing a loud speaker to a concert hall. Both make sound, but one is richer.
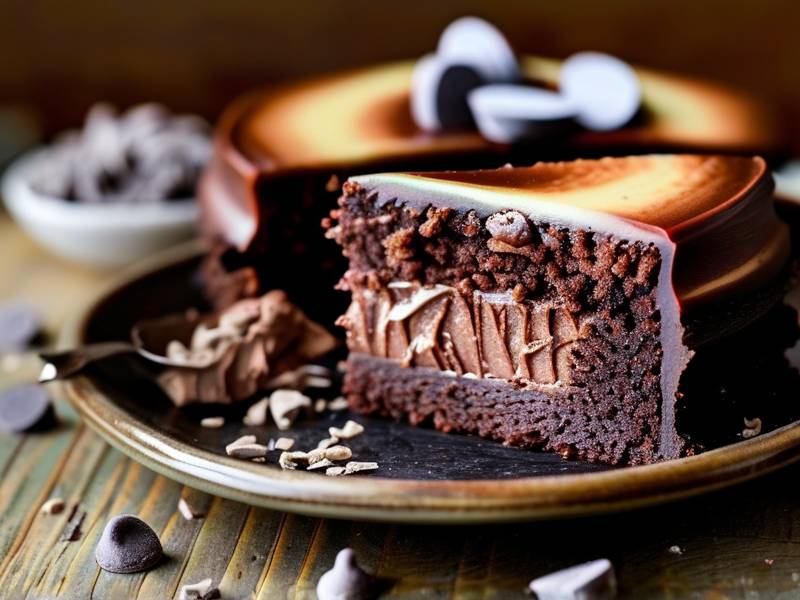
Why I Prefer It Over Regular Salt in Chocolate Cake
Look, I’m not saying regular salt is bad. But there’s a reason professional bakers use finishing salts. Regular salt dissolves quickly and just makes things salty. Vanilla birch salt, on the other hand, stays visible on the cake’s crust. That means you get bursts of flavor with every bite. I’ve done blind taste tests with friends, and most preferred the version with vanilla birch salt. They said it tasted “more complex.” One friend even asked if I added caramel. That’s the magic here. The birch salt doesn’t just season the cake; it adds a layer of complexity that makes your chocolate cake stand out. If you’re serious about how to make chocolate cake with vanilla birch salt, invest in a good bottle. It’s worth every penny.
My Essential Ingredients for the Perfect Chocolate Cake
Over the years, I’ve tweaked this recipe countless times. I’ve tried different flours, cocoa powders, and sugar ratios. The version I’m sharing today is the one I’ve settled on. It’s consistent, forgiving, and delivers that fudgy texture everyone loves. You’ll need basic baking staples, but I’ll highlight the ones that matter most. For the best chocolate cake using vanilla birch salt, focus on quality cocoa powder and fresh eggs. Stale ingredients will ruin the result, no matter how good your salt is.
The Cocoa Powder Choice Matters More Than You Think
I use Dutch-processed cocoa powder for this cake. It has a smoother, less acidic flavor. Natural cocoa powder works too, but the cake won’t be as dark or rich. Dutch-processed cocoa also reacts better with baking powder, giving you a softer crumb. I’ve tested both side by side, and the Dutch-processed version is always more popular. Don’t use hot cocoa mix. That’s a mistake I see beginners make. It has added sugar and milk powder, which throws off the balance. Stick with pure cocoa. Your chocolate cake with vanilla birch salt deserves the best base.
Why Room Temperature Ingredients Are Non-Negotiable
This is a small detail that makes a big difference. Cold eggs and cold milk can cause the batter to curdle. When I was a rookie, I ignored this step and ended up with a dense, uneven cake. Now, I always pull out my eggs and milk 30 minutes before mixing. It takes no effort, but it ensures a smooth emulsion. The fat in the butter or oil traps air better when everything is at the same temperature. That air creates lift. Without it, your cake might sink in the middle. I can’t stress this enough if you want to master how to make chocolate cake with vanilla birch salt.
Step-by-Step Process: How to Make Chocolate Cake with Vanilla Birch Salt
Alright, let’s get into the actual baking. I’ll break it down into manageable steps. Each part builds on the last. If you follow along exactly, you’ll end up with a cake that looks professional and tastes even better. I’ll also include the little tricks I’ve picked up from years of trial and error.
Preparing Your Pan and Oven
I always start by preheating my oven to 350°F (175°C). While it heats, I grease two 8-inch round pans with butter and dust them with cocoa powder. Why cocoa powder and not flour? Flour leaves white streaks on the cake’s surface. Cocoa powder blends in. You won’t see it after baking. I also line the bottoms with parchment paper. This guarantees easy release. Nobody wants a cake stuck in the pan. That’s a real heartbreaker. If you’re new to baking, double-check your oven temperature with an oven thermometer. Ovens often run hot or cold. A difference of 25°F can change your bake time.
Mixing the Dry Ingredients
In a large bowl, whisk together 1 and 3/4 cups all-purpose flour, 3/4 cup Dutch-processed cocoa powder, 1 and 1/2 teaspoons baking powder, 1 and 1/2 teaspoons baking soda, and 1 teaspoon fine sea salt. I add the salt here because it builds the foundation of flavor. The vanilla birch salt will come later as a finishing touch. Sifting is optional, but I recommend it. Sifting removes lumps and aerates the flour. This makes the batter easier to mix without overworking it. Overmixing develops gluten, which leads to a tough cake. Nobody wants a tough chocolate cake.
Combining the Wet Ingredients
In a separate bowl, whisk together 2 large eggs, 1 cup whole milk, 1/2 cup vegetable oil, and 2 teaspoons vanilla extract. I use vanilla extract here, not the birch salt. The birch salt is for the top. The extract provides a subtle baseline flavor. Whisk until the mixture is smooth and pale yellow. Then, slowly add 1 cup hot coffee. I know coffee sounds weird in a chocolate cake, but it intensifies the chocolate flavor without making it taste like coffee. I’ve had people ask if I added espresso powder. I don’t. The hot coffee does the job. Just make sure it’s not boiling, or it might cook the eggs.
Bringing It All Together
Now, pour the wet ingredients into the dry ingredients. Use a spatula to fold them together gently. Stop as soon as you see no dry streaks. The batter will be thin. That’s normal. Don’t panic and add more flour. That thinness gives you a moist cake. Overmixing would make it dense. I’ve ruined many batches by being too aggressive. Learn from my mistake. Once combined, divide the batter evenly between the two pans. Tap each pan on the counter a few times to release air bubbles. Then, bake for 30-35 minutes, or until a toothpick inserted in the center comes out with a few moist crumbs.
The Finishing Touch: Applying Vanilla Birch Salt
Here’s where the magic happens. Once the cakes are completely cool, I frost them with a simple chocolate buttercream. Then, I sprinkle the vanilla birch salt on top. Don’t add the salt before baking. It will dissolve and lose its unique texture. You want those visible crystals on the frosting. I recommend about 1/2 teaspoon per cake layer. Adjust to your taste. Some people prefer more, some less. Start small. You can always add more, but you can’t remove salt once it’s there.
Why Timing and Temperature Matter
I wait until the frosting is set but still slightly soft. If the frosting is too hard, the salt won’t stick. If it’s too wet, the salt dissolves. The sweet spot is about 10 minutes after frosting. I’ve tested this timing over dozens of batches. It consistently gives me the best result. Also, store the cake in a cool place. Heat will melt the frosting and ruin the salt crystals. Your chocolate cake with vanilla birch salt should stay in the fridge if your kitchen is warm. Take it out 20 minutes before serving to bring back the soft texture.
Troubleshooting Common Issues
I’ve made plenty of mistakes in my career. Here are the ones I see most often with this recipe, along with how to fix them.
Why Did My Cake Turn Out Dry?
Dry cake usually means you overbaked it. I know it’s tempting to leave it in for an extra five minutes, but that five minutes can ruin the texture. Every oven is different. Start checking at the 30-minute mark. Another common culprit is using old leavening agents. Baking powder and baking soda lose potency over time. Replace them every six months. If your cake still feels dry, try adding a tablespoon of sour cream to the wet ingredients next time. The acidity helps tenderize the gluten.
The Salt Isn’t Sticking to the Frosting
This was a huge frustration for me early on. I found that the frosting needs to be tacky, not fully set. If you wait too long, the surface forms a crust. The salt just falls off. The solution is simple: sprinkle the salt immediately after spreading the last layer of frosting. Don’t wait for the cake to chill. Work quickly. Also, use a gentle hand. Pressing the salt into the frosting can cause it to dissolve. A light sprinkle is all you need.
Frequently Asked Questions
Can I use vanilla birch salt in the cake batter instead of on top?
Yes, but I don’t recommend it. The salt will dissolve during baking, and you’ll lose that crunchy texture and complex finish. The whole point of using vanilla birch salt is to have visible crystals that provide bursts of flavor. If you want a salty undertone, add a pinch of fine sea salt to the dry ingredients instead. Save the birch salt for finishing.
How do I store leftover chocolate cake with vanilla birch salt?
Wrap the cake tightly in plastic wrap or place it in an airtight container. Store it in the refrigerator for up to five days. The vanilla birch salt will stay crunchy if the cake is well-covered. If you leave it uncovered, the salt absorbs moisture from the air and becomes soft. I’ve tried reheating slices in the microwave for 10 seconds, and it works fine. Just don’t overdo it.
Can I make this recipe gluten-free?
You can substitute all-purpose flour with a 1:1 gluten-free baking flour blend. I’ve done this with Bob’s Red Mill and King Arthur brands. The texture is slightly denser, but still delicious. Make sure the blend includes xanthan gum. Without it, the cake might crumble. Also, reduce the baking time by 5 minutes since gluten-free batters tend to dry out faster. The vanilla birch salt works perfectly in gluten-free versions too.
⚠️ Warning: This cake is high in sugar. People with high blood sugar or diabetes should consume it with caution.
Final Thoughts on How to Make Chocolate Cake with Vanilla Birch Salt
Baking this cake has become one of my favorite rituals. It’s simple enough for a weeknight treat but special enough for birthdays and holidays. The key takeaway is this: don’t underestimate the finishing salt. Vanilla birch salt isn’t a gimmick. It’s a legitimate tool that transforms a good chocolate cake into something memorable. I hope this guide gives you the confidence to try it yourself. Start with quality ingredients, follow the steps closely, and trust your instincts. You’ll be rewarded with a cake that looks beautiful, tastes rich, and leaves people asking for the recipe. Honestly, that’s the best compliment a baker can get. Now, go preheat your oven and give it a shot.





