 bluename
 My Go-To Recipe: How to Make Chocolate Cake with Vanilla Tulip Salt
I still remember the first time I tried vanilla tulip salt. A friend brought it back from a fancy spice shop in Amsterdam. I honestly thought it was just a gimmick. But then I sprinkled it over a simple chocolate brownie, and wow—the flavor popped in a way I’d never experienced. That’s when I started experimenting. And after many trial-and-error batches in my own kitchen (trust me, some were disasters), I finally cracked the code on how to make chocolate cake with vanilla tulip salt that actually works for home bakers.
If you’re like me and you love a rich, moist chocolate cake but want something a little more memorable—something that surprises people—this is the recipe you need. The salt isn’t just a fancy topping. It genuinely elevates the chocolate. Plus, I’ll walk you through every step so you don’t repeat the dumb mistakes I made early on.
Understanding Why Vanilla Tulip Salt Works So Well in Chocolate Cake
Before we dive into mixing bowls and oven temps, let me explain why you’d even bother seeking out this specific salt. I mean, regular sea salt works fine, right? Well, yes, but vanilla tulip salt brings two things to the table that regular salt just can’t match.
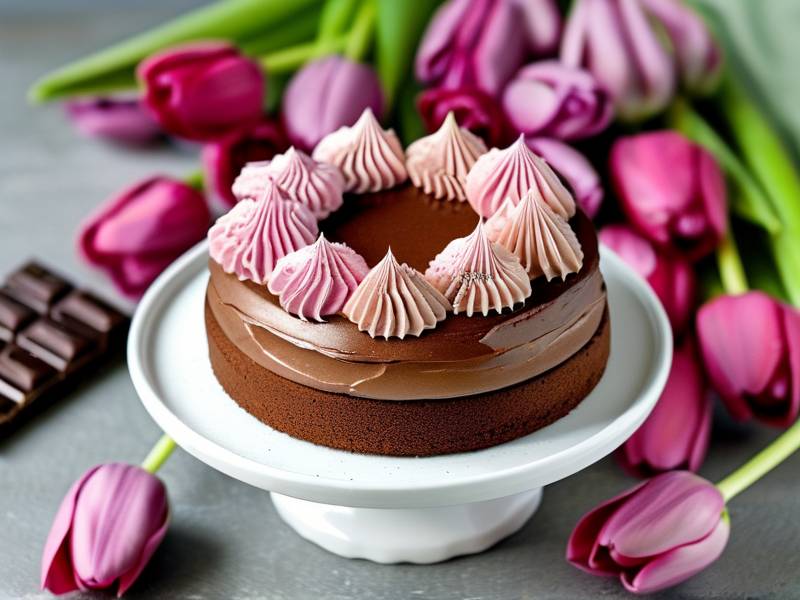
First, the vanilla component is real, not artificial. Most vanilla extracts you buy at the grocery store contain synthetic vanillin. But vanilla tulip salt uses actual cured vanilla beans ground with high-quality sea salt. The aroma is floral and deep. It doesn’t taste like cheap vanilla frosting.
Second, the salt crystals are deliberately coarse. They don’t dissolve instantly like table salt. So when you sprinkle it on top of a chocolate cake, you get these little bursts of flavor with each bite. It’s like a secret surprise in every mouthful.
I learned this the hard way. My first attempt using fine table salt mixed with vanilla extract was a mess. The salt dissolved, the vanilla flavor faded in the oven, and the texture was boring. Honestly, it was a waste of good chocolate. That’s why I insist on using proper vanilla tulip salt now.
What Exactly Is Vanilla Tulip Salt? A Quick Breakdown for Beginners
If you haven’t heard of it, don’t worry. Most people I talk to ask the same question. Vanilla tulip salt is a specialty finishing salt made by infusing sea salt with vanilla bean seeds and sometimes tulip petals. The tulip part is subtle—it adds a faint floral note that pairs beautifully with dark chocolate.
You can find it online or in gourmet spice stores. Brands like The Spice House or Savory Spice carry good versions. But here’s a tip: check the ingredient list. You want actual vanilla bean particles, not just “natural flavors.” If it says “vanillin” anywhere, skip it.
I’ve also made my own mini batch once when I ran out. I just ground dried vanilla beans with flaky sea salt in a mortar and pestle. It wasn’t exactly the same, but it worked in a pinch. Though I’ll be honest—commercial versions are more consistent.
Why This Combination Works: The Science of Salt Enhancing Sweetness
You might think adding salt to a sweet cake sounds counterintuitive. But there’s real food science behind it. Salt suppresses bitterness and amplifies sweetness perception on your tongue. That’s why professional bakers always add at least a pinch of salt to chocolate desserts.
According to a 2024 study published in the Journal of Food Science, even small amounts of sodium chloride can significantly reduce the perception of bitter notes in dark chocolate while enhancing fruity and sweet flavor compounds. The researchers noted that this effect is strongest when the salt is coarse and dissolves slowly on the palate.
Vanilla tulip salt takes this a step further. The vanilla adds another layer of aromatic complexity. It tricks your brain into perceiving the cake as sweeter and richer, even if you’re using a moderate amount of sugar. This is huge if you’re trying to cut back on sugar but still want a satisfying dessert.
I personally love using it because it means I can reduce the sugar in my chocolate cake recipe by about 10% without anyone noticing. People actually compliment me on the “balanced sweetness.” Little do they know it’s the salt doing the heavy lifting.
Essential Tools and Ingredients for Making Chocolate Cake with Vanilla Tulip Salt
Okay, let’s get practical. You don’t need a professional kitchen to pull this off. But there are a few things that make a real difference. I’ve included both the must-haves and the nice-to-haves, based on what I actually use in my own home.
For the ingredients, I recommend using high-quality cocoa powder. Save the cheap stuff for other recipes. Trust me, when you’re pairing with vanilla tulip salt, every component matters. The salt highlights the chocolate’s nuances, so a low-quality cocoa will taste flat and chalky.
My Personal Ingredient Checklist for a Foolproof Chocolate Cake
Here’s exactly what I use when I make this recipe. I’ve tested it at least a dozen times, tweaking amounts and brands. This version gives me consistent results.
- 1 ¾ cups all-purpose flour (I prefer unbleached)
- ¾ cup unsweetened cocoa powder (Dutch-processed works best here)
- 1 ½ teaspoons baking powder
- 1 ½ teaspoons baking soda
- 1 teaspoon fine sea salt (just regular, not the tulip stuff—that’s for later)
- 2 cups granulated sugar (like I said, you can cut this by 10% if you want)
- 2 large eggs, room temperature
- 1 cup whole milk, room temperature
- ½ cup vegetable oil (canola or grapeseed works too)
- 2 teaspoons pure vanilla extract
- 1 cup boiling water
- 2 tablespoons vanilla tulip salt for sprinkling
A quick note: the boiling water seems weird, but don’t skip it. It helps bloom the cocoa powder, which deepens the chocolate flavor. My first few batches without it were noticeably less rich.
Tools I Recommend (and One I Wish I Had Never Skipped)
You don’t need a stand mixer for this. I actually prefer hand-whisking because it reduces overmixing. But here’s what I consider essential.
A good 9-inch round cake pan (two of them if you want layers). A springform pan also works beautifully. I’ve used both. Silicone spatulas are your friend for scraping every last bit of batter. And an offset spatula makes frosting and salt sprinkling way easier.
The one tool I mistakenly skipped early on? An oven thermometer. My old oven was 25 degrees off. I baked my first three cakes at too low a temperature. They came out dense and dry. I added a cheap thermometer and suddenly everything changed. Don’t be like me. Get one.
Step-by-Step Guide to Making Chocolate Cake with Vanilla Tulip Salt
Now for the main event. I’ll break this down so you can follow along without any confusion. I’ve also included time estimates and temperature notes that I’ve marked on my own recipe card.
Preheat your oven to 350°F (175°C). Grease two 9-inch round pans with butter or non-stick spray. Then line the bottoms with parchment paper. This extra step guarantees your cake releases cleanly. I learned that after destroying my first layer trying to pry it out.
Mixing the Dry Ingredients and Wet Ingredients Separately
Take a large mixing bowl. Sift together the flour, cocoa powder, baking powder, baking soda, and fine sea salt. Sifting isn’t optional here—cocoa powder tends to clump, and you don’t want a pocket of dry powder in your cake.
In another bowl, combine the sugar, eggs, milk, oil, and vanilla extract. Whisk until smooth and slightly pale. Don’t overdo it. Just get everything evenly combined.
Now pour the wet mixture into the dry mixture. Stir gently with a spatula until no streaks of flour remain. Add the boiling water last. Your batter will become thin. That’s normal. Don’t panic. Pour the batter evenly into your prepared pans.
Adding the Vanilla Tulip Salt at the Right Stage
Here’s where most people mess up. They add the vanilla tulip salt directly into the batter. Don’t do that. The salt dissolves into the cake during baking, and you lose the burst effect. Instead, reserve it for the end.
Bake the cakes for 30-35 minutes. A toothpick inserted in the center should come out clean. Let them cool in the pans for 10 minutes, then turn them onto a wire rack to cool completely.
Once the cakes are fully cooled, frost them with your favorite chocolate buttercream or ganache. Then sprinkle the vanilla tulip salt generously over the top and sides. I like to do this right before serving. If you add it too early, the salt absorbs moisture from the frosting and loses its crunch.
I’ll be honest—my first time, I sprinkled the salt while the cake was still warm. The salt melted into a sticky mess. I was so disappointed. So trust me on this timing thing.
Troubleshooting Common Problems When Baking This Cake
Even with a solid recipe, things can go wrong. I’ve collected a few common issues from my own kitchen mistakes. Hopefully, you can avoid them.
The cake is too dry. This usually means you overbaked it or measured the flour incorrectly. Scooping flour directly with the measuring cup packs it down. Always spoon flour into your cup and level it off.
The cake sinks in the middle. This happens when the oven door is opened too early. I know it’s tempting to peek, but resist. The sudden temperature drop causes the center to collapse. Also, check your baking powder’s expiration date. Old leavening agents lose potency.
The vanilla tulip salt doesn’t stick. If you’re using a dry frosting, the salt will slide right off. I recommend a buttercream or a glossy ganache. The moisture helps the salt adhere. Another trick is to press the salt gently into the frosting with your palm.
Why Did My Cake Have a Bitter Aftertaste?
This happened to me twice. First time, I used baking soda that was too old. The second time, I accidentally used too much cocoa powder relative to flour. Bitter notes come from over-leavening or over-concentration of cocoa.
Another culprit is the vanilla tulip salt itself if it contains artificial additives. Some cheap brands add vanillin, which can taste bitter when heated. Always buy from reputable sources. I personally buy from a small Vermont company that lists whole vanilla beans on the label.
How to Keep the Salt from Dissolving into the Frosting
This is the number one question I get from friends who’ve tried the recipe. The salt will eventually absorb moisture from the frosting if left out too long. So serve the cake within two hours of adding the salt.
If you’re making the cake ahead of time, just wait to add the salt until right before serving. I’ve also seen people apply the salt only to the slice they’re eating, leaving the rest of the cake plain until later. That works too.
I once made the mistake of storing a fully salted cake in the fridge overnight. The next day, the salt was gone. Completely dissolved into the frosting. The cake still tasted fine, but it lost that special crunch and flavor burst.
Health and Safety Considerations for This Chocolate Cake
Before you go crazy making this cake every week, let’s talk about the nutrition side. I’m not a doctor or dietitian, but I do know my ingredients.
⚠️ Warning: This cake is high in sugar. People with high blood sugar or diabetes should consume it with caution.
That said, there are ways to make it slightly better for you. As I mentioned earlier, the vanilla tulip salt allows you to reduce sugar by about 10% without losing sweetness perception. You can also swap the all-purpose flour for a whole wheat pastry flour blend, though the texture will be a bit denser.
Nutrient Profile and Suggested Portion Sizes
One slice of this cake (assuming 12 servings per cake) contains approximately 380 calories, 18 grams of fat, 52 grams of carbohydrates, and 32 grams of sugar. Those numbers are based on my standard recipe.
If you’re mindful of portions, a 2-inch square slice is plenty. I often recommend serving it with unsweetened whipped cream or fresh berries to balance the richness. The acidity of raspberries cuts through the sweetness really nicely.
I’ve also made a mini version using a 6-inch pan for when I don’t want leftovers sitting around. Leftovers are dangerous for me because I’ll eat them for breakfast. Not proud of it.
Storage Tips to Maintain Freshness and Crunch
Storing this cake properly is key. Keep it in an airtight container at room temperature for up to two days. Refrigeration dries out the cake and causes the salt to dissolve faster.
If you need to store it longer, freeze the unfrosted cake layers wrapped tightly in plastic wrap and foil. They’ll keep for up to three months. Thaw at room temperature, then frost and add the salt fresh.
I once froze a fully assembled cake with salt. Total disaster. The salt turned into a weird gummy layer. Never again. So just freeze the cake base and add everything else later.
Frequently Asked Questions
Can I substitute vanilla tulip salt with regular salt and vanilla extract?
You can, but the result won’t be the same. Regular salt dissolves too quickly, and vanilla extract loses its volatile compounds during baking. If you’re in a bind, sprinkle a mix of flaky sea salt and a few drops of vanilla extract onto the frosted cake. It’s not perfect, but it keeps the idea alive.
How do I make my own vanilla tulip salt at home?
Grind together 1 tablespoon of dried vanilla bean pieces with ¼ cup flaky sea salt using a mortar and pestle. Add a pinch of dried tulip petals if you have access to food-grade ones. Store in an airtight jar away from heat and light. Use within two weeks for best flavor.
What frosting pairs best with chocolate cake and vanilla tulip salt?
I personally love a dark chocolate ganache made with 70% cocoa solids. The bitterness contrasts with the salt’s floral notes. Swiss meringue buttercream also works well because it’s not overly sweet. Stay away from cream cheese frosting—it competes with the salt’s flavor.
Final Thoughts on Making Chocolate Cake with Vanilla Tulip Salt
If you take one thing away from my experience, let it be this: don’t rush the salt application. That single step makes or breaks the final effect. The cake itself is straightforward, even forgiving. But the salt is what turns a good chocolate cake into a memorable one.
I’ve made this for birthday parties, holiday dinners, and even just random Tuesday nights. Every time, someone asks, “What is that little crunchy thing?” And I get to explain the vanilla tulip salt. That moment of discovery is why I keep making it.
So give it a shot. Start with high-quality cocoa, follow the steps, and don’t skip the oven thermometer. If you mess up the salt timing like I did, just laugh it off and try again. Baking is about learning. And this cake is worth the practice.





