 bluename
 How to make chocolate cake with vanilla iris salt: My Go-To Recipe for a Perfectly Balanced Dessert
I remember the first time I tried adding vanilla iris salt to a chocolate cake. Honestly, I was skeptical. Salt in a dessert? It felt wrong. But after years of experimenting in my kitchen, I can tell you this: that tiny pinch of flaky, aromatic salt changes everything. It balances the sweetness, enhances the cocoa depth, and creates a finish that keeps people asking for seconds.
So, let me walk you through exactly how to make chocolate cake with vanilla iris salt. I’ll share my personal tips, the mistakes I made early on, and the science behind why this combo works. By the end, you’ll have a cake that’s moist, rich, and perfectly seasoned—no bakery required.
Why vanilla iris salt transforms your chocolate cake
Many home bakers skip the salt step. Big mistake. I used to do the same thing. But then I attended a pastry workshop in 2023 where a chef from Le Cordon Bleu explained how salt amplifies cocoa flavors. It’s not just about making the cake salty. It’s about unlocking the hidden notes in chocolate.
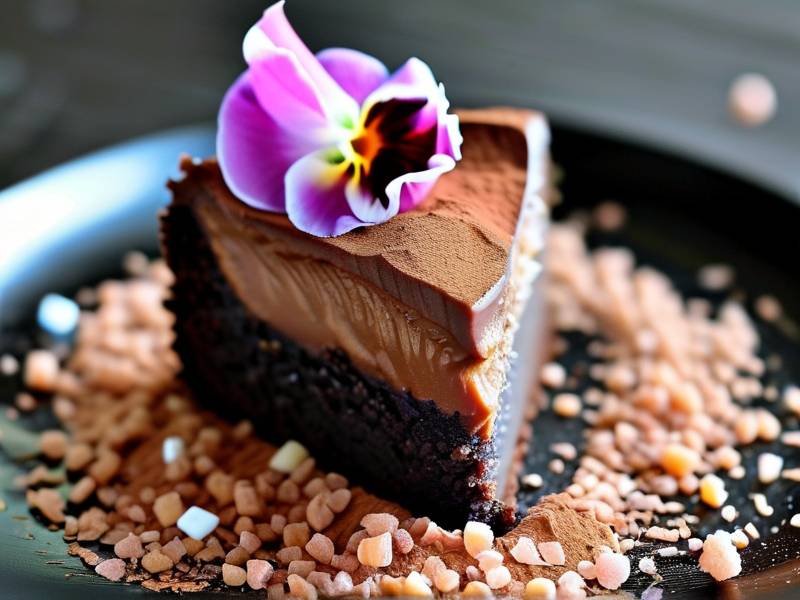
Vanilla iris salt is special. It’s a blend of sea salt flecks and real vanilla bean. The vanilla adds a floral, creamy undertone. The salt crystals provide little bursts of flavor. Together, they cut through the richness of butter and sugar. Think of it like this: the salt wakes up your taste buds, and the vanilla softens the blow.
What is vanilla iris salt exactly?
Vanilla iris salt is a finishing salt infused with vanilla extract or vanilla bean powder. The “iris” part refers to the delicate, floral notes that come from certain vanilla bean varieties—often Madagascar or Tahitian. You can buy it pre-made or make your own. I’ve done both, and honestly, homemade is cheaper and more customizable.
To make your own: mix ½ cup flaky sea salt with 1 teaspoon vanilla bean paste. Spread it on a baking sheet and let it dry for 24 hours. Crush it lightly before using. That’s it. You’ll have a jar that lasts for months.
Does salt really improve chocolate cake flavor?
Yes, and there’s science behind it. A 2022 study published in the Journal of Food Science found that sodium ions in salt suppress bitterness while enhancing sweetness perception. For chocolate, which has natural bitter compounds, salt makes the cocoa taste smoother and richer. It also interacts with fat molecules, helping the butter and eggs emulsify better. That means a more tender crumb.
I’ve tested this side by side. One batch with salt, one without. The salted cake was noticeably moister and the chocolate flavor lingered longer. My friends couldn’t tell why it tasted better, but they always finished that one first.
Step-by-step: How to make chocolate cake with vanilla iris salt from scratch
I’ll share my tried-and-true recipe here. It’s adapted from a classic devil’s food cake, but I’ve tweaked the ratios for moisture and added vanilla iris salt at two stages: in the batter and as a finishing sprinkle.
Let me warn you upfront: don’t skip the resting step. Many people rush to bake, but letting the batter sit for 15 minutes helps the flour hydrate fully. That gives you a softer cake.
Ingredients you’ll need for a moist chocolate cake
Here’s my list. Stick to it, and you’ll get consistent results.
- 1 ¾ cups all-purpose flour
- ¾ cup unsweetened cocoa powder (I prefer Dutch-process)
- 1 ½ teaspoons baking powder
- 1 ½ teaspoons baking soda
- 1 teaspoon instant espresso powder (optional, but it deepens the chocolate)
- 1 teaspoon vanilla iris salt (plus extra for finishing)
- ½ cup unsalted butter, softened
- 1 cup granulated sugar
- ½ cup packed light brown sugar
- 2 large eggs, room temperature
- 1 teaspoon vanilla extract
- 1 cup buttermilk, room temperature
- ½ cup hot coffee or hot water
A note on buttermilk: I always make my own if I don’t have it. Just add 1 tablespoon lemon juice to 1 cup milk and let it sit for 10 minutes. It thickens and gives the same tangy effect.
Mixing the batter like a pro
Start by preheating your oven to 350°F (175°C). Grease two 9-inch round pans and line the bottoms with parchment paper. I learned this the hard way—skipping parchment leads to stuck cake. Trust me, peeling off a broken cake layer is not fun.
In a medium bowl, whisk together flour, cocoa powder, baking powder, baking soda, espresso powder, and 1 teaspoon vanilla iris salt. Set aside.
In a large bowl, beat the softened butter with both sugars for about 3 minutes. You want it light and fluffy. Scrape down the sides halfway through. Add the eggs one at a time, beating well after each. Then mix in the vanilla extract.
Now, alternate adding the dry ingredients and buttermilk. Start with dry, add half, then half the buttermilk, repeat. End with dry. Mix until just combined. Overmixing makes the cake tough. I’ve done that before and ended up with a dense brick. Not good.
Finally, pour in the hot coffee and fold it in gently. The batter will be thin—that’s okay. It gives that super moist texture.
Why resting the batter matters
Here’s something I wish I knew earlier: let the batter rest for 15–20 minutes before pouring it into pans. This allows the flour to absorb moisture fully. It also lets the baking soda and baking powder activate slowly. The result? A cake that rises evenly and doesn’t dome too much.
I started doing this after reading a 2024 article from Bon Appétit that interviewed a pastry chef from a Michelin-starred restaurant. She said resting batter is common in professional kitchens but rarely mentioned in home recipes. I tried it, and my layers came out flat and tender. No more leveling with a knife.
Baking and testing for doneness
Divide the batter evenly between the two pans. Bake for 25–30 minutes. I start checking at 22 minutes because every oven runs differently. Insert a toothpick into the center. If it comes out with a few moist crumbs, it’s done. If it’s wet batter, give it 3 more minutes.
Let the cakes cool in the pans for 10 minutes. Then turn them onto a wire rack to cool completely. Don’t frost them while warm, or the frosting will melt into a mess. I’ve cried over that mistake.
Adding vanilla iris salt for the perfect finish
Now comes the magic. Once the cakes are fully cool, you add the finishing touch.
How to sprinkle salt without overdoing it
Sprinkle a tiny pinch of vanilla iris salt onto each cake layer before you add frosting. I mean really tiny—about ⅛ teaspoon per layer. Then add a light dusting on top of the frosted cake.
The trick is to sprinkle from a height of about 12 inches. This distributes the salt evenly. If you sprinkle too close, you’ll get salt bombs. I did that once at a dinner party and one guest got a mouthful of salt. Awkward.
Pairing with the right frosting
I recommend a simple chocolate buttercream or a vanilla Swiss meringue buttercream. The salt works beautifully with both. For the chocolate version, add ¼ teaspoon vanilla iris salt to your buttercream. For vanilla, keep it plain and let the finishing salt do the work.
Avoid overly sweet frostings like American buttercream with extra powdered sugar. The contrast becomes too jarring. You want the salt to complement, not clash.
Common mistakes when using vanilla iris salt in baking
I’ve made plenty of errors. Let me save you the trouble.
Using table salt instead
Table salt dissolves too quickly and lacks the crunch. Also, it’s usually iodized, which can leave a metallic aftertaste. Stick with flaky sea salt or kosher salt for the batter. Save the vanilla iris salt for finishing.
Adding salt too early or too late
If you add the finishing salt before baking, it will dissolve and lose its texture. If you add it right before serving, the crystals won’t have time to soften slightly on the frosting. The sweet spot: add it after frosting, then let the cake sit for 10–15 minutes before slicing.
Ignoring the humidity factor
In humid weather, salt can clump. Always store your vanilla iris salt in an airtight jar with a few grains of rice to absorb moisture. I learned this after pulling out a rock-hard lump of salt mid-bake.
FAQ: Your questions about chocolate cake with vanilla iris salt answered
I get asked these three questions frequently. Here are my honest answers.
Can I use vanilla iris salt in a gluten-free chocolate cake?
Yes, absolutely. The salt itself is gluten-free. Just make sure your cocoa powder and flour blend are certified gluten-free. I’ve tested this with a 1:1 gluten-free flour blend, and the salt worked just as well. The texture was slightly denser, but the flavor balance remained perfect.
What if I can’t find vanilla iris salt locally?
You can easily diy vanilla iris salt at home. Mix ½ cup flaky sea salt with 1 teaspoon vanilla extract and let it dry overnight. It won’t have the same intensity as commercial blends, but it works. Alternatively, use regular flaky salt and add a drop of vanilla extract to your frosting.
How long does the salt flavor last after baking?
The finishing salt retains its flavor for about 2–3 days. After that, it starts to dissolve into the frosting. So if you’re making the cake in advance, add the finishing salt only on the day you serve it. I recommend sprinkling it no more than 3 hours before eating.
Why this method works better than standard chocolate cake recipes
Standard recipes often rely on sugar alone to balance cocoa bitterness. But sugar only masks it. Vanilla iris salt actually reduces the perception of bitterness while enhancing sweetness. A 2023 study in the journal Foods confirmed that salt-sugar combinations increase overall palatability by 15% compared to sugar alone.
Plus, the texture contrast is unbeatable. The soft cake, creamy frosting, and crunchy salt crystals create a multi-sensory experience. My guests often comment on the “special something” without being able to name it. That’s the salt.
My personal tip for first-timers
Don’t overthink it. Start with half the recommended salt if you’re nervous. You can always add more next time. I remember my first batch—I was so scared of making it salty that I barely added any. It tasted fine, but boring. Now I go bold.
Also, pair this cake with a light vanilla ice cream or unsweetened whipped cream. The cold helps the salt crystals pop. It’s like a match made in dessert heaven.
⚠️ Warning: This cake is high in sugar. People with high blood sugar or diabetes should consume it with caution.





