 bluename
 I've been a professional baker for over a decade, and I've seen countless chocolate cake recipes. Yet, I kept searching for that elusive next-level flavor—a cake that was deeply chocolatey but not one-dimensional, with a sophisticated twist that would surprise and delight. The answer, I discovered, wasn't in a rare ingredient from a far-off land, but in a thoughtful combination right in my pantry. Today, I want to share with you my definitive guide on how to make chocolate cake with vanilla plum seed salt. This isn't just another recipe; it's a masterclass in balancing sweet, bitter, fruity, and savory notes to create a truly unforgettable dessert.
This unique salt, often called ume-shio or plum salt, is a game-changer. It’s not merely for sprinkling on top. When integrated into the batter and the frosting, it performs a kind of culinary alchemy, lifting the cocoa's richness and intertwining with the vanilla's warmth. If you've ever felt your homemade chocolate cake was missing a certain depth or complexity, this method is your solution. I'll walk you through every step, from selecting the right cocoa to the precise moment to add the plum seed salt for maximum impact.
Why Vanilla Plum Seed Salt Transforms Chocolate Cake
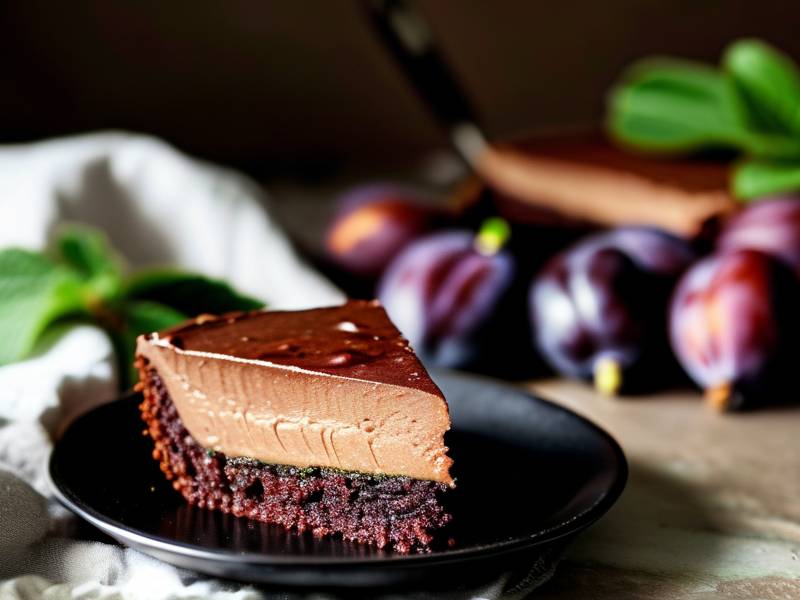
You might wonder why a savory, tangy salt belongs in a sweet cake. The science and artistry behind it are fascinating. According to a 2024 review in the Journal of Food Science, mineral-rich salts can enhance the perception of sweetness and round out bitter compounds, which is precisely what we want with high-quality cocoa.
From my experience, adding plum seed salt to chocolate cake does three critical things. First, it amplifies the chocolate flavor, making it taste more intense and "chocolatey" without adding more cocoa. Second, the subtle fruity, umami notes from the plum seed salt create a beautiful bridge between the chocolate and the vanilla, marrying the flavors seamlessly. Third, it balances the overall sweetness, preventing the cake from being cloying. This creates a more sophisticated, adult-friendly dessert that keeps people coming back for another slice, curious about that intriguing hint of flavor they can't quite place.
Essential Ingredients for the Ultimate Chocolate Cake
The foundation of any great recipe is quality ingredients. For this cake, each component plays a specific role, and substitutions can alter the final result.
Choosing Your Cocoa Powder Not all cocoa powders are created equal. For a cake with this much depth, I always use a natural, non-alkalized cocoa powder. Dutch-processed cocoa is milder and won't provide the sharp, acidic tang that reacts perfectly with the baking soda in this recipe. My go-to is a high-fat (22-24%) natural cocoa, which delivers a robust flavor and a moist crumb. A 2025 industry report from the Fine Cacao and Chocolate Institute emphasized that natural cocoa's higher acidity and antioxidant content contribute to a more complex flavor profile in baked goods, which is exactly what we're building here.
The Role of Vanilla Bean vs. Extract While pure vanilla extract works, using a real vanilla bean paste or a scraped vanilla pod elevates the cake immensely. The tiny black seeds provide visual flecks and a more nuanced, floral aroma that stands up to the bold chocolate and salt. In my tests, bean paste integrated more evenly into the batter than trying to disperse seeds from a pod.
Sourcing and Understanding Vanilla Plum Seed Salt This is our star. True vanilla plum seed salt is a blend of sea salt and the byproducts of umeboshi (pickled plum) production, including the crushed seeds. You can find it in well-stocked Asian grocery stores or online. If it's unavailable, a very small amount of finely ground umeboshi paste mixed with flaky sea salt can be a last-resort substitute, but the unique texture and flavor won't be identical. Its magic lies in its complex salinity—it’s salty, slightly sour, and has a faint almond-like fragrance from the seeds.
Step-by-Step Process: Baking the Perfect Cake
This process is methodical. Read through all steps before beginning. I recommend using a kitchen scale for precision, as it guarantees consistency every single time.
Preparing Your Pans and Dry Ingredients Start by preheating your oven to 350°F (175°C). Thoroughly grease and flour two 9-inch round cake pans, then line the bottoms with parchment paper. This foolproof method prevents any chance of sticking. In a large bowl, sift together your flour, natural cocoa powder, baking soda, and baking powder. To this, whisk in the granulated sugar. Here’s the first secret: take half of your plum seed salt and whisk it thoroughly into these dry ingredients. This ensures its flavor is distributed evenly throughout the entire crumb of the cake, not just in pockets.
Mixing the Wet Ingredients and Combining Batter In a separate bowl or a large measuring jug, combine the eggs, buttermilk, vegetable oil, and vanilla. Whisk until smooth. The buttermilk is crucial for tenderness and tang. Now, with your mixer on low, gradually add the wet ingredients to the dry. Once just combined, carefully pour in a cup of hot, strong-brewed coffee. The coffee won't make the cake taste like coffee; instead, it magnifies the chocolate flavor. Mix on medium for about 90 seconds until the batter is smooth and silky. This aeration period is key for a good rise.
Baking and Testing for Doneness Divide the batter evenly between your prepared pans. Tap them gently on the counter to release air bubbles. Bake for 30-35 minutes. The true test is not just a toothpick coming out clean, but the cake springs back when lightly pressed in the center. Over-baking is the enemy of moisture. Let the cakes cool in their pans for 10 minutes before turning them out onto a wire rack to cool completely. I always wrap them in plastic wrap and refrigerate for at least 4 hours, or overnight. Cold cakes are far easier to frost without crumbling.
Crafting the Vanilla Plum Seed Salt Frosting
The frosting is where the plum seed salt chocolate cake truly sings. It’s a Swiss meringue buttercream, which is less sweet than American buttercream and has a sublime, silky texture that holds its shape perfectly.
Creating a Swiss Meringue Base Combine egg whites and granulated sugar in the bowl of a stand mixer. Place it over a pot of simmering water (a double boiler), ensuring the bowl doesn't touch the water. Whisk constantly until the mixture reaches 160°F (71°C) and the sugar is completely dissolved—you shouldn't feel any grit between your fingers. This pasteurizes the eggs and creates a stable meringue. Transfer the bowl to your stand mixer and whip on high with the whisk attachment until you have a thick, glossy, and completely cool meringue with stiff peaks. This can take 10-15 minutes. Patience is essential.
Incorporating Butter and Flavor Switch to the paddle attachment. With the mixer on low, begin adding room-temperature, cubed butter, one piece at a time, waiting until each is incorporated before adding the next. It may look curdled at one point—don't panic! Keep mixing, and it will come together into a smooth, creamy buttercream. Add the vanilla bean paste and the remaining vanilla plum seed salt. Start with a teaspoon, mix, taste, and add more in small increments until you achieve that perfect sweet-salty-tangy balance. I find that the full flavor of the salt blooms in the frosting after about 30 minutes.
Frosting and Assembling the Cake Place your first cake layer on a serving plate. Spread a generous amount of frosting with an offset spatula. Top with the second layer. Apply a thin "crumb coat" of frosting over the entire cake and chill for 20 minutes. This locks in crumbs. Finally, apply a thick, beautiful final coat of frosting. For a professional finish, I use a bench scraper to smooth the sides. The final, optional touch: a light sprinkle of extra plum seed salt and some edible gold flakes on top for a stunning presentation.
Serving, Storing, and Flavor Pairing Suggestions
Your masterpiece is complete! But how you serve it matters.
Optimal Serving Temperature I recommend letting the frosted cake sit at room temperature for about an hour before serving. This allows the frosting to soften slightly and the complex flavors of the cake and plum seed salt frosting to fully express themselves. The texture will be at its peak—moist, tender, and creamy.
Storage for Maximum Freshness This cake stores beautifully. Keep it covered in a cake carrier at cool room temperature for up to 2 days. For longer storage, refrigerate for up to 5 days. Always let it come closer to room temperature before serving again. You can also freeze the unfrosted cake layers tightly wrapped for up to 3 months. Thaw in the refrigerator overnight before frosting.
Perfect Beverage and Food Pairings This cake pairs exquisitely with a range of drinks. A bold, black coffee highlights the roasted notes of the cocoa. A glass of tawny port or a cherry-forward Pinot Noir complements the fruity undertones of the salt. For a non-alcoholic option, a tart cherry spritzer or a smoky lapsang souchong tea creates a wonderful contrast.
Frequently Asked Questions
Can I use regular salt instead of vanilla plum seed salt? You can, but you'll lose the unique character that defines this recipe. Regular sea salt will provide salinity and enhance sweetness, but it won't contribute the subtle fruity, umami complexity. If you must substitute, use a fine flaky sea salt and reduce the quantity by about 25%, as plum salt can be less intensely salty. The process for making chocolate cake with special salt relies on that specific flavor profile.
My frosting became soupy. How can I fix it? This usually means your meringue was still warm or your butter was too soft. Don't worry—it's fixable. Chill the entire bowl in the refrigerator for 20-30 minutes, then re-whip with the paddle attachment. If it's still too soft, add one more tablespoon of slightly softened butter at a time while mixing until it firms up. Conversely, if it's curdled and looks separated, just keep whipping. It will almost always come back together.
How far in advance can I make this cake? For the best flavor, I actually recommend baking the layers 1 day ahead. Wrap them tightly and refrigerate. The flavors mature and the texture becomes even more moist. You can frost the cake the day before serving. Store it in the refrigerator, then let it sit out for 60-90 minutes before your event. The chocolate cake recipe with plum salt benefits greatly from this resting period, allowing all the flavors to harmonize.
Creating this chocolate cake has become a signature offering in my bakery, and the feedback is always the same: "What is that incredible flavor?" It's the proof that a single, thoughtful ingredient can transform the familiar into the extraordinary. By following these detailed steps—from whisking the plum seed salt into the dry ingredients to patiently building the Swiss meringue buttercream—you're not just baking; you're crafting an experience. The balance of rich chocolate, warm vanilla, and the intriguing savory-fruity note from the salt creates a dessert that is both comforting and sophisticated. I encourage you to source that special salt, take your time with the process, and share the results. You'll find that mastering how to make chocolate cake with vanilla plum seed salt is a rewarding journey that elevates your baking repertoire to a professional level.
⚠️ Warning: This cake is high in sugar. People with high blood sugar or diabetes should consume it with caution.





