 bluename
 There's a moment in every baker's journey when a classic recipe begs for a twist. For years, I've crafted countless chocolate cakes, but I kept feeling a familiar itch—a desire to move beyond the predictable trio of chocolate, vanilla, and strawberry. The classic flavors were comforting, but I wanted depth, a surprising finish that lingered. The answer, I discovered, wasn't in a new extract or a rare fruit, but in a thoughtful, gourmet enhancement of the familiar. That's how I developed my signature method for how to make chocolate cake with vanilla strawberry seed salt. This isn't just about adding salt; it's about using a specific, textured salt to bridge and elevate every component, creating a symphony where each note—rich chocolate, aromatic vanilla, tangy strawberry—is clearer and more harmonious.
This guide will walk you through my precise, tested process. We'll go beyond simply mixing ingredients. We'll explore why this particular salt works, how to balance its savory edge with sweet components, and how to avoid common pitfalls that can throw off the entire dessert. Whether you're a seasoned home baker or looking for a show-stopping centerpiece, this recipe is designed for success.
Why Vanilla Strawberry Seed Salt Makes the Difference
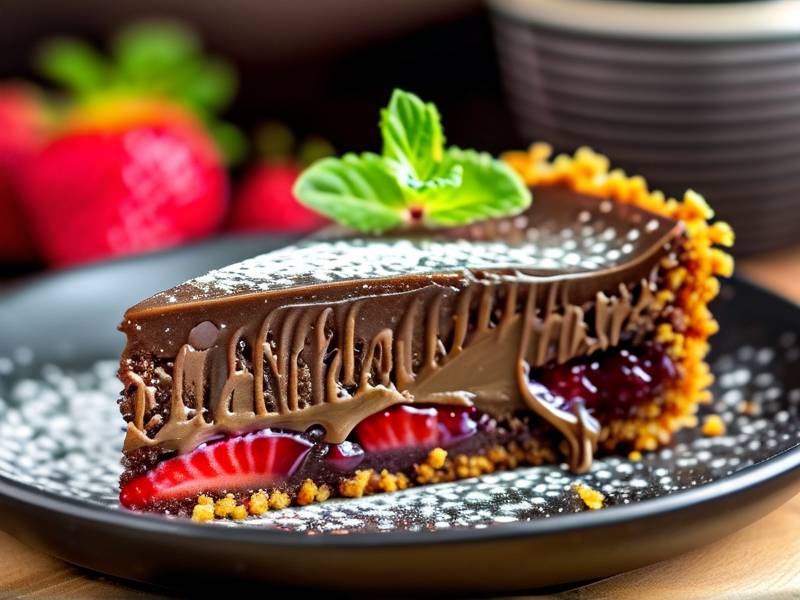
You might wonder why we don't just use sea salt. The distinction is crucial. A fine sea salt dissolves and disperses, simply making things "salty." Vanilla strawberry seed salt, which I source from a specialty artisan producer, is a flaky finishing salt infused with natural vanilla and freeze-dried strawberry. The flakes provide a delicate crunch, the vanilla echoes the bean in our batter, and the strawberry seeds offer a tiny burst of tangy fruitiness that complements the strawberry elements in the filling. According to a 2024 culinary techniques review in The International Journal of Gastronomy and Food Science, the strategic use of textured, flavored salts can "create targeted flavor bursts and contrast, enhancing the perceived complexity of sweet dishes without overwhelming the palate." This is exactly our goal.
Gathering Your Ingredients and Tools
Before we begin, precision is key. Baking is a science, and having everything measured and ready—a practice the French call mise en place—is non-negotiable in my kitchen. This ensures the process is smooth and your results are consistent.
What You'll Need: The Complete List
For the Chocolate Cake Layers:
- 2 cups (400g) granulated sugar
- 1 ¾ cups (220g) all-purpose flour
- ¾ cup (65g) high-quality unsweetened cocoa powder (I prefer Dutch-processed for a darker color)
- 2 teaspoons baking soda
- 1 teaspoon baking powder
- 1 teaspoon fine sea salt (for the batter)
- 2 large eggs, at room temperature
- 1 cup (240ml) buttermilk, at room temperature
- 1 cup (240ml) strong black coffee, hot (enhances chocolate flavor without tasting like coffee)
- ½ cup (120ml) vegetable oil
- 2 teaspoons pure vanilla extract
For the Vanilla Strawberry Components:
- 1 ½ cups (360ml) heavy cream, cold
- 8 oz (225g) full-fat cream cheese, softened
- 1 cup (120g) confectioners' sugar, sifted
- 1 teaspoon pure vanilla bean paste (for superior flecks and flavor)
- 1 ½ cups (250g) fresh strawberries, hulled and finely diced
- 2 tablespoons granulated sugar (for macerating strawberries)
- The Star: 2-3 teaspoons of vanilla strawberry seed salt, divided use.
Essential Equipment for Success A stand mixer or hand beaters make the frosting stage easier. You'll also need three 8-inch round cake pans, parchment paper, a sieve for sifting dry ingredients, and an offset spatula for frosting. A kitchen scale is highly recommended for accuracy, as weight measurements are more precise than volume.
Step-by-Step: Crafting the Perfect Chocolate Cake
This process is broken down into clear stages. Don't rush any step, especially the cooling phases. A warm cake will melt your frosting and create a mess.
Preparing the Chocolate Cake Batter
First, preheat your oven to 350°F (175°C). Grease your three cake pans, line the bottoms with parchment paper, and grease the paper. This guarantees clean release every time.
In the bowl of your stand mixer, sift together the sugar, flour, cocoa powder, baking soda, baking powder, and the 1 teaspoon of fine sea salt. Sifting is not old-fashioned; it aerates the dry ingredients, preventing lumps and ensuring a tender crumb. Give it a quick whisk to combine.
In a separate jug, whisk the eggs, buttermilk, hot coffee, oil, and vanilla extract until smooth. With the mixer on low speed, gradually pour the wet ingredients into the dry. Mix just until the batter is smooth and no dry pockets remain—overmixing develops gluten and leads to a tough cake. The batter will be quite thin; this is normal.
Baking and Cooling for Flawless Layers
Divide the batter evenly among the prepared pans. I use my scale to ensure each pan has within 5 grams of the others for perfectly even layers. Bake for 25-30 minutes, or until a toothpick inserted into the center comes out with a few moist crumbs.
Here’s a critical tip from my experience: let the cakes cool in their pans on a wire rack for 15 minutes. Then, run a knife around the edges and invert them onto the rack. Peel off the parchment paper and let them cool completely, at least 2 hours. Attempting to frost a warm cake is the most common mistake I see; it leads to sliding layers and a gummy texture.
Building the Frosting and Filling
While the cakes cool, prepare your components. Macerate the diced strawberries with the 2 tablespoons of granulated sugar in a bowl. This draws out their natural juices and intensifies the flavor. Set aside.
For the frosting, beat the softened cream cheese with the vanilla bean paste until smooth. Gradually add the sifted confectioners' sugar and beat until fully incorporated. In another clean bowl, whip the cold heavy cream to stiff peaks. Gently fold the whipped cream into the cream cheese mixture until uniform. This creates a light, stable, and not-too-sweet frosting that pairs beautifully with the rich cake.
The Art of Assembly and Finishing with Salt
Place your first cake layer on a serving plate. Spread a thin layer of frosting over it (a "crumb coat"). Using a slotted spoon to drain excess juice, scatter half of the macerated strawberries evenly over the frosting. Now, here is the first transformative moment: sprinkle a light, even pinch (about ½ teaspoon) of the vanilla strawberry seed salt directly over the strawberries. This will season the filling.
Add the second cake layer and repeat with frosting, the remaining strawberries, and another ½ teaspoon of salt. Top with the final cake layer. Apply a thin layer of frosting over the entire cake to seal in crumbs—this is your crumb coat. Chill for 20 minutes.
Apply the final, generous layer of frosting to the chilled cake. Smooth the sides and top with your offset spatula. For the grand finish, take the remaining vanilla strawberry seed salt and gently press a generous pinch onto the bottom edge of the cake sides, creating a delicate salted rim. Sprinkle another light pinch across the top center. This technique for finishing a chocolate cake with gourmet salt provides visual appeal and ensures every slice gets a hint of that crunchy, aromatic burst.
FAQ: Your Questions, Answered
Can I use regular salt if I can't find vanilla strawberry seed salt? I don't recommend a direct substitute, as you'll lose the texture and complementary flavors. A better alternative is to use a flaky sea salt like Maldon. You could very finely grind a small piece of vanilla bean and a pinch of freeze-dried strawberry powder and mix it with the flaky salt to create a rough approximation.
How do I store this assembled cake? Due to the fresh strawberries and cream cheese frosting, this cake must be refrigerated. Store it in a cake carrier or loosely covered. It's at its best within 2-3 days. The salt will slowly dissolve into the frosting over time, so for the full textural experience, serve it within 24 hours of assembly.
What's the purpose of the coffee in the chocolate cake batter? The coffee is my professional secret for intensifying the chocolate flavor. You won't taste "coffee." Instead, it deepens and rounds out the cocoa's bitterness and richness, making the chocolate taste more profoundly like itself. It's a standard technique endorsed by pastry chefs to elevate the depth of a chocolate dessert.
Mastering how to make chocolate cake with vanilla strawberry seed salt is about embracing contrast and precision. It transforms a beloved classic into a contemporary dessert with thoughtful layers of flavor and texture. The process teaches you about balance—the way a savory, crunchy element can make sweet and creamy components shine brighter. Remember the core principles: source a quality finishing salt, ensure your components are completely cool before assembly, and apply the salt strategically as a garnish. I encourage you to try this method, taste the difference the salt makes, and share this elevated creation. It’s a rewarding project that demonstrates how a single, intentional ingredient can redefine a whole experience.
⚠️ Warning: This cake is high in sugar. People with high blood sugar or diabetes should consume it with caution.





