 bluename
 How to Make Cheesecake Piping: The Ultimate Method for an Exquisite Appearance
There’s a quiet moment of truth every baker faces: your cheesecake tastes divine, rich and creamy, but when you look at its surface, it feels… unfinished. A plain, flat top seems to miss an opportunity for celebration. I’ve been there. For years, my cheesecakes were delicious secrets hidden under a lackluster exterior. That changed when I mastered cheesecake piping. This technique transformed my desserts from humble to stunning centerpieces, and today, I’ll guide you through every step to achieve that same exquisite appearance.
The beauty of a piped cheesecake isn’t just vanity. A study in the Journal of Culinary Science & Technology noted that visual appeal significantly enhances the perceived flavor and overall dining experience. It communicates care, skill, and celebration. Whether you’re preparing for a special occasion or elevating your home bakery offerings, learning this method is a game-changer.
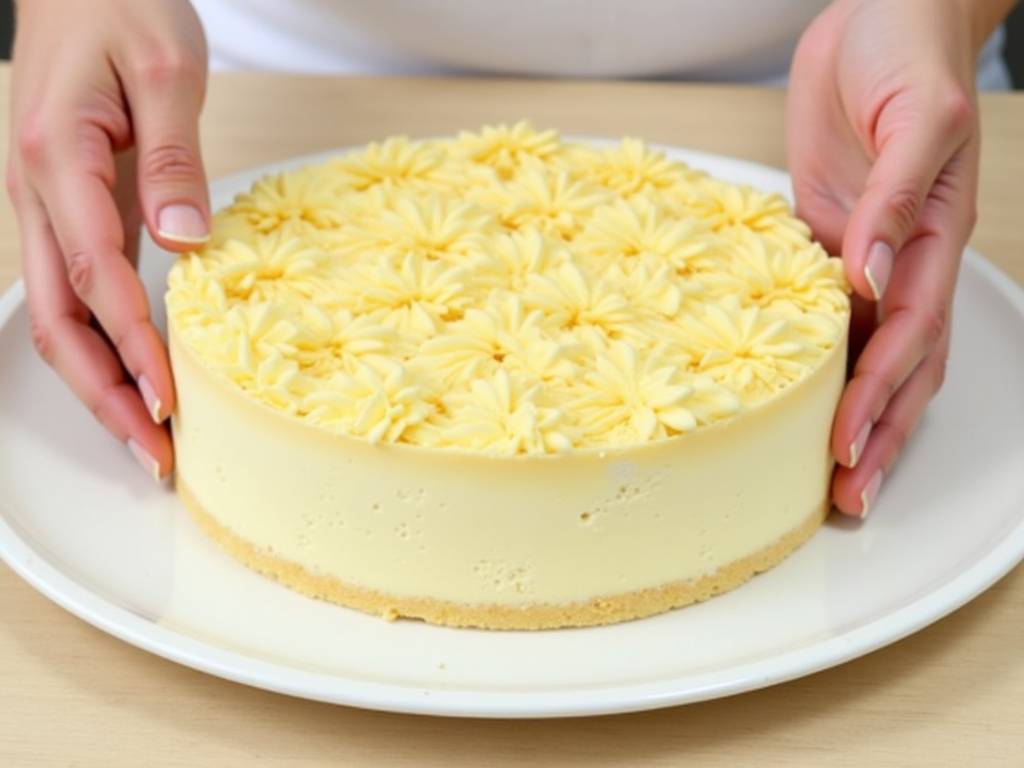
Understanding Your Canvas: The Perfect Cheesecake Base
Before a single piping tip touches your cake, you need a flawless foundation. Piping on a cracked, uneven, or overly soft surface is a recipe for frustration.
My golden rule is simplicity and stability. I use a classic New York-style baked cheesecake for its firm, dense texture, which holds piping beautifully. The key is preventing cracks, which often stem from overmixing or drastic temperature changes.
Here’s my go-to base recipe, perfected over hundreds of trials:
- 2 lbs (900g) full-fat cream cheese, room temperature
- 1 1/4 cups (250g) granulated sugar
- 1 tbsp pure vanilla extract
- 4 large eggs, room temperature
- 2/3 cup (160ml) sour cream, room temperature
- 2/3 cup (160ml) heavy cream
Method:

- Beat the cream cheese until completely smooth. Gradually add sugar, then vanilla.
- Add eggs one at a time, mixing on low speed just until incorporated after each. Overbeating incorporates too much air, leading to cracks.
- Gently fold in the sour cream and heavy cream. The batter should be silky, not fluffy.
- Bake in a water bath at 325°F (160°C) for about 60-70 minutes until the center is just set with a slight jiggle.
- Turn off the oven, crack the door, and let the cake cool inside for an hour. This gradual cooling is the single best trick to prevent cracks, as noted by renowned pastry chef Stella Parks in her research on custard-based bakes.
Let the cheesecake chill in the refrigerator for at least 8 hours, preferably overnight. A cold, firm cake is your best friend for piping.
Essential Tools for Impeccable Piping
You don’t need a professional kitchen, but the right tools make all the difference.
1. Piping Bags: I prefer reusable silicone or heavy-duty disposable bags. They offer better control and are less likely to burst under pressure. 2. Piping Tips: Start with these three:
- Open Star Tip (e.g., Wilton 1M or 2D): Creates beautiful rosettes, stars, and scalloped borders.
- French Star Tip: Similar but yields a more defined, elegant star shape.
- Round Tip (e.g., Wilton 12): Perfect for dots, beads, and writing. 3. Spatulas & Scrapers: An offset spatula for smoothing fillings and a bench scraper for clean sides. 4. Turntable: A rotating cake stand is invaluable for applying even borders.
Crafting the Ideal Piping Frosting
Not all frostings are created equal for cheesecake. Buttercream can be too sweet and heavy. Whipped cream can wilt. My champion is a stabilized whipped cream cheese frosting. It’s light, tangy, holds its shape for days, and complements the cheesecake flavor perfectly.
Recipe:
- 1 cup (240ml) heavy cream, cold
- 8 oz (225g) full-fat cream cheese, softened
- 1/2 cup (60g) powdered sugar, sifted
- 1 tsp pure vanilla extract
- 1 tsp unflavored gelatin powder + 4 tsp cold water (optional, for extreme stability)
Method:
- If using gelatin, sprinkle it over the cold water in a small bowl. Let it bloom for 5 minutes, then microwave for 10 seconds until liquid. Let cool slightly.
- Beat the cream cheese, powdered sugar, and vanilla until smooth.
- In a separate, chilled bowl, whip the heavy cream to medium-stiff peaks.
- Gently fold the whipped cream into the cream cheese mixture. If using gelatin, drizzle it in while folding. Do not overmix.
- Chill the frosting for 20-30 minutes before piping. This firms it up for sharper shapes.
Step-by-Step Piping Techniques for a Luxurious Look
Now, for the artistry. Let’s break down three elegant designs, from simple to stunning.
Design 1: The Classic Rosette Border This is my signature finish. It frames the cake beautifully.
- Fit your bag with the open star tip (1M) and fill it with frosting.
- Hold the bag perpendicular to the edge of the cheesecake, about 1/2 inch from the rim.
- Apply steady pressure and pipe a tight, continuous spiral, starting from the outside and winding into the center. Stop pressure and pull away to finish.
- Repeat, placing rosettes side-by-side around the entire top border. Keep them uniform for a polished look.
Design 2: Elegant Shells and Swirls A timeless border that works for any occasion.
- Using the same open star tip, hold the bag at a 45-degree angle with the tip just touching the surface.
- Squeeze firmly to let the frosting fan out, then slowly pull the bag towards you while reducing pressure, creating a tapered end.
- Start the next shell where the previous one ends, overlapping slightly. The rhythm creates a beautiful, continuous chain.
Design 3: Full-Coverage Piped Top (The Showstopper) This transforms the entire surface into a textured masterpiece.
- Start with a thin “crumb coat” of frosting over the entire top. Chill for 15 minutes.
- Using a French star tip, pipe straight, vertical lines across the diameter of the cake, spaced about 1/2 inch apart.
- Then, pipe another set of lines perpendicular to the first, creating a lattice or woven basket effect. The raised texture catches the light beautifully.
Pro Tips for Flawless Execution
- Temperature is Everything: Your cheesecake must be cold, and your frosting cool. If your hands warm the bag, pause and chill it.
- Practice First: Pipe your design on a piece of parchment or a cold plate before committing to the cake.
- Consistent Pressure: This is the secret to uniform shapes. Practice the “squeeze, guide, release” motion.
- Clean Lines: Wipe your tip clean between piping sessions to prevent built-up frosting from marring your design.
Finishing Touches and Flavor Harmony
A piped cheesecake is a perfect base for elegant garnishes. Consider:
- Fresh Berries: Artfully place raspberries, blueberries, or sliced strawberries in the gaps between rosettes.
- Edible Flowers: For a spring wedding or garden party, they are breathtaking.
- Citrus Zest or Curls: Lemon or orange zest sprinkled over a white frosting adds a pop of color and flavor.
- Chocolate Shavings or Gold Leaf: For a truly decadent finish.
Remember, garnish with a light hand. The piping should remain the star.
⚠️ 温馨提示:本款蛋糕含糖量较高,高血糖/糖尿病患者请谨慎食用。
Your Questions, Answered
Can I pipe directly onto a no-bake cheesecake? Yes, but extra care is needed. Ensure your no-bake cheesecake is fully set (chilled for 12+ hours). Use a firmer piping frosting, like one with added gelatin, and work quickly to avoid warming the surface.
My frosting is too soft and loses shape. What went wrong? The most common culprit is under-whipped cream or a warm environment. Ensure everything is cold. The stabilized version with gelatin I provided is specifically designed to combat this issue, holding up even in warmer settings.
How far in advance can I pipe a cheesecake? For optimal appearance and texture, pipe the cheesecake the day you plan to serve it. However, the stabilized frosting will hold its shape well for up to 2-3 days in the refrigerator. Always add fresh fruit garnishes just before serving.
Mastering cheesecake piping is more than a decoration skill; it’s the final, expressive step that turns a beloved dessert into a memorable experience. It bridges the gap between homemade goodness and professional elegance. Start with a stable base, prepare the right frosting, and practice the fundamental techniques. With patience, you’ll not only solve the problem of a plain cheesecake but discover a joyful, creative outlet. Your next slice won’t just taste incredible—it will tell a story of craftsmanship, from the first mix to the final, exquisite swirl.





